The creators of Warframe have been working on their new project Soulframe for several years now. The well-known MMORPG YouTuber TheLazyPeon recently had the opportunity to check out the online RPG for the first time.
What does TheLazyPeon say about Soulframe? The popular MMORPG enthusiast (759,000 subscribers on YouTube) was allowed to play the new project from Digital Extremes (Warframe) and summarize his impressions in a video.
In almost 34 minutes, he shows character creation, parts of the game world, dungeons, environmental puzzles, quests, many skirmishes against regular enemies, cute wolf pets, and a well-staged boss fight. At the end, there’s the usual conclusion drawn from the strengths and weaknesses experienced.
Here is one of the trailers for Soulframe:
Start video
The dark fantasy experience Soulframe in the trailer
The YouTuber praises:
The fights feel great and are fun, even though the start was difficult due to the unusual key layout.
The voice actors heard so far are doing an excellent job.
The sound design is among the best currently available on the market.
The graphics are appealing, and the game world has many beautiful corners.
The setting and style are quite unique.
The minimalist UI is initially a bit odd but enhances immersion.
With the combination of graphics, presentation, and sound design, there are already some great moments in the current demo that have goosebumps potential.
TheLazyPeon criticizes:
The camera behaves dangerously in fights, for instance, when it targets the wrong opponent or doesn’t want to aim at any enemy at all.
The standard keyboard layout for mouse and keyboard is a bit unusual and unintuitive.
The displays of content on the map can often confuse more than they help, as events, quests, and points of interest are hardly distinguishable for new players. Furthermore, the discovered dungeon entrances are not shown on the map.
In crafting, you need to plan a lot of real-time to make items. An item that the YouTuber wanted to craft at the end of his playtime took 5 hours to complete.
Overall, TheLazyPeon is impressed and pleasantly surprised by the alpha version of Soulframe. He even commented on the fully showcased boss fight in the video with an enthusiastic “This game is so damn cool”.
What does the community say about the video? The video has already received 4,434 thumbs up and more than 520 comments. Here is a small selection:
Faolan_Grey is looking forward to YouTube for Soulframe: “This game looks damn fantastic. Once they fix the bugs and it is fully released, it will definitely be a hit.”
WaterGuuru writes on YouTube: “I trust Digital Extremes. Warframe is a labor of love and has received so much free content over the years. It is also so cool to see a continuation of their unique art style, the bosses look so great!”
5H4D3 explains in his post on YouTube: “Some of the systems present at the time of this recording have already been overhauled, and more massive changes are planned (the polearm as a starter is still crap).”
Additionally, 5H4D3 comments on the MMO term used by TheLazyPeon: “The game is NOT an MMO, it is better described as a multiplayer online action RPG rather than a massive multiplayer RPG; you will not be running around seeing hundreds of other players on the map.”
What kind of game is Soulframe? The new project from the Warframe creators was first presented at TennoCon 2022 and is currently in an early alpha testing phase. The developers themselves describe Soulframe as a “Free2Play open-world adventure” with a fantasy setting.
The gameplay shown so far is reminiscent – in terms of atmosphere and combat – of the Souls games from From Software. However, the developers insist that despite the name, there are many more differences than similarities. The world is not as grim, and the combat is not as punishing. Soulframe is supposed to be even less hardcore than Warframe.
Due to the multiplayer content and Warframe roots, the MMO term often comes up for this action title. However, so far there are no indications that players will actually be roaming around with a “massive” number of other players in the world or certain regions. The developers themselves avoid the MMO designation. By the way, there should soon be significantly more access to the test version: New fantasy RPG from the Warframe makers is making access easier, soon distributing beta access via Twitch
This is an AI-powered translation. Some inaccuracies might exist.
In Kingdom Come Deliverance 2, there are some game systems that the developers do not explicitly tell you about, and that you have to discover for yourself. Among these is the fact that your loyal horse can be fed. Players on Reddit are shocked to find this out.
How does food work in KCD 2? Food plays an important role in Kingdom Come Deliverance 2. The character Heinrich must eat regularly to avoid continuously losing stamina and eventually collapsing from lack of strength – you can read more in our beginner’s guide.
This game element is explained to you by the developers right at the start. However, they conceal that your horse can also consume food. A player has recently figured this out and shared his discovery on Reddit.
Kingdom Come Deliverance 2: Details, die das Spiel perfekt machen
Players feel guilty
How is the horse fed? It’s actually quite obvious. As Reddit user Sir_JumboSaurus shows in a video, you just need to open the inventory, select food, and drop it.
The carrots or whatever you serve your animal companion tumble to the ground and are immediately eaten by the horse.
However, because Kingdom Come 2 keeps this detail from you, very few players discover it themselves. It would be only logical in a game that requires you to eat regularly – wouldn’t it?
Recommended editorial content
At this point you will find external content from Reddit that complements the article.
I consent to external content being displayed to me. Personal data can be transmitted to third party platforms.
Read more about our privacy policy.
How does the community react? Apparently, this feature has slipped past numerous players. This is evidenced by the many comments under the Reddit post. Many are just now finding out that they can feed their horse, and they feel guilty about it.
Among them is the user grimarchangel, who has put 200 hours into the game. He writes: “Now I feel like I let my buddy starve for 200 hours.”
Does food have an impact on the horse? Unlike Heinrich, it doesn’t matter to the horses whether they get something to eat or not. From a gameplay perspective, it makes no difference. Morally speaking, however… it does – depending on what kind of person you are.
At least on Reddit, it shows that most players now have a guilty conscience. Had they known about it, they would have thrown food at their horse much earlier. Did you know about this feature? Feel free to let us know in the comments. In KCD 2, there is still a secret feature related to horses: Players learn about a secret skill of their horse, feel guilty
This is an AI-powered translation. Some inaccuracies might exist.
In 1995, Microsoft released software for Windows, but a year later, the project was discontinued. For years, the failed software remained hidden in Windows XP.
In 1995, Microsoft launched a software package for Windows 3.1. The software named ‘Bob’ was intended to serve as a replacement for the graphical interface and to make it easier for inexperienced PC users to access Windows and computers.
The software primarily relied on objects from the home environment: One entered a house through an apartment door and was greeted by animated figures that guided the user through the functions. In each room, specific functions were embedded, such as the calendar or an email program.
Start video
In Germany, there are over 400 USB sticks protruding from walls – What is the ‘Dead Drops’ project?
Bob was too child-friendly and too hardware-hungry for 1995
Why did Bob fail? Today, several factors are blamed for the failure:
The design, a cartoonish graphic, was off-putting for many, and many found the software overly childish.
‘Bob’ required computers with at least 8 MB of RAM, which was a considerable amount in 1995.
The result: Microsoft discontinued its software ‘Bob’ just a year later, and the software disappeared from the market. Soon after, Windows 95 was released, featuring an intuitive interface and completely without a mascot.
What happened next? When Microsoft was preparing the installation CD for Windows XP, the team found that approximately 30 MB of free space was still available. What should they do with it? To avoid wasting it and also to make illegal downloads more difficult, they decided to fill it with fictional data.
Instead of generating random files, a developer searched the company’s historical archives, found Bob’s original disk images, combined them, encrypted them with a randomly entered key, and eventually used them as digital filler. The result was as ironic as it was unexpected: Microsoft Bob was hidden in millions of legal copies of Windows XP, without anyone knowing (via xda-developers.com).
By the way, Microsoft Bob has not completely disappeared: The digital dog Rover from Bob later returned as a search assistant in Windows XP.
Chaos gods and their demons are one of the greatest dangers in the world of Warhammer. But which of them are the worst? MeinMMO dares to rank them and explains which demon you definitely do not want to encounter.
[toc]
Demons exist in Warhammer in various forms, but they all have one thing in common: they all come from the Warp, the realm of Chaos. As Warp entities, they cannot exist in the real world for long.
Nevertheless, even short stays here are enough to give you a really bad day. In and of itself, it doesn’t matter which demon you encounter: as a normal human, you have no chance and will likely perish within seconds. So it’s good to know what actually happens when you die in Warhammer.
The way you lose your life varies greatly from demon to demon. Some encounters are relatively pleasant compared to the alternatives. Therefore, we will take into account which encounter would go the worst for you.
By the way: Although Warhammer Fantasy and Warhammer 40,000 are separate universes, the Chaos in both worlds is the same. However, how exactly a connection exists here has never been explained.
Start video
Das passiert, wenn sich die Space Marines aus Warhammer 40.000 dem Chaos verschreiben
10. Chaos Spawn
Mutations are considered a danger among humans and the Chaos spawn is one reason why. Strictly speaking, Chaos spawn are not demons, but mortals mutated beyond recognition by the power of the Warp.
Among the forces of Chaos, chaos spawn are considered one of the lowest forms, but in battle, they are still formidable fighters. However, an encounter with them would likely be rather short: chaos spawn behave more like a wild animal or a madman and would simply tear you apart without much ado. Not the prettiest demise, but still better than anything that comes after.
This is an AI-powered translation. Some inaccuracies might exist.
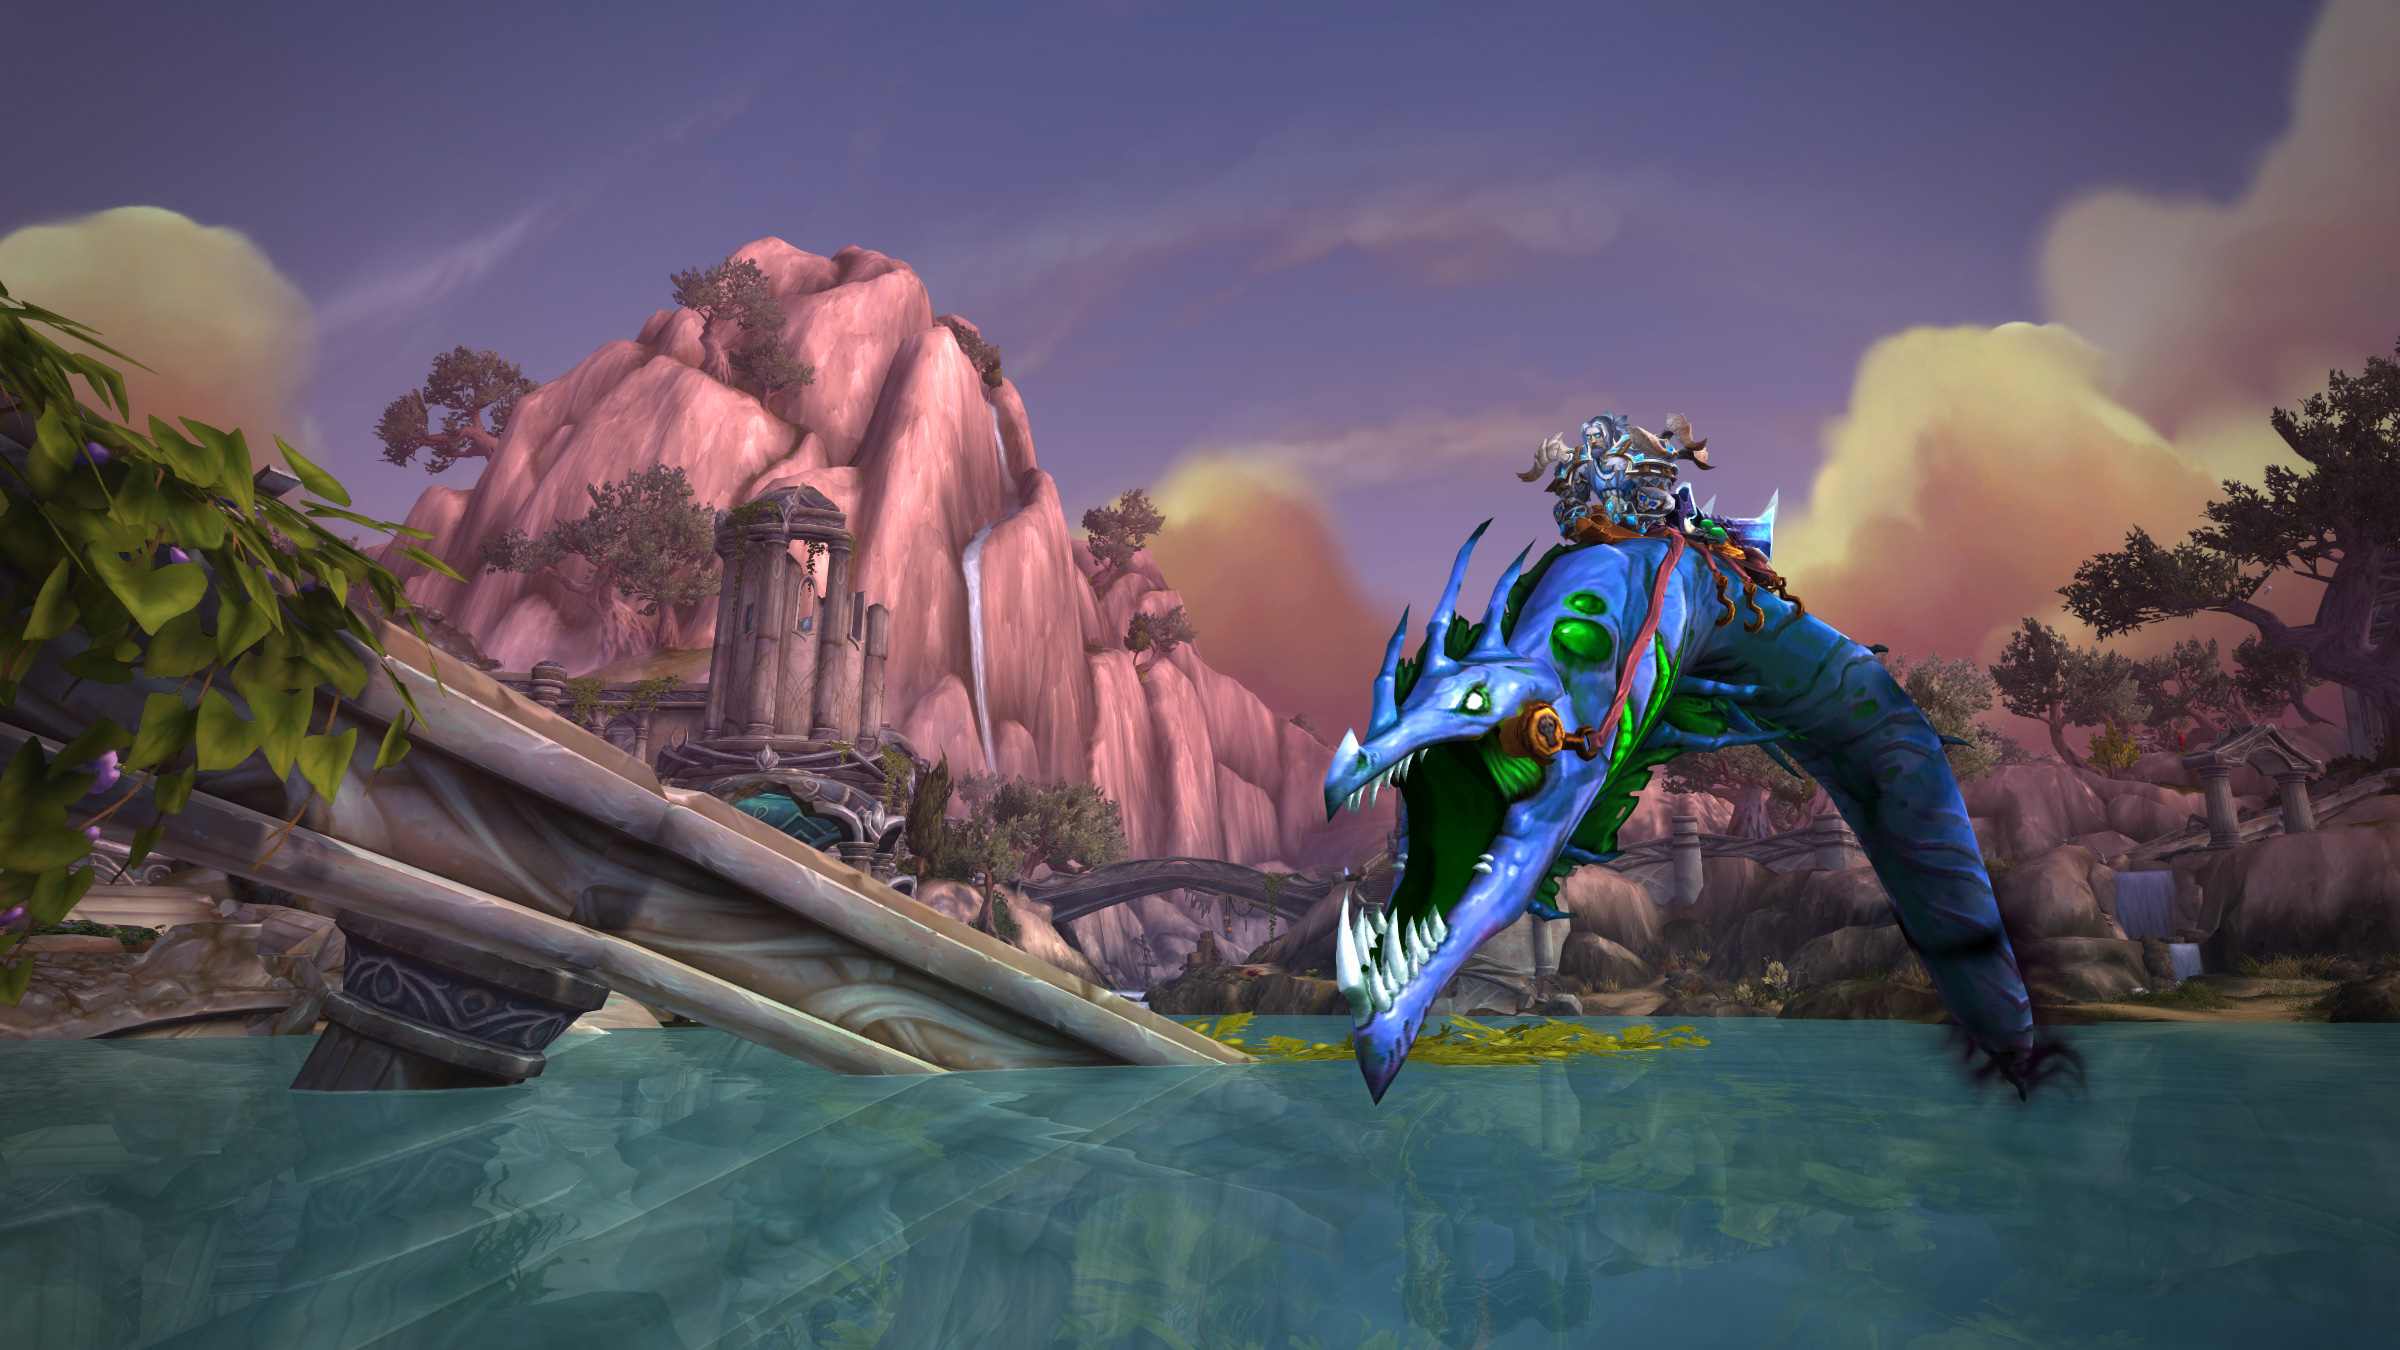
At some point in the coming weeks, Patch 11.1.5 will land on the live servers of World of Warcraft. Included: a shadow worm mount that you must conquer a particularly tough challenge to earn.
What kind of mount is this? The shadow worm, officially named “Ny’alothan Shadow Worm,” is coming to Azeroth with WoW Patch 11.1.5 and is one of the new rewards you can earn through the returned version of a content from the expansion Battle for Azeroth.
Specifically, the Disturbing Visions from Patch 8.3 will celebrate their comeback with the next content patch. They will take you into the nightmarish versions of the faction capitals Orgrimmar and Stormwind as dreamed up by N’Zoth’s mind.
Your job: Prevent these visions from becoming reality! For this, you must find and defeat Alleria or Thrall. Additionally, you can also complete several optional tasks and hard modes during each run. Back then, through the Disturbing Visions, you could upgrade the legendary cloak Ashjra’kamas, thereby increasing resistance to N’Zoth’s corruption.
The trailer for the current WoW Patch 11.1:
Start video
WoW Patch 11.1: Gallywix’s Control over the Cartels
From Hard Mode to Super Hard Mode
What changes with the new version? Those who wanted to tackle the toughest version of the Disturbing Visions back then could activate a total of five masks and thus as many affixes that significantly affected the difficulty of the challenge – at least until the nerfs.
There will be those five masks again this time. Additionally, you should also be able to unlock three more masks, allowing a total of eight affixes to be activated in the new version of the visions.
The new “Ny’alothan Shadow Worm” mount is very similar in design to the Mind Wyrm of the Riddler from Legion.
Those who activate all eight masks in Stormwind and Orgrimmar and successfully complete the resulting madness in each Disturbing Vision will earn the achievements “Beyond the Most Horrific Vision of Stormwind” and “Beyond the Most Horrific Vision of Orgrimmar.”
You need these for the new achievement “Mastering the Visions,” which rewards you with the already mentioned shadow worm mount.
What else does Patch 11.1.5 bring? The interim patch also includes the comeback of the Disturbing Visions, the new Glory faction Nightfall, adjustments to Children’s Week, and the boss event “Cunning Duos.”
As of now, there is no release date. However, the release candidate has already gone live on the PTR, which suggests a timely launch. Additionally, Children’s Week is likely to start on April 28, 2025. Since the patch brings various adjustments for the event, it must be released beforehand. More information can be found here: WoW Patch 11.1.5 – All Info on Nightfall, Disturbing Visions, and Cunning Duos
This is an AI-powered translation. Some inaccuracies might exist.
A streaming service asked users how much time they spend on streaming. Half of the respondents stated that they don’t want to go to the office because they would have to give up binge-watching series.
Where do the data come from? The streaming service Tubi surveyed 2,502 individuals who stream video content for at least one hour per week. Tubi operates in North America, Australia, and the UK and has about 100 million monthly users.
In the survey, 53% of Generation Z respondents indicated that they would postpone their work to watch series or finish a movie they missed.
More than half of Gen Z reported hesitating to return to the office because they would lose their streaming time, according to the Tubi survey.
Start video
Students spy on passersby with hidden cameras and AI, find name and address in seconds
More than 80% stream movies and series while working from home
Here are some additional responses from the survey:
84% of Generation Z employees admitted that they stream shows and movies while working from home.
53% of Generation Z reported that they have postponed work to finish a series they were watching in fast-forward.
73% stated that they are tired of having to watch popular content. Instead, young viewers prefer nostalgic favorites.
81% agree that watching advertisements is a fair exchange for free content.
Given the survey results, it may not be surprising that many employers have a certain distrust towards their employees regarding how they spend their work time while working from home. This is because, in the office, employees can typically be monitored better. On the other hand, there are also studies that prove, that employees working from home are more productive than their colleagues in the office.
Is that really a bad thing? Not necessarily, as some experts report that especially young people promote their concentration in different ways. Cynthia Clevenger, Senior Vice President of B2B Marketing at Tubi, explains to Fortune:
As hybrid work models become increasingly the norm, the boundary between work and entertainment becomes more fluid. It’s not just passive background noise – it’s part of how they take breaks, stay stimulated, or even regulate their focus throughout the day.
Watching a series in the background, listening to a podcast or music, does not necessarily have to be a distraction, but can also boost productivity.
In Baldur’s Gate 3, the Arcane Tower in the Underdark is one of the many mysteries you can explore. How to get inside and what you can find there is explained here.
Spoiler warning: We go into detail here on how to bypass the watchtowers and what can be found in the Arcane Tower.
What is the Arcane Tower? If you head into the Underdark at the end of Act 1, you can find the Arcane Tower, which is also partly called the Ruined Tower.
The exploration is optional, and there is no quest marker leading there. However, the mission Help Omeluum examine the parasite requires you to visit the said tower. There, you are supposed to find two mushrooms, namely Timmask spores and the Tongue of Madness.
Even aside from that, it can be worthwhile to undertake an exploration tour. Because in the tower, some helpful ingredients and equipment are hidden.
Update on April 7, 2025: We have adjusted the structure of the article and updated the information.
[toc]
Start video
Baldur’s Gate 3 is coming to PS5 – Trailer prepares for console release
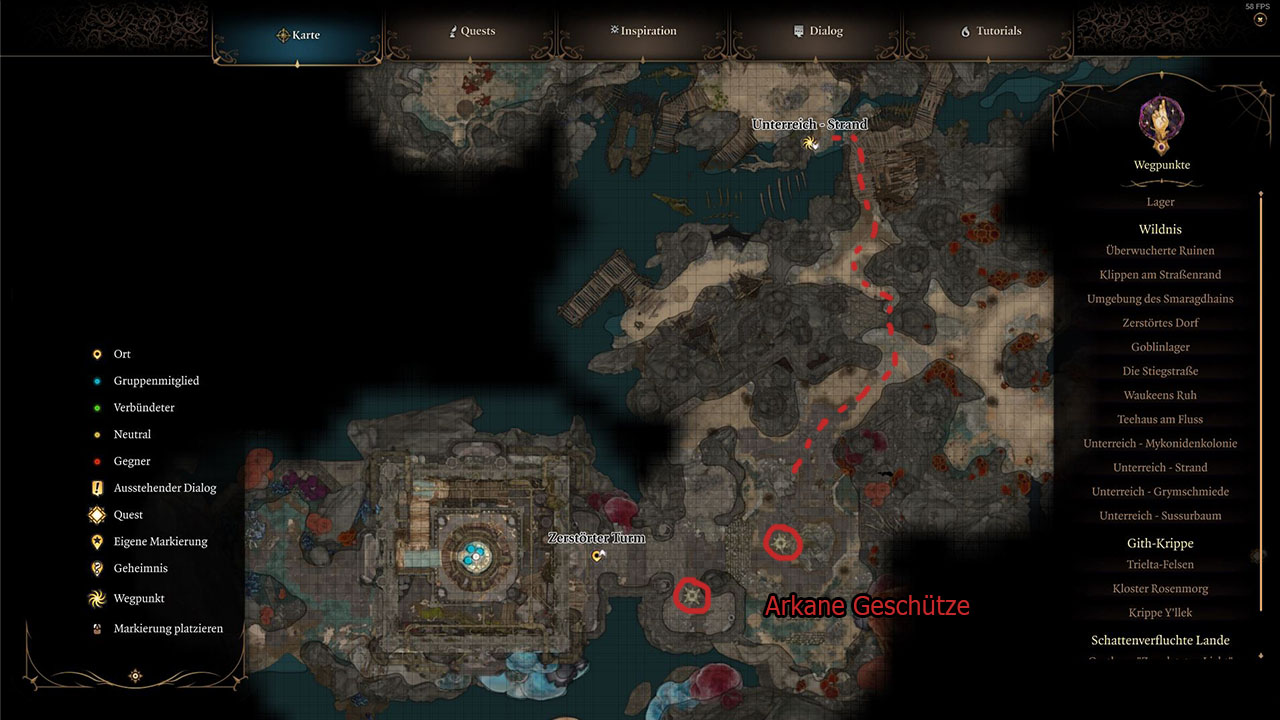
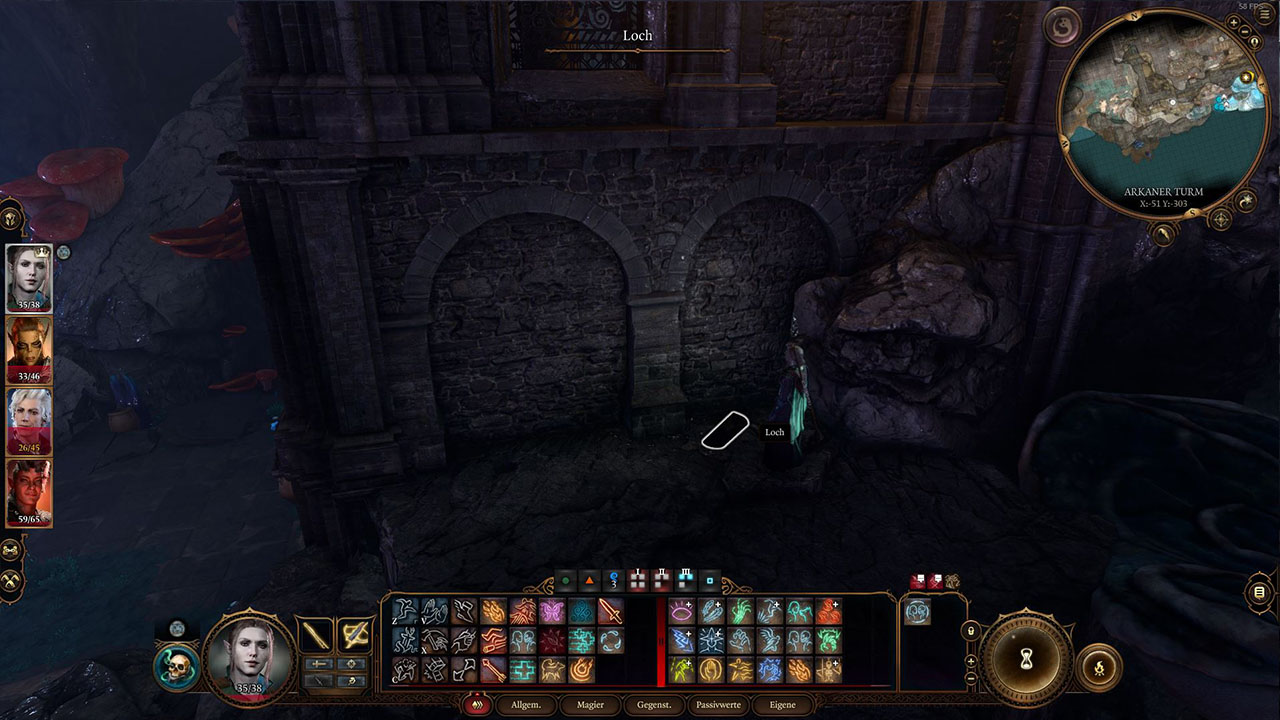
To reach the Arcane Tower, you need to head to the southwest of the Underdark. The nearest waypoint is Underdark – Shore.
From there, first climb the rope net, walk a short distance south, and then turn directly east. Here, you need to jump over the rocks once and then walk southwest.
You will quickly encounter the tower’s defense, the Arcane Cannons.
This is how you find the way to the Ruined Tower.
How to disable the Arcane Cannons
There are a total of four Arcane Cannons: two in the courtyard, and two on the ground floor.
While you can try to sneak past the cannons with great skill, it is much more effective to at least disable the two Arcane Cannons in the courtyard. You can achieve this effectively with two methods: lightning damage or Sussur blooms.
Whichever option you choose, it is best to play in turn-based mode!
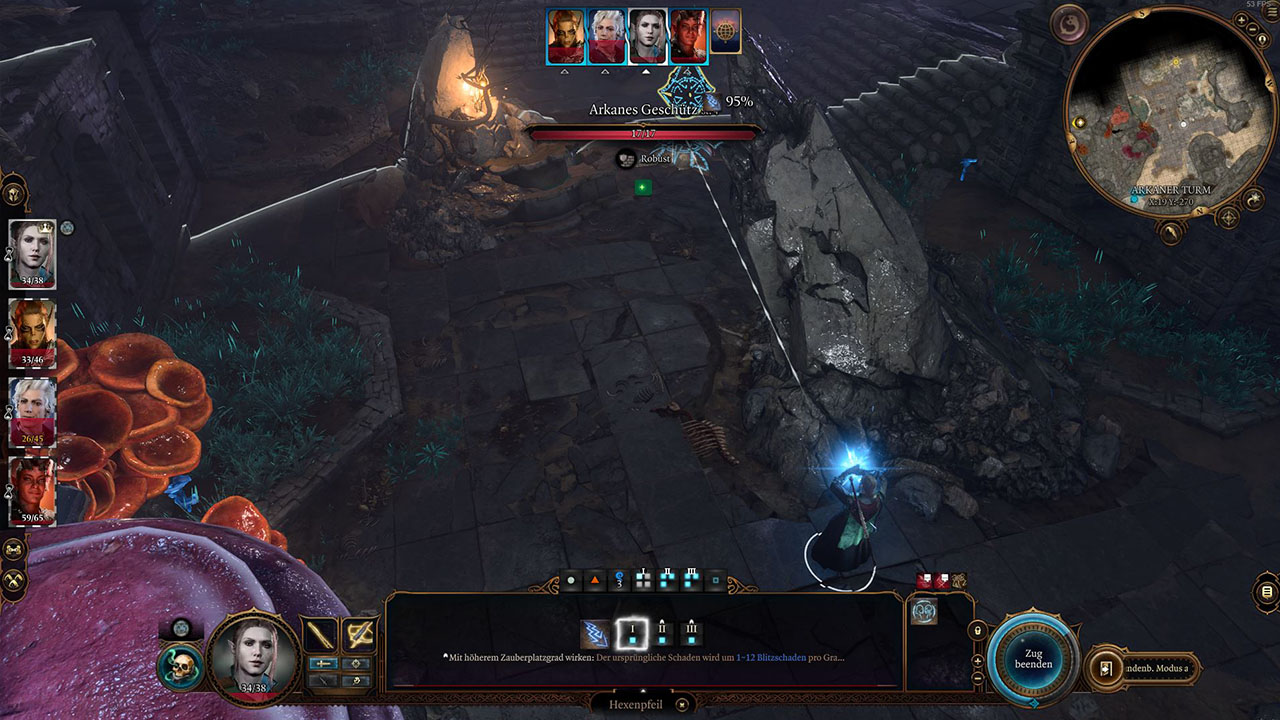
The only type of damage that works well against the Arcane Cannons is lightning damage. So make sure that one of your characters can deal such damage.
Then break up the group to avoid endangering your remaining companions. Activate turn-based mode, move a short distance out of cover, and then cast your lightning spell on the first cannon. Then immediately move out of the cannon’s line of fire to avoid being hit.
Repeat this until the cannon is destroyed. With this method, you can also take out the second Arcane Cannon.
The Arcane Cannons can easily be destroyed with lightning damage.
Disabling Cannons with Sussur Blooms
The Arcane Cannons operate through magic. And you can use this to your advantage. The so-called Sussur blooms block all types of magic in their vicinity. Therefore, if you throw such a bloom near a cannon, it will become harmless.
Where do I find Sussur Blooms? You can find the glowing plant northwest of the Underdark by the Sussur Tree. If you haven’t been to this area yet, be careful – you will encounter some enemies.
In total, you should collect at least three Sussur Blooms. Two of them can be found right in the area of the tree. Another one is located a bit further north near some poisonous gas.
Be careful again on the way to the Arcane Tower. Because the plants block your magical abilities as long as you carry them. If necessary, temporarily store them in your camp.
How do I use Sussur Blooms? First, break up the group so you can control the character with the Sussur Blooms alone. Then move towards the first cannon in turn-based mode. Either use Darting to be faster, or seek cover behind the large rock along the way.
Then drop a Sussur Bloom to neutralize the cannon. Repeat this procedure at the second tower.
How to activate the elevator in the Arcane Tower
Once you have overcome the two Arcane Cannons in the courtyard, your next obstacle is the broken elevator. You need to repair it to explore the tower. Follow these steps:
1. Get to the backyard
Ignore the main entrance and instead jump down to the large mushrooms on the left until you are in the backyard.
2. Collect Sussur Blooms
In the backyard, you will find more Sussur Blooms. Collect them, as you will need them shortly.
3. Pull the lever to get to the basement
To enter the tower, you need to get past a locked door. You can either pick it or bash it down.
Alternatively, you will find a pipe on the side of the tower. To get through, use the spell Fog Shape or transform into a rat. Inside the tower, there will be a lever that opens the door.
In your normal form, you do not fit through the pipe.
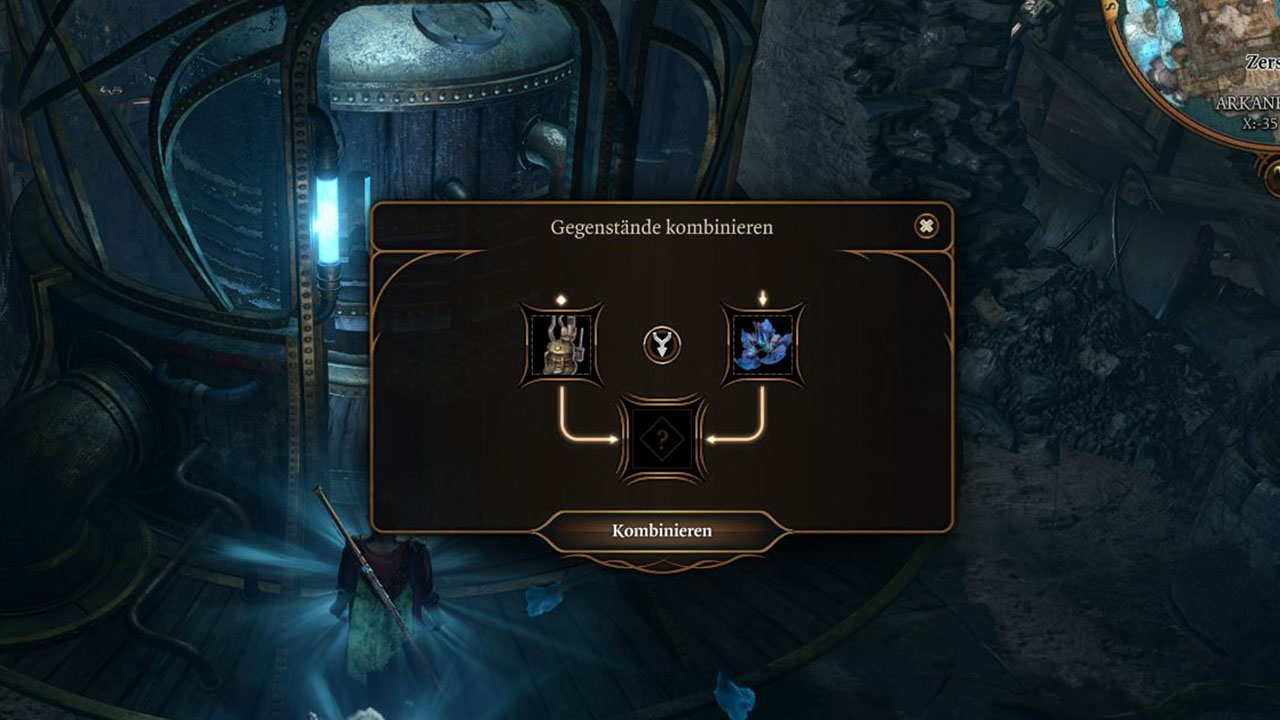
4. Activate the generator
Once inside the tower, you can now go to the generator. Interact with it and place one of the Sussur Blooms in the appropriate slot. The elevator works again, and the Arcane Cannons are finally disabled.
What you will find through the elevator in the Arcane Tower – All floors
Once you have successfully activated the elevator, you can start searching the tower for loot. Walk up the stairs from the basement to reach the elevator.
It is best to search all floors one by one and take everything you like.
Ground Floor: Finding Quest Items
If you have the quest from Omeluum to seek Timmask spores and The Tongue of Madness, head to the level directly above the basement. Search the shelves and beds there, and you should find them quickly.
First Floor: Chest of the Profane
On the next floor, you will find a mysterious chest on the balcony, the Chest of the Profane. Its useless items transform into useful equipment and scrolls after a successful arcane test.
Tip: Take the chest with you to improve your inventory management! You can place heavy equipment in it to transform them into lighter items, thus allowing you to carry more. Don’t worry, the items revert to their original state once you remove them from the chest.
Second Floor: Documents
Here, you will mainly find the torn paper and the Book of Darkness. Read both to potentially avoid a fight later on.
The button in the corner only works if you have dug up the dog collar southwest of the Sussur Tree. Then you will receive dog food.
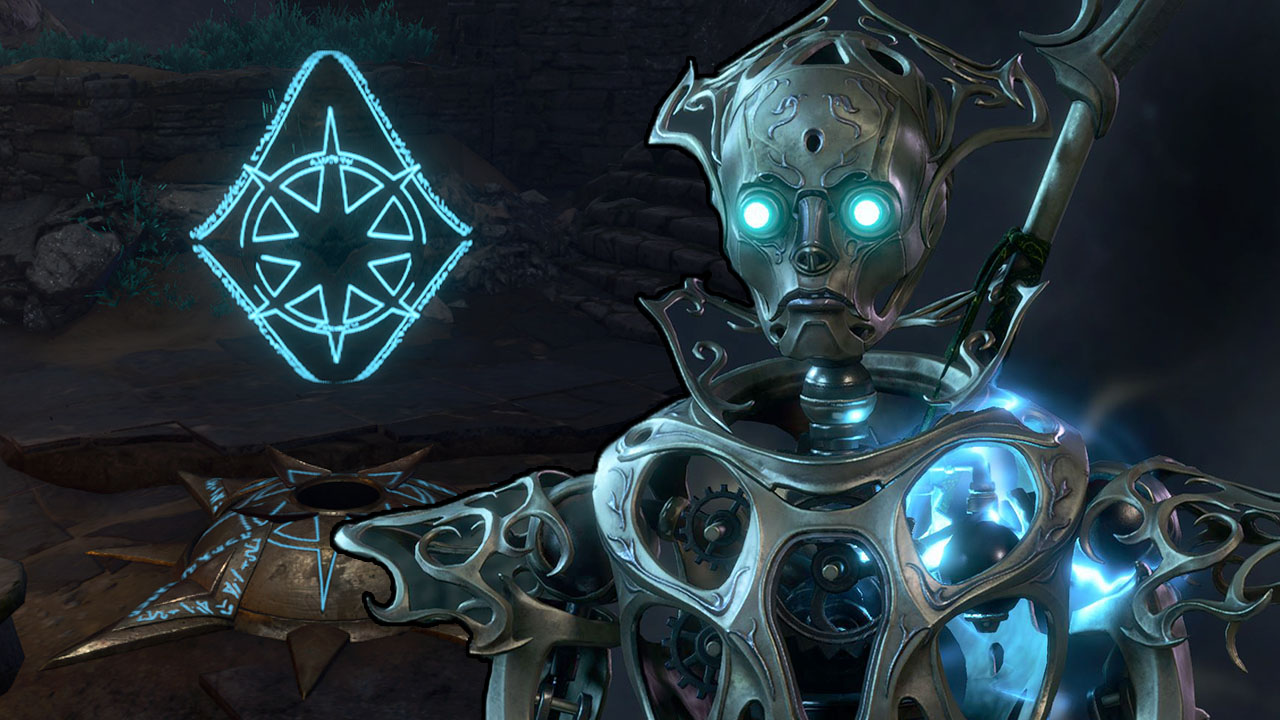
Third Floor: Talk to Bernard and find the secret basement
On the top floor of the Arcane Tower, you will meet the robot Bernard. He communicates through quotes from poems and carries the ring Beacon with him. You need this to get into a secret basement room.
If you go to this floor unprepared, you will enter a fight with Bernard and his companions. Once you defeat him, you can loot the ring.
If you wish to resolve the situation peacefully, you need to have read the appropriate documents on the previous floor.
Select the conversation action: “Or are you a friend, a savior from solitude?”
Then select: “How can I trust? …”
You will then receive the required ring.
Warning: If you have read the Dusty Book and choose the conversation option “There is a light in every living being…”, you will also get into a fight with Bernard.
Secret Basement in the Arcane Tower
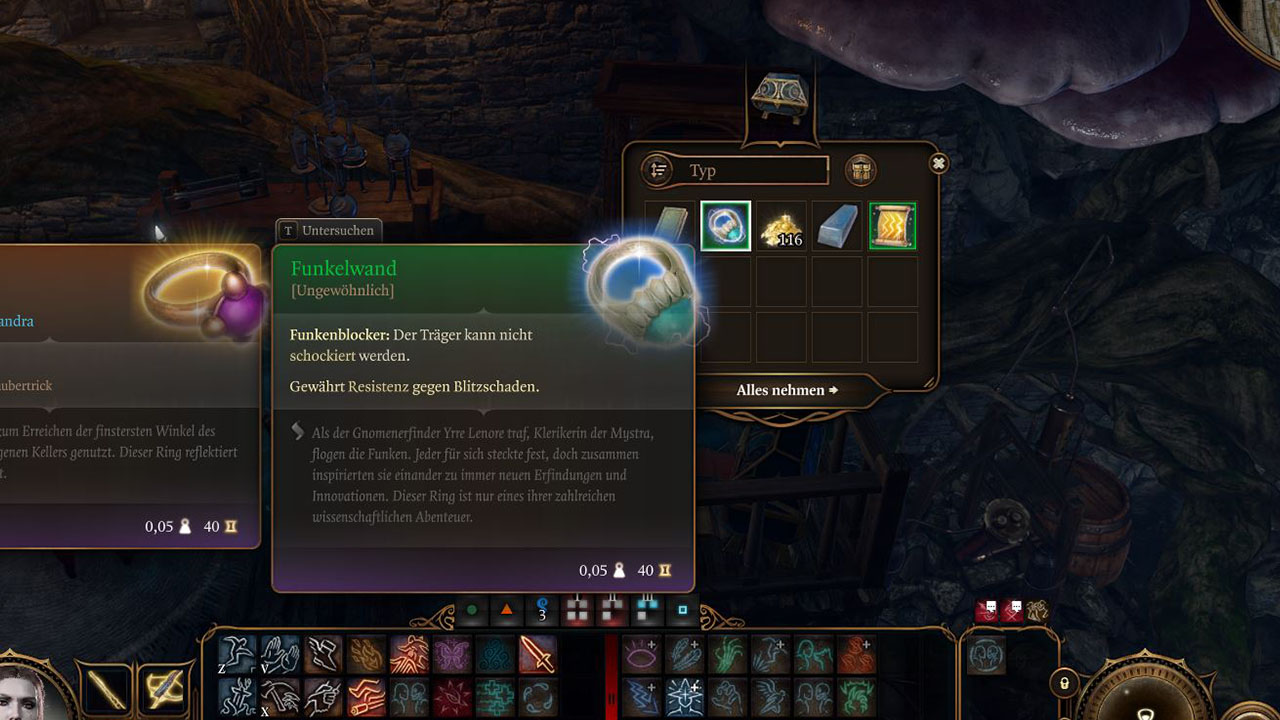
In the secret basement room, you will find, among other things, the ring Glimmering Wall.
Once you have equipped Bernard’s ring, you can use the elevator to go one level deeper than usual. There you can find more loot, especially in the golden chest.
The ring Glimmering Wall makes you immune to lightning damage.
We hope that with this guide, you can navigate the Arcane Tower a little better. Once you have successfully crossed the Underdark, the second act of Baldur’s Gate 3 will begin. Here, many more secrets and powerful enemies await you.
If you want to prepare yourself as best as possible, you can try to optimize your builds with multiclassing. These can be very strong and bring a lot of variety to the game. One YouTuber managed to defeat boss enemies just by touching them with such a build: A multiclass build makes you untouchable, defeating enemies with a touch
This is an AI-powered translation. Some inaccuracies might exist.
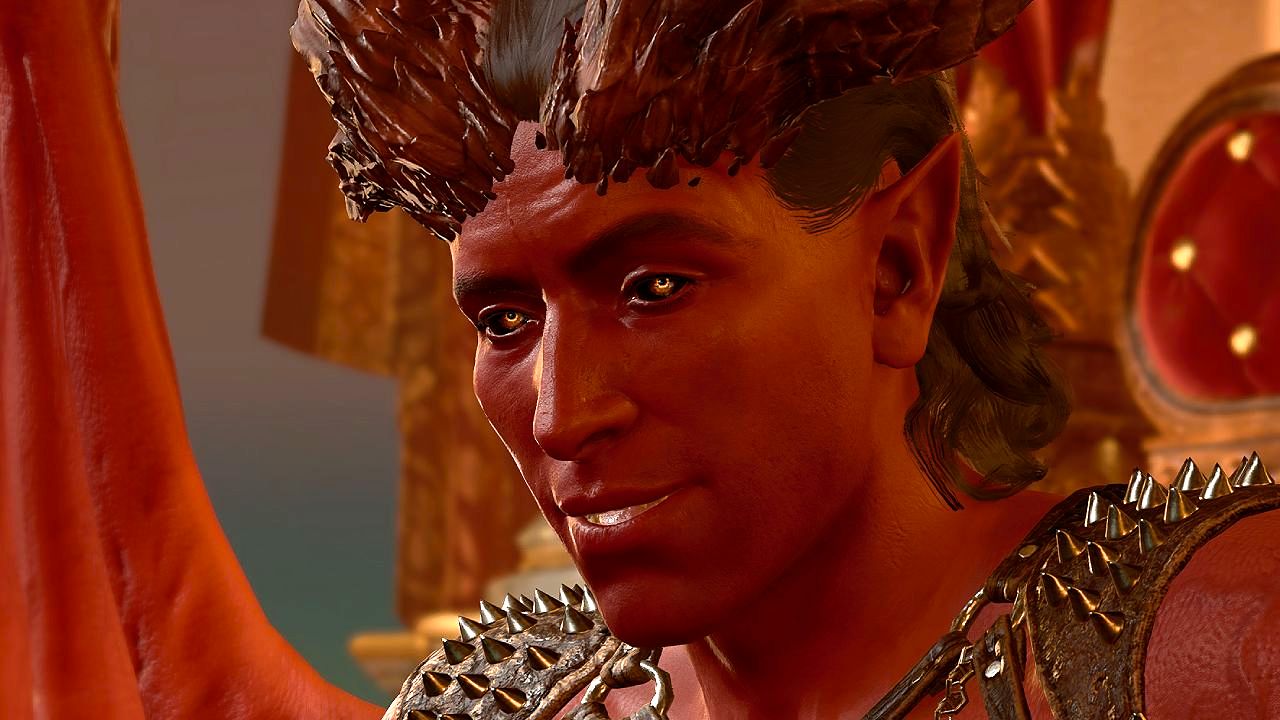
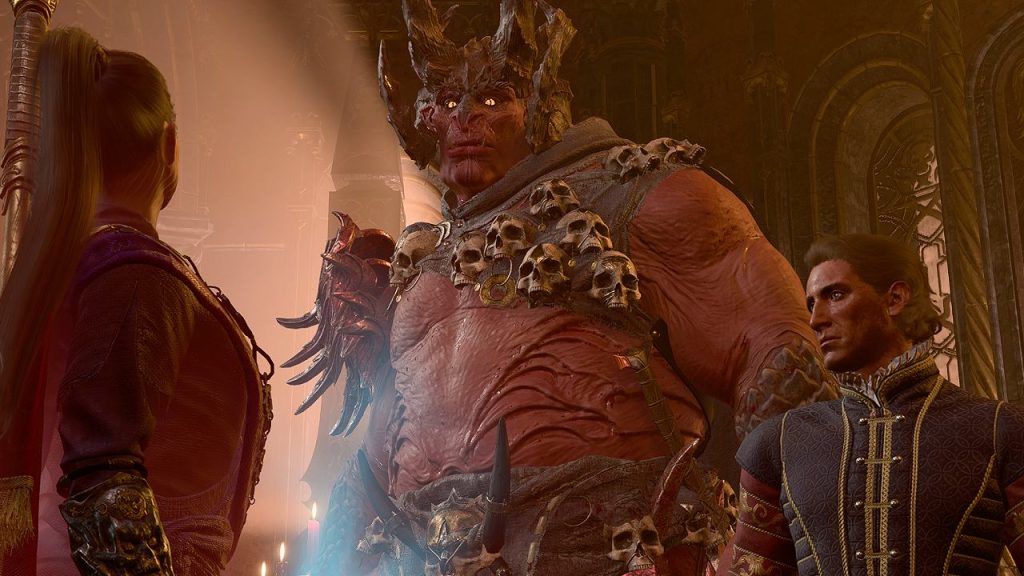
In the House of Hope in Baldur’s Gate 3, you have to overcome some challenges, but you will be richly rewarded. MeinMMO will tell you how to enter the house, grab the Orphic Hammer, and defeat the boss.
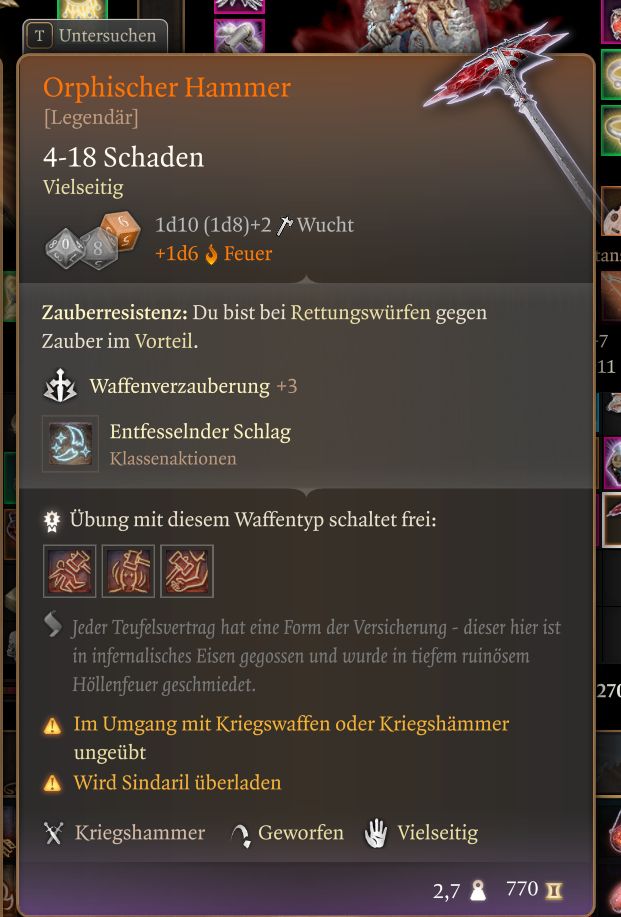
What is the House of Hope all about? The goal is to get the Orphic Hammer from the House of Hope to free Orpheus from his chains in the Astral Prism (if you want to). Raphael has the hammer and is located in his estate – the House of Hope. Besides that, a cool battle and legendary items await you.
Alternatively, you can also make a pact with the devil Raphael in the brothel Sharess’ Caress to directly obtain the Orphic Hammer. However, at a price: In exchange for the promise to hand him the Crown of Karsus once you have defeated the Elder Brain.
Note: It is also possible to enter the House of Hope if you have already made a pact with Raphael. In this case, you can destroy your contract on-site to free yourself from the pact. However, Raphael will be anything but pleased about it.
Update on April 7, 2025: We have adjusted the structure of the article and updated information.
Start video
3 Tips to Reduce Your Carrying Weight in Baldur’s Gate 3
[toc]
How to get into the House of Hope – Use the Ritual Circle
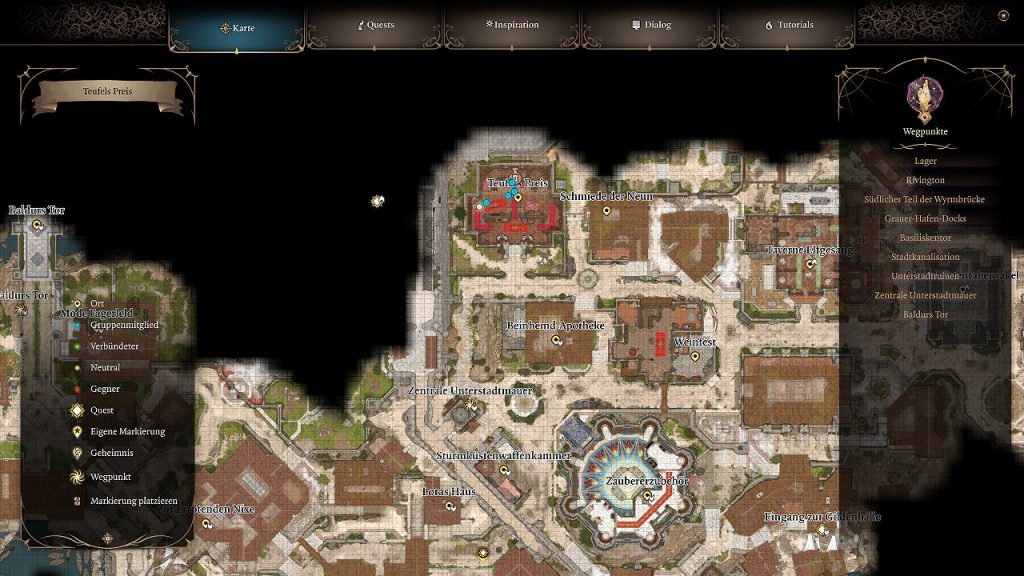
First, you need to get into the House of Hope. To do this, go to the occult shop Devil’s Price in Baldur’s Gate – about northwest of the Lower City, west of the smithy. This shop has many curious items, including items from hell. Examine the items to find out that there is more behind Helsik. Then speak with Helsik.
Go to the shop Devil’s Price to access the House of Hope.
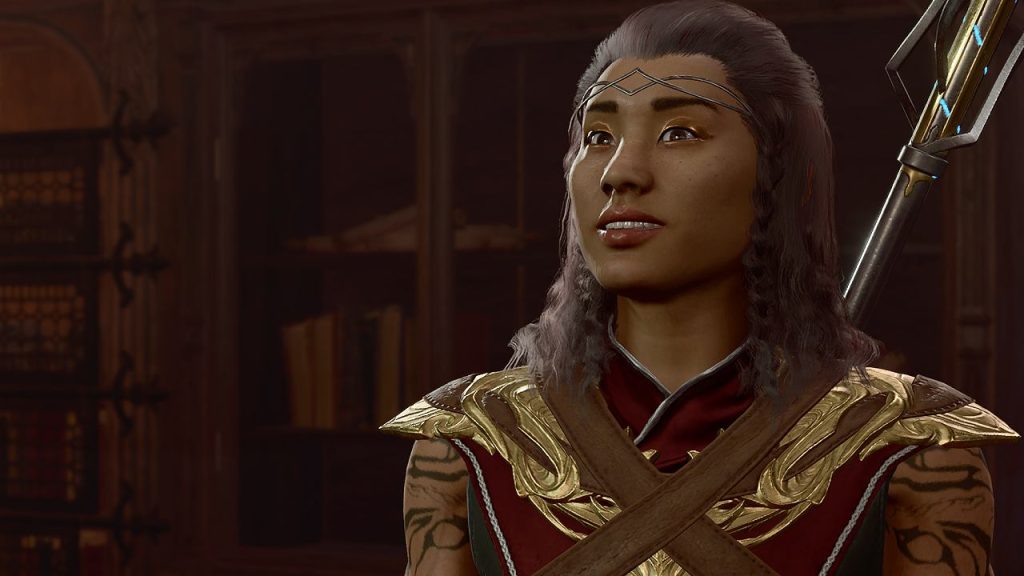
Either convince her with the right price, promise to bring her Gauntlets of Hill Giant Strength, or use skilled pickpocketing to obtain the necessary information. The Diabolist Helsik will reveal the secret ritual that will give you access to the House of Hope.
The Diabolist Helsik in the shop Devil’s Price
Solve the Ritual and Open the Portal to the House of Hope
From Helsik, you will receive a Spellbook Bound in Devil Skin with instructions on how the ritual to open the portal works and a ritual pouch with five materials. You will also receive a key to the upper floor of her shop, where the blood circle of the ritual is located.
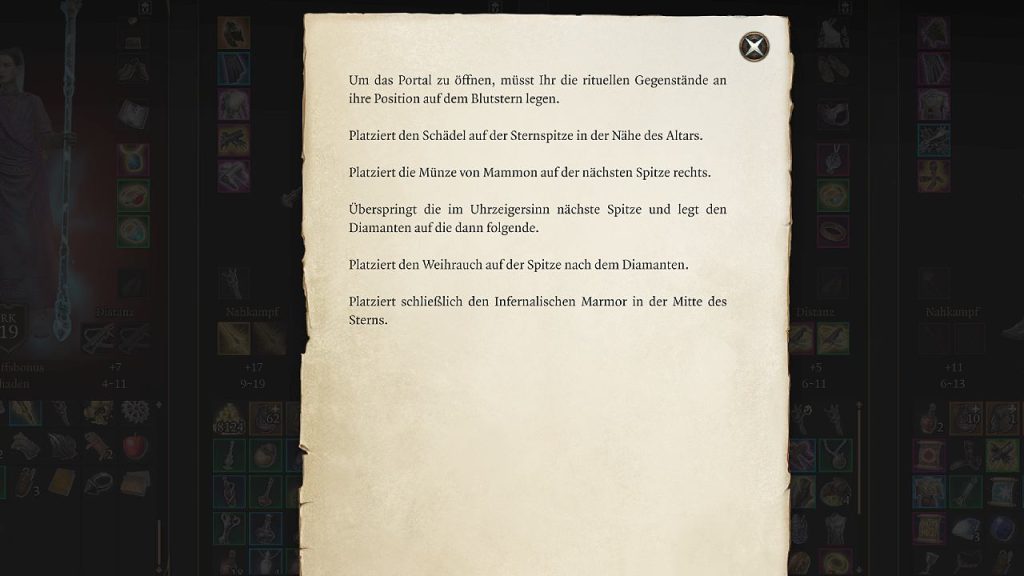
What is in the portal’s instructions:
Instructions on what you need to do to open the portal.
This is how you implement the instructions at the ritual circle: Treat the table in the room as south. From there, lay out the following items correctly:
The skull on the star tip in the south (by the table)
The coin of Mammon (looking from the table) left on the tip
The diamond on the left tip in the north
The incense on the right tip in the north
The infernal marble in the middle of the star
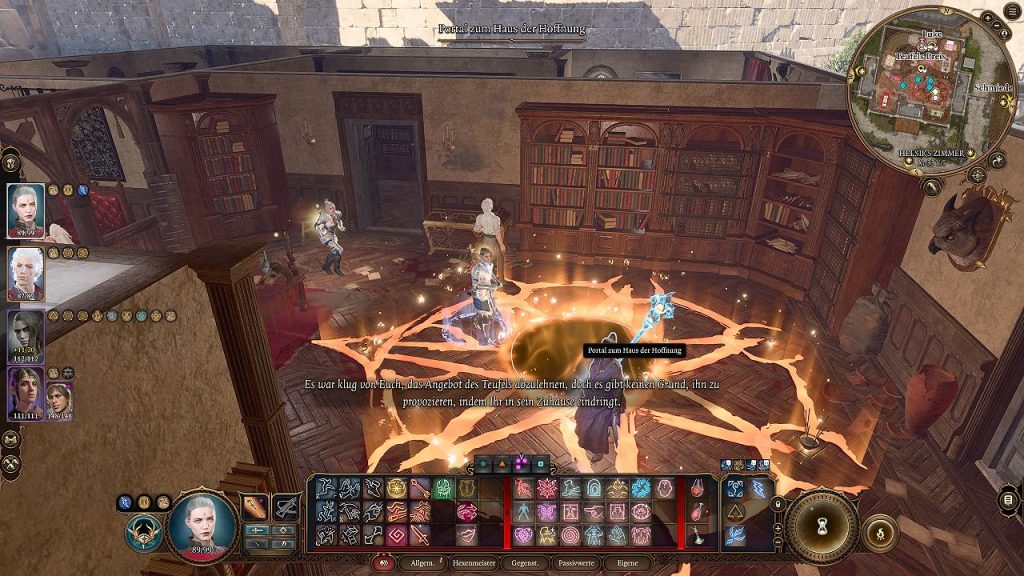
Ritual Circle House of Hope
After you have taken the necessary steps, you can interact with the portal to get to the House of Hope.
Tip: It’s better to rest again and stock up on supplies – such as potions, elixirs, or certain scrolls. Once you are in the House of Hope, you can no longer use fast travel.
House of Hope – All Tasks and Solutions
Once you have arrived in the House of Hope, various tasks await you.
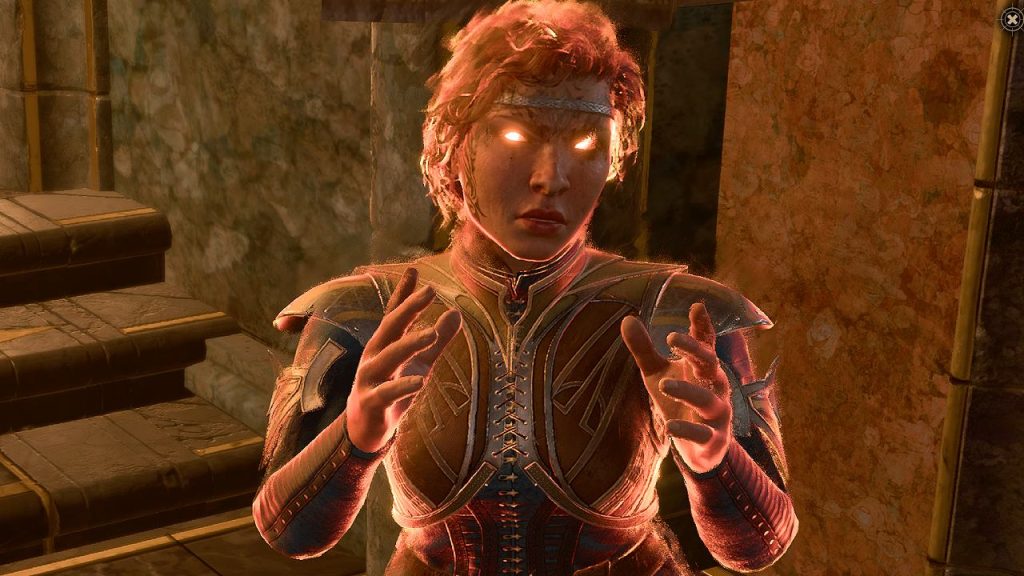
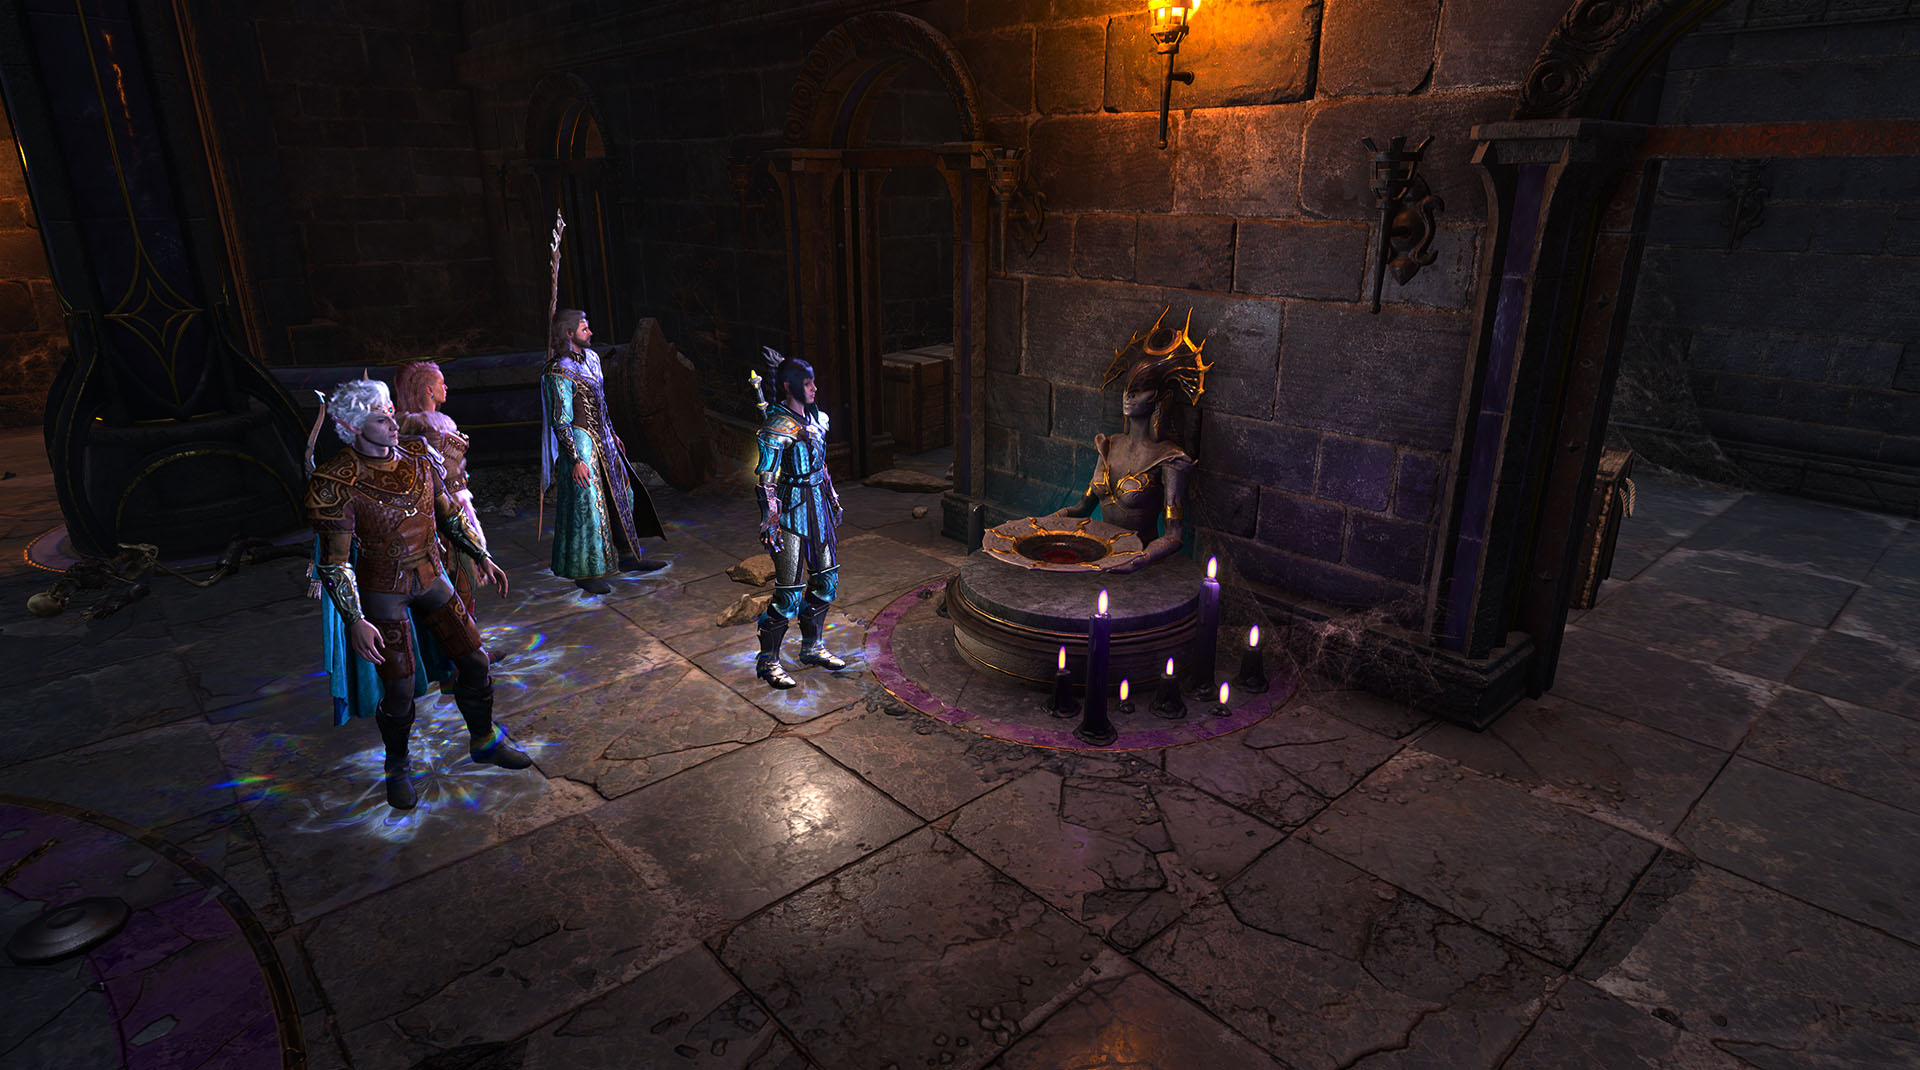
Encounter with Hope
Upon arriving at the House of Hope, you will first encounter a dwarf named Hope – more precisely, a projection. She gives you clothing so that you can move inconspicuously in the House of Hope. You should keep this clothing on, as otherwise, several opponents will appear, all of whom are hostile towards you.
Hope will help you with navigating the House of Hope.
There are still several skill checks to obtain information. She will explain to you that you need a key, the Orphic Hammer, or the contract (if you have made a pact with him) with Raphael and need to find them. In the end, you are also supposed to free her. The first step, however, is the archive.
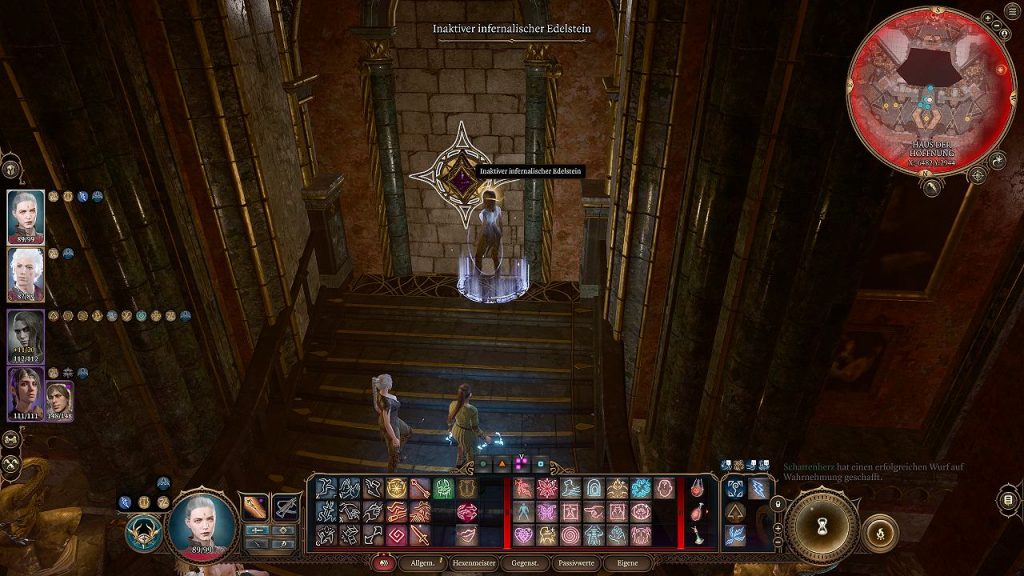
House of Hope secret hideaway
House of Hope – Secret Hideaway
Explore the House of Hope and make your way to the archive. At a wall (X: – 6482, Y: 2944), you will encounter an inactive infernal gemstone with which you can interact. Pass the Wisdom and Intelligence checks to reveal a hidden chamber and loot the items. Here you will also find the contract of Mol.
This item can be looted:
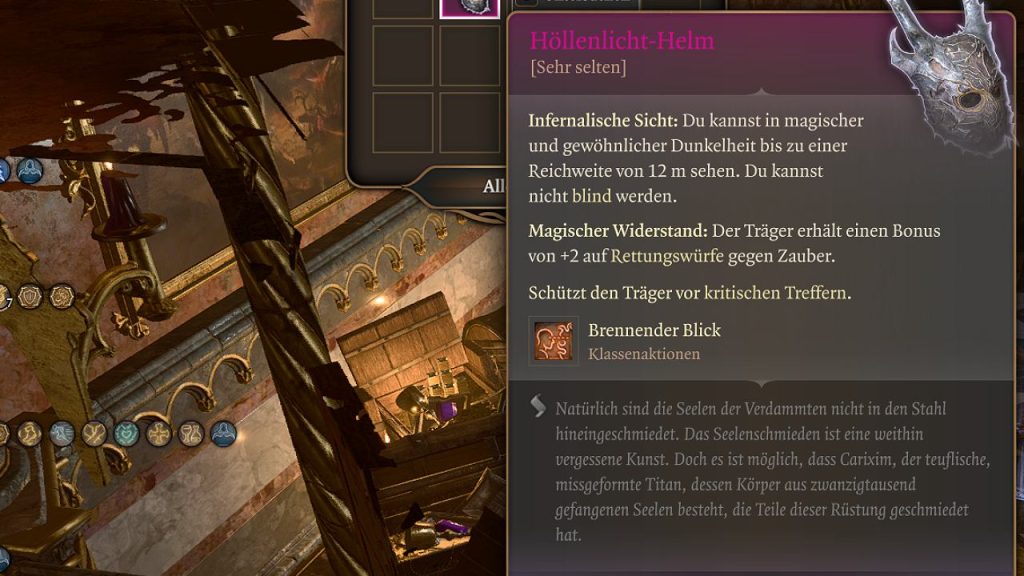
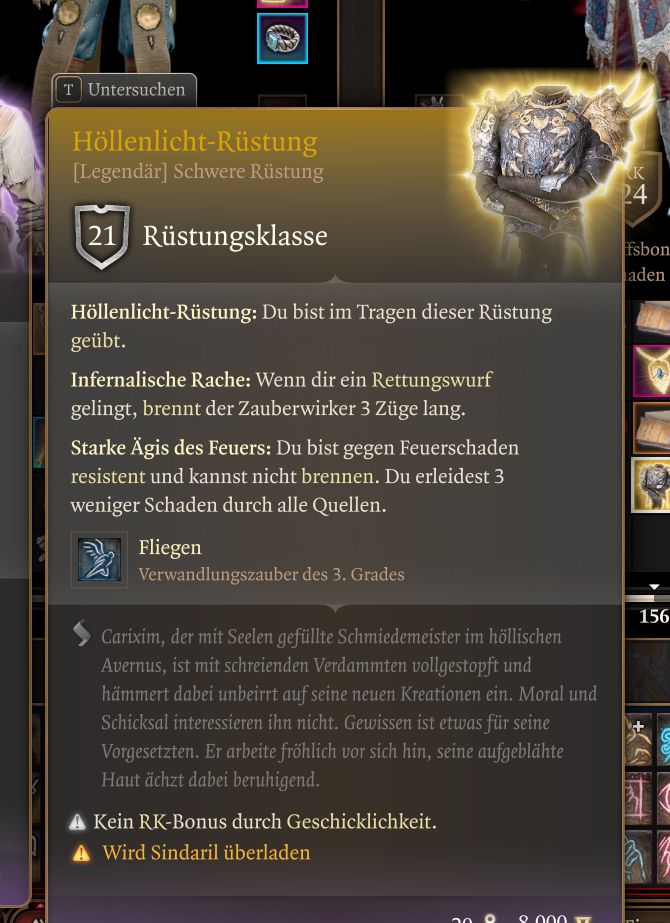
Helllight Helm
Helllight Helm: What it can do
Go to the Archive to Obtain the Boudoir Invitation
Before the archive, it’s best to talk to Hope again. She will give you information that you can use to deceive the Archivist in order to obtain the invitation to the boudoir. For this, you must again pass skill checks. After that, you go into the archive.
This is how you obtain the invitation:
Go into the archive and talk to the Archivist, try to deceive him; this will immediately get you the boudoir invitation
Alternatively, you can try other skill rolls to get the invitation
If all fails, you can attack the Archivist or steal the invitation from him
After you have successfully received the invitation, make your way to Raphael’s boudoir.
Map of House of Hope
The Boudoir – Meeting Haarlep in the House of Hope
The incubus challenges you to a game of seduction. He can change his appearance at will, which is why you see him in the form of Raphael.
Tip: There is a fountain in the room that allows you to effectively take a long rest.
What options do you now have with Haarlep? Haarlep has the key to the vault, where the password for the Orphic Hammer is located.
Allow Haarlep to use your body as a disguise (disguise) to obtain the key. But do not sell your soul, because that leads to a Game Over.
Or: Fight Haarlep to obtain the key
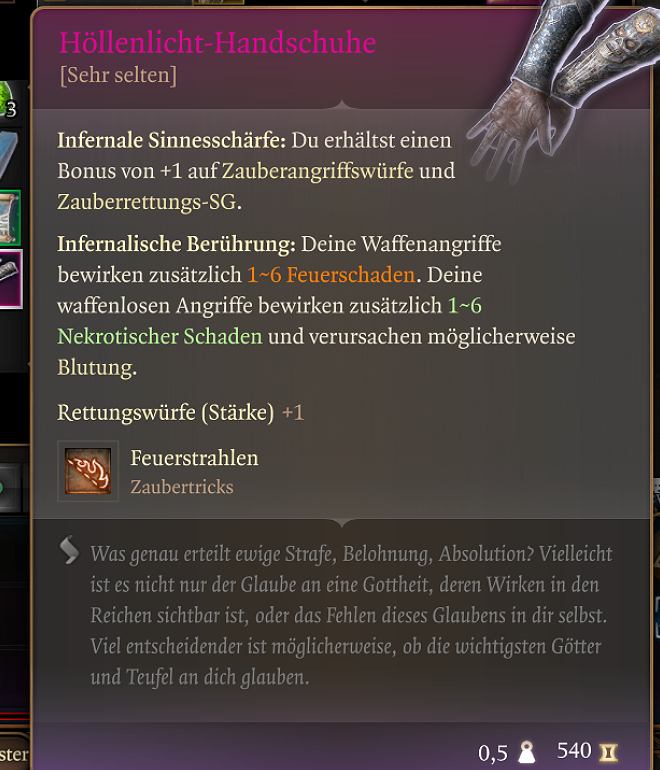
Tip: If you want the Helllight Gloves, you need to fight Haarlep to loot them.
This is what the gloves can do:
You will obtain the Helllight Gloves when you defeat Haarlep in combat.
Once you have the key, look for a painting of Raphael – it is located to the left of the magnificent bed. Pass the perception check to notice the trap and disarm it. Under the painting is a button you can press, and behind the painting, the vault will reveal itself.
In the vault, there is also a note with the sought-after password. You need this password to deactivate the dome in the archive that protects the Orphic Hammer (or your contract).
Tip: Use the fountain in the boudoir to regain your spell slots and HP, and prepare for a fight.
Back to the Archive to Retrieve the Orphic Hammer or Contract from the House of Hope
Make your way back to the archive. Now you can go to the Orphic Hammer (or contract) and remove the dome using the password to grab the hammer or tear up the contract.
The Archivist will notice, and everyone will be hostile towards you as soon as you leave the room. Fight your way through after you have collected the items.
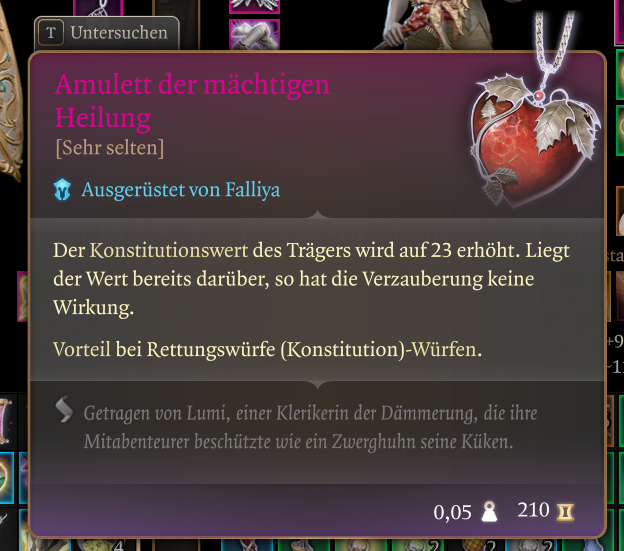
In addition to the Orphic Hammer (or the contract), you can collect other powerful items found in the archive, including:
Amulet of Greater Healing
Gauntlets of Hill Giant Strength (which Helsik desperately wants)
Here’s a closer look at the items:
Amulet of Greater Healing
Gauntlets of Hill Giant Strength
Orphic Hammer
Save Hope
After fighting your way through, head east to rescue Hope from the prison. To do this, climb down through a hatch into the prison. In the prison, Hope is chained, and another fight awaits you – so get ready.
After that, you can destroy Hope’s chains and free her by equipping the Orphic Hammer and smashing the crystals. She will assist you in the fight against Raphael.
Tip: Afterward, go back to the boudoir to heal yourself using the fountain and refresh your spell slots.
After that, you will encounter Raphael when you go back to the portal. The battle against Raphael is a very difficult one. If you have the option (depending on the decision in the Shar Temple), Yurgir will appear alongside Raphael. With a Charisma roll, you can try to convince Yurgir to fight on your side.
Raphael and Yurgir
Raphael has 666 hit points, which is a symbol for the devil, and an armor class (AC) of 21. Additionally, he has his own boss room and song. In the room, there are four soul pillars, which grant him additional fire damage and a bonus on Dexterity and saving throws. He uses the pillars to restore HP and cast powerful spells.
Tips:
Destroy the soul pillars before focusing on Raphael and the adds and ideally take blinding damage with you. With blinding damage, you can also disable the pillar for one round. Because if more pillars are active, it is harder to hit Raphael – as he gains more AC.
You can also try spells like Hold Monster or Tasha’s Hideous Laughter by casting spells on Raphael.
Hold Monster or Tasha’s Hideous Laughter work well because the saving throws are based on Wisdom – and Raphael has 13 Wisdom, which is not very much against his Charisma score of 19.
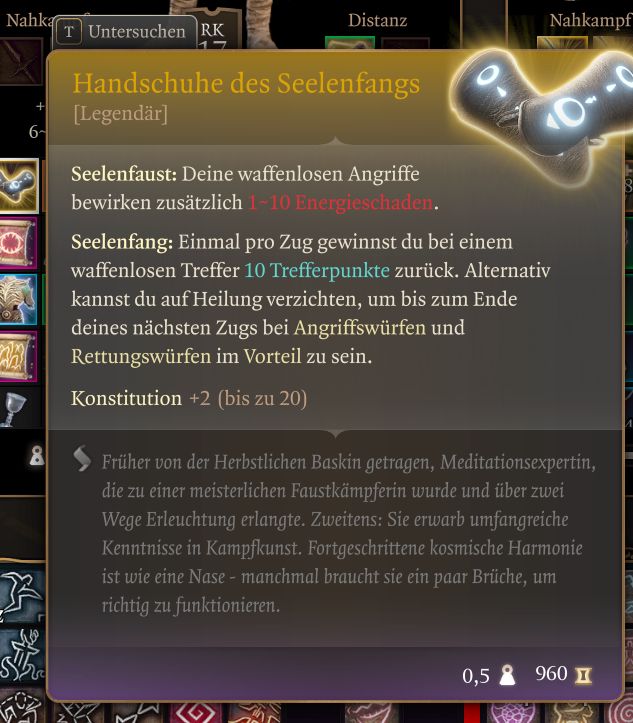
After you have defeated Raphael, you can loot the legendary Helllight Armor. If Hope has survived, you will also receive the Legendary Gloves of Soul Catching as a quest reward from her.
The Druid is a versatile class in Baldur’s Gate 3. This time, we show you the Druid build, the subclass “Circle of the Moon”, where you fight in animal form. We list subclass, attribute points, talents, and spells in our overview.
Update, April 7, 2025: We have reviewed the article, adjusted the structure, and updated information.
What is the Druid? The Druid is one of the major classes in Baldur’s Gate 3. It is nature-oriented and can thus cast various spells related to shape-shifting, spores from fungi, and necromancy.
In this guide, we will show you a build for the subclass “Circle of the Moon”, which specializes in transforming into other creatures like bears, spiders, panthers, or even saber-toothed tigers. So you predominantly fight in animal form.
We will now show you in the following section which attribute points, talents, and spells you should focus on if you want to play the Druid predominantly in animal form.
[toc]
Start video
Baldur’s Gate 3: Reset Character and Choose New Class
Druid Build: Subclass Circle of the Moon – Choose the following attribute points
Which subclass should I choose as Druid? Use the Circle of the Moon as your subclass.
Which attributes should I focus on? As a Druid with the Circle of the Moon, you should concentrate on Wisdom. As a second focus, concentrate on Constitution.
How do talents work? In Baldur’s Gate 3, you can choose a talent at levels 4, 8, and 12 to complement your build. However, if you dislike any talent, you can instead invest 2 points into your desired attributes.
Which talents do I need? In this case, we recommend focusing on the following talents per level:
Level 4: Alert
Function: You can no longer be surprised and gain +5 to Initiative. However, you can also choose any talent of your choice.
Level 8: No talent, but improve abilities
Wisdom should be increased to level 18.
Level 12: No talent, but improve abilities
Wisdom should now be pushed up to level 20. The talents in this level range are not optimal, and by improving your ability, you can strengthen yourself without taking risks.
As a Druid of the Circle of the Moon, spells that you can maintain with your concentration are especially worthwhile. You can cast a concentration spell before you transform into an animal of your choice. The transformation does not break the spell.
The good thing is: As a Druid, you can swap your spells freely before each battle. You do not have to run to Lazarus and reset your level. You don’t have a fixed loadout but can adjust your spells according to the situation. Thus, you can constantly swap out your spells and try out what works best for you.
The following spells and cantrips are worthwhile as a Druid of the Circle of the Moon:
Level 1
Cantrips: Guidance and Thorn Whip
Guidance is one of the strongest cantrips in Baldur’s Gate 3. With Guidance, the target receives a bonus of 1d4 on ability checks, which is particularly useful in conversations and for picking locks.
Spells you have at Level 1: Ice Knife, Thunderwave, Cure Wounds, Healing Word, Enhance Jump
You only get your animal form at Level 2, so at Level 1, you mainly use the damage spells Ice Knife, Thunderwave, and the cantrip Thorn Whip to deal damage. With Cure Wounds and Healing Word, you can heal yourself or allies.
Level 2
Spells that are worthwhile: Speak with Animals, Entangle, Healing Word, Thunderwave, Faerie Fire
Choose subclass: Circle of the Moon
Cantrip: Resistance
Animal form: Now you can transform into animals. The options available at Level 2 are: A badger, a wolf, a spider, and a cat. Through your subclass, you gain an additional animal form, the bear, which is quite tanky.
Faerie Fire is a handy concentration spell that you can use before transforming into an animal. All targets in the light become visible, and your attack rolls have an advantage.
Speak with Animals is not practical in combat, but it is very worthwhile in Baldur’s Gate 3 because you encounter numerous animals and thus engage in some fun dialogues.
Level 3
Spells that are worthwhile: Flame Sphere, Moonbeam, Hold Person, Entangle, Healing Word
Flame Sphere is a strong spell that creates a burning sphere. This sphere can be moved over a certain distance and causes fire damage to targets that come into contact with it or are immediately nearby.
You can conjure the sphere before you transform into an animal of your choice. Your concentration is not interrupted by the transformation. The sphere will support you in combat until your concentration is broken (or up to 10 turns).
Hold Person is also a very strong spell, especially if you have melee fighters on your team. If the spell is successful, the humanoid target becomes incapacitated and cannot perform any actions or reactions. All melee attacks against the target are automatically critical hits, allowing you to deal massive damage.
Level 4
Spells that are worthwhile: Here you could also prepare the concentration spell Heat Metal or Thorn Whip. Just see which spells you find useful. You can swap them out before each battle.
Cantrip: Pick your favorite
New animal forms: Deep Rothé and Nightmare Crow
You can choose your first talent (see above)
Level 5
Spells that are worthwhile:Call Lightning, Snowstorm, or Plant Growth
All three spells are strong. With Call Lightning, you hit multiple targets with lightning that are within radius. You can cast the spell with good concentration up to ten rounds each time without wasting a spell slot. Therefore, it would be worthwhile to always choose the highest spell level to get the most benefit from the feature.
The spells Snowstorm and Plant Growth give you plenty of crowd control effects (CC).
You can make a second attack after your first unarmed strike in your animal form.
Level 6
Prepare spells: Pick your favorites
First strike: You gain a new passive feature from the Circle of the Moon, making your attacks in animal form count as magical damage.
New animal forms: Owlbear and Panther
You heard right: You can turn into an owlbear, but you’re not as cute as this little owlbear cub!
New spells that are worthwhile: Wall of Fire and Summon Forest Creature
Wall of Fire is considered one of the most powerful AoE spells in the game. The spell can be flexibly placed as long as there is visibility to the entire area. All within the area take immediate 5d8 fire damage and catch fire. The spell covers large areas, is good for long distances or narrow corridors, and can deal damage to enemies over several rounds when positioned well tactically.
Summon Forest Creature allows you to call a dryad that follows you and supports you in battle. The cool thing is: it’s not a concentration spell. It’s best to summon her before the fight so that you don’t use an action in combat. And what’s even more practical is that your dryad can also summon another creature. A great two-for-one deal.
Level 8
Prepare spells: Pick your favorites
You can choose your second talent (see above)
New animal form: Saber-toothed Tiger
The saber-toothed tiger also focuses entirely on damage, just like the panther and the wolf. However, they have different abilities. See what you like best.
Level 9
New spells that are worthwhile:Summon Elemental and Insect Plague
With Summon Elemental, you can summon an elemental of your choice that supports you in battle.
Level 10
Cantrip: Pick your favorite
Prepare spells: Pick your favorites
You can now make two extra attacks after your first unarmed strike in your animal form.
New animal forms: Dilophosaurus and Myrmidon
You can transform into a dino and a Myrmidon of your choice. The Myrmidon comes in four different variants, each with different abilities. Overall, the 4 forms are very strong. To transform into a Myrmidon, you need two animal form charges.
Level 11
New spells that are worthwhile:Hero’s Feast, Wall of Thorns, and Sunbeam
Hero’s Feast gives your party strong buffs. You can no longer be sick, frightened, or poisoned. Additionally, your health increases, and you gain an advantage on Wisdom checks. The buff lasts until the next long rest.
Sunbeam is a far-reaching concentration spell that is worthwhile in combat. The beam deals a lot of damage and blinds enemies. You can use the spell once each turn (up to a maximum of 10 turns) as long as your concentration holds – without needing to use another spell slot again.
Level 12
Prepare spells: Pick your favorites
You can choose your third talent (see above)
These were the most important things. You can also swap spells as you like, depending on what you feel like in combat. So feel free to try out new spells. What do you think of the Druid? Have you tested it yet? If so, how strong do you find it? Let us know in the comments!
What animals can the Druid transform into?
To transform into an animal, you need animal form charges. You regain these through a short or long rest. You can also dispel the transformation yourself. If your hit points in animal form drop to 0, you automatically transform back.
Each animal form has different abilities and has its own attribute points. In total, there are 15 animals that the Druid of the Circle of the Moon can transform into:
One of the biggest quests in Baldur’s Gate 3 is “Finding the Nightsong.” We will show you what you need to do for the quest – and how to complete it.
Baldur’s Gate 3 is full of quests that may seem small at the beginning, but stretch over many hours and multiple acts. One of these missions is “Finding the Nightsong.” We will tell you everything you need to know about this quest, how to start it, and where it ends.
Spoiler Warning: The article contains some spoilers regarding the questline surrounding the Shadowsong and its possible outcomes. However, the summary with initial hints is spoiler-free.
Update on April 7, 2025: We have adjusted the structure of the article and updated information.
[toc]
The Essentials About the Nightsong at a Glance
You receive the quest as early as Act 1.
You can complete the quest at the earliest in Act 2, but it may extend into Act 3.
The questline has multiple different endings depending on your choices.
The questline is particularly significant for Shadowheart and her personal story.
How do you start the Nightsong questline? You will inevitably encounter the questline “Finding the Nightsong” during the first act of the game. After your first visit to the Druid Grove, you may meet Liam. Either in the grove itself, outside the grove with his crew, or – if he has died – the quest begins through a letter from his corpse.
Typically, you will find him when you leave the grove and head towards the swamp.
Alternatively, you can also receive the first hint about the quest from Halsin or Aradin, usually in connection with your mission to attack and take out the goblin camp.
In summary, the quest asks you to find the legendary “Nightsong” for a powerful wizard in Baldur’s Gate and bring it to him. Details about this Nightsong are initially unknown, but it is said to be a powerful weapon of the followers of Shar.
At first glance, the mission may seem like a simple side quest, but it holds great significance for the story of the game and extends throughout the longest part of your adventure.
Tip: Since the questline surrounding the Nightsong is particularly significant for Shadowheart, we recommend having her with you at all steps of the quest. While it is not strictly necessary for completion, Shadowheart has special dialogues and may unlock unique events and options during this questline. Additionally, Shadowheart may become very unhappy if you do not take her with you while fulfilling the quest.
Start video
There are secret rooms in Baldur’s Gate 3 that only a few of you will ever see
Act 1: Finding the Nightsong – Searching for More Clues
The Nightsong is supposed to be located somewhere in the Underdark; accordingly, that is your first clue.
Note that you basically have no time pressure for this questline. You will encounter many other side missions while searching for the Nightsong – especially in the Underdark – which you can all complete at your leisure.
You have several ways to enter the Underdark during Act 1:
Head to the Ruined Sanctum (the “Goblin Camp”). In the healer’s room Gut, one of the three leaders of the camp, you may discover a staircase with a perception check. The staircase leads into the defiled temple. There, you need to solve a small puzzle with moon discs or alternatively discover and unlock a lock (for example, with Astarion). Once done, a long ladder leads directly into the Underdark to the Selunite outpost.
In the small village controlled by the goblins, you can climb into the well. Down there, you will fight a large spider matriarch and see a deep hole in the ground. Cast the spell Feather Fall or use a corresponding potion to jump into the hole and thus fall into the Underdark.
Another access point can be found at Aunt Ethel in her teahouse in the swamp. Climb through the chimney into her hideout and make sure to grab one of the eerie masks. In the room with the many gas traps, after the waterfall, you can jump onto an elevation. Put on the mask (after Ethel has been defeated!) and you can walk through the wall. A magical mushroom circle teleports you into the Underdark.
In a barn next to the inn “Waukeen’s Rest,” you will find the hideout of the Zhentarim behind a trapdoor. In the northwest of the hideout, you may discover a wall that is merely an illusion. You can simply pass through the wall, but conversations with the wolves may also draw your attention to it.
Once you reach the Underdark, you need to advance to the west. There you will find a small ship, which you can take to sail to the Grymschmiede. Explore the area thoroughly and follow the story. After you have completed the situation regarding the “True Soul Nere,” you can go through the hallway filled with poisonous gas and unlock a locked door.
From here, you can see an ancient temple of Shar, but there seems to be no way to enter the temple from here. The quest continues in Act 2.
Act 2: Finding the Nightsong – The Trials of Shar
Once you arrive in the Shadowlands, you can continue your search for the Nightsong.
Here’s a clear warning: Completing this quest will – depending on your choices – rapidly advance the story in this area and cause significant changes. If you want to experience the Shadowlands in their original state, you should explore a bit before turning your attention to finding the Nightsong.
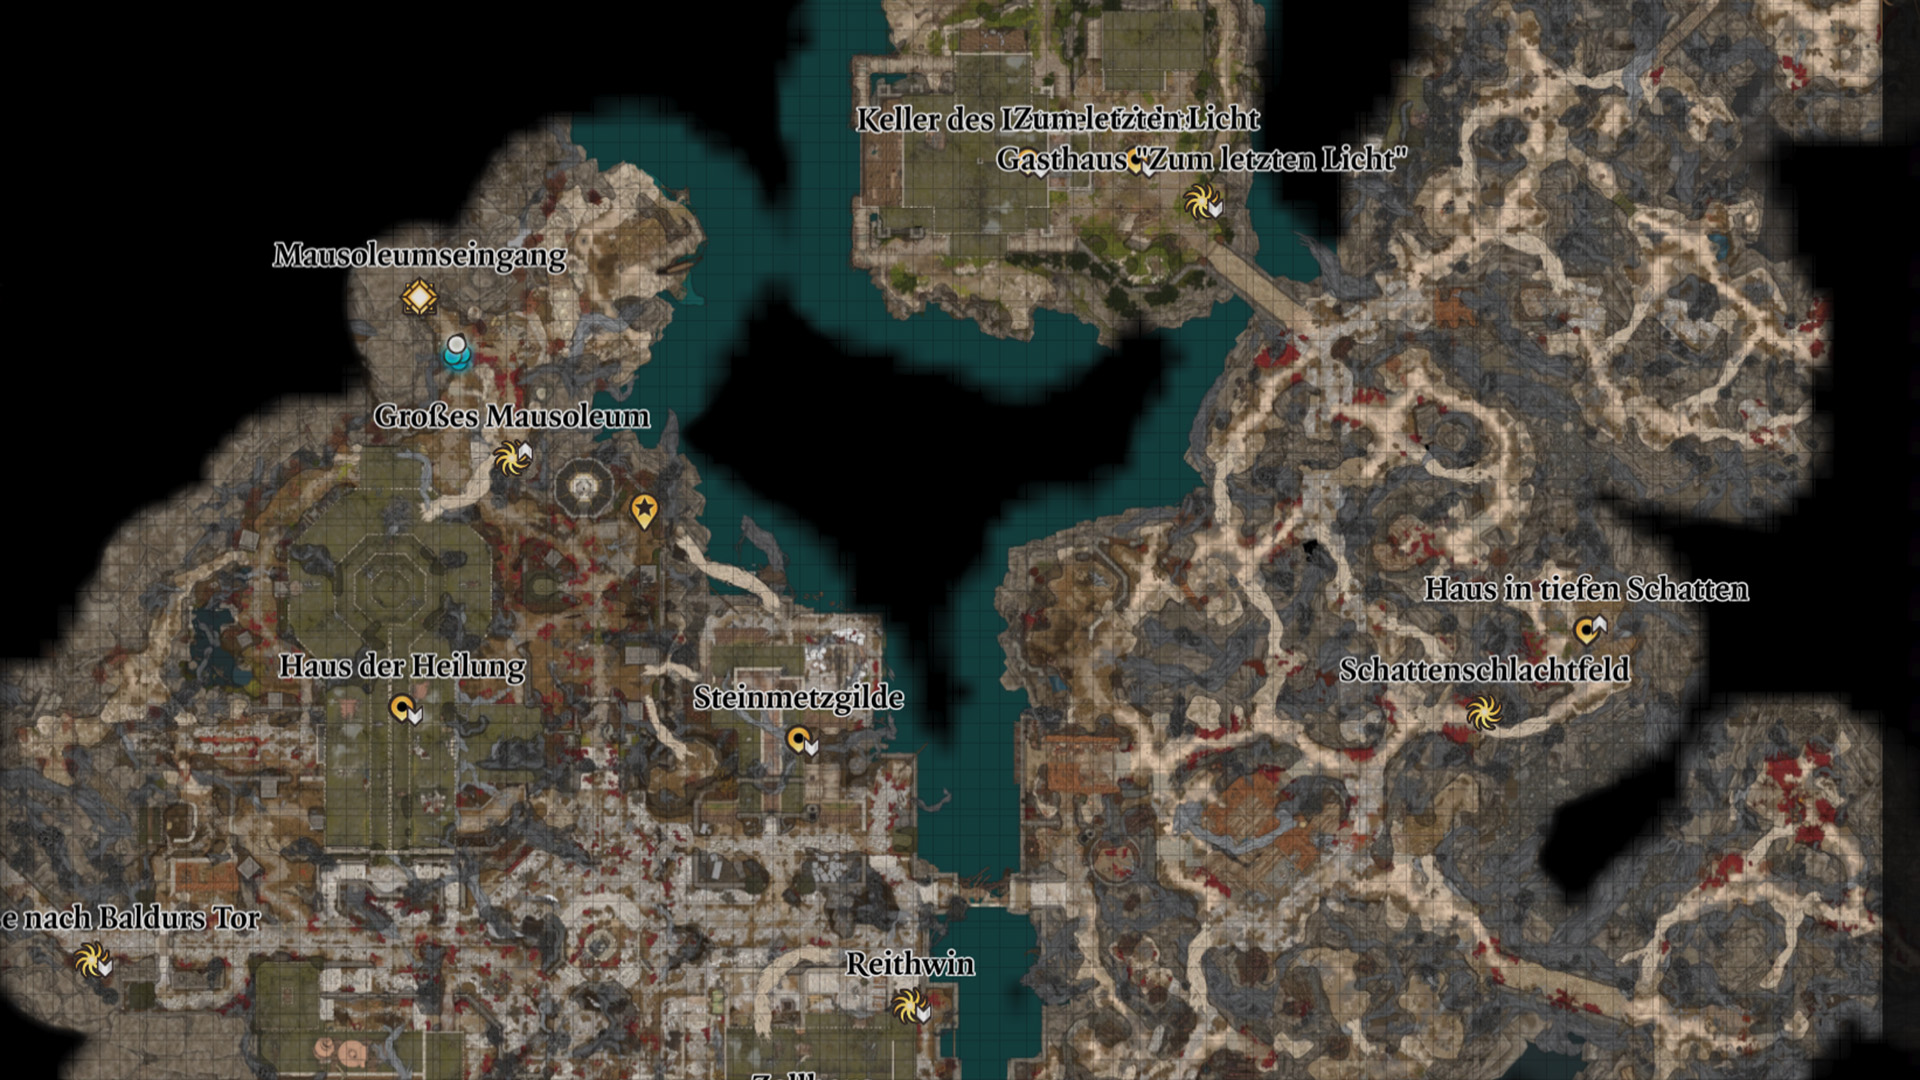
Far to the northwest of the area, west of the river and north of the House of Healing, you can discover access to a mausoleum of the Thorm family. The mausoleum contains a secret entrance to the temple of Shar.
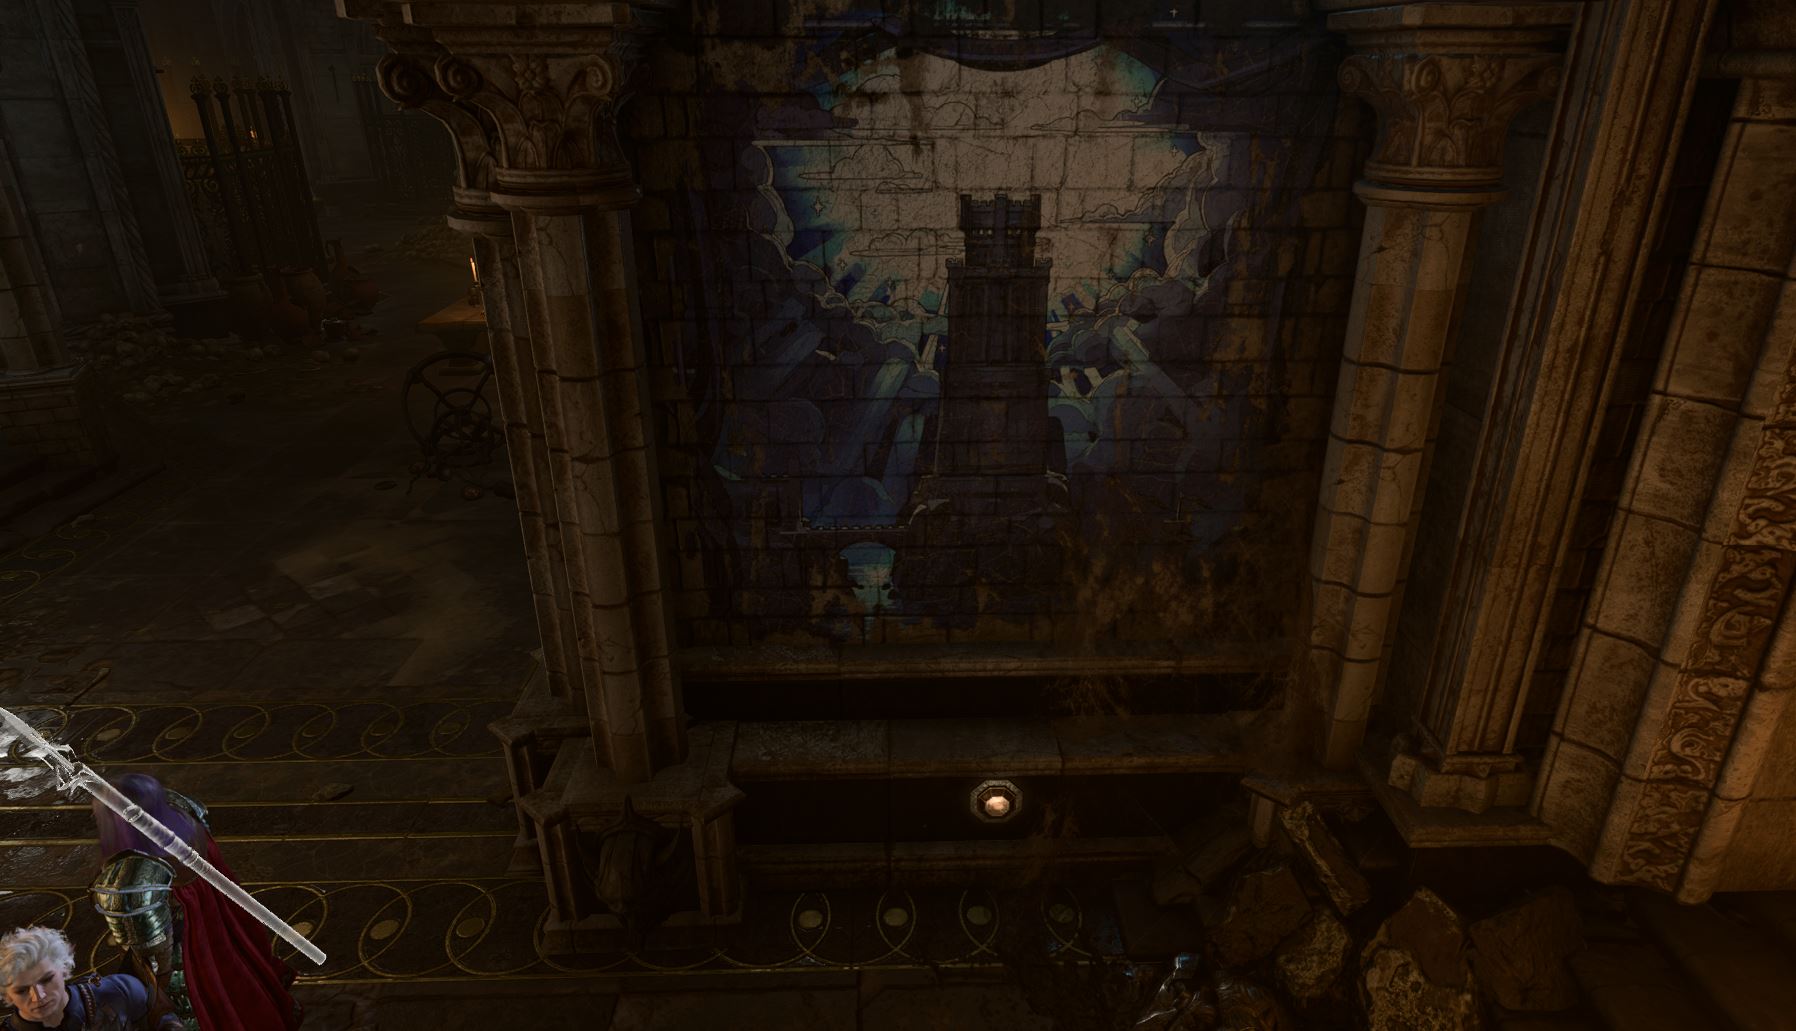
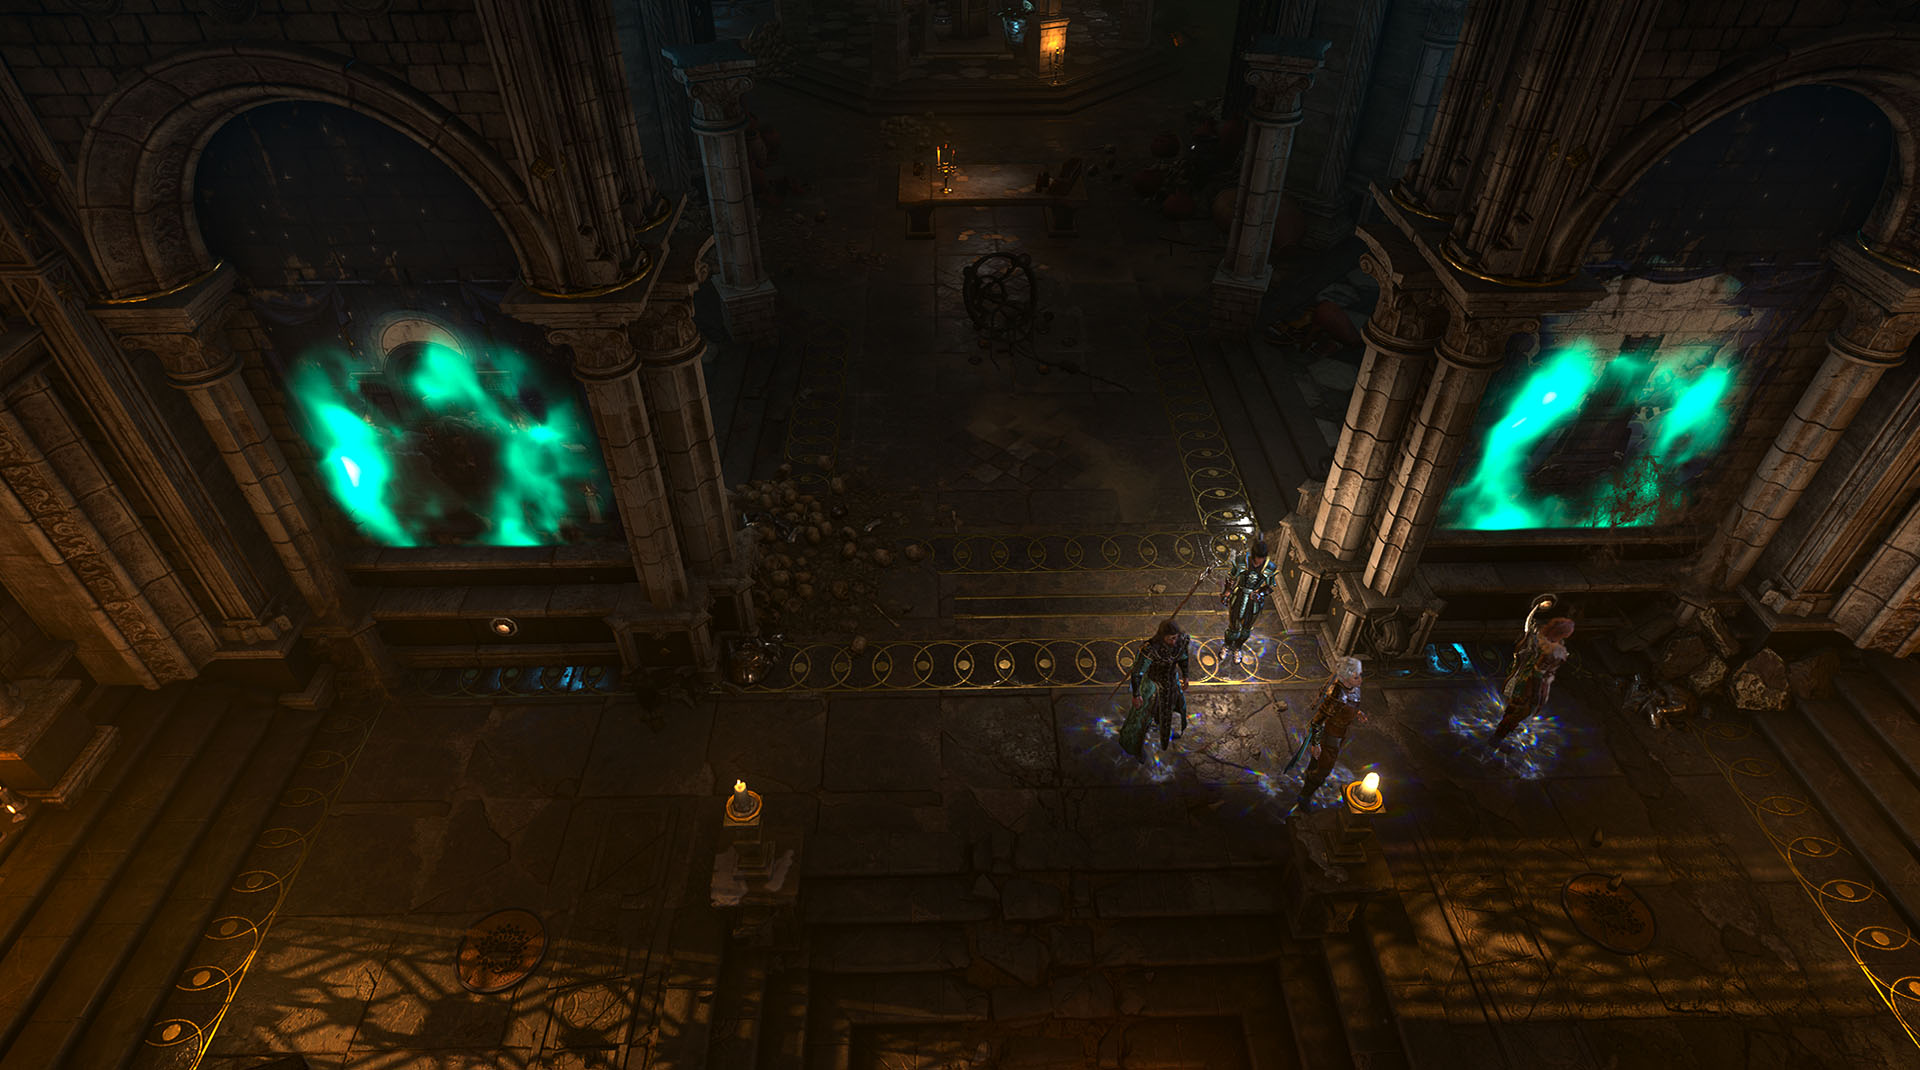
To reach the temple, you must click the paintings on the wall in the correct order in the back room of the mausoleum. The order is:
The painting Towers of Moonrise
The painting of Grief
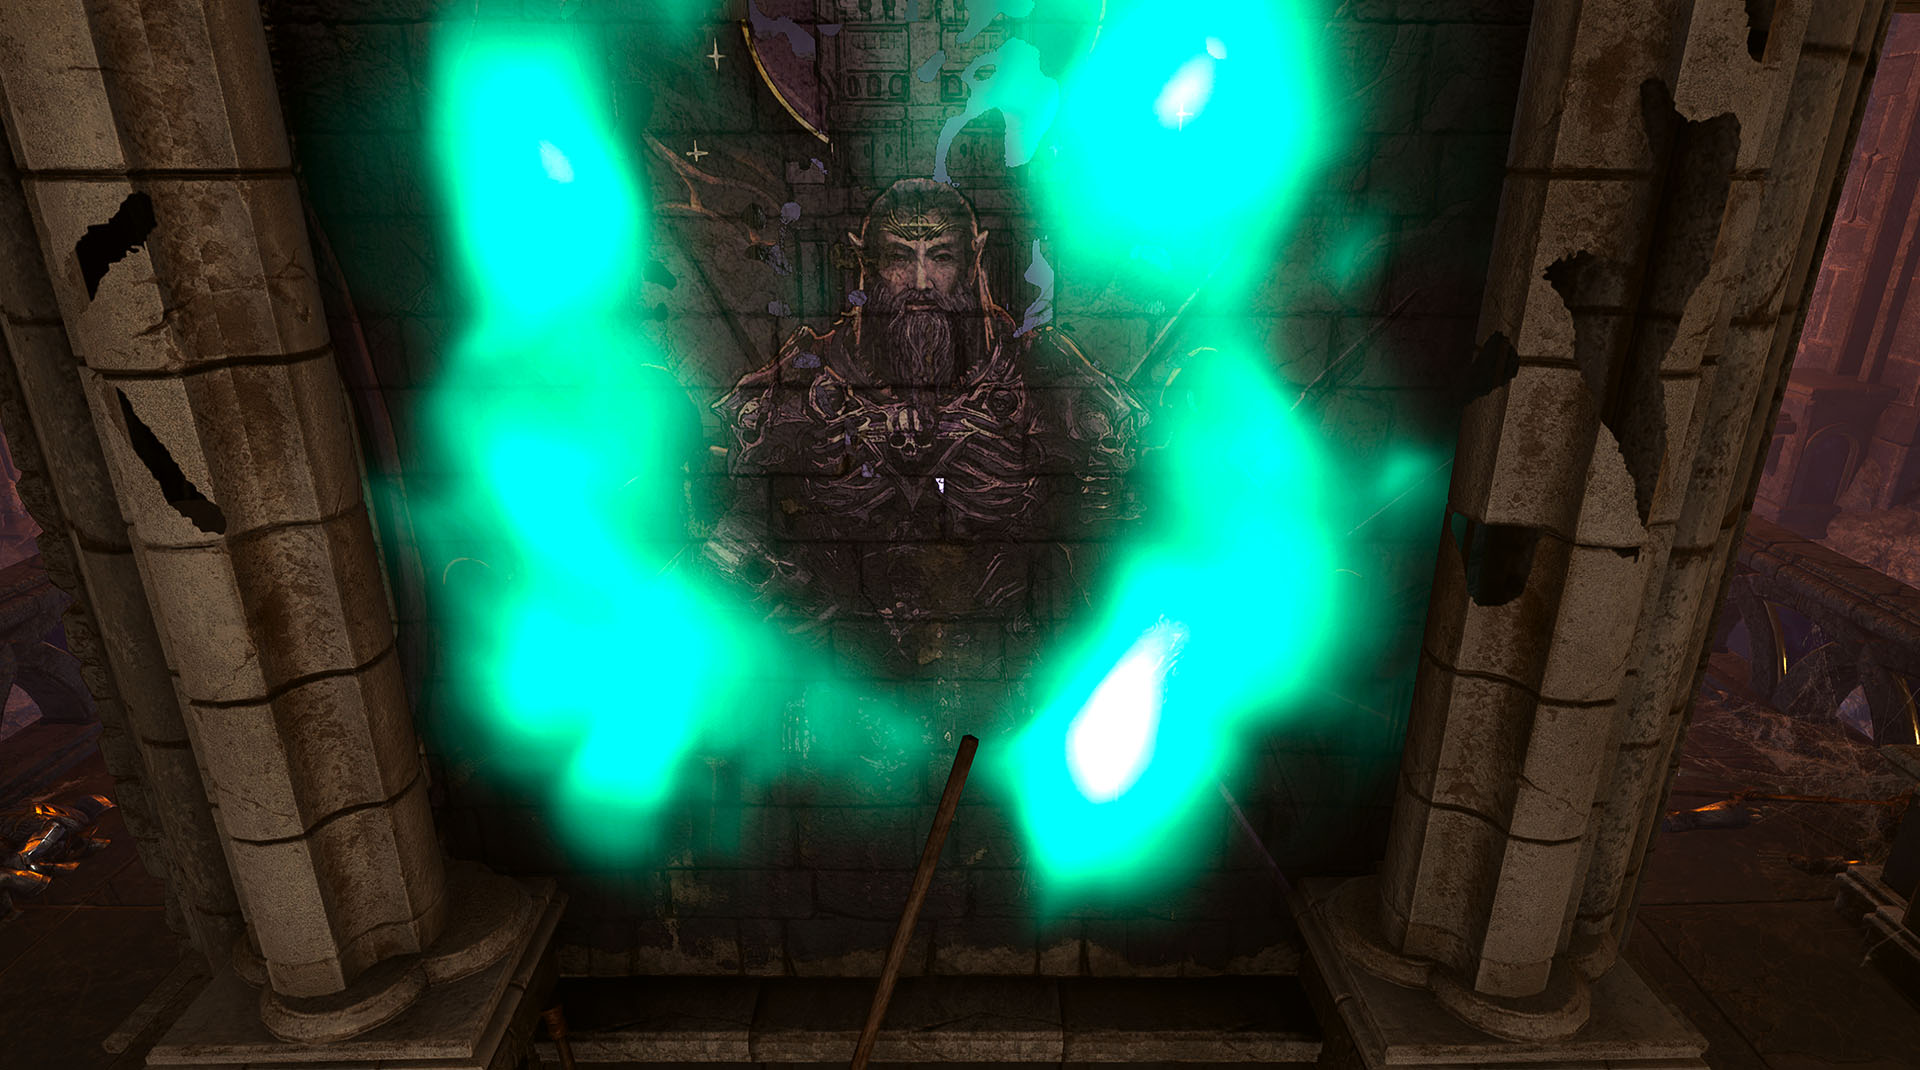
The painting of the General
The paintings must be activated in the correct order.
If entered correctly, a hidden access point will open, leading down into the temple. If you make a mistake, traps will be triggered – but you can try again.
The Access to the Deeper Temple of Shar
In the temple of Shar, there is much to do. Not only can you meet Balthazar here, but you can also complete a mission for Raphael, acquire plenty of powerful scrolls and weapons, or uncover the mystery behind the many rats in the temple.
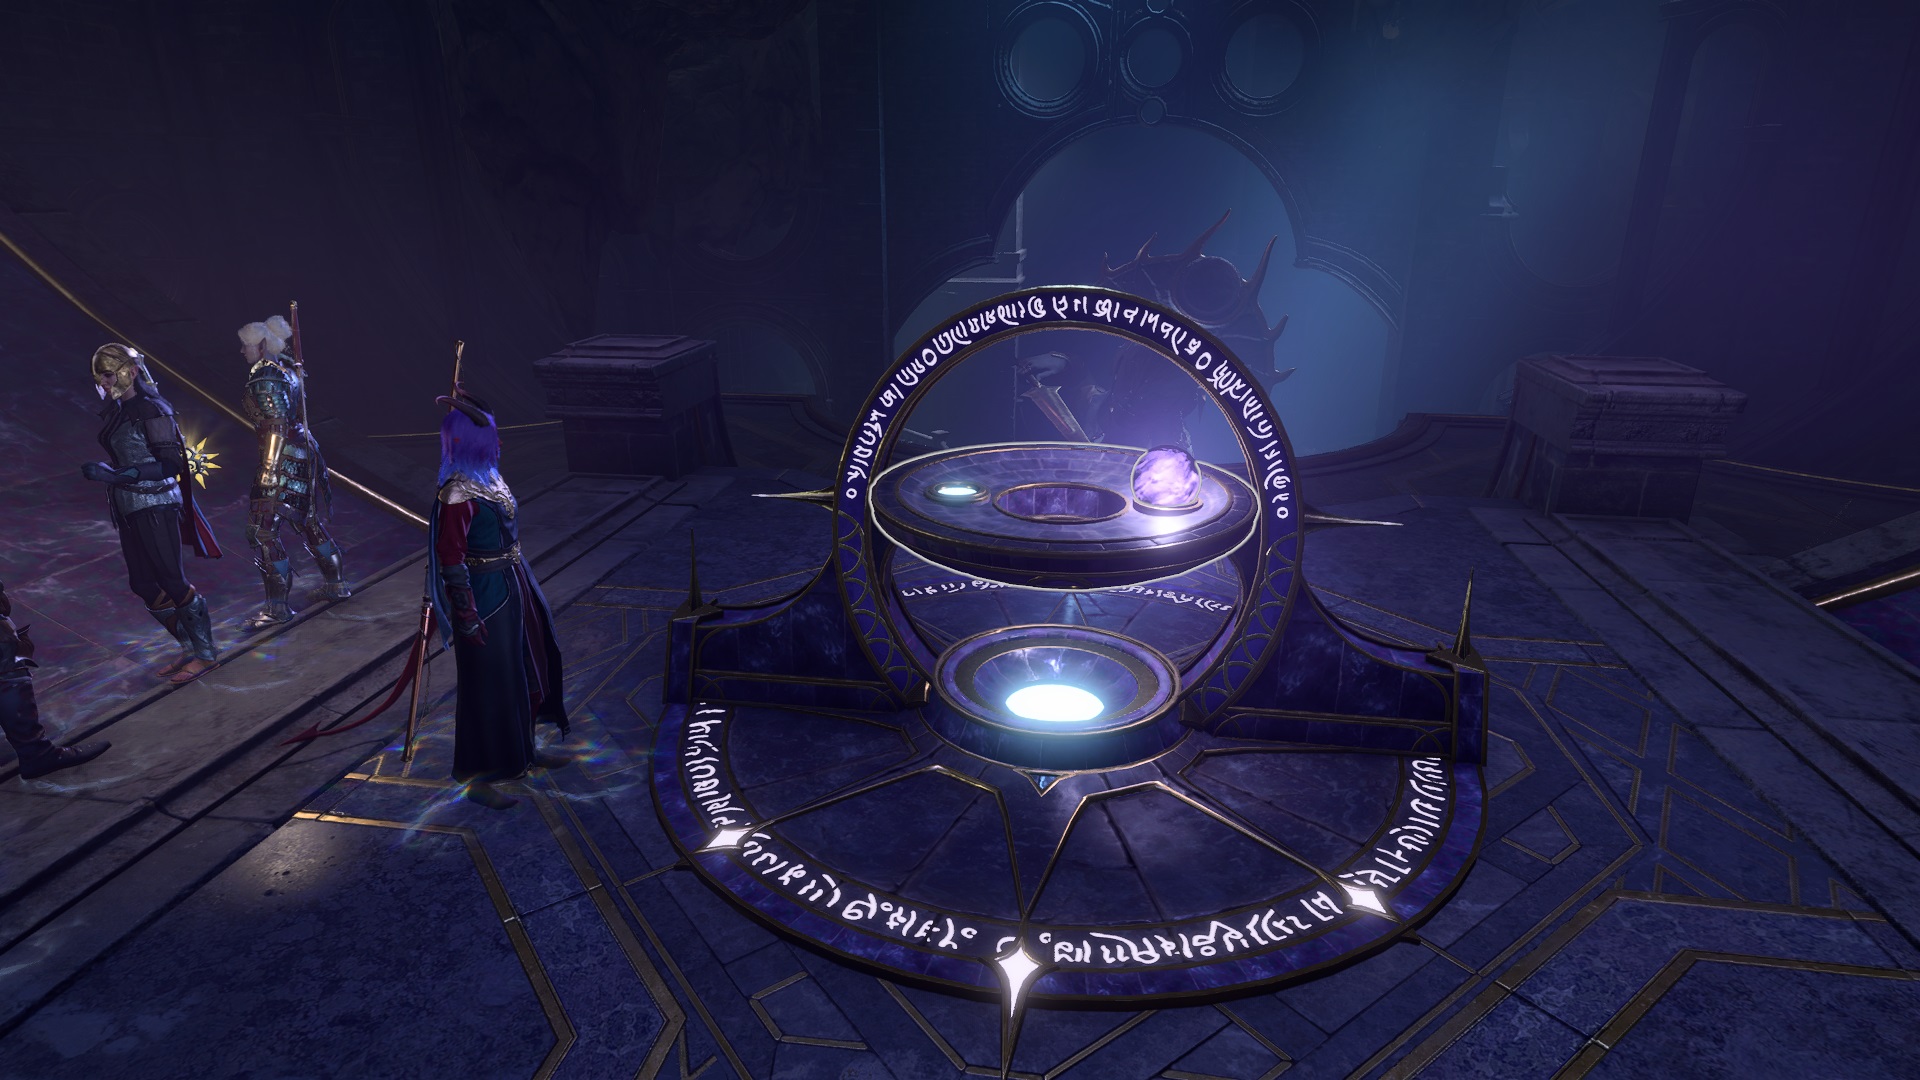
To access the deeper part of the temple, you need to solve a small puzzle at the beginning. In the side corridors, you will find different levers to raise and lower the lanterns and turn them off. Make sure the room is in complete darkness to reveal glowing runes on the floor, which are placed around the statue.
These runes are barriers that you cannot cross. However, each rune circle has a gap through which you can maneuver to reach the statue at the end. This will break the seal of the gate and allow access to the deeper levels of the temple.
The Path to the Sanctum
In the next hours, you will have to overcome the various trials of Shar to ultimately obtain four shadowy gemstones.
The individual trials consist of fights, logic puzzles, and a small stealth mission. You will receive the last gemstone from the demon Yurgir, who has also settled in the temple.
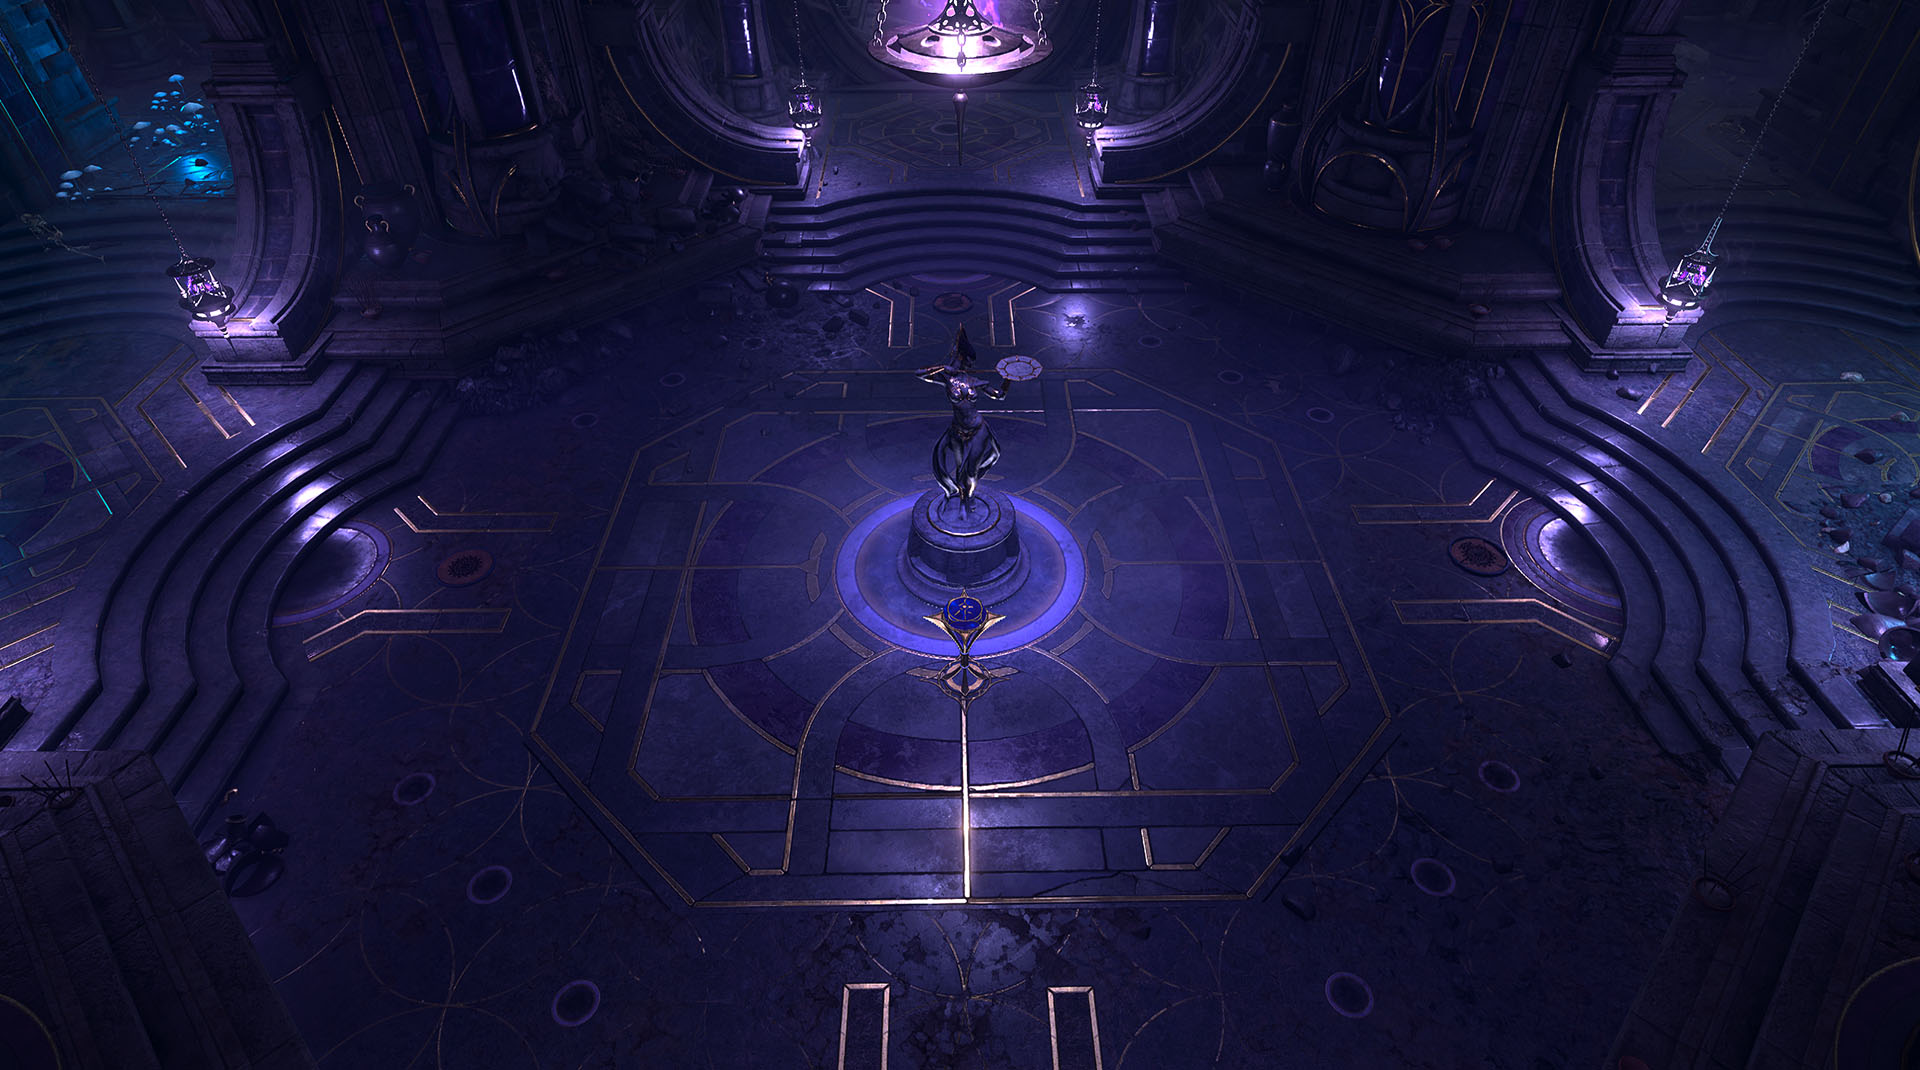
Once you have collected all the stones, you can activate the floating platform in the center of the temple and advance to the innermost sanctum. There, you can plunge into a water basin and enter the area “Shadowfell.” Make sure to save beforehand, as there is (for now) no return from there.
The Fate of the Nightsong – Make a Decision
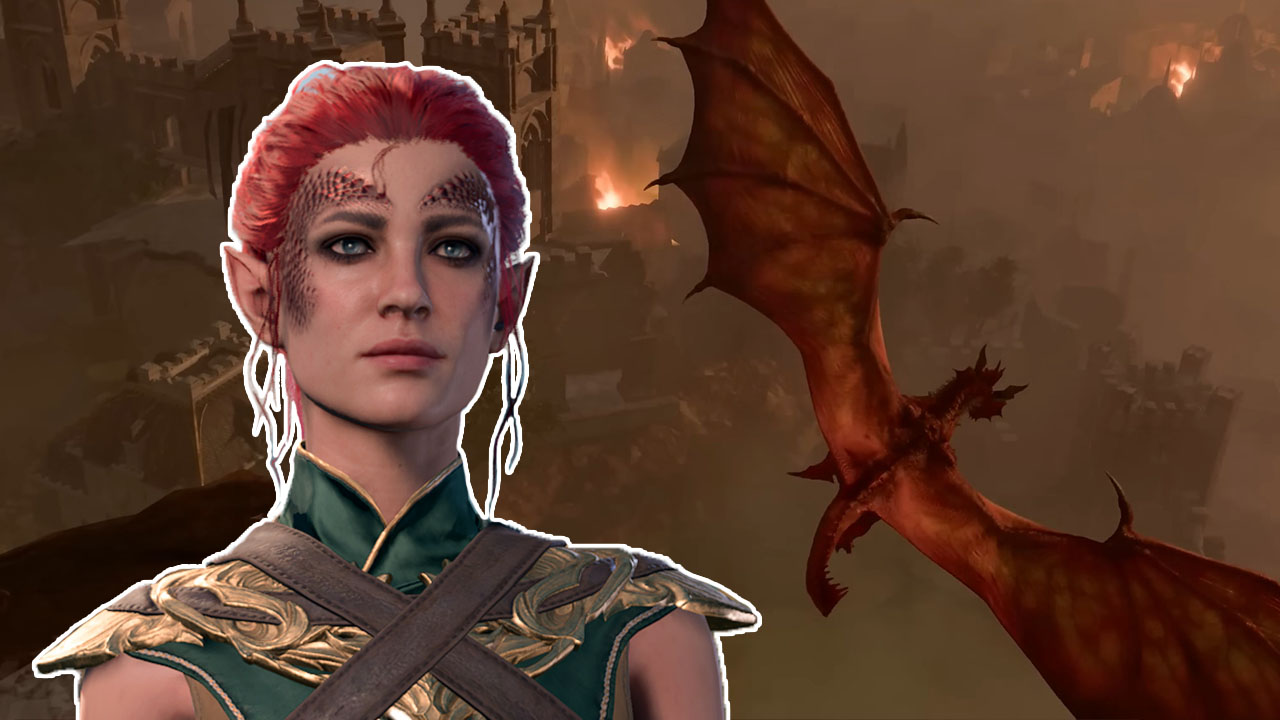
What happens in Shadowfell strongly depends on your previous decisions. By now, you have revealed that the Nightsong is not a weapon but a person. A demigod being that is repeatedly killed by followers of Shar – as a final trial for ascension to the Dark Justiciar.
Depending on your previous choices and the ones you now make, there are different options:
You can hand the Nightsong over to Balthazar. Nightsong will then be brought to General Thorm. You maintain your disguise as members of the Cult of Absolute and gain more trust with the cult. If you do not choose this option and Balthazar is still alive, you will have to fight against him.
You can persuade Shadowheart to kill the Nightsong. In that case, she fully commits to Lady Shar and becomes a Dark Justiciar with new powers and equipment.
You can dissuade Shadowheart from killing the Nightsong. In that case, you disappoint the goddess Shar, but the Nightsong is freed and helps you throughout the story, potentially even becoming a guest in your camp.
Which decision you make here should mainly depend on your story preference, as it will have significant consequences for Shadowheart.
If this scene ends with the death of the Nightsong, the quest will also be concluded here, as delivering her to the wizard is no longer possible.
Depending on the decisions you made earlier, the Nightsong and/or her partner is now one of your companions in the camp. If the Nightsong is present, in Act 3, you can decide how you want to proceed with her:
You can pledge your loyalty to the Nightsong and fight against the wizard who wanted to possess her.
You can betray the Nightsong and deliver her to the wizard.
You can meet the wizard Lorroakan in Baldur’s Gate. His wizard’s tower is above the large magic shop “Sorcerous Sundries.” You can enter the tower from the shop or the library.
No matter what you decide here, the questline about the Nightsong will inevitably come to an end. You can also determine your decision based on your preferred story outcome. Even if you deliver the Nightsong, you can still raid the wizard afterward and take his possessions if you wish. How did you handle the Nightsong in Baldur’s Gate 3? Tell us in the comments. And all other guides and tips for Baldur’s Gate 3 can be found here.
This is an AI-powered translation. Some inaccuracies might exist.
If you want to progress from Act 2 to Act 3 in Baldur’s Gate 3, you first need to successfully navigate through the Shadowlands. An essential part that is not optional are the Trials of Shar. We have the answers to all your questions about the Shar trials.
Attention, Spoiler: We go into detail here on how to face the Trials of Shar and what they are. So there are plenty of spoilers for Acts 1 and 2 of Baldur’s Gate 3.
The Trials of Shar are one of the most important things you complete in Act 2. They are not optional and an important part of the personal quest of Shadowheart. Additionally, you need to pass them to find the Night Song and progress to the finale of Act 2.
You will find them in a hidden temple of Shar, which also turns out to be a real labyrinth. To avoid wandering aimlessly through the world and potentially getting lost, we have gathered everything you need here: namely where to find the trials, how to reach them, and how to master them.
Depending on which step you need support with, you can jump to it using the table of contents.
Update, April 7, 2025: We have adjusted the structure of the article and updated information.
[toc]
Start video
Baldur’s Gate 3 is coming to PS5 – Trailer prepares for console release
Trials of Shar – how to find the temple
How to reach the Trials of Shar in the Overworld
You can find the Trials of Shar north of Reithwin in Act 2. The entrance is located in the mausoleum of the Thorm family. If the devil Raphael has gotten in your way, you know it is nearby. Depending on the run, you might also meet the young Tiefling Arabella on your way there.
The easiest way for you is to go over the bridge to Reithwin and then head north. Leave the mausoleum on your right and continue north on its left until you reach the entrance of the mausoleum.
How to unlock the entrance to the Shar temple
In the mausoleum itself, you will face a few challenges. Once all opponents and traps are cleared, make your way to the northernmost chamber. Don’t forget to loot everything you can – you’ll find a lot of background story about Baldur’s Gate 3 and the Shadow Curse specifically. Not to mention the actual loot.
In the northernmost room, you will find a picture puzzle: Three large pictures hang on the walls. Each depicts a moment in the life of Ketheric Thorm. Below each picture is a button. You need to activate them in chronological order. To determine the correct order, you can read several books, notes, and stone tablets in the main chamber.
This is the correct order:
The painting Towers of the Moonrise
The painting of Grief
The painting of the General
Two pictures are next to the entrance to the northernmost chamber.The third picture can be found on the wall opposite the entrance.
Once you solve the picture puzzle, the northern wall will open. You can now enter the temple of Shar.
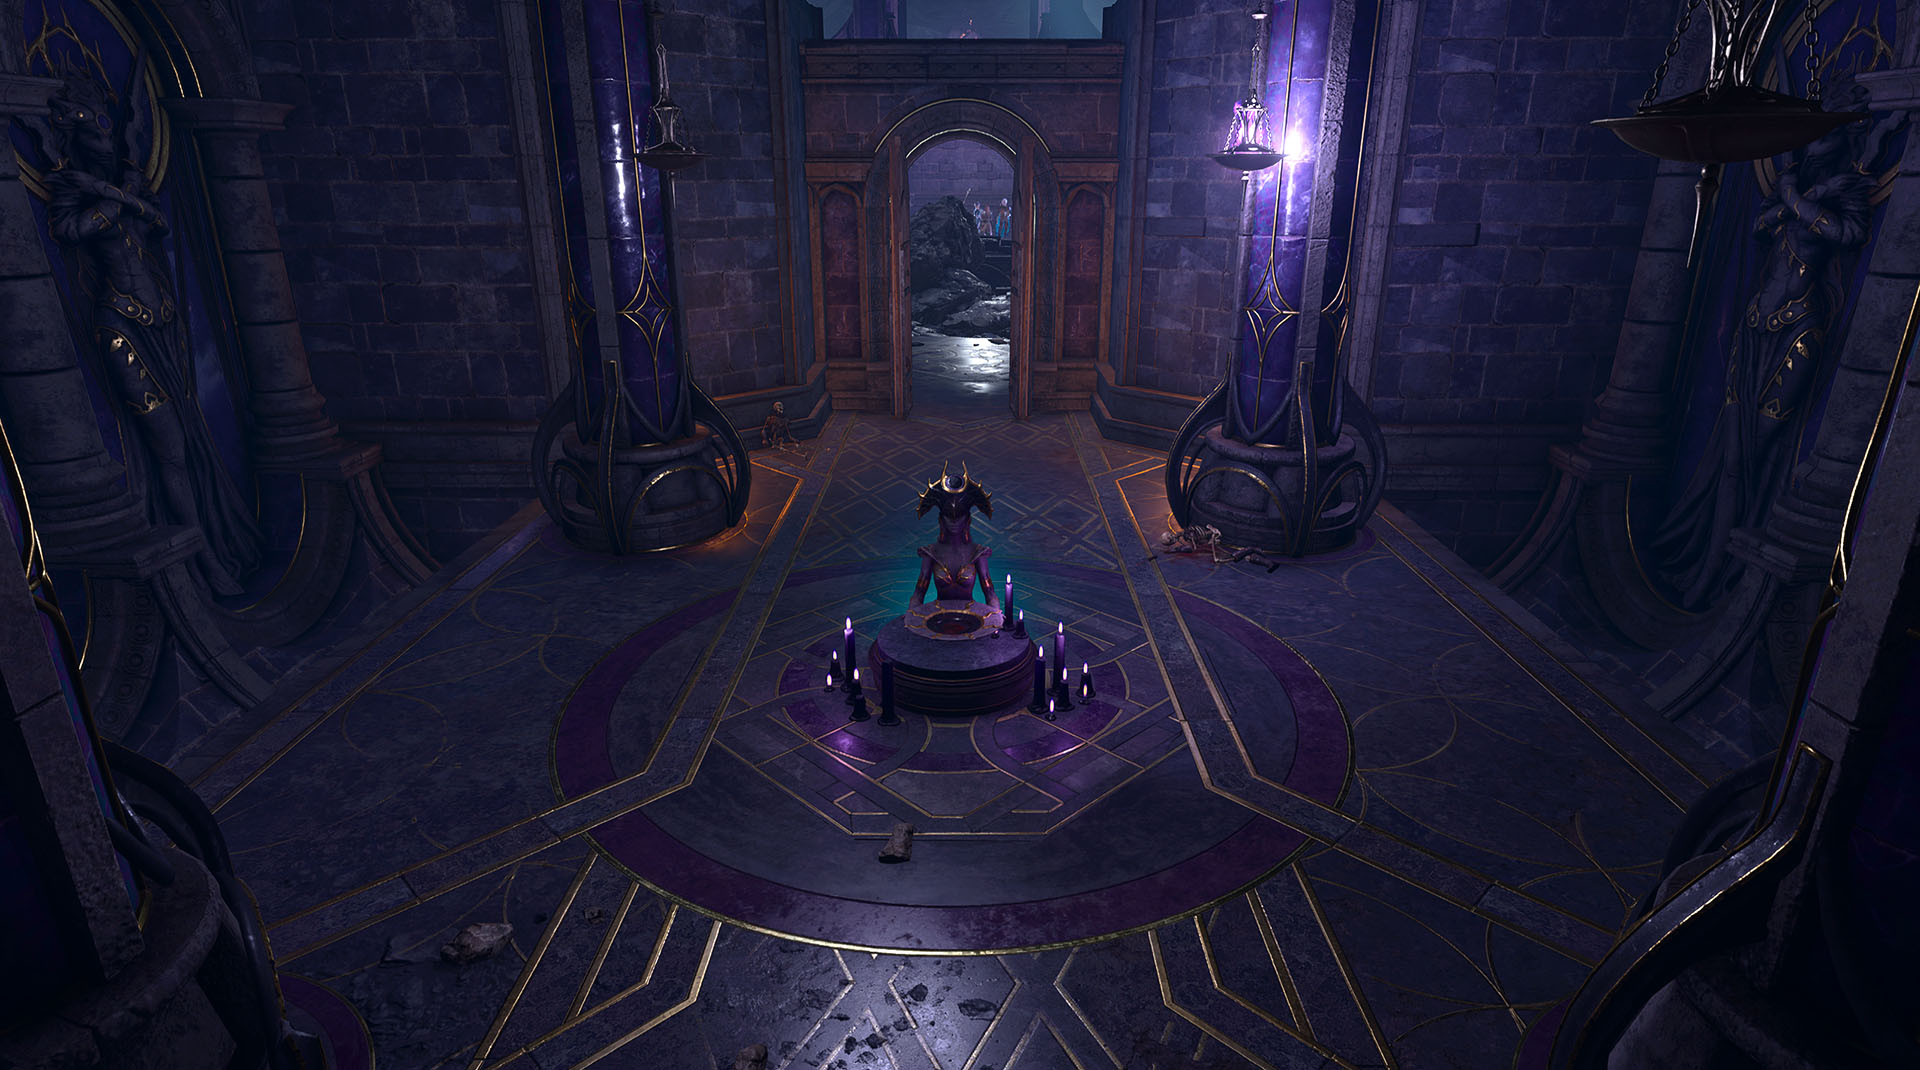
Entering the Temple of Shar and unlocking the main part
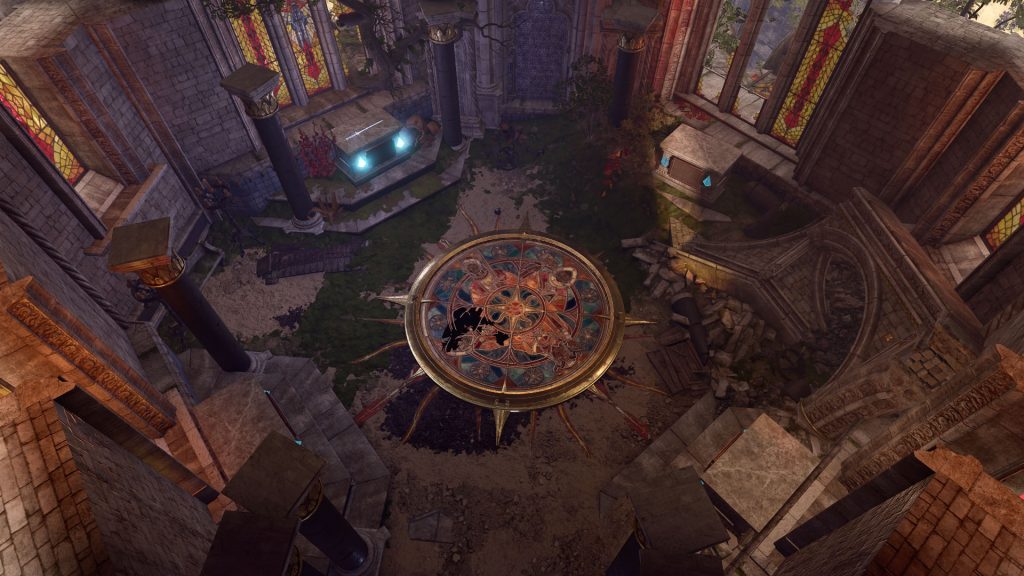
Before you can delve deeper into the sanctuary, you need to solve another puzzle. If you go straight from your spawn point, you will reach a chamber with a statue.
To fully open the temple, you need to get to the statue. Unfortunately, you cannot do this as your characters keep getting thrown back. To circumvent this barrier, you need to lower the lamps from the ceiling and extinguish all lights – you must also not carry any light source with you.
You can lower the lamps with levers. These can be found on the sides of the corridors leading directly from the main chamber. Disarm the preceding traps and activate the levers. Each lever lowers a lantern to the ground, whose light you can then extinguish.
When it’s dark and you’ve done everything correctly, you should see a circle of runes around the statue. You cannot walk over the runes themselves. However, they have holes through which you can reach the statue like through a mini-labyrinth.
Once you reach the statue, interact with it and the gate to the temple should open.
This is what the room should look like when you have solved the puzzle.
Mastering the Trials of Shar – here’s how
The temple of Shar and the trials are on multiple levels. Navigation is therefore not particularly easy. Here we describe the path through the temple as suggested by the layout of the sanctuary.
Important: You do not have to complete the trials with Shadowheart or any other single character. You can have your whole party help, which at least makes the Gentle Step and Same trials easier.
We have walked through the temple for you to show you exactly where to find what:
Start video
Baldur’s Gate 3 Temple of Shar Runthrough
Trials of Shar: Find all Shadow Gems
To complete the temple, you must collect a Shadow Gem at the end of each trial. These spheres open the way to the final room and towards the Night Song.
The first three spheres can be found at the end of the trials described here. The fourth sphere, on the other hand, is hoarded by the Orthon Yurgir. If the devil Raphael encountered you at the beginning, the name might ring a bell. The encounter with the Orthon can happen in various ways. In the end, just make sure to search his belongings after the last Shadow Gem.
The first trial takes place down the western stairs. Activate the waypoint and go down further stairs to the right from there. The door to the Gentle Step Trial is labeled Your Most Desired Treasure.
Once you go through the door, you are in the trial area. However, before you can start, you must make a blood sacrifice. This starts the challenge.
Trials of Shar: The entrance to the first trial.
How do you solve the trial? The fundamental goal for you is to obtain a crystal sphere at the other end of a labyrinth. The path through the labyrinth is not straightforward: with levers and buttons, you can adjust and change the layout. Watch out for traps and enemy shadows.
There are several ways to solve it. The easiest is to send a party member through the labyrinth and to the other end before you start the trial. This way, you can take your time to explore everything and find a safe path before the enemies spawn and make it harder for you.
If you don’t want to cheat, grab your character with the highest stealth score. Here is your route:
Start the trial.
Have the selected character use the Hide action.
Send this character through the gate to the left of the Shar statue where you started the trial.
Take the first left turn. Continue west until you reach the slimy ground.
Use the jump action to jump through the window.
Then continue west until the end of the trial.
Here are some additional tips:
Try to disarm the traps while passing through.
The skeleton to the left of the entrance to the trial has an invisibility potion that makes the trial much easier.
Don’t forget to collect the Shadow Gem at the end.
Trials of Shar 2: Same Trial – find & solve
The so-called Same Trial can be reached if you turn left after the Gentle Step Trial. It is the next door on the same wall as the first trial. Also start this trial by making a blood sacrifice at the statue of Shar.
Trials of Shar: The entrance to the second trial.
How do you solve the trial? This trial is relatively simple: Once you have started the trial and entered the area, doppelgangers of your current party will appear. They attack you, and what follows is a normal fight – only this time against yourselves.
The twist: Your evil selves can become invisible and distribute the debuff Cheater’s Folly. Cheater’s Folly, translated as Betrayer’s Folly, lowers an attribute by 1. The debuff is triggered when your character attacks a doppelganger that is not their own. The effect can be applied up to four times – so you can temporarily lose up to 4 attribute points.
To avoid the debuff, let your characters always fight their own doppelgänger first. Once a doppelgänger is defeated, its original can attack whoever they want.
Here are some tips to make it easier for you:
Once the trial has started, sneak into the battle area and overwhelm your opponents from the shadows.
Make sure to have Shadowheart with magic/weapons/attacks that deal radiant damage. This makes the invisible enemies visible. Just make sure they defeat their own doppelgänger first so the debuff is not transferred.
Also, don’t forget to take the Shadow Gem with you.
Trials of Shar 3: Trust Leap – find & solve
The third and final trial can be found one floor down. To do this, exit the second trial and go left down the stairs. There are a few more steps down on your right – that’s where you’ll find the trial.
Trials of Shar: The entrance to the second trial.
How do you solve the trial? Before you now stands a statue and behind it a deep abyss. The object of your desire, another Shadow Gem, is placed on a platform above the void. So now it’s about overcoming the abyss in order to collect the sphere.
So how to overcome the abyss?
On the floor in front of the statue where you start the trial, you will see a floor plate with weird patterns. They show you where there are invisible but walkable paths above the abyss. You can also make these paths visible with a lever next to the entrance door.
Alternatively, you can fly over the abyss. Or jump with a character who has a long jump distance from visible platform to visible platform.
However, if your character falls into the abyss, they are immediately dead. The corpse will reappear at the starting point and can be resurrected with the spell Revive or a scroll.
Once you have collected the gem, the Trials of Shar are finished. You can now return towards the entrance and continue the quest towards the Night Song. But if you want, you can also go one room further into the Silent Library – where you can obtain the Night Spear, among other things.
Already in Act 1 of Baldur’s Gate 3 there is a really powerful weapon. Where to find it and how to obtain the mace Blood of Lathander, you can read here.
Warning, Spoilers: The following article contains spoilers for Act 1 of Baldur’s Gate 3.
Update from 07.04.2025: We have restructured the article and adjusted the designation of some items.
[toc]
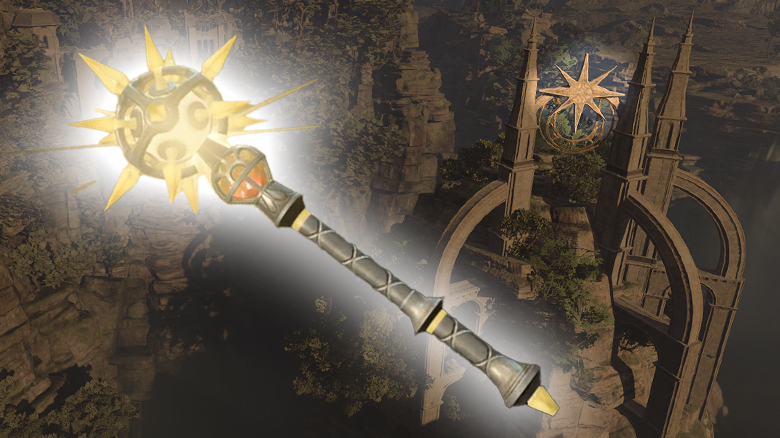
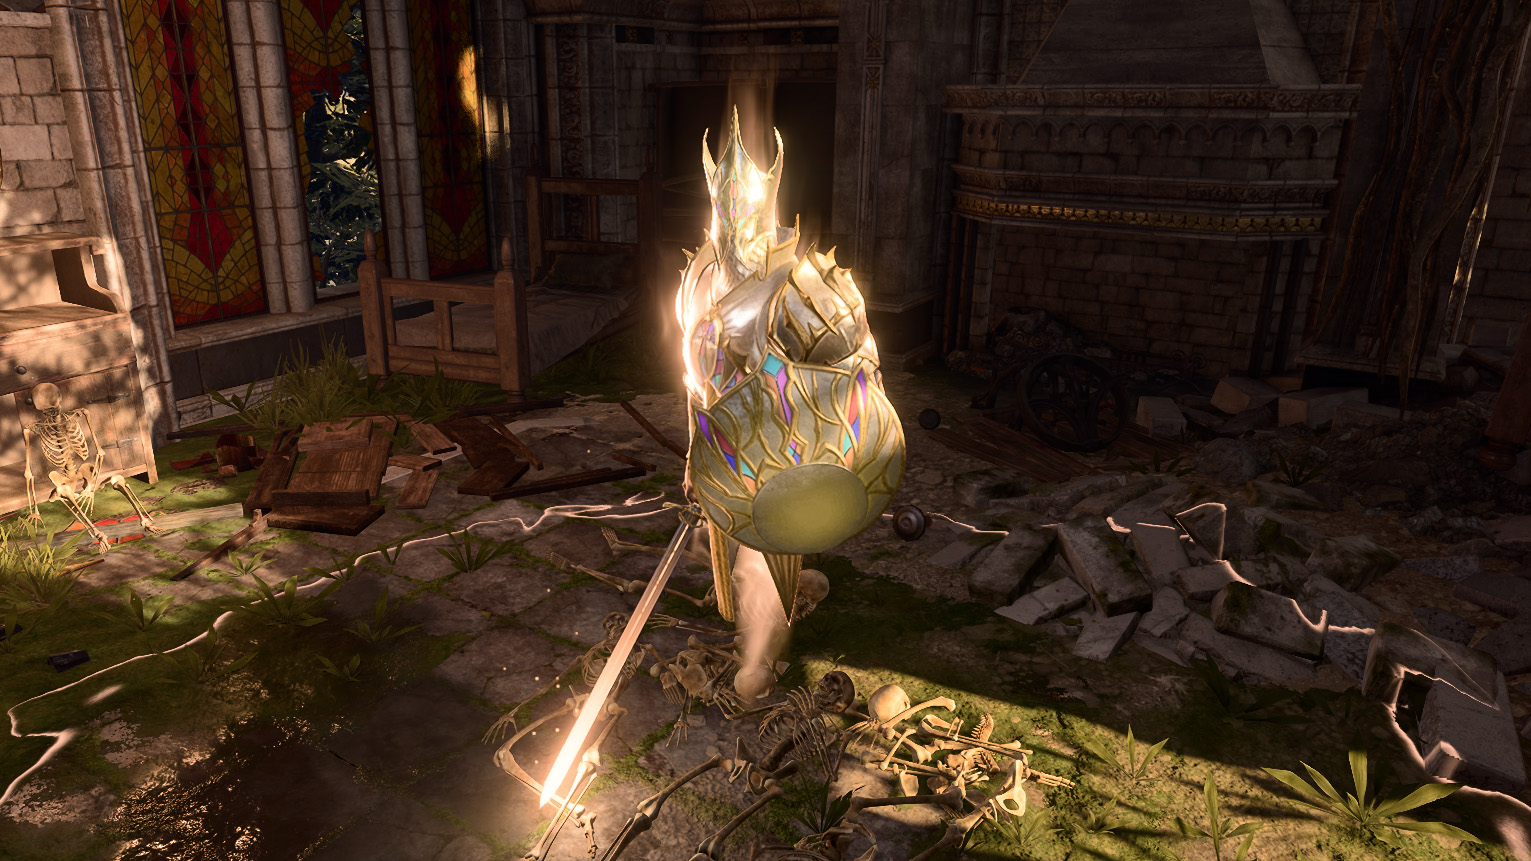
When exploring the mountain pass in Act 1, it’s best to visit the Monastery of Rosenmorg. There you will find the Githyanki crib and can, among other things, obtain Blood of Lathander. The weapon has been blessed by Lathander, the god of the monastery.
It deals 8-13 damage per hit. With the ability Blessing of Lathander you can, once per long rest, resurrect: If the wielder’s hit points drop to 0, they and all allies within a radius of nine meters regain 2-12 and 2-6 hit points, respectively. Additionally, you can cast Sunbeam with the weapon and blind fiends and undead.
To secure the Blood of Lathander, you need the three ceremonial weapons:
The ceremonial axe,
The ceremonial hammer
And the ceremonial mace
You can collect the ceremonial mace shortly after entering the monastery: When you stand in front of the entrance, you can climb through a shattered stained glass window. One of the goblins drinking there carries it with him.
If you continue climbing, you will find a magically sealed door. However, with a bit of dexterity, you can simply open it. Unfortunately, a ghostly guardian still blocks your way. He must be defeated to obtain the ceremonial axe .
The ghostly guardian is tough, but defeatable.
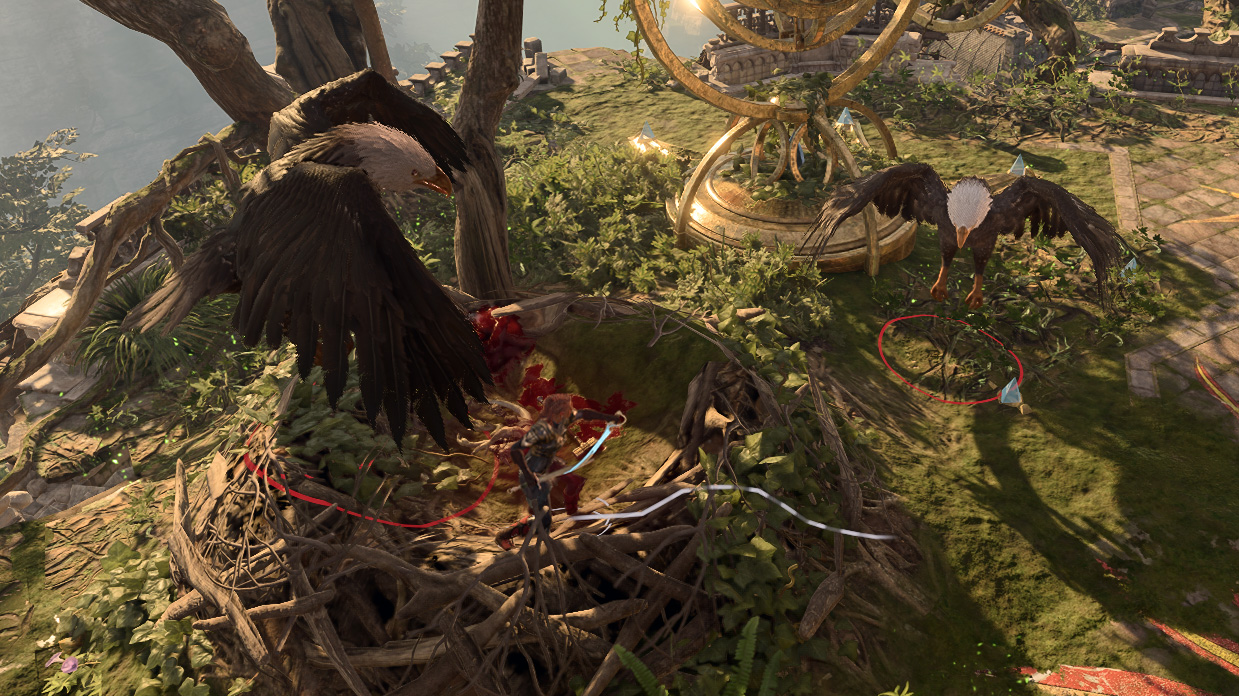
On the roof of the monastery, you will eventually find two eagles. They have the ceremonial mace with them. The two are part of another quest that you can receive from a small bird.
If you touch the nest, the eagles will immediately attack you.
If you address that or even touch the nest, you will have to fight. Alternatively, you can also sneak invisibly to the nest and snatch the weapon.
Step 2: Use ceremonial weapons and unlock the crest
In the monastery, you will find a room with several altars and a stained glass window in the floor. Now you must place your spoils on the respective altars. Read the tablets: The hammer belongs to the Seed Altar, the axe to Vaseid, and the mace to Stockhalt.
The ceremonial room gives you more information about the original purpose of the monastery.
Theoretically, you could also take weapons of the required type that are not the specific ceremonial weapons. However, if you have already collected them, you can use them immediately and then take them back with you.
If you did everything correctly, a secret door will open. Take the crest hidden behind it.
Step 3: Enter the secret cellar
The next step takes you to the Githyanki crib in the cellar of the monastery. Make your way to the northernmost room. There on the left side, you will find two statues that need to be turned.
Unfortunately, the mechanism has not been used for a long time. Use the spell “Grease” or one or two vials of oil. The lubricant will allow you to use the statues again.
Step through the now opened door and follow the path. Next, a magical door will block your way. You can disable it by destroying the blue crystal on the wall.
Step 4: Obtain Blood of Lathander without blowing up the monastery
If you continue down the path to the left, you need to eliminate a second such crystal. There are a few traps that you can skip or disarm. Finally, you need to destroy a third crystal.
Now you stand before the object of your desire: Blood of Lathander.
To prevent triggering the security mechanism when stealing the weapon, you must take the mace and place the previously collected seal on the pedestal.
Important: If you do not receive the seal, you can still retrieve the mace. However, the mechanism recognizes you with the seal as the so-called “Twilight Master” and cancels the self-destruction. If you don’t have it with you, you need to leave the monastery within four turns to avoid being blown up.
Alternatively, you can also try to shoot down the four energy cores in time. Where there is no energy, there is no explosion. Now you are in possession of the weapon. If you do not want to give it to your own character, it works particularly well in Shadowheart’s hands. How to skill the cleric best, you can read here: Baldur’s Gate 3: Best Shadowheart Build – How to play your cleric correctly
This is an AI-powered translation. Some inaccuracies might exist.
If you want to deal significant magic damage in Baldur’s Gate 3, the Wizard class is a great choice. But what is the best Wizard build? You will find out in this guide.
What can the Wizard do? The Wizard is one of the few classes not represented by any of the potential companions in Baldur’s Gate 3 by default. Nevertheless, it is very worthwhile to take a closer look at the class.
As a Wizard, you have the power to cast and even modify powerful spells. You prefer to stay in the back rows and deal a lot of damage from there.
Compared to their mage counterparts, Wizards cannot change their spells at will. Instead, they receive powerful bonuses that vary depending on the subclass, as well as the ability to make their spells even stronger through Metamagic.
This makes the Wizard one of the more complex classes in Baldur’s Gate 3. In contrast, you can find out here which class is particularly beginner-friendly.
Update on April 7, 2025: We have adjusted the structure of the article and updated information.
Wizard Build – Best Subclass
Even at level 1, you need to choose one of three subclasses as a Wizard.
Wild Magic
Draconic Bloodline
Storm Sorcery
One of the most fun subclasses in the entire game is probably Wild Magic. Its unpredictability can lead to chaotic and hilariously funny situations.
However, if you want a truly reliable damage beast for your team, you should go for the Draconic Bloodline. This gives you the option to specialize in an element. Additionally, you will become significantly more resilient. In this guide, we will therefore delve further into this subclass.
Which element should I choose? As a member of the Draconic Bloodline, you can choose a Dragon Ancestor for your character. This determines which element you specialize in.
To create a powerful fire mage, we will choose Red (Fire) here. This gives you the strong spell Burning Hands right from the start. Starting at level 6, not only will fire damage increase, but your character can also become immune to fire damage. Since this type of damage occurs quite frequently in Baldur’s Gate 3, that’s pretty handy.
Character Creation in the Wizard Build: Which Race?
Just through the initial character creation, you can receive some bonuses that make life as a Wizard easier and should not be underestimated.
The following options are recommended when choosing your race:
Half-elf
Darkvision: Helps you stay at a distance even in darkness.
Fey Ancestry: You have an advantage on saving throws against being charmed and cannot be magically put to sleep.
Human Militia: You gain proficiency with some weapons, light armor, and shields, making you somewhat more resilient.
Subrace: Here, either the Half-Orc for the additional cantrip, or the Half-Wood Elf for the increased movement speed is advisable.
Drow
Superior Darkvision: Even better darkvision than the Half-Elf.
Fey Ancestry
Cantrips: Additional spells that can be helpful in certain situations.
A background that suits your character particularly well:
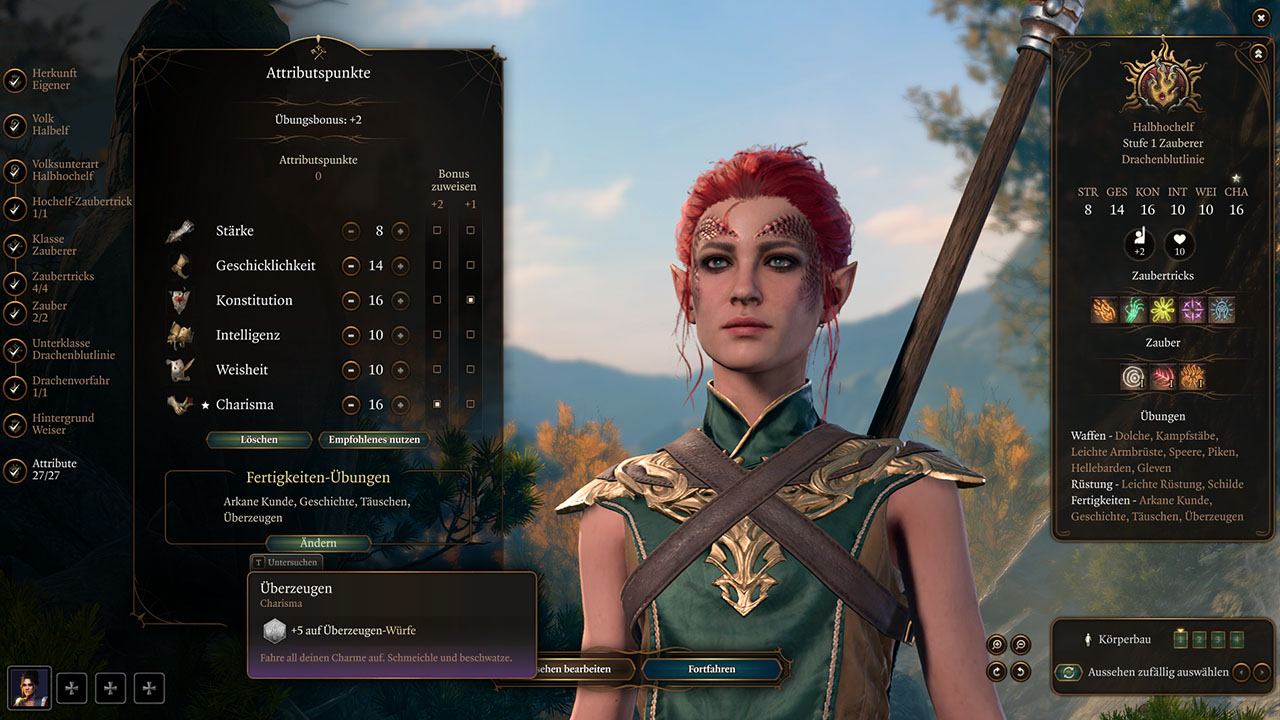
Attributes in the Wizard Build: Focus on Charisma and Constitution
The most important attribute for any Wizard is Charisma. You should definitely invest the most points here. A high Constitution score also helps you strengthen your defenses. A good distribution for the start is:
Strength: 8
Dexterity: 14
Constitution: 16
Intelligence: 10
Wisdom: 10
Charisma: 16
For optimal selection, you should generally choose even numbers for point distribution. This is because the respective bonuses are only actually increased every two levels.
The high Charisma score helps us both in combat and outside of it.
Which skills should I choose? In addition to the attribute points, you can choose two skills for your character. You will receive two additional skills based on the background you’ve chosen.
Make sure to possess the skill Persuasion, as it can be particularly useful in many situations.
Additionally, Deception and Intimidation are also good choices, as they are based on your (high) Charisma score.
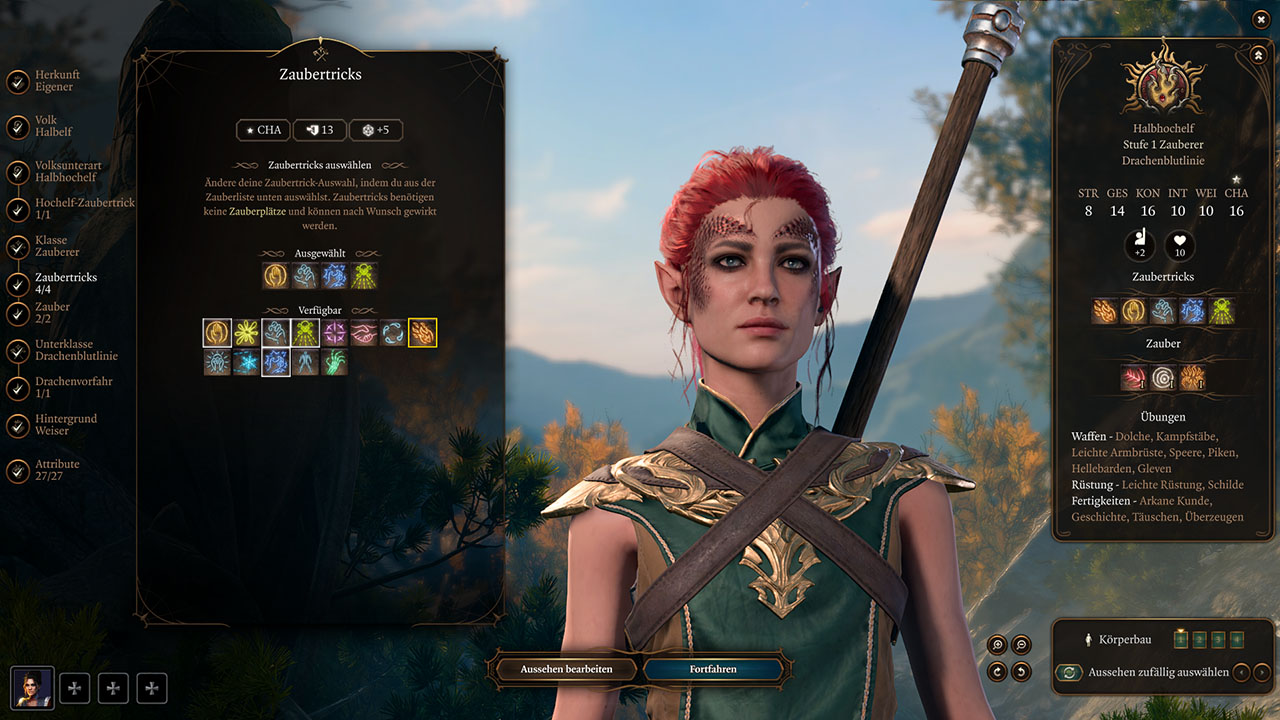
Wizard Build – The Best Spells at Every Level
In Baldur’s Gate 3, you have a wide array of spells and cantrips available. Which ones you should choose depends on many factors, especially your team composition and personal play style.
Which spells are generally strong in the game can be found here:
As an Elemental Spellcaster, you should certainly place special emphasis on all spells of your chosen element, which in this case is fire. The spell selection across all levels and the choice of Metamagic could look like this:
1. Cantrips
Level 1: Fire Bolt; Blade Ward; Shocking Grasp; Mage Hand
If you have already chosen one of these cantrips through the subrace Half-Orc, choose another option like Poison Spray instead.
Level 4: Minor Illusion
2. Spells
Level 1: Magic Missile; Chromatic Orb
Level 2: Thunderwave
Level 3: Misty Step
Level 4: Cloud of Daggers
Level 5: Fireball
Level 6: Dispel Magic
Level 7: Wall of Fire
Level 8: Polymorph
Level 9: Telekinesis
Level 10: Cloudkill
Level 11: Disintegration
Level 12: Globe of Invulnerability
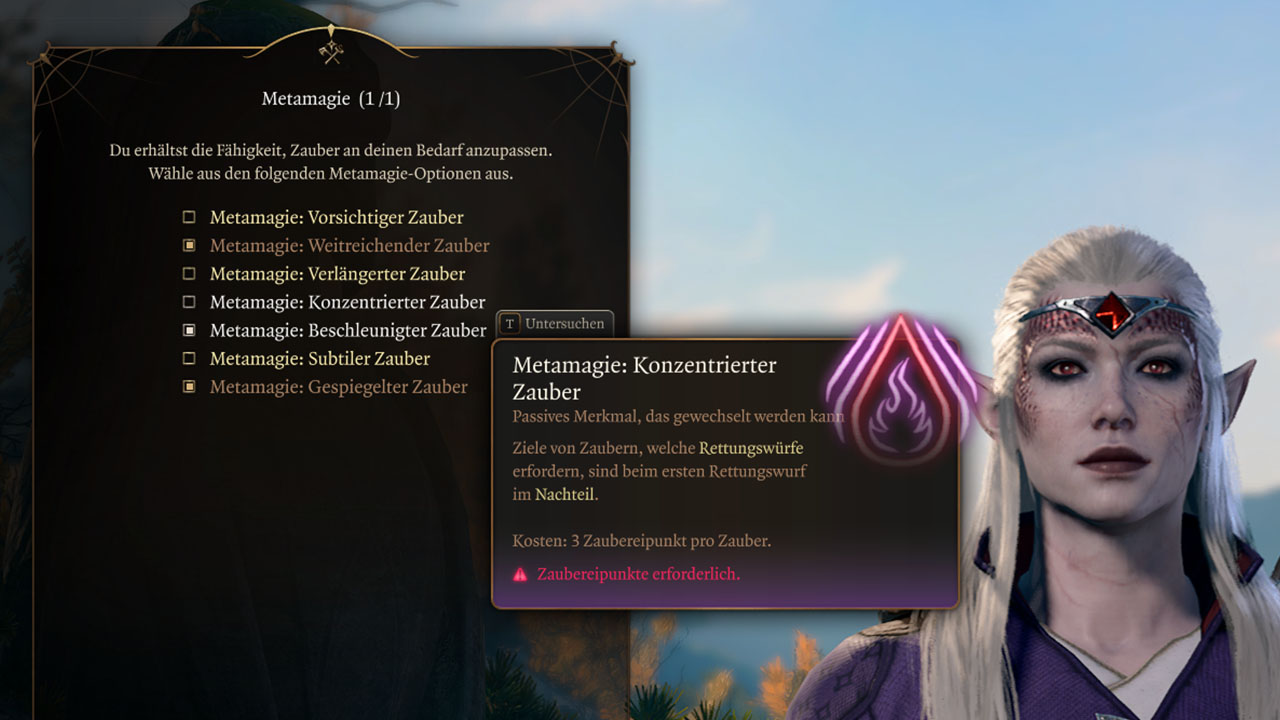
3. Metamagic
Level 2: Extended Spell; Twinned Spell
Level 3: Quickened Spell
Level 10: Focused Spell
Since I already have the cantrip Fire Bolt, I will choose Poison Spray instead.With Metamagic, you can influence your spells.
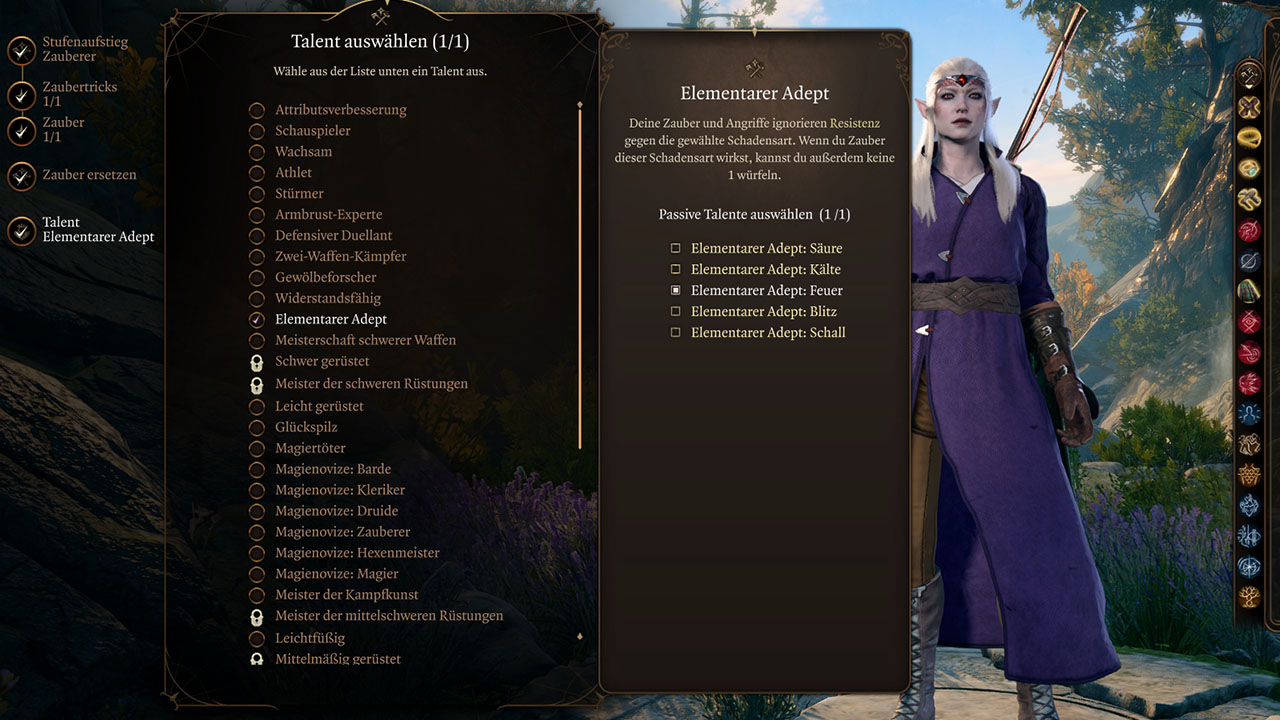
Wizard Build – Talents at Every Level
At levels 4, 8, and 12, you have the opportunity to choose a talent. The following are recommended:
So by level 12, you should have brought your Charisma score to the maximum of 20.
As Elemental Adept, you ignore opposing resistances to your element.
We hope we could help you with this guide. Have you ever tried the Wizard class? And if so, what were your experiences? Feel free to let us know in the comments.
In this guide, we focused on a pure Wizard build. However, in Baldur’s Gate 3, you also have the option of multiclassing. This allows you to mix multiple classes. For example, if you want to give your Wizard more supportive abilities, you could invest a few levels in Cleric. You can find all the important basics about multiclassing here: Why beginners should refrain from multiclassing in Baldur’s Gate 3 and when it makes sense
This is an AI-powered translation. Some inaccuracies might exist.
In Baldur’s Gate 3 has a ton of weapons. Since we want to make your choice easier, we will show you the best weapons for beginners that you can get early in Act 1.
With this guide, we aim to ease your introduction to the epic adventure of Baldur’s Gate 3 by presenting the best weapons for newcomers that you can obtain early in the first act of the game.
These weapons will provide you with a crucial advantage and are therefore a smart choice for the start of your journey. The weapons in this game feature a diverse range of properties, bonuses, and types of damage. Some of them even allow you to use useful spells and tricks that can expand your tactical options in combat.
[toc]
Best Melee Weapons in the Early Game
Below we present the best melee weapons that you can obtain early in the first act of Baldur’s Gate 3.
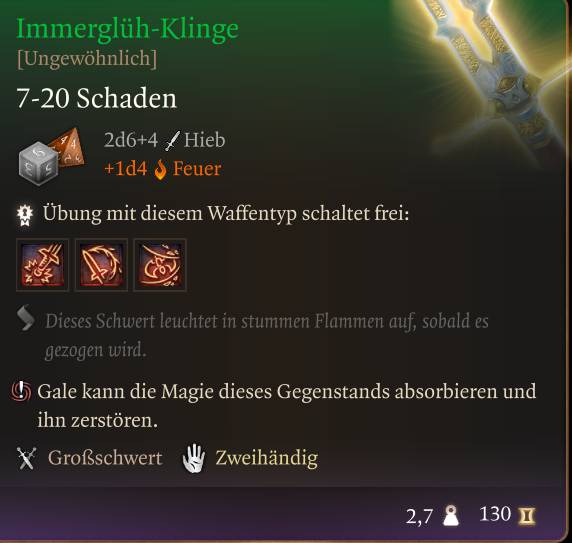
Everglow Blade
What can the weapon do? The Everglow Blade is an ideal weapon for Paladins, Barbarians, and Fighters. Its fire damage represents an impressive bonus and makes it an excellent choice.
Especially against enemies like Treants, who are resistant to slashing damage but vulnerable to fire damage, the blade shows its strength. Additionally, it looks damn cool.
Particularly suitable for the companion Lae’zel, the Everglow Blade is perfect. As a Githyanki warrior, she masters the use of greatswords.
Where can I find the Everglow Blade? You receive the Everglow Blade at the start of the game from Commander Zhalk on the Nautiloid. In a duel against a Mind Flayer, he commands you to flee.
To obtain the blade more easily without defeating the enemies, you can use a clever strategy:
Use the spell “Command” to command the commander to drop the weapon. Tip: Save beforehand as it doesn’t always work the first time – the chance is 65%.
You can prepare this spell yourself if you play as a Wizard or Cleric. Alternatively, you can free her Shadowheart, who is located in a previous room.
Once you’ve done this, you can simply pick up the Everglow Blade and make your escape.
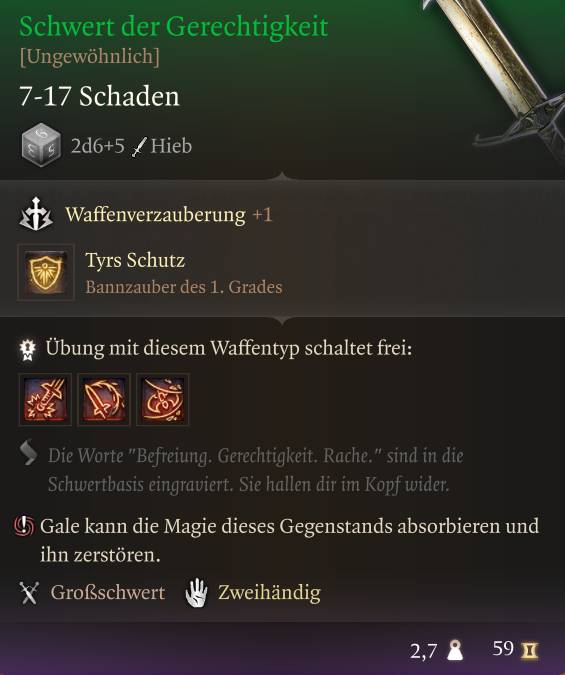
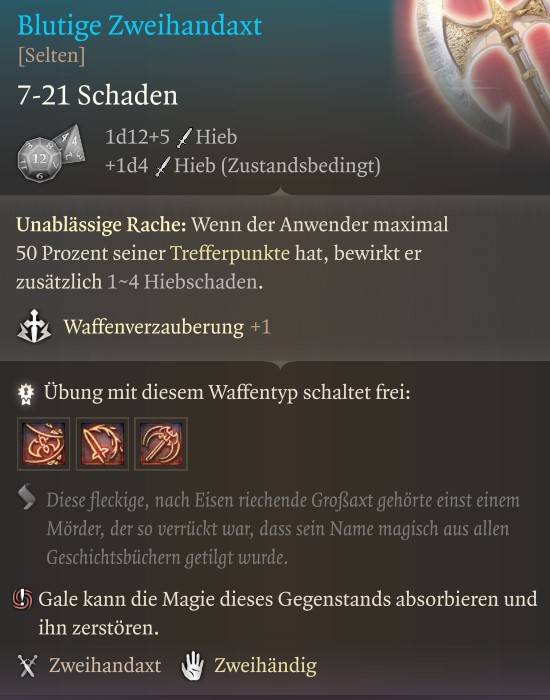
What can the weapon do? The Sword of Justice is a good alternative to the Everglow Blade if you want to equip two melee fighters. You get a spell called Tyr’s Protection, which gives you +2 to armor as long as you concentrate on it and wield the weapon.
Sword of Justice – Stats Overview:
Two-handed great sword
2d6 slashing damage
+1 weapon enchantment
Spell “Tyr’s Protection”
Where can I find the Sword of Justice? Early in Act 1, you can recruit Karlach into your party and complete her quest “Hunt the Deviless.” You can find the Tiefling Barbarian hidden south of the Stiegstraße in Act 1.
For the quest, you need to go to a house that is nearby, where you found Karlach. There, you need to speak to Anders. Defeat Anders and you will receive the great sword.
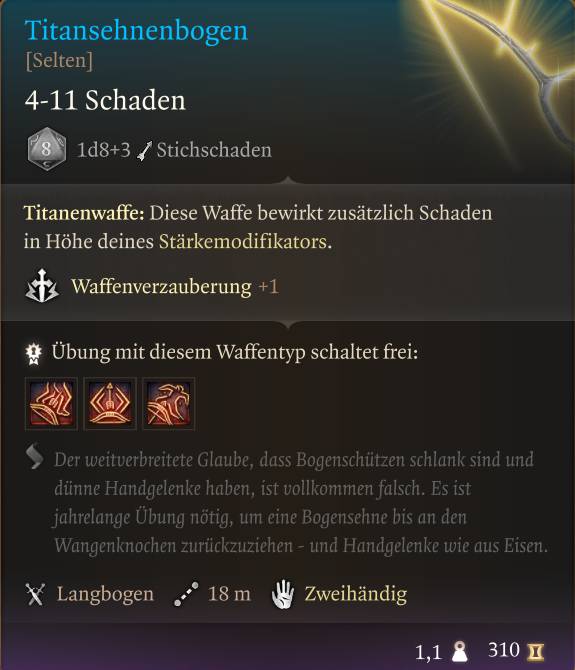
Lightning Spear
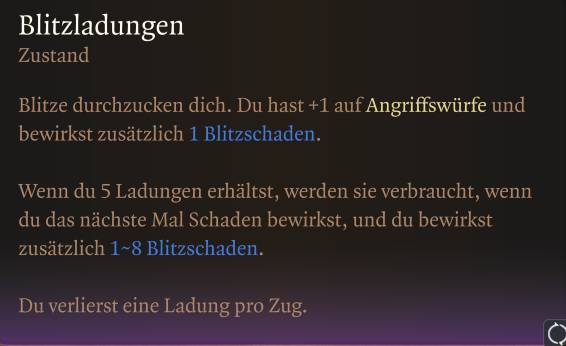
What can the weapon do? When you deal damage with this weapon, the wielder gains two lightning charges. This is a buff that provides you with an additional +1 on attack rolls, and you deal an additional 1 lightning damage.
If you receive 5 charges, they are consumed, and on the next attack, you deal an additional 1-8 lightning damage. You lose one charge per turn.
Lightning Spear – Stats Overview:
Trident, one-handed or two-handed
1d8 piercing damage
Where can I find the weapon? North of the waypoint “Waukeen’s Rest,” you will encounter a burning house. Yeva urgently needs your help to rescue the people, including Advisor Florrick, from the burning house.
If you succeed in the task, you can then choose one of the three weapons as a reward. Further down in this guide, we will address the other two weapons that are suitable for ranged fighters.
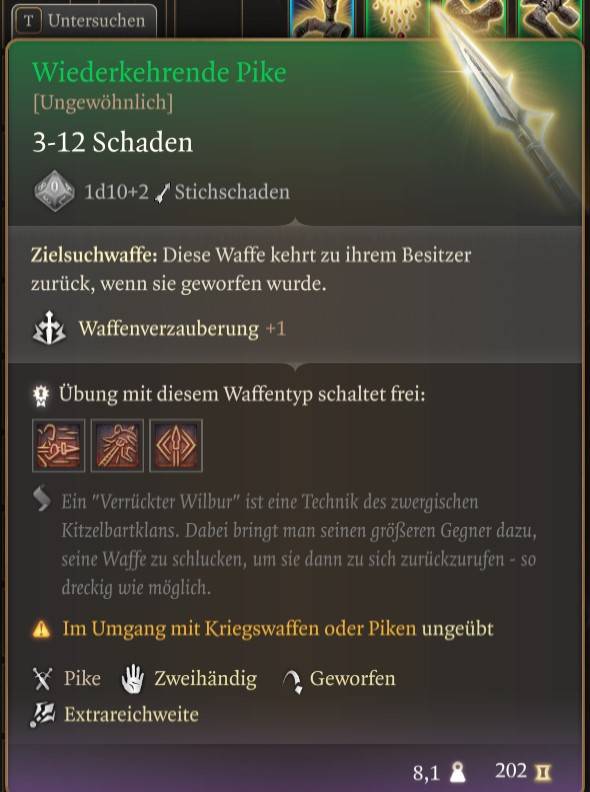
Returning Pike
What can the weapon do? As the name suggests, this pike always returns to you when thrown. For starters, the weapon is strong because it automatically returns. If you enjoy throwing weapons, this pike is a good choice for beginners.
However, be aware that the pike is quite heavy, and its wielder should not be overloaded.
Returning Pike – Stats Overview:
Two-handed pike
+1 weapon enchantment
1d10 piercing damage
Best suited for strength-based characters like Barbarian, Paladin, and Fighter.
Where can I find the Returning Pike? During Act 1, you will come across the Goblin Camp. There, you will find a merchant (right at the entrance) who sells the Returning Pike.
Sorrow
What can the weapon do? Sorrow is a two-handed glaive that grants you the cantrip “Painful Whip Stroke.” This weapon is particularly well-suited for strength-based characters like Paladins, Fighters, or Barbarians.
Sorrow – Stats Overview:
Two-handed glaive
+1 weapon enchantment
Cantrip: Painful Whip Stroke
+1d10+1 slashing damage
Where can I find the glaive Sorrow? To get the glaive, you need to rescue Halsin and return to the Emerald Grove and speak with the NPC Rath. After that, you will receive a “Rune of the Wolf.”
Alternatively, you can also steal the rune. This rune can then be used in the enclave library. Once you activate all four runes, you will find the weapon in the basement.
Bloody Two-Handed Axe
What can the weapon do? This two-handed axe is one of the best weapons for the beginning of the game. You can easily carry this weapon well into the second act of the game.
It inflicts slashing damage, and if someone who is proficient with two-handed axes wields it, the damage is increased. If your hit points drop to 50%, you inflict additional damage.
Bloody Two-Handed Axe – Stats Overview
Two-handed great axe
+1 weapon enchantment
1d12+5 slashing damage
At hit points at 50%: Additional 1-4 damage.
Where can I find the weapon? You can easily buy this weapon. Go to the merchant Roah Moonglow inside the Goblin Camp. Coordinates – X: 274, Y: -32.
Here you can find 5 helpful tips for Baldur’s Gate 3:
Start video
5 helpful tips for Baldur’s Gate 3
Best Ranged Weapons in the Early Game
Next, we present to you a selection of the best ranged weapons that you can obtain early in the first act of Baldur’s Gate 3.
What can the weapon do? Harold is a ranged weapon and is one of the best weapons that players can obtain early in the game. Every hit with Harold has a chance to curse enemies, reducing their effectiveness and making them more vulnerable to damage.
Harold – Stats Overview:
Heavy crossbow, two-handed
Range: 18 m
1d10 piercing damage
Weapon enchantment +1
Suitable for ranged characters like Rangers.
Where can I find the weapon? During the quest “Find the Missing Delivery,” the weapon is awarded by Zarys as a reward for recovering her lost delivery. Do not open the delivery, but bring it back unopened.
When you finally reach the Zhentarim hideout, there is a possibility to hand the delivery to Zarys. The hideout is located in the villa at the waypoint “Waukeen’s Rest.” This way, you receive gold and the rare crossbow called “Harold” as a reward for your integrity and commitment.
Titan String Bow
What can the weapon do? This longbow deals additional damage equal to your strength modifier, which can be quite powerful.
Titan String Bow – Stats Overview:
Two-handed longbow
+1 weapon enchantment
Effect Titan Weapon: Additional damage equal to the strength modifier.
1d8+3 piercing damage
Range: 18 m
Where can I find the weapon? You can purchase this bow from the merchant at the Zhentarim hideout, it couldn’t be easier. Coordinates for the hideout – -65, Y: 566.
Spell Sniper, Shock Shooter
What can the weapons do? When you deal damage with one of these weapons, the wielder gains two lightning charges. This is a buff that gives you an additional +1 on attack rolls, and you deal an additional 1 lightning damage.
If you receive 5 charges, they are consumed, and on the next attack, you deal an additional 1-8 lightning damage. You lose one charge per turn.
Spell Sniper – Stats Overview:
Combat staff, one-handed or two-handed
1d8 bludgeoning damage
Very suitable for wizards, sorcerers, and warlocks.
Shock Shooter – Stats Overview:
Two-handed longbow
1d8 piercing damage
Range: 18 m
Suitable for dexterity-based characters such as Rogues (Astarion) and Rangers.
Where can I find the weapons? North of the waypoint “Waukeen’s Rest,” you will encounter a burning house. Yeva urgently needs your support to rescue the people, including Advisor Florrick, from the burning house. If you successfully complete the task, you can then choose one of the three weapons as a reward.
Best Weapons for Beginners – Outlook: These weapons provide you with an excellent foundation to successfully start your adventure in Baldur’s Gate 3. The choice of the right weapon depends on your character and your preferred play style. Experiment with different weapons to find out which one suits your heroes best.
In the later part of Act 1, even stronger weapons await you. For now, these best weapons will help you along the way.
With the owlbear cub, Baldur’s Gate 3 offers you a heartwarming animal companion. MeinMMO reveals how to secure this companion.
Update from 07.04.2025: We have slightly revised the article.
Warning, Spoiler: The article contains light spoilers for Act 1 of Baldur’s Gate 3.
Where can you find the owlbear cub in Baldur’s Gate 3? You can win a cute owlbear cub as a friend. To do this, you must save it twice before it appears in your camp:
Owlbear Nest: X: 86, Y: 448
Goblin Camp: X: -112, Y: 430
Initially, you will find a helpful feature that makes life in Baldur’s Gate 3 easier:
Start video
A useful feature can make your life in Baldur’s Gate 3 much easier
Baldur’s Gate 3: Save the owlbear cub and find a friend for life
This is how you find the owlbear cub in the nest: The first time you encounter the owlbear cub in Baldur’s Gate 3, it is with its mother in the owlbear nest. The spell (or potion) “Speak with Animals” helps with most checks regarding the owlbear cub.
Go to these coordinates, west of the Emerald Grove: X: 86, Y: 448
Crawl into the cave to the owlbear nest
Keep the owlbear cub alive
Spar the owlbear mother or kill her
If you killed the mother, then interact with the cub afterwards
This is how you rescue the owlbear cub from the goblin camp: If you kept the owlbear cub alive in the nest, you will encounter it again in the goblin camp. When you interact with the owlbear cub there, it leads to a discussion with the NPC “Krolla”.
Free the owlbear cub from the goblins’ clutches
Goblin camp coordinates: -112, Y: 430
Tell Krolla you are leaving and taking the cub with you
You have the following options:
Persuade
Intimidate
Illithid Mind Control
Bribe (500 gold)
Speak to the owlbear cub to have it pick up your trail: Pass the animal handling check, or use the spell (or potion) “Speak with Animals”
Alternatively: Slaughter all goblins and their allies in the goblin camp – after speaking with the owlbear cub. This way, the owlbear cub escapes and also returns to you.
A feared but also cute friend in the camp: On a random day, the owlbear cub will appear in your camp. To gain a new friend, you still have to go through a few trust tests. After that, the owlbear cub will gradually gain your trust and will appear at regular intervals in the camp.
This is what you need to do:
Pass the animal handling check – roll at least a 10
Feed the owlbear cub
At first, it will flee into the forest, but it will return
Heal the owlbear cub’s wound
Accept its food
What kind of animals are these? The owlbear is a creature from the Dungeons & Dragons universe. They are usually considered particularly bloodthirsty and one of the most feared predators. Owlbears are majestic beings and a cross between a bear and a giant owl.
With their sharp claws and pointed beaks, they are beings deserving of respect. However, our little feathered companion in the camp presents itself in a completely different light.
In Monster Hunter Wilds, you can start the quest “The Apple of Her Eye” after downloading the first Title Update to give Alma a new pair of glasses. But where does the quest start, and what do you need to do for it? We will show you.
How do I start Alma’s quest? To start Alma’s quest, you must have downloaded Update 1.010.00 first. After that, log in to Monster Hunter Wilds and speak with Alma first. She will tell you about her glasses. Now the quest “Blurred Vision” begins. You can find all the quest steps here:
Talk to Alma to start the quest (the location doesn’t matter, but we recommend the Crimson Forest)
Now go from the base camp of the Crimson Forest to the marked river and talk to the Wudwud “Champel”
Look around for a Wudwud with glasses
Then go to the “Wudwud Hideout” in the Crimson Forest and talk to Donk
Rest until “Night” and “Abundance” are active and then return to the Wudwud Hideout
Talk to the Wudwud “Donk” at the entrance
Gather information from the celebrating Wudwuds on the roof of the hideout (can be reached by vines)
Talk to 4 Wudwuds that are marked with exclamation points
Visit Wilbrill, who is near the campfire in the Wudwud camp (not on the roof, but below in the covered camp)
Wilbrill is hanging in a nest of leaves and sleeping
Obtain Eastland Honey
Can be acquired through trading with Ren
Can be obtained with some luck by collecting honey
Deliver the Eastland Honey to Wilbrill to complete the quest
What rewards are there? Once you have completed the quest, you will have the opportunity to craft the Strategist Glasses and the Square Glasses for Alma. Additionally, you can now equip Alma with new skins and change her glasses. In the future, more skins for Alma may appear, which you can then add to her wardrobe.
With the first major Title Update (TU1), Mizutsune moves in as a new monster in Monster Hunter Wilds. The agile leviathan is very cunning, so caution is required. We will show you how to defeat him safely.
Where can I find Mizutsune? To hunt Mizutsune, you must first have reached Hunter Rank 21. Then speak to the NPC Kanya in the Base Camp in the Crimson Forest. You will find her by the lake in your camp, recognizable by her fishing rod.
If Kanya does not have the quest for you, you must first complete at least the first fishing quest with her. If Kanya does not have the quest for you, you must first complete at least the first fishing quest with her.
Once you have spoken to her, the optional mission “Spirit in the Moonlight” will be unlocked, and you can go after Mizutsune. Once you have hunted him down, he will appear freely in the Crimson Forest and in Wyveria on the map, so you can hunt him there or you can start the optional 5-star quest “Flowers in Purple Foam” with Alma.
Update from April 7, 2025: We have added information about the Soulseer-Mizutsune.
[toc]
Start video
Monster Hunter Wilds shows its first title update with a new monster
Exploiting Mizutsune’s Weaknesses
What weaknesses does Mizutsune have? You should focus on Dragon, Ice, or Thunder as your best elemental options. The leviathan has a weakness against these elements.
He is resistant to fire and water. He is also moderately weak to various status effects (2*).
In the monster lexicon, you can see the weaknesses at a glance
What weak points does he have and what can be severed and broken? His mouth is his weak point. Head, claws, dorsal fin, and tail can be broken. You can also sever his tail.
Weak points and breakable parts at a glance
Preparation is Key – Things to Consider
This is how you optimally prepare for the hunt: Before the hunt or when you have started the quest, you should eat a meal to strengthen yourself. In addition to healing potions, the following items in your bag will be helpful:
Pitfall Trap
Shock Trap
Thunderbombs
Cleaner against Bubbleblight
Tranquilizers or ammunition if you want to capture him
Sound bombs have no effect on him. Also, make sure to bring weapons that have an element that Mizutsune is weak to. Abilities like Earplugs or those that increase your resistances to water and fire damage are also helpful.
Mizutsune’s Attacks: How He Harms You
Mizutsune can hit you with the following attacks:
Basic Attacks
Body Slam: He stands on his hind legs and after a few seconds slams back down to the ground, burying everything underneath him – including you.
Mizutsune’s Body Slam attack
Claw Attack: Mizutsune raises his paws and lets them go at you after a short delay.
Spin Jump: Mizutsune can jump a large distance and spins, potentially knocking back the hunters hit by the attack.
Tail Attack: Mizutsune frequently resorts to this type of attack. He spins around and sweeps everything down with his tail.
Water Shot: Mizutsune shoots a stream of water forward or moves it sideways to hit his hunters.
Here you see the water beam attack
Bubble Attacks
Bubble Breath: Mizutsune raises his head and shoots a series of bubbles from left to right (or from right to left). Typically, this movement is followed by an identical attack in the opposite direction.
Unstable Bubble Breath: Mizutsune jumps backward and expels a large, single bubble that deals moderate damage. This bubble can still be burst.
Bubble Launcher: Mizutsune spins quickly in place and expels many bubbles that spread out while circling around his original position. These bubbles can come in three colors:
Normal (White/Pink/Blue) – Deals damage and continuously stacks Bubbleblight
Red – Grants a damage boost
Green – Heals
Fire Bubbles: When Mizutsune is angry, he can also make bubbles explode, causing great damage.
Bubbleblight: If you collect too many bubbles, you will receive the Bubbleblight status. This causes you to move poorly and take more damage.
Different bubbles cause different effects
Soulseer-Mizutsune
If you break his head, Mizutsune will go blind and enter the Soulseer state. While in this state, he becomes enraged and his eyes glow blue. He then perceives his surroundings mainly through his bubbles. His attacks become faster and more intense. Additionally, he starts shooting larger, blue-burning bubbles that can explode.
After you have softened up Mizutsune, he will go berserk.
Catch Your Chances: These Tips Will Help You Defeat Him Safely
When Mizutsune is angry, he spits out a large explosion-like bubble. After this, he is exhausted for a few seconds and his mouth becomes a weak point that you can immediately target with a focus attack to deal significant damage.
After the bubble explosion, his mouth becomes a focusable weak point
You can also dodge his water beam attacks and attack from the side, as he is well occupied at that moment and cannot inflict any damage otherwise. Additionally, you should focus on continuously inflicting injuries and maximizing them to extract the optimal damage.
You should also always pay attention to the colors of his bubbles and burst the green and red bubbles to gain their buffs.
If you want to play for the round victory in Call of Duty: Warzone, you should take the best weapons of the game. We show you what the current meta is.
What kind of overview is this? We looked at which weapons are played a lot in Call of Duty: Warzone. Based on that, we created an overview of the current meta weapons of the Battle Royale.
The 5 Best Weapons in CoD Warzone
These are the meta weapons: In selecting the 5 meta weapons, we focused on the 2 strongest assault rifles for medium to long-range combat and the strongest submachine guns for close-range combat, as well as the HDR as the currently best sniper rifle.
These are the top 5 meta weapons:
SWAT 5.56 with the Grau upgrade (Assault Rifle)
C9 (Submachine Gun)
KRIG C (Assault Rifle)
LADRA (Submachine Gun)
HDR (Sniper Rifle)
Start video
CoD Black Ops 6: Prestige explained – Is it worth it?
The Meta Builds of the 5 Best Weapons
What are these builds? The individual weapons can, of course, be played with various attachments, resulting in quite different loadouts. Therefore, we list the loadout for each meta weapon from the top 5 that is currently played the most.
Which loadouts are recommended? In Warzone, you have to be prepared for both long and short-range battles. Especially a combination of assault rifle and submachine gun is therefore recommended, such as:
SWAT 5.56 with Grau Upgrade + C9
KRIG-C + LADRA
If you want to play the HDR, it is advisable to pack an assault rifle as a secondary weapon. Currently, the strongest combination is HDR and SWAT 5.56 with Grau upgrade. Other assault rifles work as well. Various options would be:
HDR + SWAT 5.56 with Grau Upgrade
HDR + GPR 91
HDR + Kilo 141
That way you are equipped for both short and long distances.
If you are not only playing the Battle Royale of Call of Duty, but also regularly playing in the multiplayer of Black Ops 6, you are probably also interested in the best weapons of the most recent installment of the shooter series: CoD Black Ops 6: Meta – The Best Weapons
This is an AI-powered translation. Some inaccuracies might exist.
The new update for Monster Hunter Wilds introduced a new NPC that is already being worshipped by players. We at MeinMMO will show you how to find the big, beautiful bird that is revered by players.
This is the situation: Anyone who reaches Hunter Rank 16 in Monster Hunter Wilds can gain access to “The Great Site”, a social hub that is much more suitable for experienced and successful hunters like you will be than the barren starting camp.
In this “The Great Site”, Capcom has hidden a bonus feature that hunters are increasingly discovering: a large, extremely round, yellow bird.
How exactly you get to this bird, we explain to you on MeinMMO in this short video:
Start video
So findet ihr das flauschige Huhn in Monster Hunter Wilds
Fluffy bird distributes gifts
What does the bird bring? The bird has chicks around it that collect items and deposit them in the nest. The bird has no use for them and instead gives the items away to players who pass by.
The site PCGamer reports that the bird distributes
This is being discussed: On reddit, hunters are singing the praises of the new friend. Some even call him a bird-god. It is said:
“He is as kind as he is fluffy.”
“I ran around him and bumped into him and he stood up. I have never felt so much fear because I thought I had angered God. But luckily, he is a benevolent god and forgave me before lying back down.”
“If you hang around him for a while, he does a few things that are all fun and admirable. I won’t reveal what he does, but it’s great.”
Players have discovered a mysterious giant bird in Monster Hunter Wilds. Fans of Dark Souls know immediately what to do and swear their loyalty to it.
What kind of strange bird is this? The giant bird is located in a hidden cave in Monster Hunter Wilds. There, it sits in a large nest surrounded by smaller birds. Its body resembles a fluffy egg, with eyes and a beak.
You can find out how to find this bird in this video:
Start video
So findet ihr das flauschige Huhn in Monster Hunter Wilds
A little secret brings players back to Dark Souls
A certain type of player feels transported to another world: Just as the light shines down on the bird, many a Dark Souls player feels compelled to pledge an oath to it. This is also the case for Reddit user angelXholika, who shared her first reaction to the bird in a post in the subreddit r/MHWilds:
“My first thoughts when I found this bird,” writes angelXholika, showing a screenshot with a pop-up from Dark Souls inserted at the bottom. This pop-up always appeared when a new Covenant was offered to you.
Recommended editorial content
At this point you will find external content from Reddit that complements the article.
I consent to external content being displayed to me. Personal data can be transmitted to third party platforms.
Read more about our privacy policy.
What are Covenants? In the first Dark Souls, some NPCs offered so-called “Covenants” that players could join. The mysterious yet majestic presence of the bird makes it seem like one of those NPCs.
Even though this Covenant mechanic doesn’t exist in Monster Hunter Wilds, that doesn’t stop fans from pledging an oath anyway:
Metaruoreo89 comments on the post: “I joined immediately, didn’t even read the fine print, lol.” angelXholika then confirms that she and her team also pledged their oath to the bird. Both share pictures of this moment.
redshieldheroz reminds them of Snuggly the Crow, another famous bird from Dark Souls. angelXholika also immediately thought of Snuggly’s lines “You! You! Just give me…”.