
In our special, we provide you with 15 useful tips and tricks to help you get started in The Division 2.

The Division 2 officially releases on March 15, but some can play thanks to early access since the 12th, and some even since March 11.
Therefore, we have 10 tips that should be helpful to you right now – or at the latest by the official release.

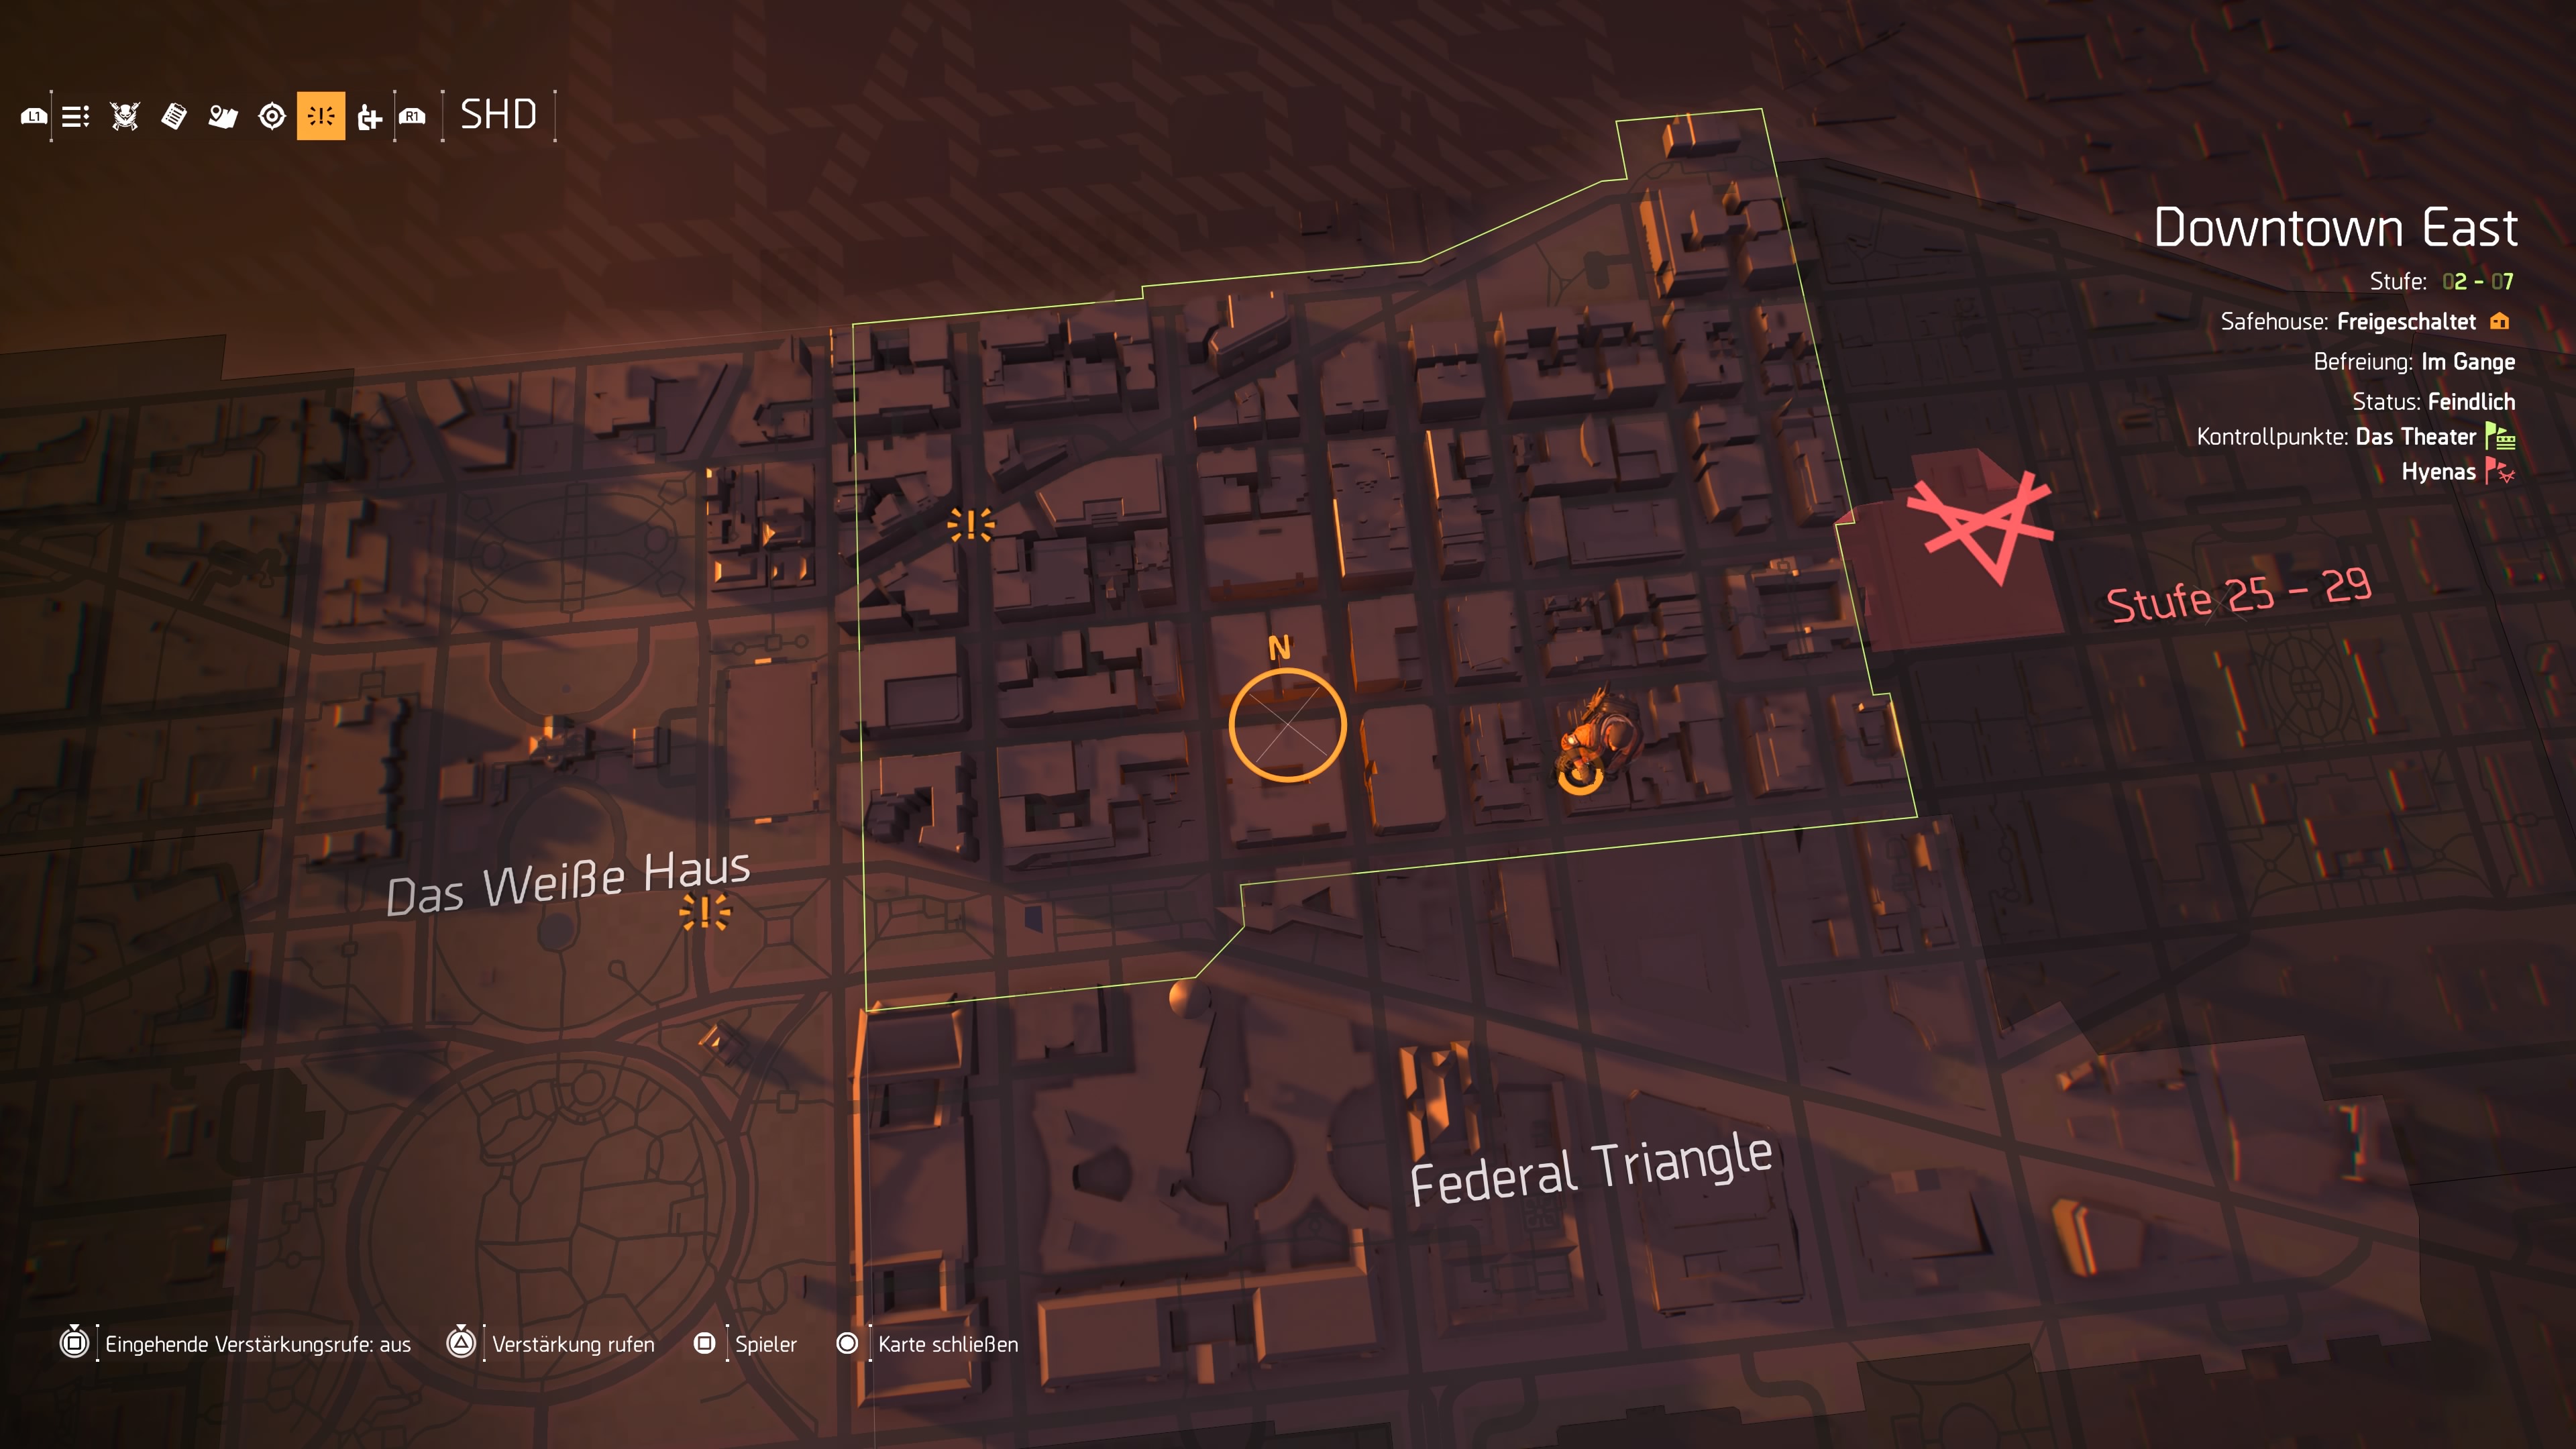
Annoyed by reinforcement requests? You can disable them
What are reinforcement requests? When these requests are active, you can receive a message in-game at any time that a player needs help for a specific activity. If you confirm this, you can directly join groups of players.
Although the reinforcement request is a cool feature, it annoyed many during the private and open beta, as the messages can pop up continuously. However, they can be easily disabled.
Here’s how to disable the reinforcement requests: Open the map and switch to “SHD”. You should now see the option “Incoming reinforcement requests: on/off”. Set it to “off” and you should finally have peace.
Alternatively, this feature can also be disabled in the settings under “Gameplay” at the bottom in “Reinforcement request status”.
Check out the HUD options
The Division 2 offers several options to optimize your HUD. Do you want a permanent user interface? Or should it be hidden when not needed?
Where should the minimap be located? And how big should the group display be? You can set all of this separately and position it as you like.
Here’s how to edit your HUD layouts: Simply go into your menu, under “Settings” you will find the HUD category. Here you can freely experiment and reset everything if you don’t like it.
Much nonsense can also be produced here, as this screenshot shows:

Don’t break everything you find
Many will quickly begin to break down useless loot. While this is an option to obtain materials.
However, in the settlements of civilians, there are projects where you can donate materials, resources, and also equipment. If you complete these projects, you will receive rewards such as blueprints, credits, and bounty contracts.
So you should first check if you would rather donate your loot for projects. Just visit the project officers at the respective base and check in advance what they need. It doesn’t hurt to carry 2 or 3 additional items of each piece of armor.
Save your credits
Veterans should already know the principle. Before level 30, it is hardly worth investing credits in equipment. You level up too quickly, and enemies usually drop enough usable equipment.
So rather save the credits you collect throughout the game and keep them for the endgame. If you occasionally see a specific item in the store that you absolutely want, you can of course buy it.

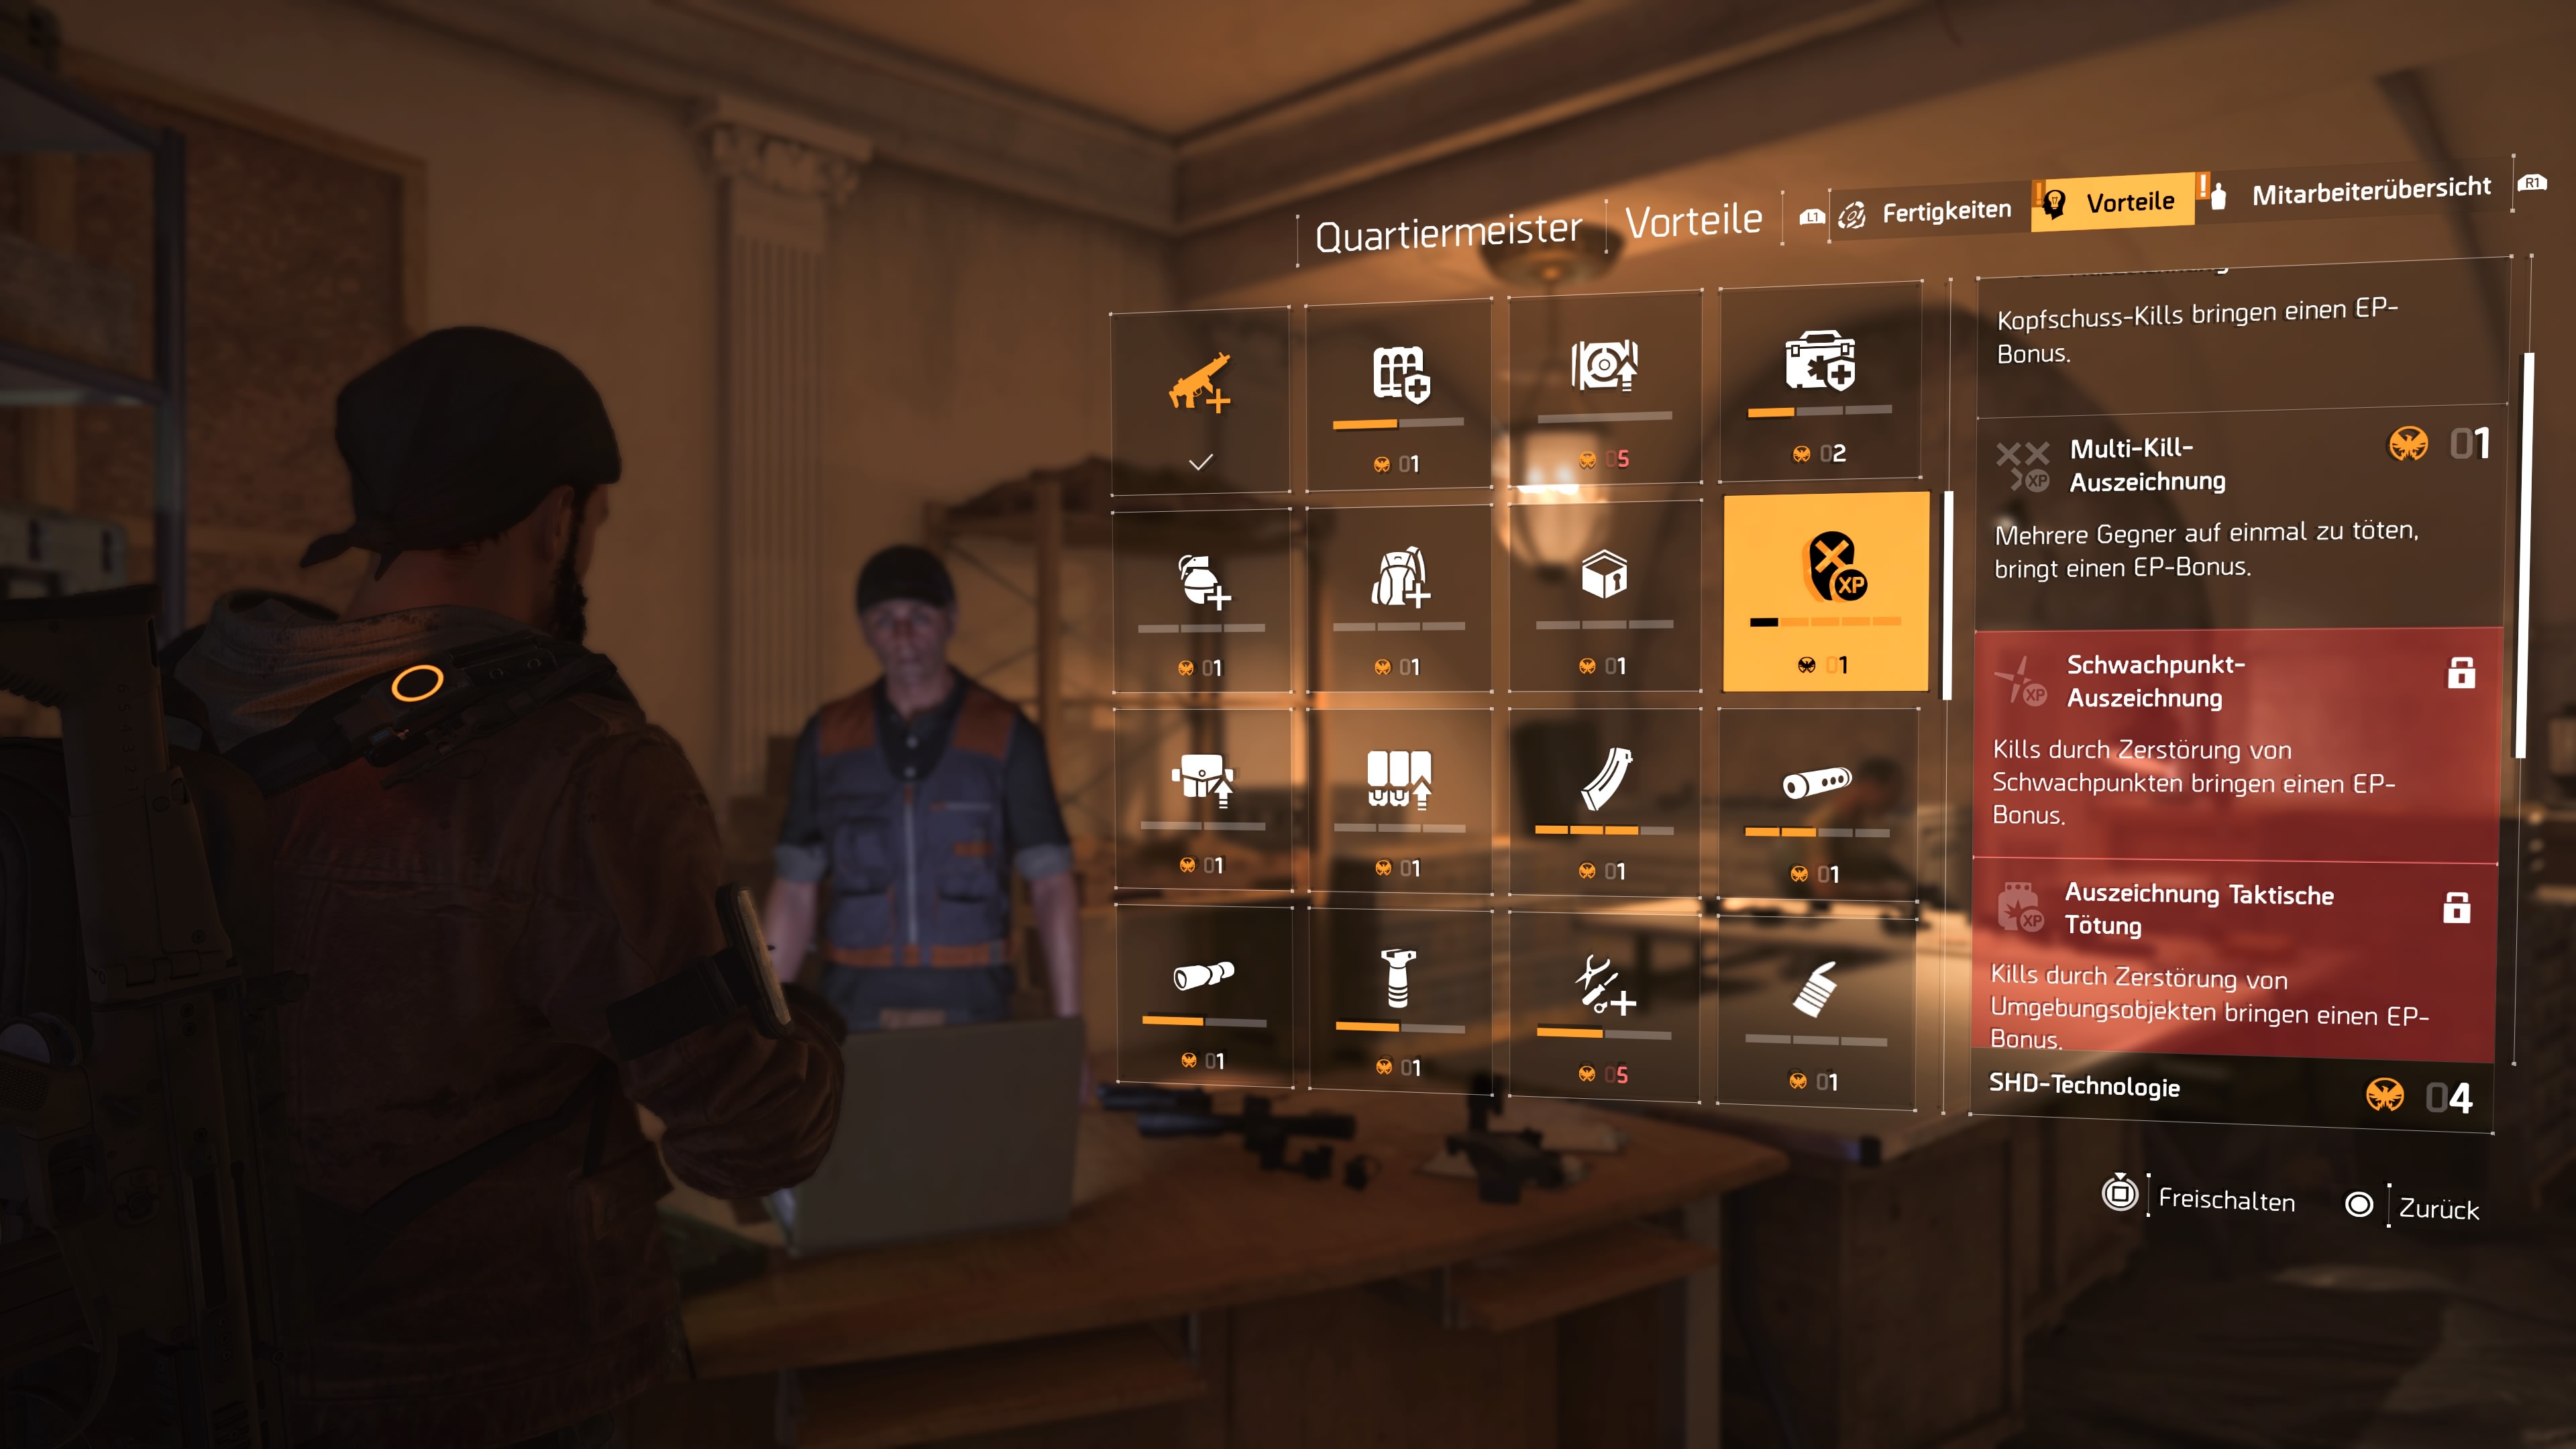
Regularly return to the White House
Your Operations Base is an important place that you should return to repeatedly. Especially at the beginning, it is worth it, as you constantly find SHD-Tech and can unlock new perks, skills, and their skill mods.
How do I unlock perks and skills? Perks cost SHD-Tech, which you can find by playing missions and in containers in the game world.

For skills, you need skill points, which can be unlocked by completing story missions. All of this can be done at the quartermaster in the White House.
Are you still at the beginning and undecided about your abilities? These 3 skills are particularly suitable for starting.
In the White House, you also have an overview of the projects and several merchants whose offers you can check.
Clans can also organize themselves there in a dedicated area. Our clan guide explains to you how to create a clan and what advantages it brings.

Level up faster with the right perks
Especially at the beginning, you can speed up leveling up by unlocking the right perks from the quartermaster in the White House.
There are several tiers:
- Headshot Award
- Multi-Kill Award
- Weak Point Award
- Award Tactical Kill
- Survivor
Each of these tiers gives you a new way to earn bonus XP through certain kill methods. This helps you level up faster.
Save side missions for later
That’s why you should wait with side missions: They give you experience points corresponding to your level and are therefore more valuable the higher you are in level.
So try to save as many as possible until you’re done with the story. This tip is only interesting for players who want to level up as quickly as possible.
In our matching level guide, you will learn how to reach max level 30 the fastest:

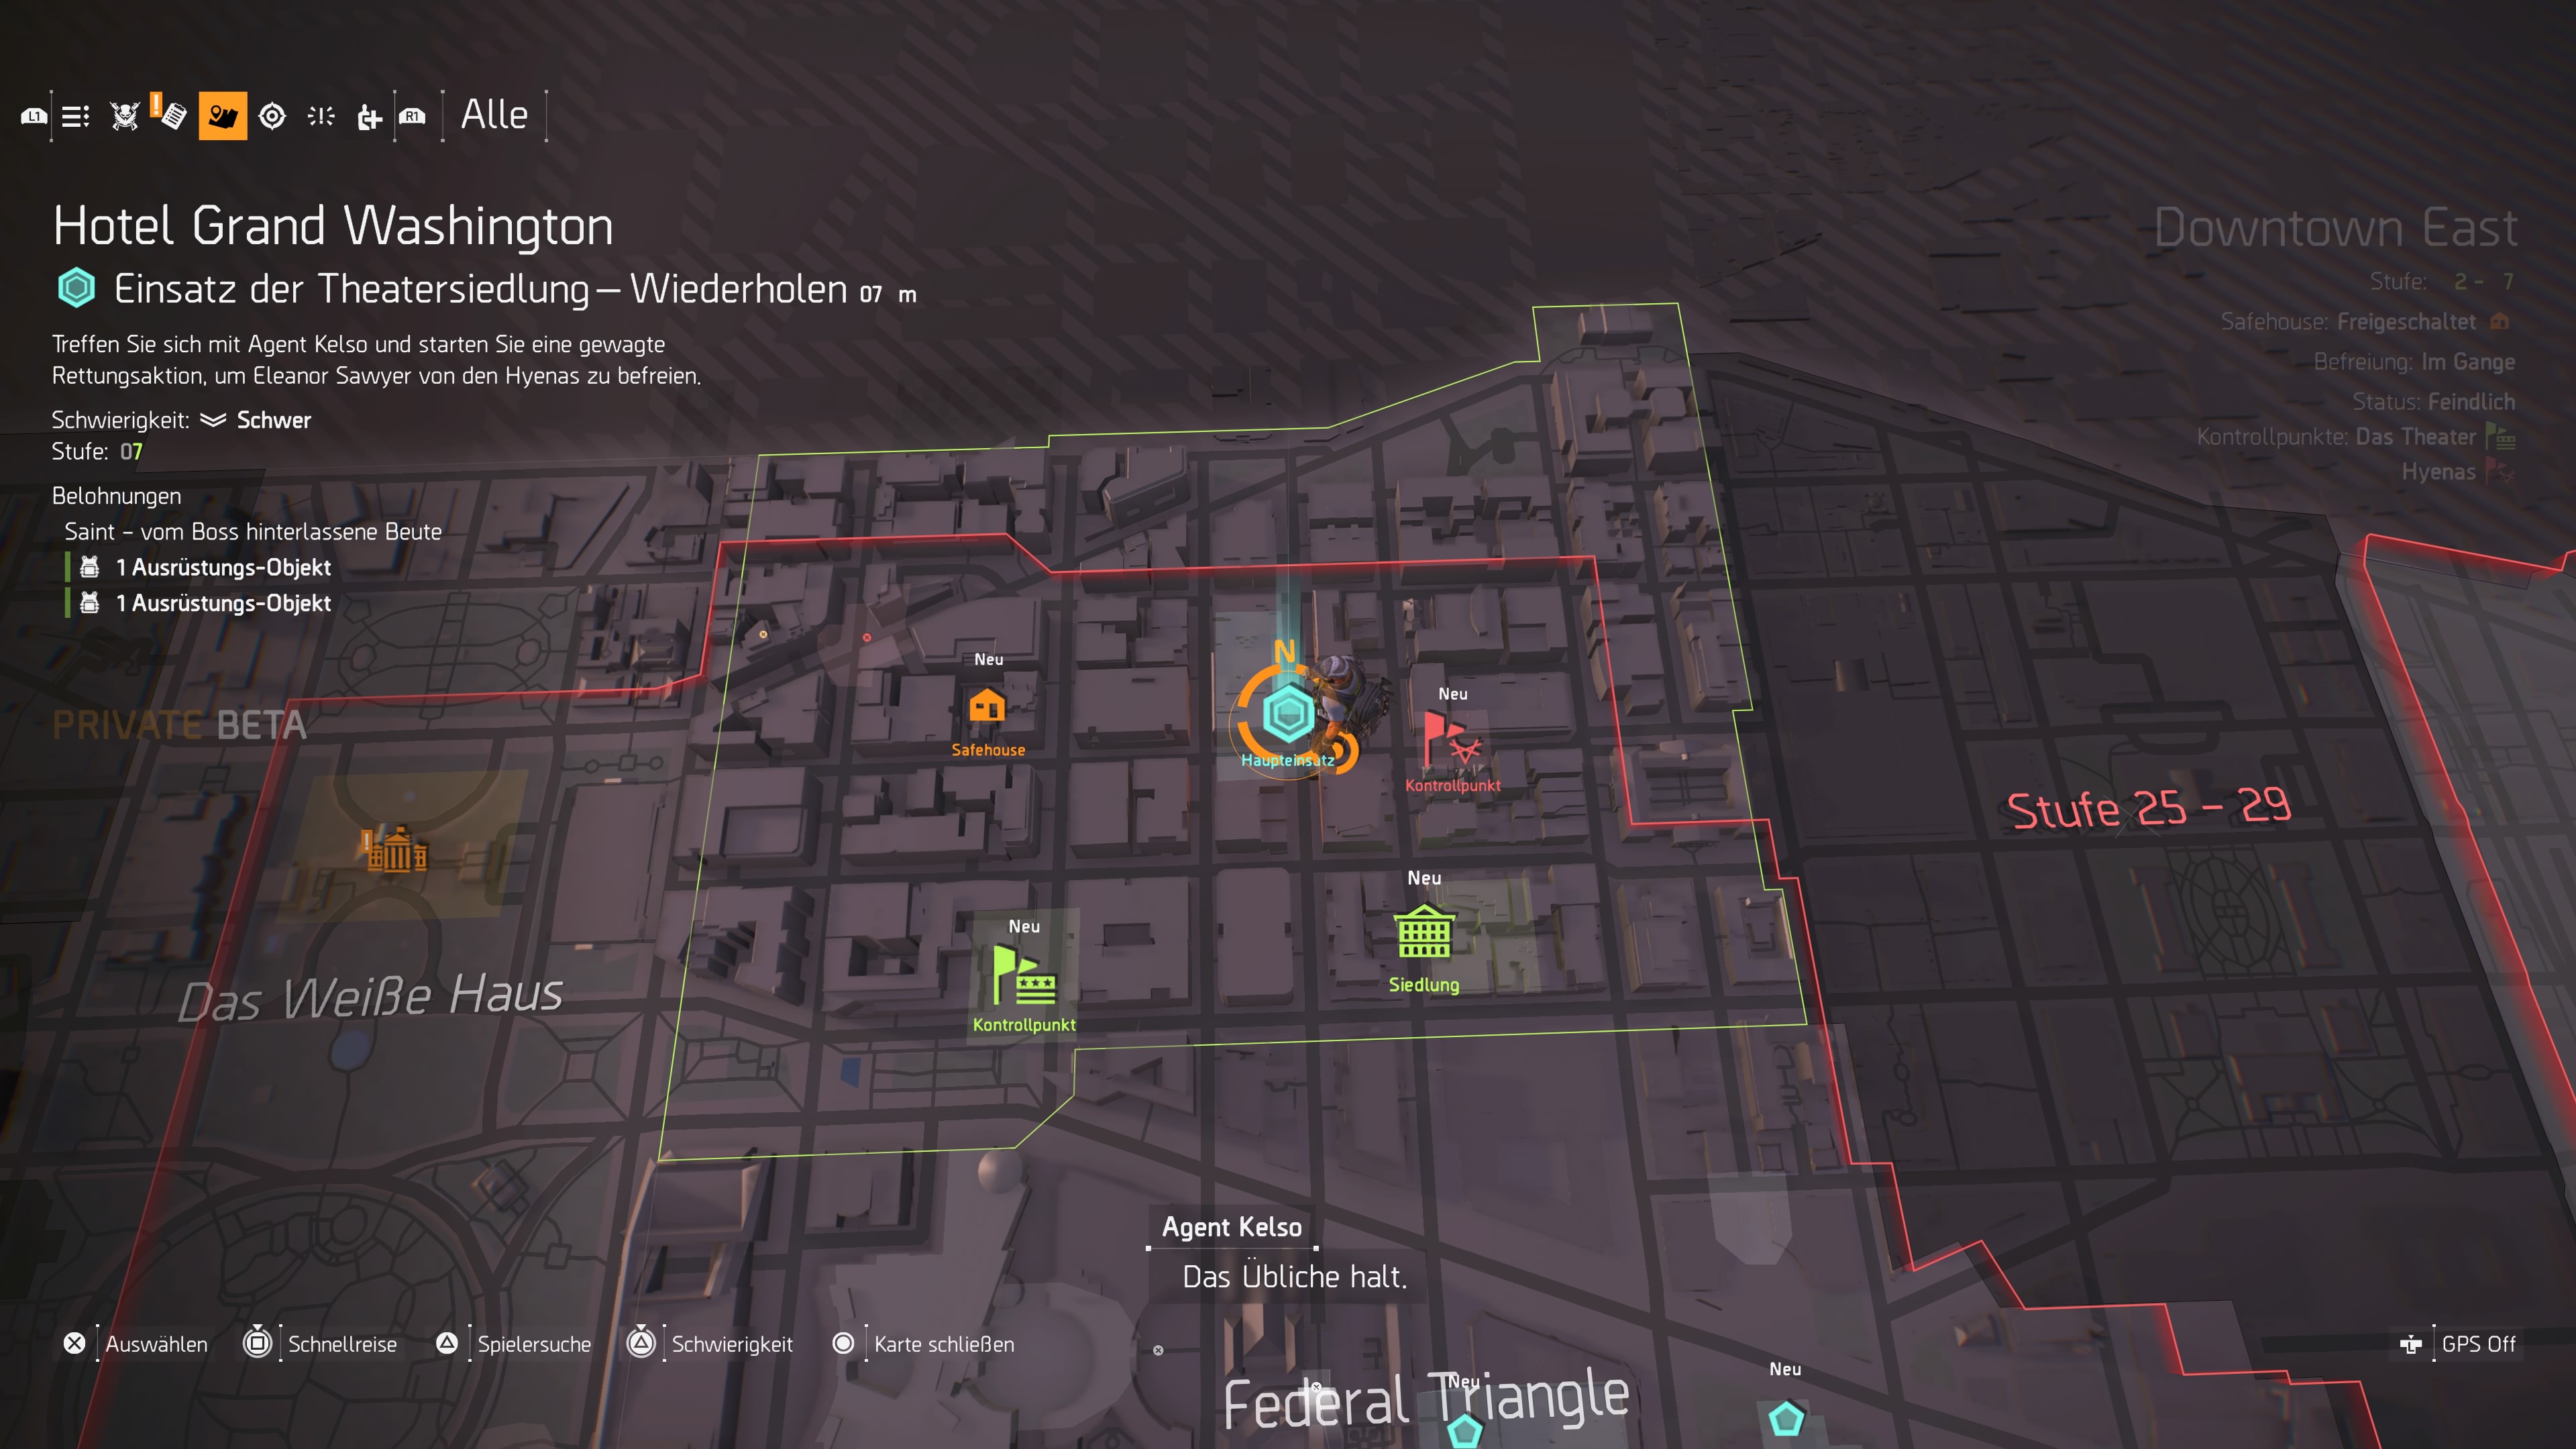
Visit the safe houses
Safe houses in The Division 2 are not just additional refuge points for civilians and fast travel points for you; they also provide useful data during your first visit.
This is the benefit of the safe houses: As soon as you enter a safe house and go to the computer, you can access the data. Then, all missions and SHD containers of the respective district will be revealed on your map.
This way, you can leisurely find SHD-Tech over your map when you want to unlock new perks or skills.

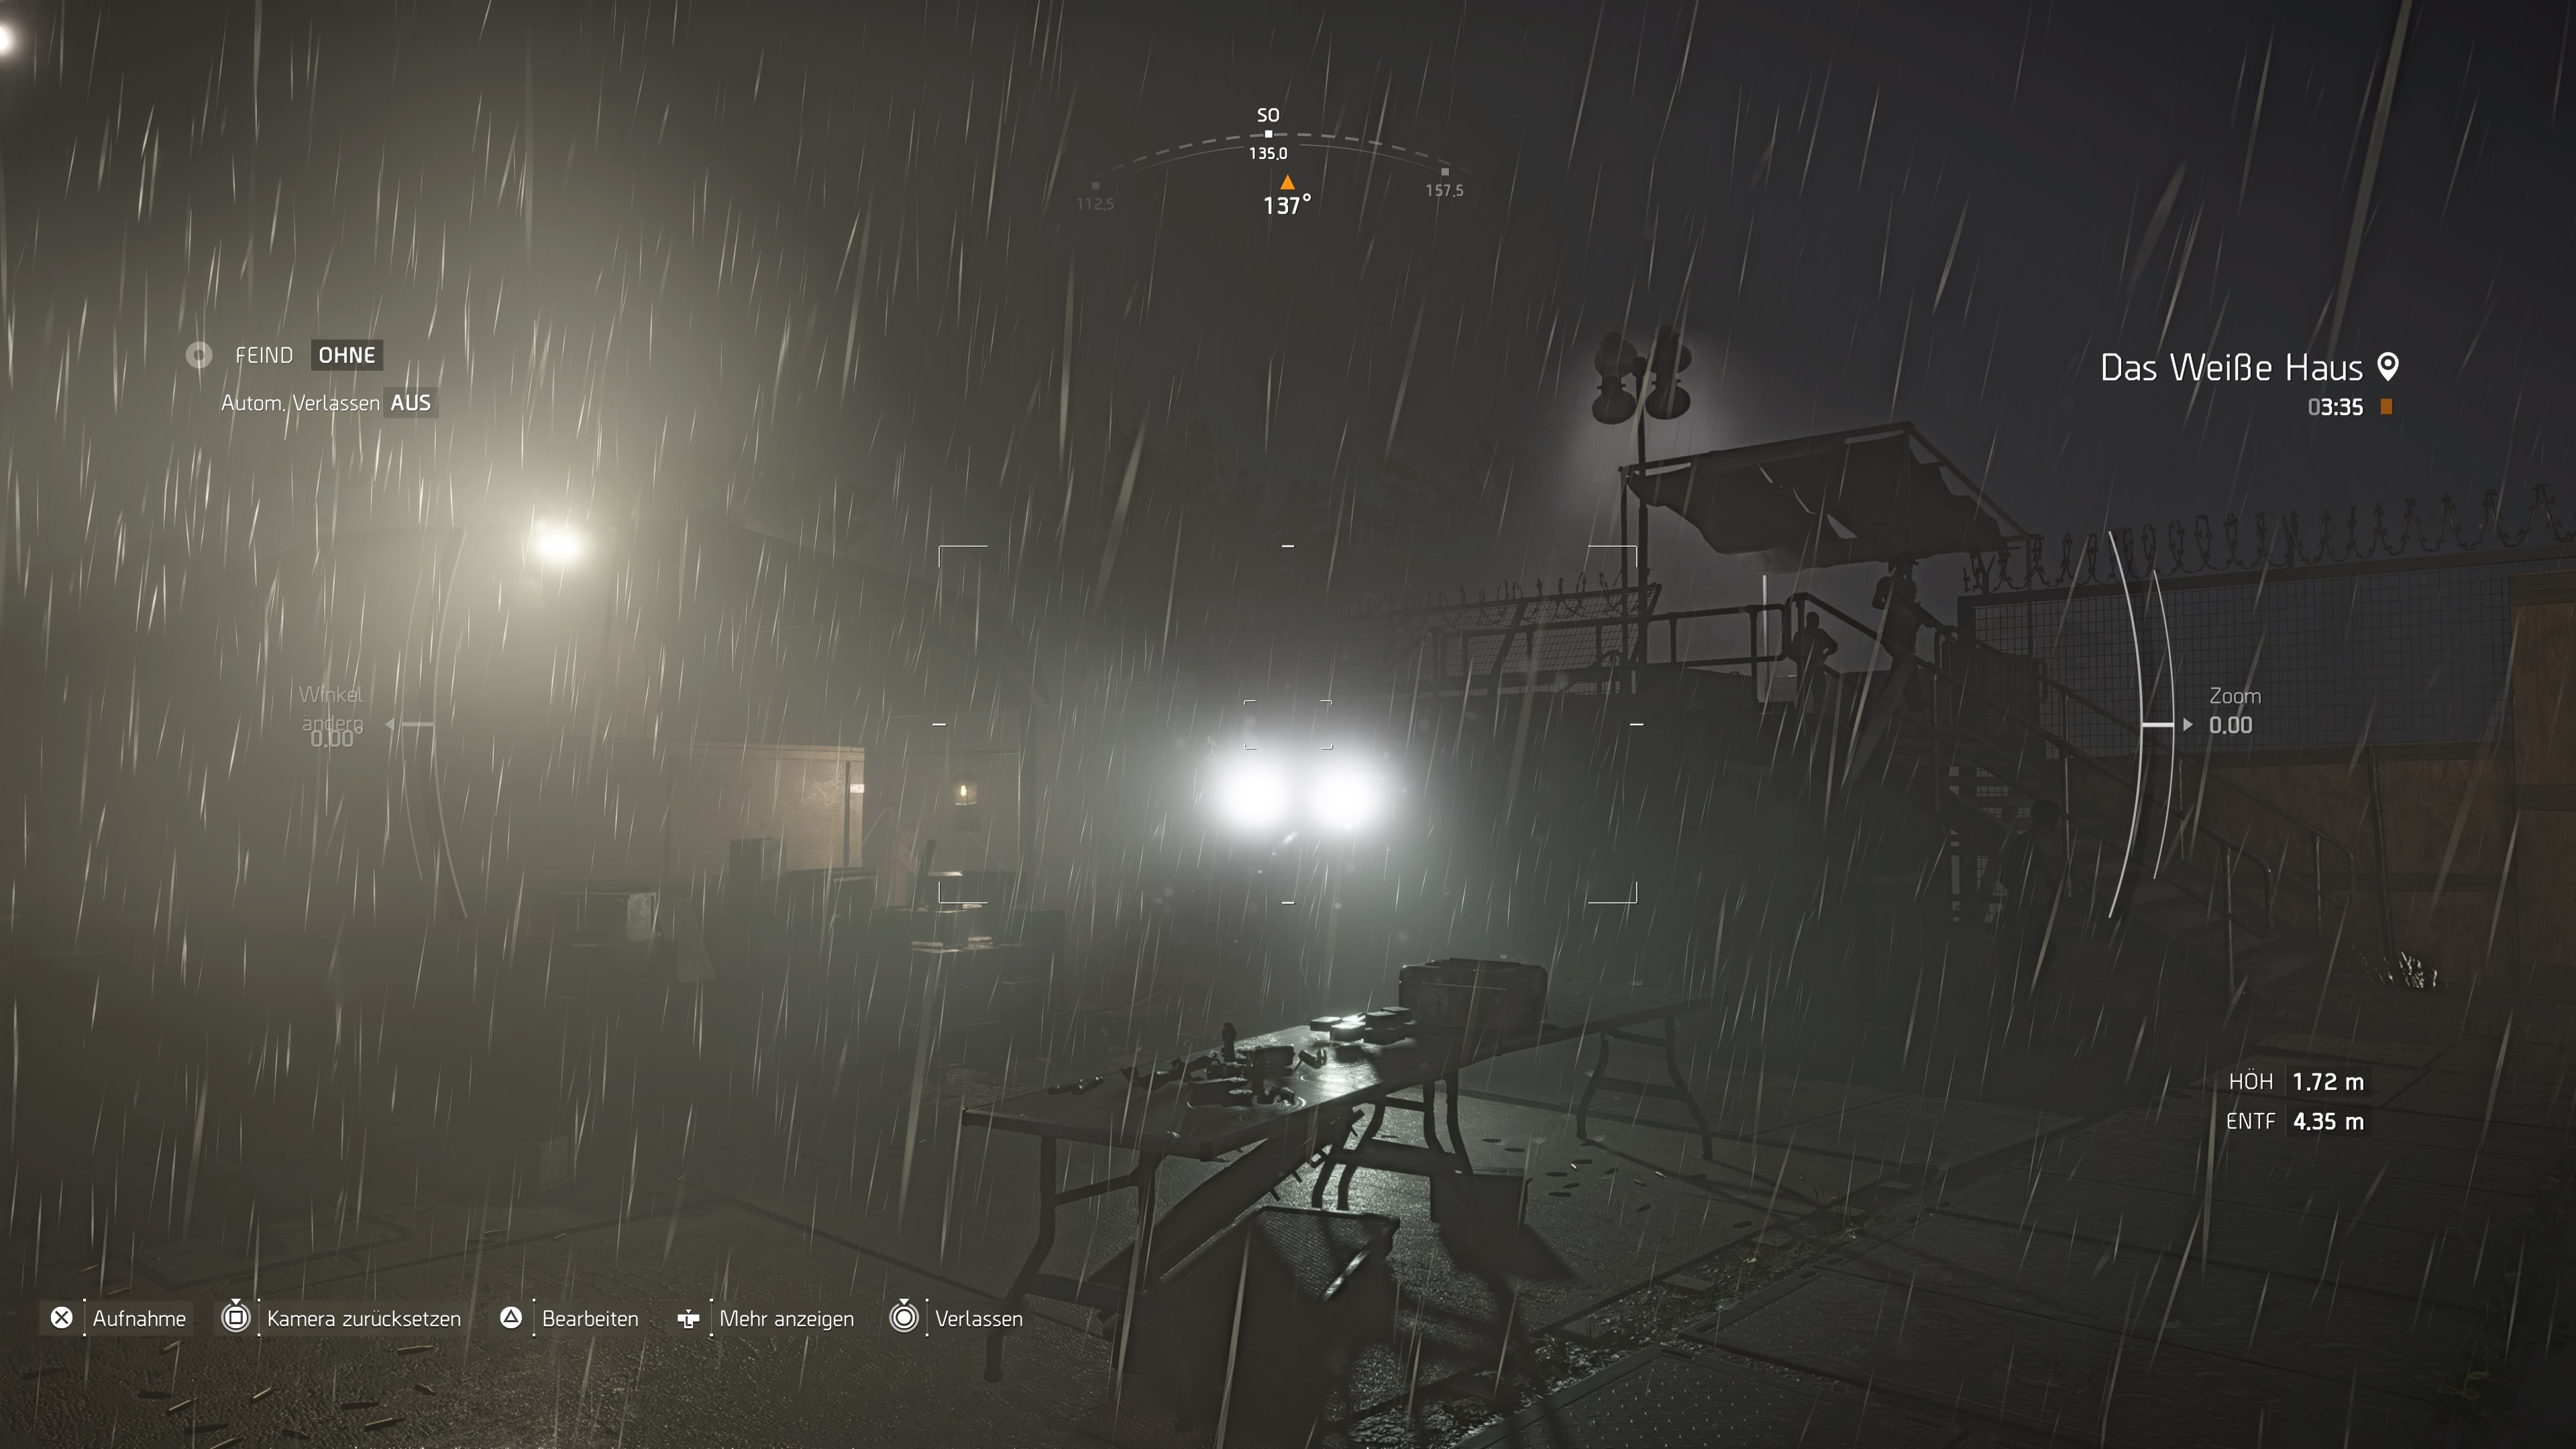
Need equipment? Capture control points
In the game world of The Division 2, there are several control points that are either under the control of enemy factions or can be taken and held by you and the civilians.
If you are looking for loot, these control points are a good way to bring your equipment up to your level.
Here’s how to capture control points: Enemy control points can be attacked either alone, with your friends, or with additional reinforcements. Once you enter the area, you can summon allied NPCs with a flare gun.
- In the first phase, you need to take the area and eliminate an elite enemy.
- Once you’ve captured the position, you’ll be attacked by enemy reinforcements.
- If you fend them off, the control point belongs to you and you can open a room with several loot crates containing equipment and material for you.
But wait as long as possible until you have just leveled up. Then you can directly equip yourself for the new level.
Disable HUD in photo mode
If you are a hobby photographer and want to take cool snapshots in Washington D.C., there is the photo mode.
This allows you to pause at any time and take photos that you can edit later. Before you start, however, you should know that you also have to disable the menu in photo mode to take proper pictures.
If you don’t do this manually, the HUD will be visible in your picture. In the worst case, this can ruin many cool screenshots.
How do I turn off the HUD? This will be displayed in the photo mode menu. On the PS4, it’s the “Options” button.
Connection problems? Switch servers
If you have problems with lags and connection while playing, you should try switching servers.
How do I switch servers? Go to the menu and click on “Social” on the left. Then click on your name, where you will have the option to search for a better server on the right. This option should only be available if the game indicates that you have a bad connection to the server.
Alternatively: Just find a group through the player search. If you don’t want to continue playing with that group, leave it. You should still be in a new instance. Logging out and back in should also help.

Keep an eye on your progress
It can happen that the progress in your instance is not saved. This can especially occur if you play with random players through the search function.
What should you keep in mind? Once you have completed a joint operation and are not the group leader, you should leave the group.
If you still capture control points, for example, this will not be saved because you are in a foreign instance.
Always make sure that you are the group leader when capturing control points with other players. Otherwise, you have to live with the fact that you need to do it again in your game world.
Faction keys should be kept
What are faction keys? In the game, you can occasionally find special containers that bear the name and logo of the factions. There are Hyena containers, Outcast containers, and so on.
These can only be opened with the appropriate keys and contain above-average valuable loot. It’s better to save these keys until the endgame, as you quickly level up in the lower level areas and the loot becomes useless again quickly.

Get the extended magazine if you like assault rifles
Here’s how to get the magazine mod: You need to complete a side mission in the Federal Triangle district. It’s called “Department of Justice”. The goal is to destroy an ammunition stockpile of the True Sons.
Once you have completed this, you will receive the blueprint for the 7.62 magazine, which fits assault rifles. The mission should come up fairly early in the normal game flow after you have unlocked the level 2 side missions in the theater settlement.
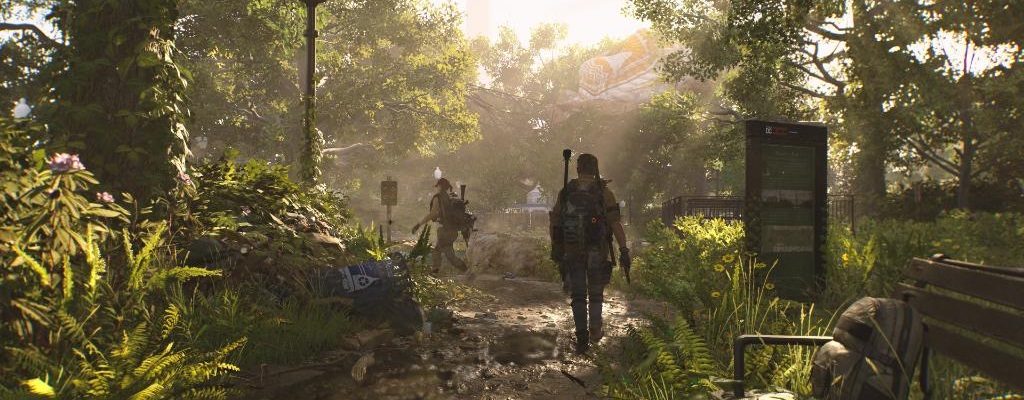
Avoid fast travel as much as possible
That’s why walking is worth it: Washington D.C. is huge and filled with many interesting places. That’s why it’s worth it to refrain from fast travel as much as possible.
On the way from point A to point B, you often find useful materials and some equipment with which you can either improve your character or complete the projects in the settlements.
Additionally, you often find collectibles and echoes that reveal stories from the game world.
Do you have your own tips? Did ours help you? Write in the comments!
Many can already play The Division 2. We have summarized their impressions for you:


Your opinion is important to us!
Do you like the article? Then let us know!
Comments