
Lae’zel is the first Companion you meet in Baldur’s Gate 3. How to get the most out of the Githyanki fighter, or a character of your own in the Fighter class, is explained in this guide.

Who is Lae’zel? The grumpy Githyanki Lae’zel is an outstanding warrior. She is a loyal follower of Vlaakith, the god-queen of her people. To serve her as a blade against the Illithids and to prove herself worthy, she embarked on a mission. However, she was captured and now risks becoming one of the hated Mind Flayers she has sworn to fight.
Lae’zel can be chosen as an Origin character or recruited as a companion.
What can the fighter do? As a fighter, you are a true all-rounder. Armored in heavy armor, you stand at the forefront, can take a lot of hits, and heal yourself. At the same time, you deal a lot of damage.
If the situation requires it, ranged weapons can also be easily picked up. Fighters can be played entirely focusing on ranged combat. However, the strengths of the class lie more in melee combat, which is why we will focus on that in this build.
This versatility makes fighters also very suitable for beginners:
Lae’zel as a Fighter
Lae’zel is a Githyanki with a Soldier background. This is not only interesting for the story, but it also slightly influences combat.
Githyanki
As a Githyanki, Lae’zel benefits from high mobility. At level 3, she gains the ability Githyanki Psionics: Leap, and at level 5 Mist Step, which allows her to cover large distances. This is extremely practical for fighters, as it enables them to engage enemies in melee combat quickly, which is the strength of the class.
Soldier
As a soldier, Lae’zel receives the skills Athletics and Intimidation. Her athletic abilities are particularly useful as they improve jumps. This contributes – as mentioned above – to getting to enemies as quickly as possible.
Since Lae’zel does not shine with high Charisma, Intimidation provides a little help in dealing with other characters.
Fighter Build – Best Subclass
For the fighter, there are three subclasses available: Battle Master, Champion, and Arcane Knight. The subclass can be chosen at level 3.
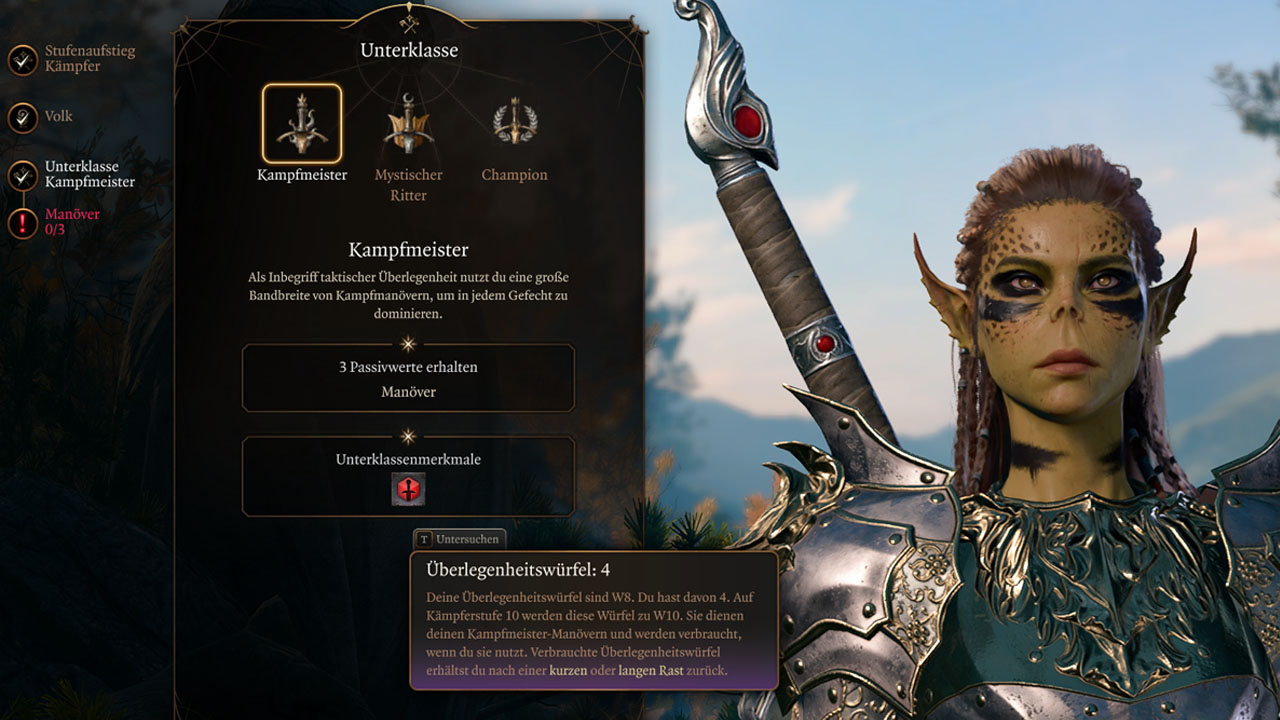
The best subclass for Lae’zel is that of the Battle Master. It is very adaptable, versatile, and fits perfectly with the strengths of the fighter. Through maneuvers, you gain tactical advantages. For example, you can disarm or frighten enemies.
How do maneuvers work? To execute a maneuver, you need to use a Supremacy Die. What kind of die it is and how many you have available depends on your level. Supremacy Dice are restored after a short or long rest.
Level 3
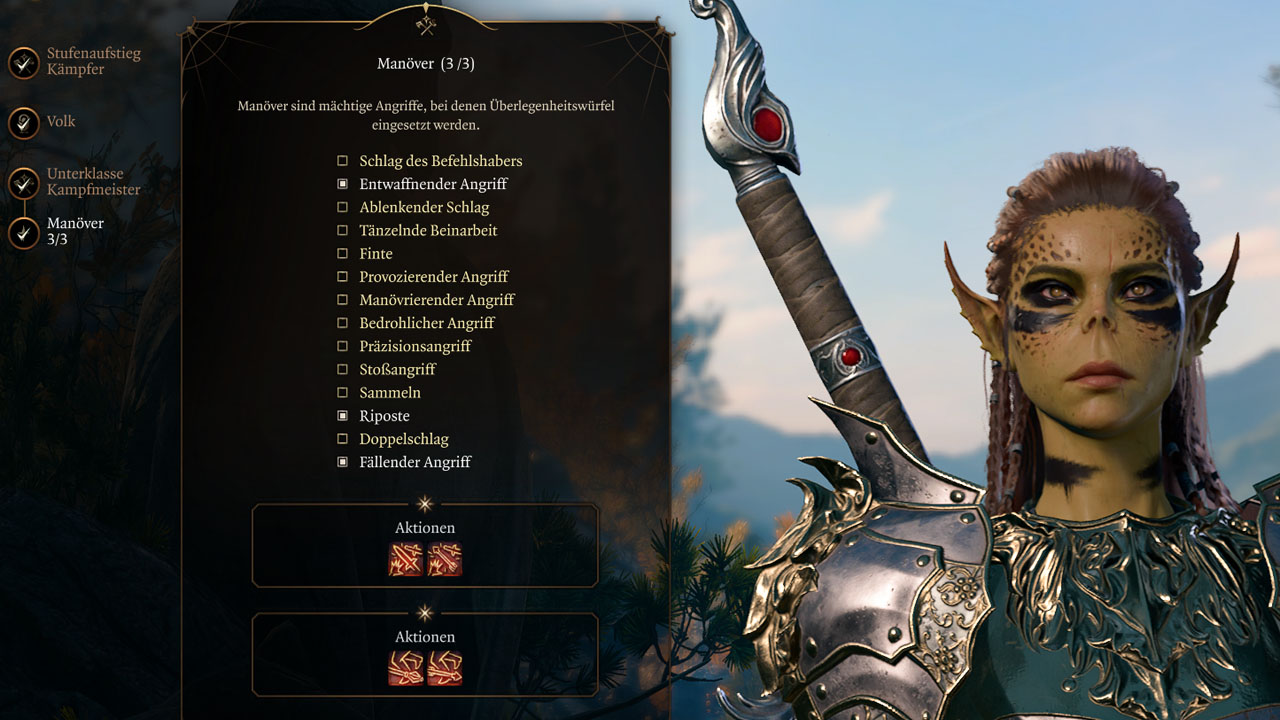
With the choice of the Battle Master subclass, you can immediately choose three maneuvers. You have four Supremacy Dice (D8). The following maneuvers are recommended:
- Disarming Attack: Causes extra damage and possibly forces the target to drop their weapon.
- At the very beginning, this is very useful as it effectively neutralizes an opponent. It is particularly effective to pick up the weapon immediately after disarming so that the opponent cannot get it back.
- Knockdown Attack: Causes extra damage and may knock the target down.
- This can take out opponents who are not using a weapon.
- Riposte: Counters with a D8 when the opponent misses a melee attack.
- Since the fighter usually stands in melee combat, they will often be exposed to attacks and can use this ability. Dealing damage without consuming an action is always good.
Level 7
You now have 5 Supremacy Dice. Two additional maneuvers can be chosen.
- Charge Attack: Causes extra damage and possibly pushes the target back 15 feet.
- This gives you even more control in combat. Additionally, opponents can often be defeated by pushing them off an edge.
- Rally: Grants allies 8 temporary hit points.
- Since the fighter is not otherwise specialized on supporting their allies, this ability provides some more variety and flexibility.
Level 10
The Supremacy Dice are now D10. Two more maneuvers can be chosen.
- Provoking Attack: Causes extra damage and may provoke the opponent to attack you. Attacks on other characters receive a disadvantage.
- While the fighter is not a pure tank, this ability can still be very helpful if a more fragile character like a wizard is in danger.
- Double Strike: Swings the weapon in an arc and attacks multiple opponents.
- A good way to obtain some area damage, which is otherwise more of a weakness of the fighter.
Fighter Build – Attributes

The most important attribute for fighters who want to specialize in melee is Strength. Focusing on it allows you to deal maximum damage. To stay alive as long as possible, prioritize Constitution second. Finally, Dexterity increases your armor class and initiative.
Wisdom, Charisma, and Intelligence can be more or less neglected as a Battle Master.
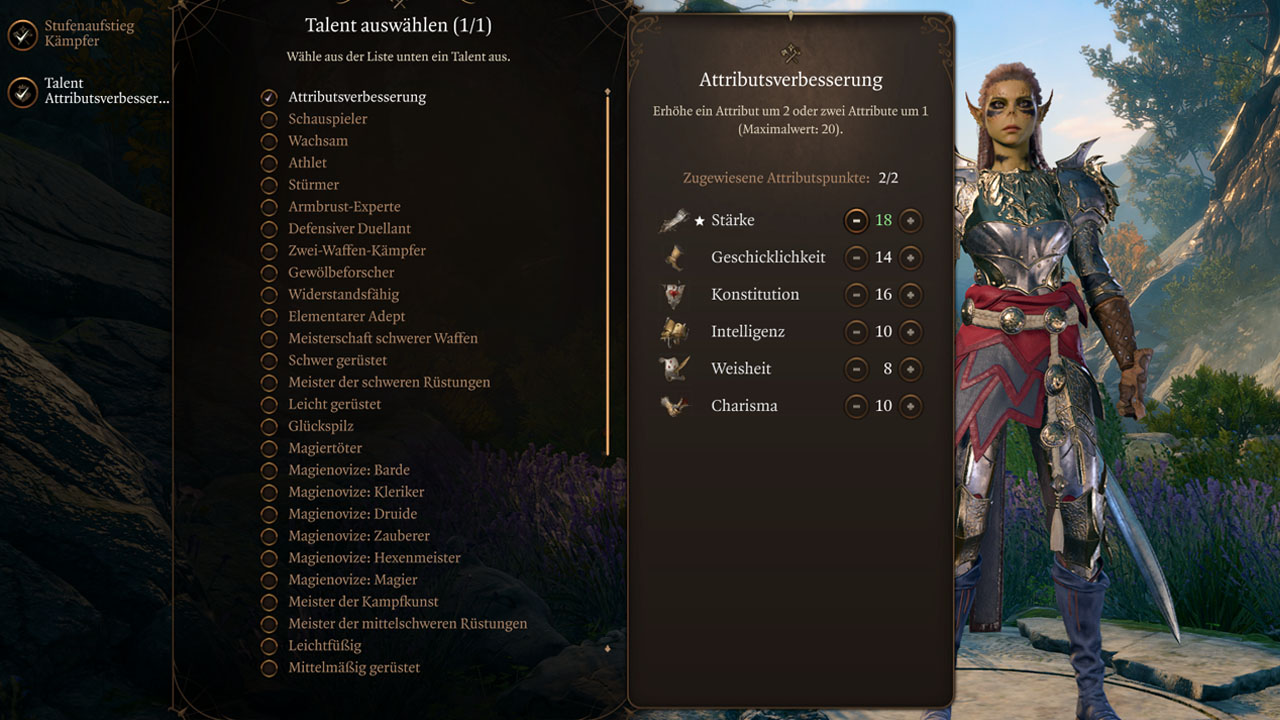
A balanced attribute distribution at the start is for example:
- Strength: 16
- Dexterity: 14
- Constitution: 16
- Intelligence: 10
- Wisdom: 8
- Charisma: 10
But the attributes with which Lae’zel defaults to you can also be well utilized.
Fighter Build – Talents
Throughout the game, you will have the opportunity to choose special talents. These can influence the values of your character, add spells or abilities. You can choose talents at levels 4, 8, and 12.
Level 4
- Ability Improvement: +2 Strength
- This should allow you to reach 18 in your most important attribute.
Level 8
- Heavy Weapon Mastery: Upon a critical hit, you can perform an additional melee attack as a bonus action. Heavy two-handed weapons can also deal an additional 10 damage, but attack rolls receive a -5 penalty.
- This ability is very strong, as it gives you the option for an additional attack. The second part of the ability can be optionally turned off if the penalty on attack rolls bothers you too much.
Level 12
- Ability Improvement: +2 Strength
- If you have already reached Strength 20 in another way, for example through the “Potion of Everlasting Vitality,” you can redistribute these points. A good alternative is, for example, the talents Alert, Resilient or Mage Slayer.
Fighter Build – The Best Items
What weapons for the fighter?
Optimal for Lae’zel are two-handed great swords. With the default selected fighting style Great Weapon Fighting, which can theoretically be chosen at level 1, you gain an additional nice advantage here. If you roll a 1 or 2 on the damage roll for an attack with such a weapon, the roll is repeated.
If you want a perfect start, you can secure the Everglow Blade right in the prologue.
Also, get a crossbow as soon as possible. This will help you especially at the beginning when you haven’t unlocked Mist Step yet and are still not very mobile.
Good weapons include:
- Sword of Justice
- Effect: Spell Tyr’s Protection (+2 armor).
- Location: Act 1
- Githyanki Greatsword
- Effect: Plus 1D4 damage when the wielder has less than 50% hit points.
- Location: Act 1
- Breaker Greatsword
- Effect: Plus 1D4 psychic damage when wielded by a Githyanki. +2 on initiative.
- Location: Act 1
- Balduran’s Giant Slayer
- Effect: Advantage on attack rolls against large creatures or larger, as well as a class action that temporarily increases damage and hit points.
- Location: Act 3
What armor for the fighter?
Lae’zel’s starting armor is quite good. At the beginning, you should have no problems. If you find better heavy armor later, use it. Good options are:
- Adamantine Chain Mail Armor
- Effect: All damage is reduced by 2. Opponents stagger after a successful attack on the wielder. Protection against critical hits.
- Location: Adamantine Forge (Act 1)
- Favorite of the Killers (Ring)
- Effect: After an opponent has been killed, the next attack is a critical hit.
- Location: Act 2
- Embrace of the Executioner
- Effect: All damage taken is reduced by 2. You cannot be moved against your will. Cantrip Howl of the Dead (stuns opponents).
- Location: End of Act 2
- Helm of Balduran
- Effect: Heals 2 hit points every turn. +1 to armor class. Protection against stunning and critical hits.
- Location: Act 3
In general, anything that gives you more control in combat, increases attack power, heals, or reduces taken damage is suitable. For Lae’zel, equipment that provides special bonuses for Githyanki also works well.


With this build, your fighter should become a true combat machine. If you want a little more variety, you can of course also consider “multiclassing”. Especially if you have gained some experience with Baldur’s Gate 3, it can be very exciting to try out various combinations.
For example, you can combine your fighter with the attacking power and spellcasting of the paladin. Other multiclass builds can also be very strong: The best multiclass builds and what makes them so good

Your opinion is important to us!
Do you like the article? Then let us know!