
For those who are new to the world of Monster Hunter: World and incredibly overwhelmed, we have something for you: our handy beginner’s guide with tips and tricks for the base camp, the quest system, the weapons, and online multiplayer!
Monster Hunter: World is the latest installment in Capcom’s monster hunting series and was first released on January 26, 2018, for PlayStation 4 and Xbox One. The PC version of MHW was released on August 9, 2018.
Monster Hunter: World does little to hand-hold you. Aside from a few tutorials here and there, you are left to fend for yourself. Therefore, we provide you with a wealth of useful quick tips to help you stay on track.
The guide is aimed at beginners, but veterans can also learn a thing or two here. A lot has changed in Monster Hunter World compared to the series’ predecessors.
What is Monster Hunter: World about?
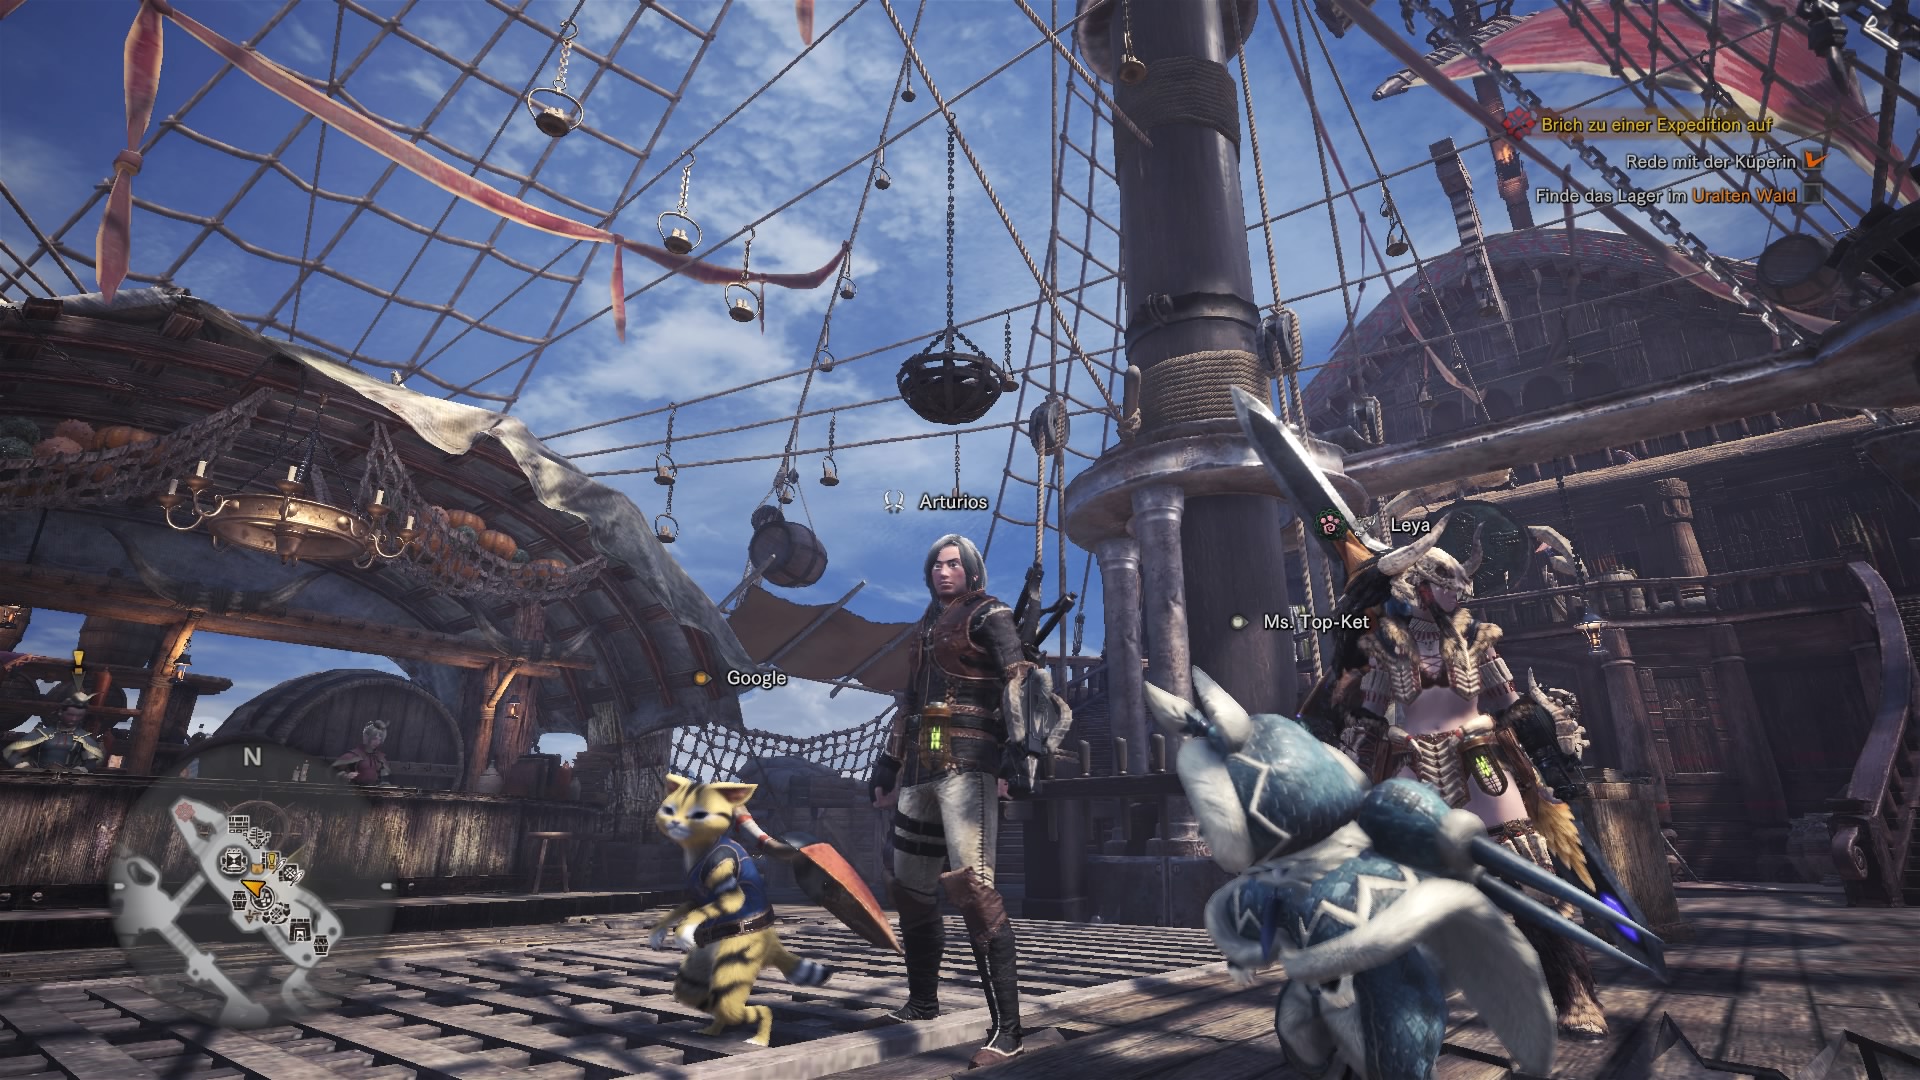
You find yourself on a ship heading to the New World. You are an elite hunter tasked with helping to protect the city of Astera from the local fauna. But that’s not all – on your way to the New World, you encounter Zorah Magdaros – an elder dragon that is also drawn to the New World.
The arrival of an elder dragon causes great upheaval and disrupts the ecosystem. What is the secret of Zorah Magdaros? What drives it to the New World? That’s what needs to be uncovered.
To uncover the mystery, you must fight your way through a number of monsters that exhibit all sorts of different colors and shapes. The battles are highly demanding. Only those who act tactically and creatively will emerge victorious!
You can engage in battles alone in single-player mode or in a group with up to 4 players in online multiplayer.
[toc]
The controls of Monster Hunter: World
The controls of Monster Hunter: World are intuitive and easy to learn. However, there are differences between the different weapons. The possible key combinations and commands are always displayed in the upper right corner of the screen.
What actions are possible depends on various factors. The possible interaction options vary in the following situations:
- In the city, you cannot draw your weapon
- There are different key commands when your weapon is shouldered or equipped
- If you mount a monster, the commands may also vary
Monster Mounting: How the controls work when mounting
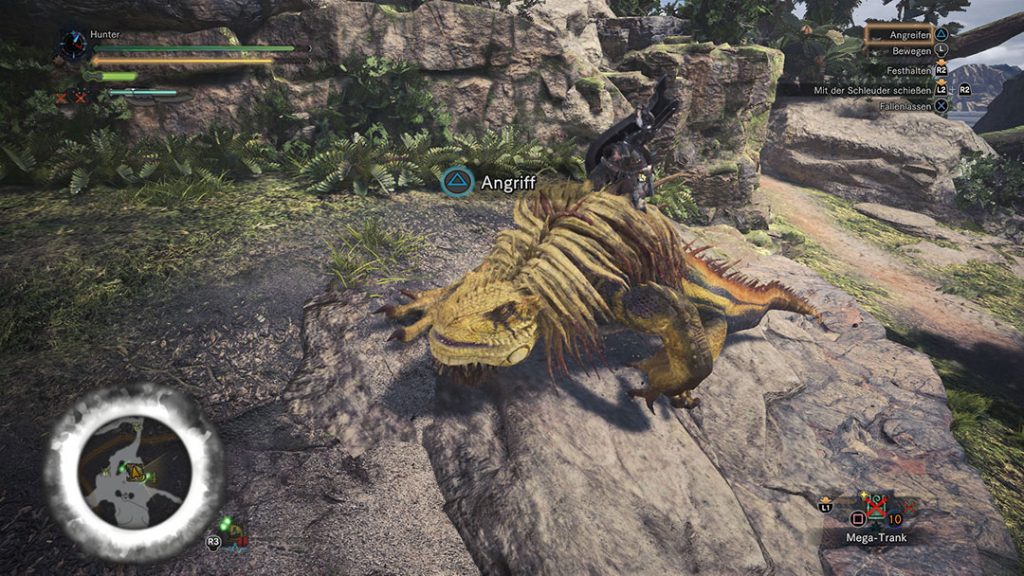
You can ride on a monster and attack it from there. Once you have mounted the creature, it can no longer harm you and you have free reign for attacks.
This is how you mount the monster:
- You must be higher than the monster to get on its back
- The easiest way is to stand on a higher point and jump onto the monster
- When jumping, perform an attack, and you will have the chance to cling to the monster
- As you progress in the game, you can unlock a Master Mounting skill
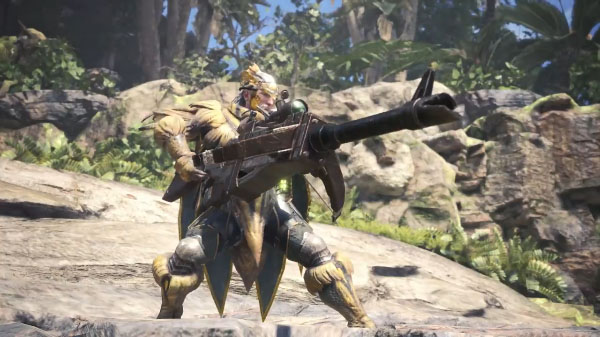
Tip: With the Insect Glaive weapon, it is particularly easy to mount a monster. With this weapon, you can perform jumping attacks.
Tips for Riding Monsters – How to stay in the saddle
When you are on a monster, the border around the mini-map changes colors to warn you of which action the monster will attempt next to throw you off. Watch its movements and the mini-map closely to know when you can attack without hesitation.
- When you ride a monster, you continuously lose stamina. Keep an eye on your stamina bar!
- While on a monster, you can attack it with Triangle. Attack the monster as long as possible, and eventually, you will get the chance for a powerful final blow.
- The mini-map lights up white when the time for the final blow has come. The monster will not just sit idly by but will try to throw you off.
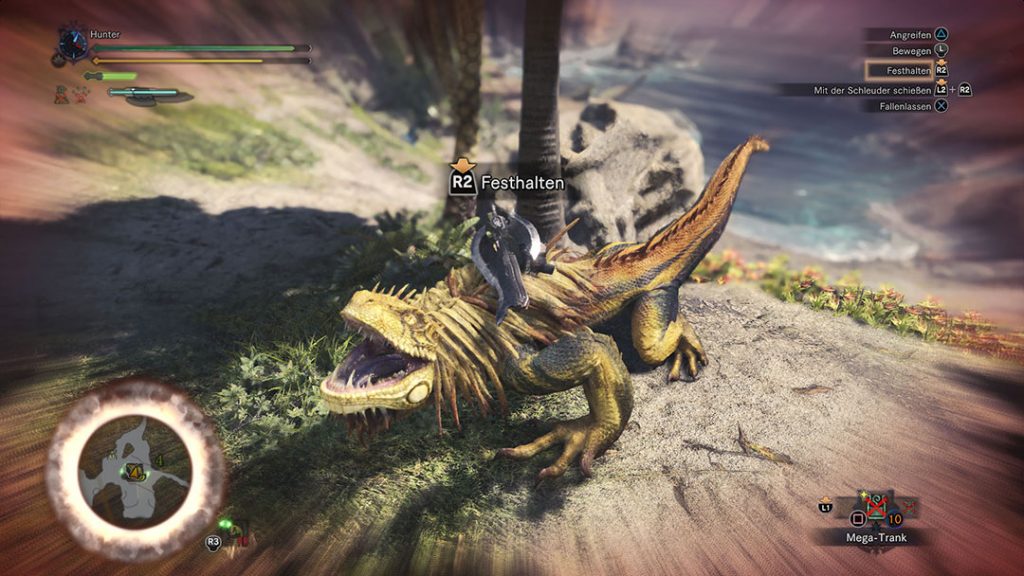
- Press R2 at the right moment to fend off attempts to throw you off. In addition, you can see on the red border of the mini-map when the monster no longer wants to play along.
- The beasts love to use the terrain to throw you off. They will slam against rocks or trees. Avoid these attacks with the left stick!
- You can also recognize these attempts on the mini-map – a red glow with a zoom on your character indicates an attempt to throw you off!
The Interface of Monster Hunter World
The interface – or HUD – will accompany you most of the time in the game. To keep you from losing track, we explain the various symbols on your screen.
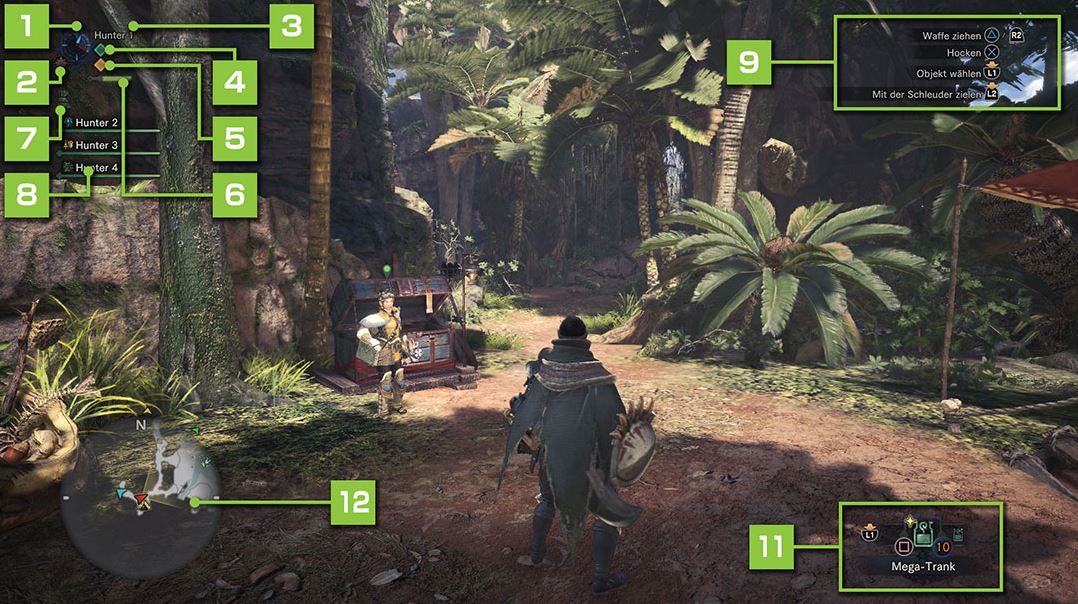
1. Time limit: The blue pointer of the time limit shows the remaining time – when it reaches the red pointer, the time is up, and the quest ends as failed.
2. Day/Night indicator: The sun symbol means day, the moon symbol means night
3. Your name: Your character’s name.
4. Your health: Your character’s health. The display automatically enlarges depending on your combat status. Your character will faint when the green part of the display is completely emptied. If you take damage, a portion of the display remains red and automatically recovers over time.
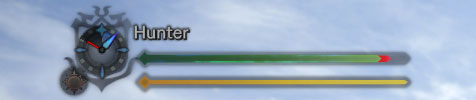
5. Your stamina: Your character’s stamina. The display automatically enlarges depending on your combat status. Your character consumes stamina while sprinting and using certain attacks – and more during a fight than usual. Stamina regenerates over time, but the maximum value of the display decreases over time. You can increase the maximum value of the stamina display by consuming Grilled Steaks and similar items.
6. Melee weapon status: The current sharpness of your weapon – the displayed information depends on the weapon.
7. Special tool status: Here you can find out the current cooldowns of your special tools, so you are informed when you can use them again. Special tools include things like mantles. A cross (x) indicates that the tool cannot currently be used.
8. Quest members: This shows the names and health of other quest members.
9. Controls: This shows the currently available controls.
10. Ranged weapon status: This shows the current ammo type and remaining ammo.
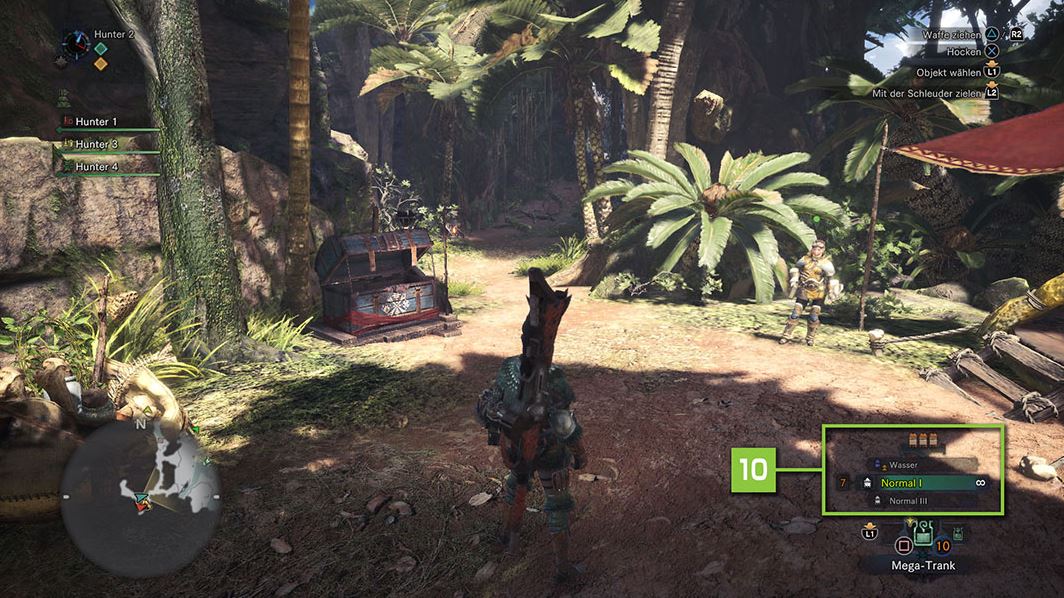
11. Item bar: This item is currently selected.
12. Mini-map: The mini-map shows not only your immediate surroundings and the direction you are looking but also provides information about monsters, gathering points, and other important locations.
All information about the capital of Monster Hunter: World – Astera!
The central base of the hunters in Monster Hunter World. Astera is a camp made up of several ships, where players can play through the story and side quests alone or in groups. This is where the hunters gather to explore the New World and learn to understand its ecological system.
Here you can find everything that a hunter’s heart desires: a forge, various shops for shopping, an arena to compete with other players, and much more.
In this section, you will find an overview of the most important locations in Astera. These are marked with numbers on the map below and explained below the image.
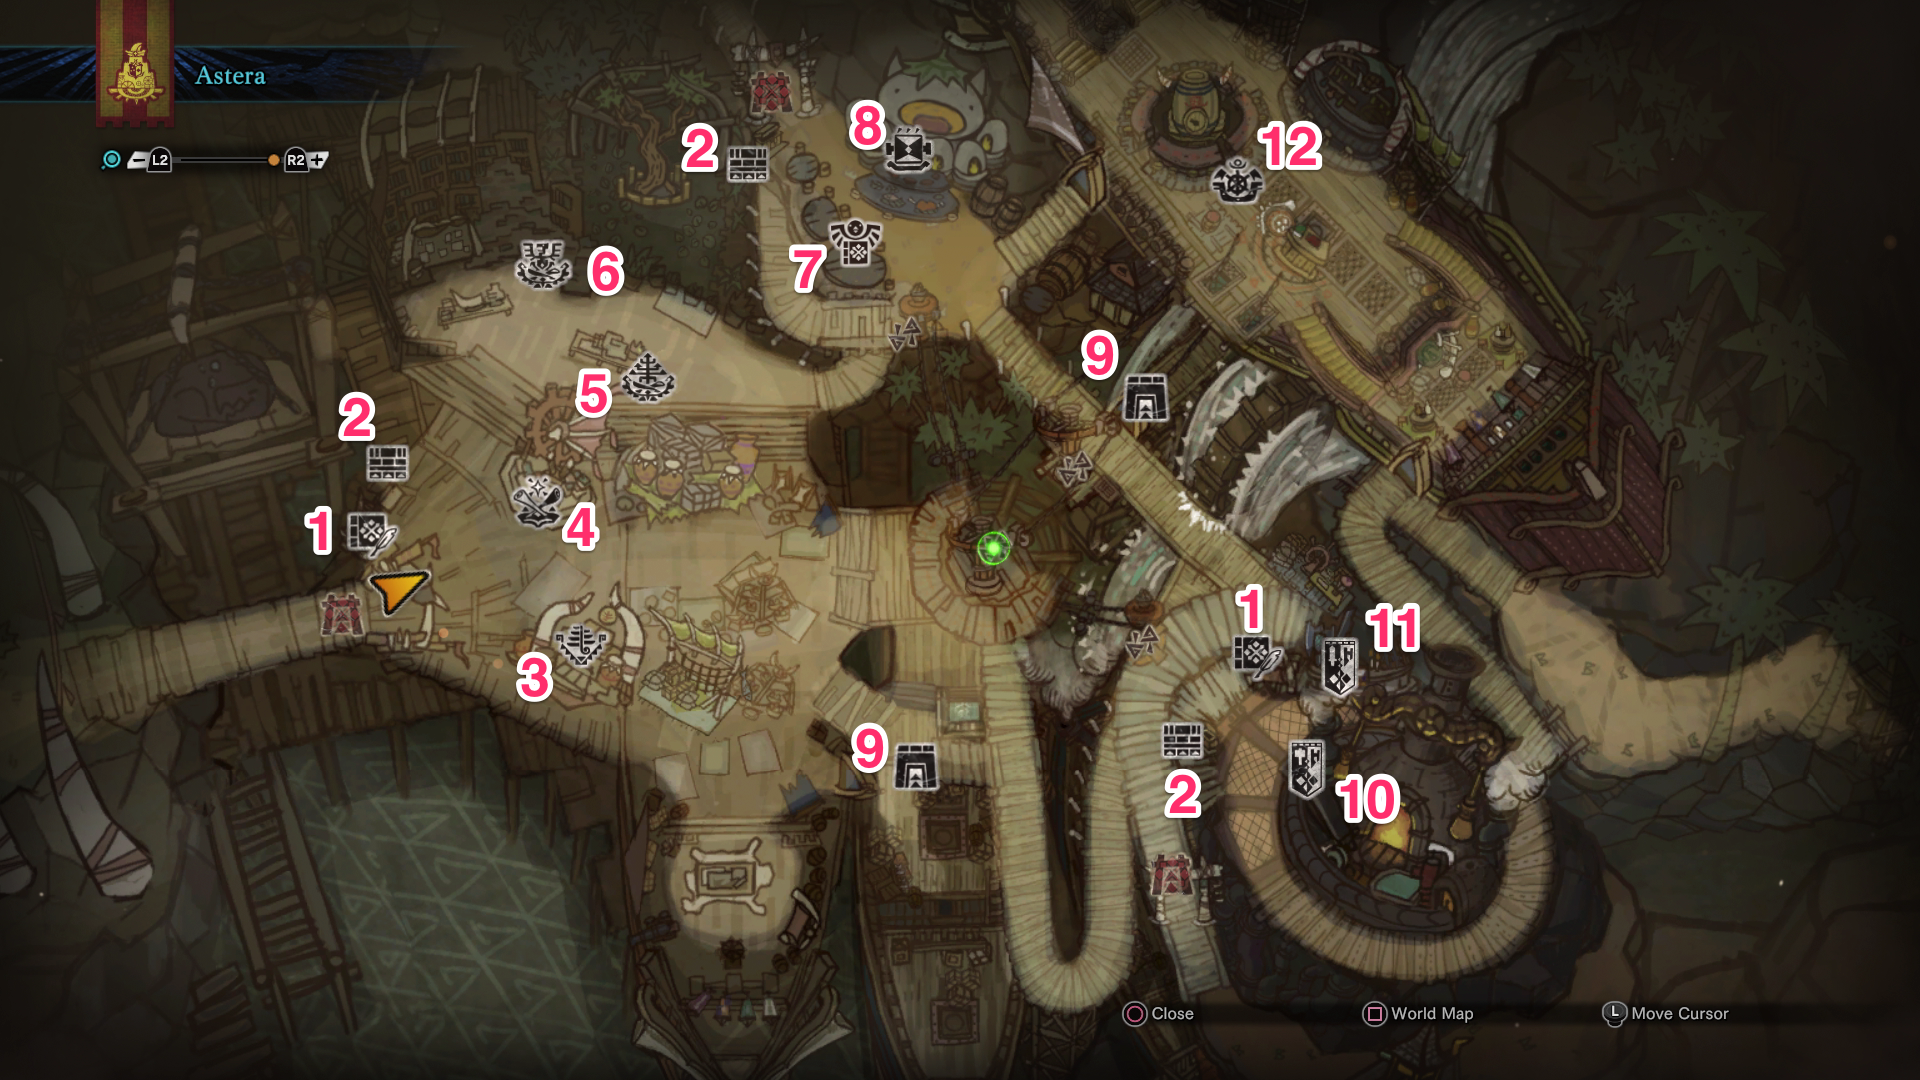
1. Quest Board – The quest board is a place to accept main quests, side quests, and investigations. Here you will find the same quests that can also be picked up from the Wild Expert.
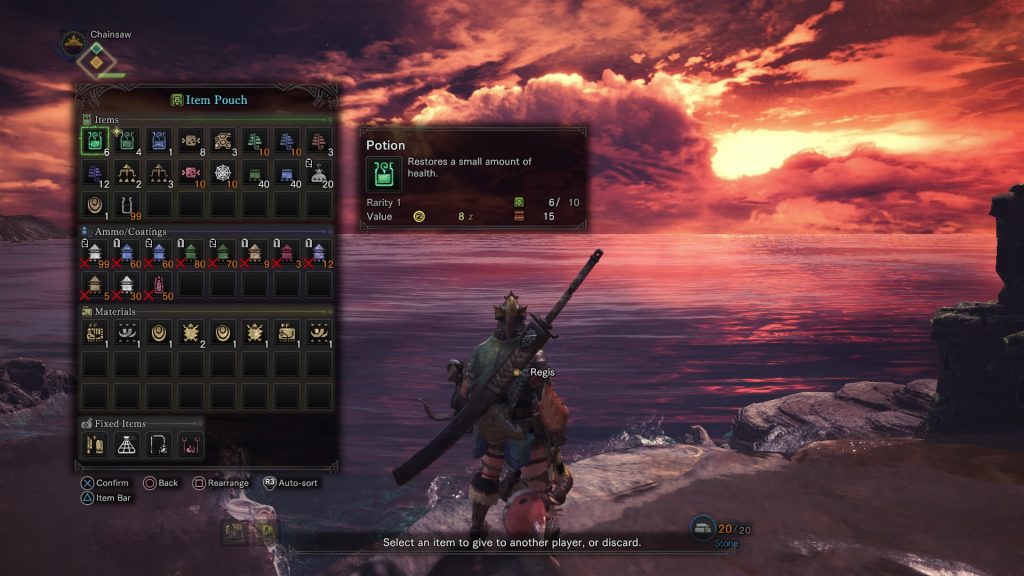
2. Item Box – This is where your equipment and items are stored. The box allows you to quickly access the necessary items outside of your own room or simply empty your inventory before the next hunt.
3. Supply Merchant – At the merchant, you can purchase various items such as healing potions or ammunition. The further you progress in the game, the more consumables you will also find at the merchant.
4. Resource Center – Here is the main point of contact for side quests, investigations, and bounty hunts. These can be completed in groups or alone and bring money and materials as well as upgrade items for your armor. Tip: Bounty hunts are integrated into the quests and can be completed in one go. It is always advisable to stop by here before a hunt and accept new bounty hunts
5. Botanical Research – Missing large quantities of a specific ingredient for a potion? Here you can have NPCs grow plants like mushrooms! You must have played for a few hours to unlock the growing feature. Initially, a limited selection is available, but this area of Astera can be further expanded to obtain more items.
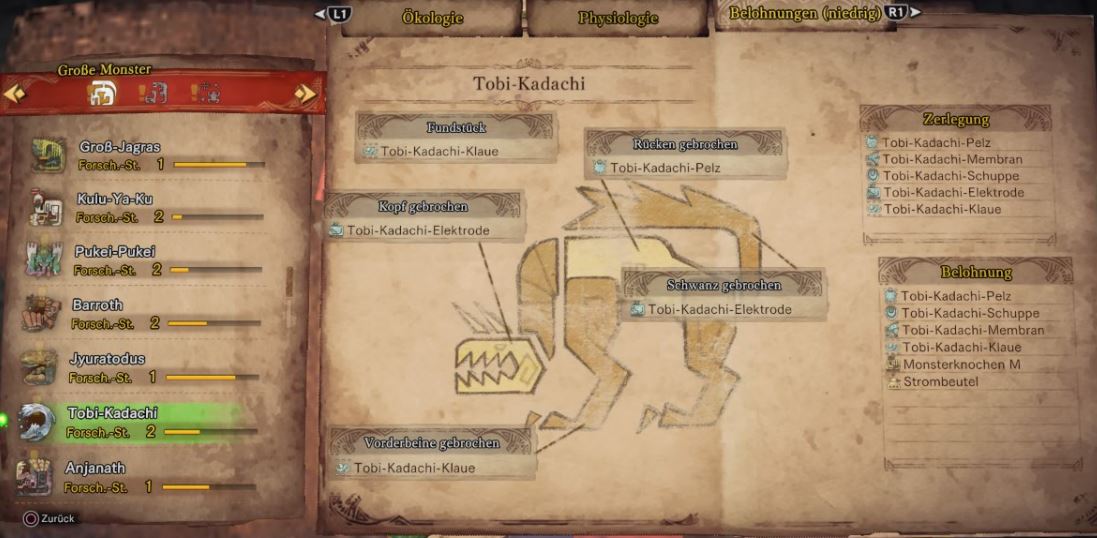
6. Ecology Center – The bestiary of MHW. Information gathered about monsters during hunts is collected and processed here. This gives you access to detailed information about the behavior of monsters, their weaknesses, and their potential loot!
7. Wild Expert – At her, you can pick up quests, and she usually sits in the canteen.
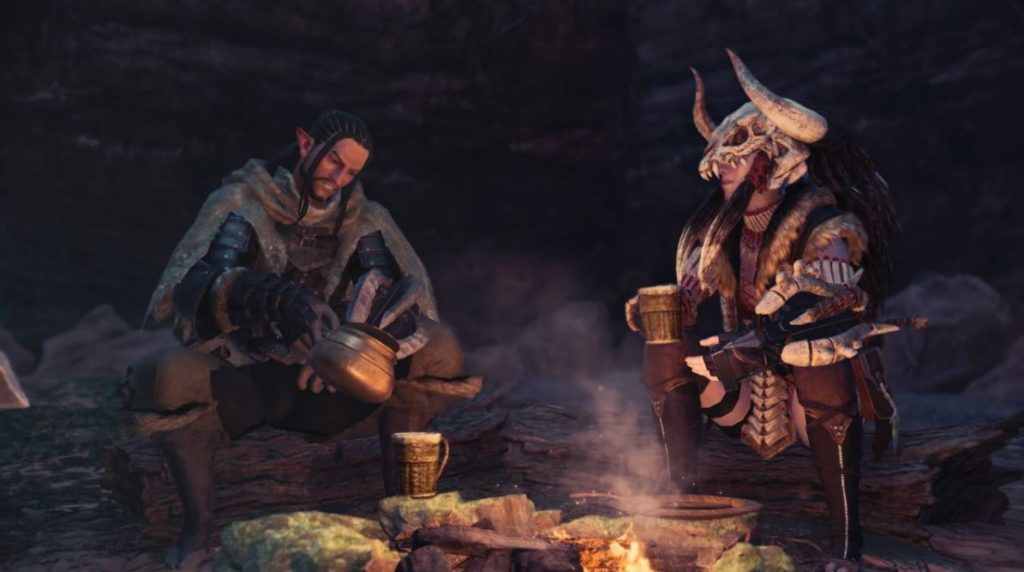
8. Canteen – The dishes in the canteen provide you and the Palico bonuses such as additional HP and stamina. You should definitely stop by the canteen and eat something before a hunt or expedition. Through various quests, you can later expand and improve the food offer even further. Tip: You also have access to a canteen in the camp if you have already set off for the quest.
9. Quarters – The quarters are your own personal space. Here you can manage your inventory and the Palico. Furthermore, your butler Palico can take you to the training area upon request, where you can extensively test the vast arsenal of weapons from Monster Hunter World.
10. Forge – The heart and soul of the Monster Hunter games. Here you can process your gathered materials and monster parts into weapons and armor. You can also craft new equipment. Existing equipment can also receive upgrades and enhancements.
11. Armor Merchant – At the merchant, you can buy the basic types of weapons and armor. These can be further upgraded at the forge. The armor merchant is located directly in the forge!
12. Gathering Hub – Here you will find the online multiplayer area. Up to 16 players can stay in this area and interact with each other. Here you can also join a squad (guild), allowing up to 50 players.
Tip: There are lifts in Astera, which quickly take you to all important points and floors.

Online Multiplayer in Monster Hunter World – How does the coop work?
In Monster Hunter World, you can hunt alone or as part of a group of up to 4 players. The strength of the monsters scales with the number of group members.
The online multiplayer feature in Monster Hunter World is not very intuitive and is cumbersome. You can only start with multiplayer once you have progressed far enough in the story to unlock the Gathering Hub. Before you start playing, you should also set your session to “Online” on the start screen.
Gathering Hub: The place where you meet other players
The Gathering Hub is a separate area within Astera. This is the only place outside of quests where you can see other players. A total of 16 players can fit in a session at the same time.
Here you can utilize various online features of Monster Hunter World. Through a chat, emotes, and gestures, you can exchange with others. There is also a canteen, quest boards, and item boxes.
You can also find in the Gathering Hub:
- The Squad Switch – The central multiplayer element of Monster Hunter: World. Here you can see which groups you have joined or create your own group. Members of a group can send each other messages. New members can only be invited by the team leader. Additionally, you can form a squad of up to 50 players here.
- The Barrel – At the barrel, you can pass the time arm-wrestling until that one colleague shows up who is always late.
- The Arena – In the arena, you can take down monsters in a small space with the group and try to set records.
Creating or joining quests for multiplayer
If you want to go hunting in a group, you should keep the following in mind:
- Quest Leadership: Create a multiplayer hunt
As soon as you accept a quest, you can create a lobby. Here you can wait for hunters who want to follow the same quest. However, it is also possible to invite friends directly to the quest.
- Joining another player’s quest
You can see at the quest board or with the Wild Expert if anyone is currently on a quest. If you want to join the quest, you just need to click on it, and you can set off together. If you want to complete a main quest together, you need to be at least at the same stage. That means you cannot join a story quest that is in the last chapter if you are still at the beginning.
- Everyone has time to prepare and must agree to the start of the quest
If you have formed a group and jointly accepted a quest, you still have time to prepare. All team members must indicate that they are ready to depart. Only then does the quest start. The quest leader can also start the quest when not everyone has indicated that they are ready.
- Drop-In mode via the SOS flare
You can fire an SOS flare during the quest. This marks your current location as a coop zone, and other players can drop in to join. The strength of the monsters will directly adjust to the number of players.
- Crossplay between PS4, PC, and Xbox One is NOT possible. Only players on the same platform can play together.
- You can read here how to play expeditions in Monster Hunter: World in multiplayer
The following video shows you the multiplayer features and how to play together in coop:
The Quest System: What tasks are there and where can you get them?
Primarily, you will be hunting monsters to slay or capture. However, Monster Hunter: World is filled with side quests, investigations, and mini-missions that you can complete along the way.
Monster Hunter World: Catching Monsters – Here’s how
If you really want to complete all quests, you should plan a lot of time. For most quests, you can go directly to the quest board, which is located in various places in Astera. However, some quests can only be obtained by speaking to the right people.
Quests in Monster Hunter World are divided into 5 categories. This section explains the difference between the missions and how you can accept quests.
Main Quests
Main quests guide you through the storyline of the game and are hardly missable. The starting point or the person giving you a main quest is always marked with a thick, red symbol. These quests unlock new maps and bring new monsters into play. Additionally, you can unlock new equipment and new content here. Main quests are often tied to tutorials. These quests are bound by a time limit of 50 minutes during which you must complete the quest.
Side Missions
Side missions are structured like main quests and marked with a question mark over the heads of NPCs. If you talk to the people, you can then take the quest at the quest board. These missions have a timer of 50 minutes, just like main quests. Through these quests, you can obtain additional resources and rewards.
Investigations of the Resource Center
The Resource Center has a number of mini-quests for you. When you are out in the field, you will find things like footprints, scales, feathers, or scratch marks from monsters. If you investigate these, you will earn research points and unlock new investigation quests. At the Resource Center, you can choose the small quests and complete them parallel to other missions or expeditions.
These quests consist of tasks like “Kill 10 specific monsters of a species” or “Catch a specific monster.” Investigations are also started through the quest board. Through the investigations, you will receive additional and often rare rewards and items.

Bounty Hunts
Bounty hunts are structured like investigation quests. You will receive smaller tasks that you can easily complete along the way. These consist of things like “Collect 10 mushrooms” or “Kill 20 smaller monsters.”
When you complete the bounty hunts, you get to keep all the items you collected. Whenever you have completed a bounty hunt, be sure to go to the Resource Center! Through the bounty hunts, you also receive rewards that vary and depend on the difficulty level.
For your efforts, you will receive:
- Money
- Research points
- Armor spheres – With armor spheres, you can improve the defensive values of your armor at the forge.
- Resources
Expeditions
Expeditions are the only way to explore the maps without a time limit! Expeditions are also the only quests that you CANNOT complete in multiplayer. Expeditions have no target and you cannot fail.
You can use expeditions to explore areas, gather resources, practice, and simply experiment.
How and where to start the different quests is explained in the video
This video will guide you through the different quest options. Charles explains where to get the quests and how to start them.
Items: The consumable items of Monster Hunter World
The possibilities for influencing the course of battle are diverse and offer room for creativity. Besides the obligatory healing items, you have access to various other tools:
- Traps in various designs for capturing monsters
- Bombs in different variants to deal additional damage
- Throwing items with additional effects like paralysis or poison
- Utility items like the binoculars and whetstone to sharpen your weapons
Treasure lies literally on the ground in Monster Hunter: World. Almost all utensils can be found in the wild. A basic supply of items is always provided by the supply master at the trading post in Astera for you.
The variety of items allows for many tactical tricks:
- Catch a monster with a Shock Trap before placing Barrel Bombs. A guaranteed explosive experience.
- Fire bombs in combination with paralysis arrows or a paralysis frog can deal significant damage to monsters.
Play around with the combinations and develop tactics that are tailored specifically to the monster you are currently targeting.
The auto-crafting of items – Here’s how
The auto-crafting feature is extremely useful – when you are on your way to the monster during downtime, you can gather resources to replenish your item stock – without having to navigate through annoying menus.
This is how to use auto-crafting:
- Open your menu with the Options button and go to the Crafting List
- Now you will find items that can be crafted.
- If you check a box next to an item, it will be crafted automatically as soon as you have gathered all the necessary materials. If the maximum capacity of an item is reached, it will NOT be crafted.
- So, if you find materials in the wild that can be crafted into an item, this will happen automatically
The function is perfect for the following items:
- Healing items like potions and mega potions
- Ammunition for your ranged weapons
- Bombs of all kinds
- Items that cause negative status effects
Over time, you will gain access to more items that you can craft automatically.
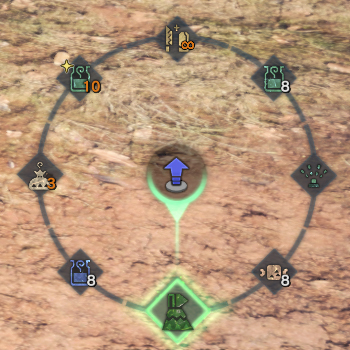
Using the pie menus – Customize access to items
In the bottom right of the screen, you have the option to scroll through consumables using the left and right arrow keys. There is also a circular menu, represented in the game as a pie. This function is extremely practical. The pure item bar is unstructured, and sometimes it’s hard to find the desired item at first glance.
This is how to access the pie menu:
- Hold the L1 button to select from four different circle menus.
- The menus are activated with one of the arrow keys.
- How you assign items to your circle menus is up to you and can be set in the options.
You can categorize the pie menus thematically like this:
- A radial menu for healing items
- One for traps / bombs
- Another radial menu for utility items like whetstones and binoculars
The Weapons of Monster Hunter World
A hunter is practically defenseless without weapons. This is especially true for Monster Hunter World. There are no magical skills or abilities – in Monster Hunter World it is: no weapon, no chance!
There are 14 different weapon classes in Monster Hunter World. They have individual abilities and combinations.
- Sword and Shield (beginner-friendly)
- Hammer
- Hunting Horn
- Spear
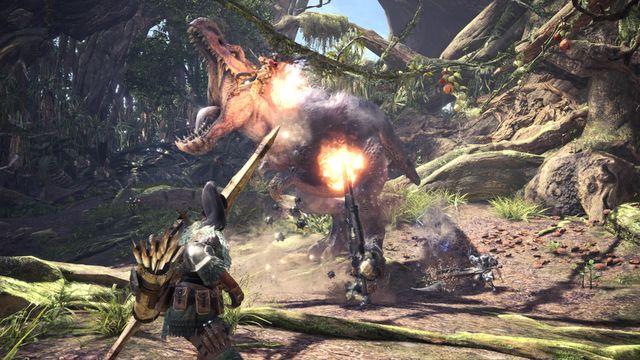
- Gunlance
- Switch Axe
- Charge Blade
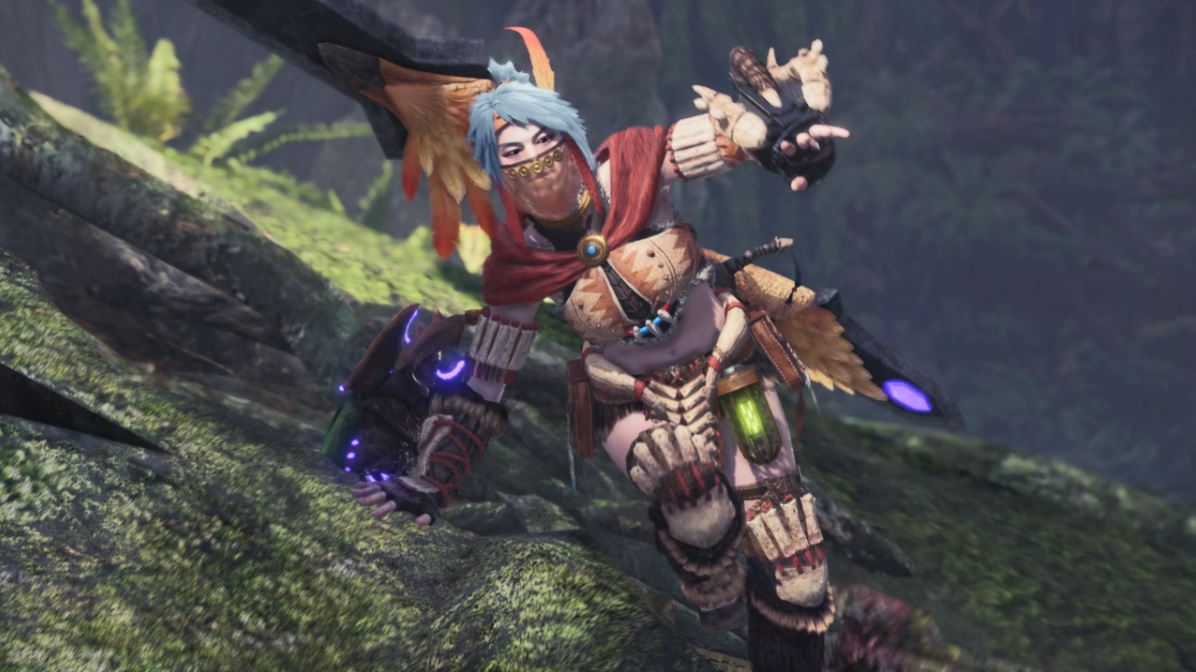
- Insect Glaive
- Bow
- Light Bowgun
- Heavy Bowgun
- Great Sword
- Dual Blades (beginner-friendly)
- Long Sword
No weapon is like the other in terms of gameplay feel. They also have various capabilities:
- With Dual Blades, you can activate a Demon Mode that enhances your attacks but also eats away at your stamina bar.
- With the Insect Glaive, you can shoot an insect at the opponent, granting you various bonuses depending on where you hit. One thing is common to all weapons: if you master them perfectly, you can instill fear in any enemy with any weapon.
Every weapon can be improved and expanded in many ways. You can add an element or increase your critical hit chance. To improve your weapons, you must slay monsters and collect their remains, which then serve as the basis for weapon enhancements.
The differences among the 14 weapon classes explained in the video
Here you can see the weapon classes in the video. Charles explains in the video in German what their advantages and disadvantages are and what you can do with the weapons.
You can practice with every weapon in the training area
If you don’t know which weapon class you want to start with, be sure to visit the training area. This is accessible through your butler Palico in your room. In the training area, you can test all weapons.
Practical: The combos of each individual weapon will be displayed and can be practiced at your leisure.
Beginner-friendly weapons
There are weapon classes that are particularly friendly for beginners. Our recommendation:
- Sword and Shield: Beginners will feel comfortable with the combination of sword and shield as you can both attack and block. Furthermore, you do not need to put away your weapon to consume a healing potion.
- Dual Blades: The Dual Blades are also beginner-friendly. With these, you can quickly dance around your opponents and land many hits. You also don’t have to remember combos. You just have to remember which button activates the Demon Mode that increases your attack. The downside of the Dual Blades is the frequent use of the whetstone, which temporarily takes you out of combat. Additionally, your stamina drains faster while in Demon Mode.

Weapon Affinities in Monster Hunter World
Affinity roughly defines how much damage your weapon does. Affinity is expressed in percentage:
- An affinity of -100% means that your weapon always does less damage. A disadvantage that is offset by various advantages such as a weapon element or status changes.
- If the affinity is 100%, your weapon will always deal more damage – as high affinity is very valuable, it may come with certain disadvantages.
- If your weapon’s affinity is 50%, then on average every second hit will deal more damage.
Always consider the overall package of your weapon – there is no weapon that only brings advantages and destroys everything. You must weigh which weapon is the best choice depending on the situation.
In general, you can remember: If the affinity is in the negative range, that’s bad. If the affinity is in the high positive range, that’s good.
The Crafting System of Monster Hunter: World
Since your hero has no skills, abilities, or special bonuses, you draw 100% of your strength from your equipment. Clothes make the man, after all. You should continuously improve your equipment. To improve your weapons and armor, you must loot slain monsters, gather resources, and invest money.
With hunting trophies like teeth, tails, or hides, you can craft armor or upgrade weapons. To do this, visit the forge in Astera. In addition to monster utensils, you will need research points, which you can earn by completing many quests. Following tracks in the wild also grants you research points.
Elements protect against certain monsters
- Equip your weapons with enhancements that add an element. Many monsters are weak against certain elements.
- Build armor sets that offer strengths against certain elements. Many opponents can attack with devastating elemental attacks. So make sure you are equipped against these.
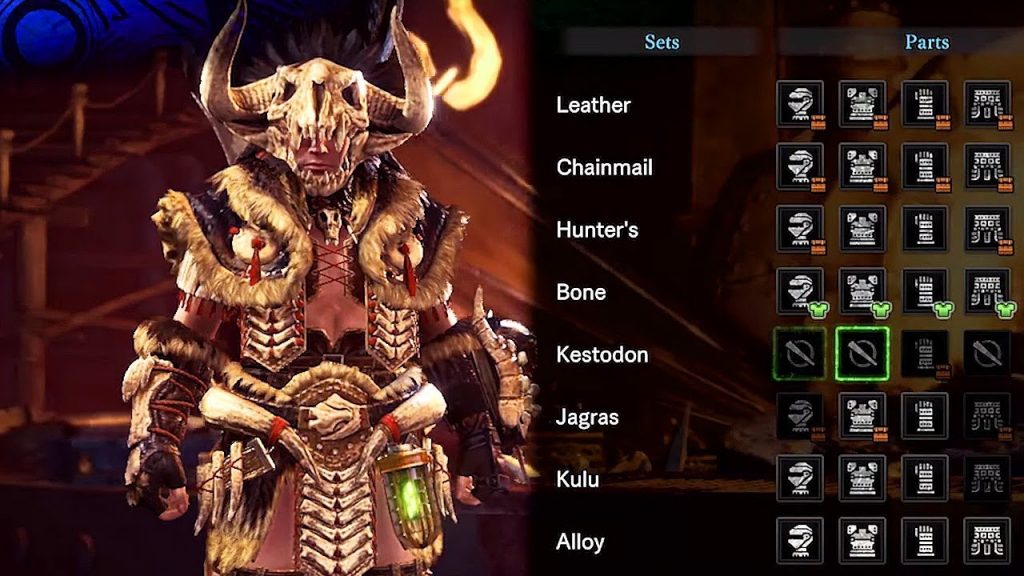
At the beginning, you will have only a few options. However, as soon as you have a new monster material, a new set will be unlocked at the forge. Now you can see what you can craft from a specific monster and what you need for it.
Armor spheres enhance defense
You can increase the defensive values of your armor with armor spheres. You primarily receive these through bounty hunts. Don’t put all your armor spheres into one piece of equipment, as the effect decreases with each level.
Distribute the spheres across your armor parts to maximize the gain. Later, you will find armor spheres that grant an increased bonus to your defensive values.
The Combat System of Monster Hunter World
You fight alone or in a group of up to four people. The game is controlled from a third-person perspective and offers all the features that an action game must have.
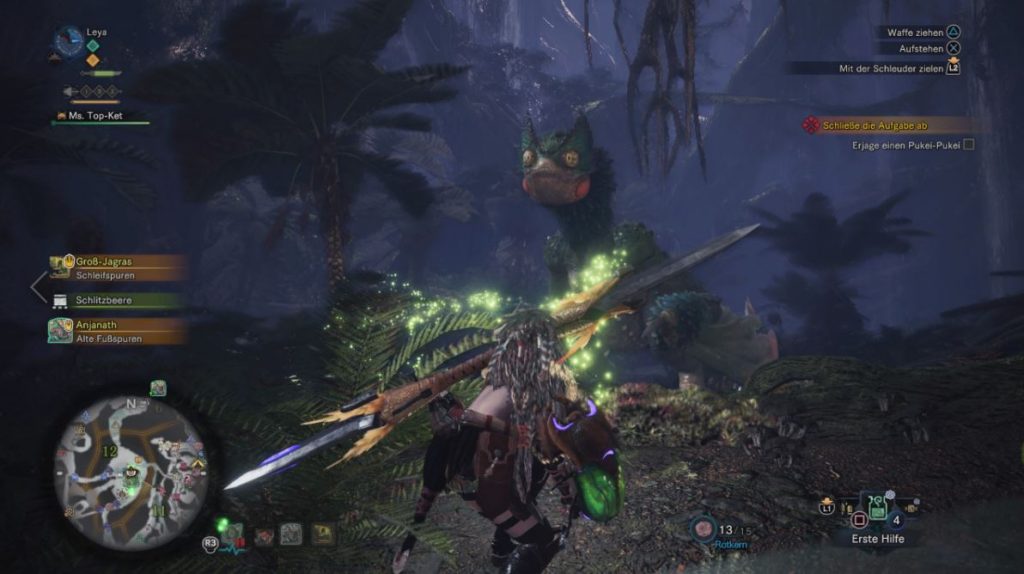
Throughout the game, you will hunt many monsters that have different attacks and exhibit individual strengths and weaknesses. You will spot the target monster using your scout flies. These are small, green-glowing creatures that reliably follow the monster’s trail.
Once you have confronted the beast, the battle begins. The fights can last a long time – this depends on your equipment and the toughness of the opponent. After you have dealt a certain amount of damage, the monster will flee – time for you to regenerate health and sharpen your weapons using the whetstone.
Monsters do not have health bars: Here’s how to see how damaged the opponent is
Monsters show you quite clearly if they are injured. But you need to know the signs. Observe your opponent and ask yourself these questions:
- Is the opponent starting to limp?
- Were you able to even sever a body part?
- Does the opponent’s skin change?
- Is the monster panting?
- Does it want to flee from the fight?
- Is it laying down to rest?
Be creative in monster hunting
How you approach fights is entirely up to your imagination. You can draw on a variety of tools to decide a battle in your favor. Especially the interaction with the environment creates immersion.
Do you want to hide behind a tree to throw a desperately needed healing potion? Forget it! A hefty creature will simply knock the tree over and you along with it.
Tips for monster combat:
- You can use the terrain to your advantage! Overhanging stones, poisonous plants, or frogs that paralyze enemies – those who observe the environment will surely find a tactical trick to take down the opponent faster.
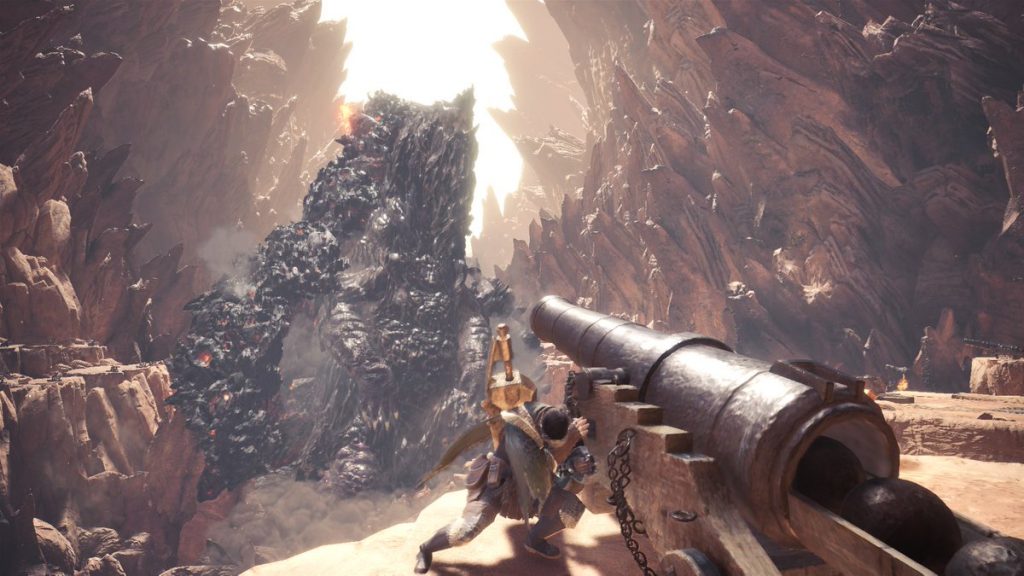
- Draw even tougher opponents for assistance! There are large foes that treat your current target like a toy. However, be careful not to get caught in the crossfire. That won’t end well for you. But you can safely observe the events from a distance.
- Use items to weaken the opponent! With traps and bombs, you can seriously injure monsters if you do it right. Always check your inventory for items that are suitable for the monster. You can also use bait if you want to lure the creature to a specific spot.
Dodging is more important than attacking – Learn the monster’s attack patterns
The most important rule in monster combat: Dodging is more important than attacking. Your opponents can often K.O. you with their strong attacks in a single blow. If you faint, it costs you valuable time. If you faint too often, it costs you the mission.
To learn when to dodge and when you can attack, you need to learn the attack patterns of the monsters. You can achieve this by observing the opponents closely and checking your encyclopedia.
This guide was created in collaboration with authors Robert Albrecht and Echo Mirage. The German YouTuber Charles, with whom we have worked together several times, provided us with videos for the guide.
More useful guides and tips for Monster Hunter World:
- How to quickly get Zenny, the currency of Monster Hunter World
- Anjanath Guide: How to defeat the beast!
- Monster Hunter World Monster List with Loot and Habitat
- Monster Hunter World: All High Rank Armors

Your opinion is important to us!
Do you like the article? Then let us know!
Comments