We have compiled a list of all the new monsters in Monster Hunter World: Iceborne and summarized what is known about them so far. This includes loot, areas, weaknesses, elements, and combat tips.
Monster Hunter World: Iceborne is the first major expansion of the game and introduces a new set of monsters. The most important thing for a clever hunter is preparation.
Notice: The list is constantly being updated. Information about new DLC monsters will be added as soon as it is available.
Update January 7: A few final items have been added.
In the monster list you can see:
- Where you can find the creatures.
- What loot they drop.
- Which elements and statuses they are weak against.
- A brief description of the monsters, where you can also find small tips for fighting against them.
Are you also looking for all the monsters from the base version? Here we have for you all monsters from the base game of Monster Hunter World.
How many new monsters are there in Iceborne? So far, 29 large and 4 small new monsters are known.
Large new monsters in Monster Hunter World: Iceborne
These are the large monsters you will encounter in Monster Hunter World: Iceborne. Some of them will only appear to you later in the guiding lands.
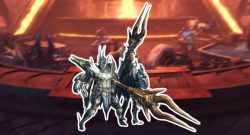
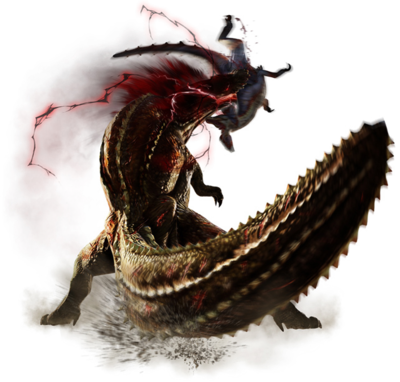
Alatreon
- Type: Elder Dragon
- Habitat: unknown
- Rewards:
- Alatreon Carapace
- Alatreon Pallium
- Alatreon Crusher
- Alatreon Wings of Terror
- Alatreon Tail of Terror
- Azure Dragon Godstone
- Sky Ruler
- Great Elder Dragon Jewel
- Elemental Weaknesses:
- Fire 0
- Water 2
- Thunder 1
- Ice 3
- Dragon 1
- Status Weaknesses:
- Poison 1
- Sleep 1
- Paralysis 1
- Explosion 1
- Stun 1
Description: Alatreon is known as a symbol of destruction. With its horns, it can control the elements. However, all records of it have been burned.
Combat Tip: Alatreon is a powerful dragon with strong attacks. You cannot evade its strongest attack, a shockwave, but you can mitigate it. To do this, you must break its horns with effective elemental attacks. While it is executing the attack, you should heal. Additionally, you should cover the elements Dragon, Ice, and Fire in a group, as Alatreon switches between them.
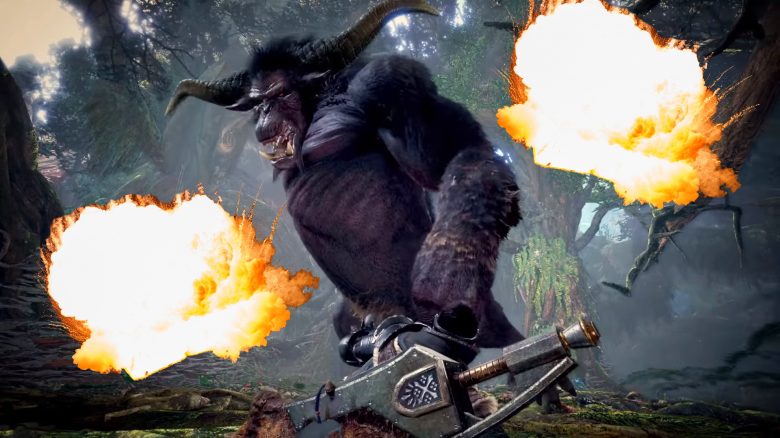
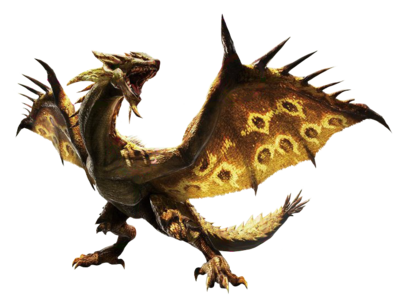
Banbaro
- Type: Fighting Wyvern
- Habitat: Home of the Elders, Coral Highlands, Frost Islands, Valley of Despair, Ancient Forest, Wildspire Waste
- Resources:
- Banbaro Great Horn
- Banbaro Cortex
- Banbaro Whip
- Banbaro Spine
- Large Wyvern Gem
- Sprint Extract
- Resource Carves:
- Grim Dragon Bone
- Ancient Great Horn
- Hardened Great Horn (hardened)
- Spiritvein Gem Shard (hardened)
- Spiritvein Dragon Bone (hardened)
- Element Weaknesses:
- Fire 2
- Water 0
- Thunder 1
- Ice 0
- Dragon 3
- Status Weaknesses:
- Poison 2
- Sleep 2
- Paralysis 2
- Explosion 3
- Stun 3
Description: Banbaros uproot trees with their twin horns and dig up earth. In battle, they use their great physical strength and charge at opponents with branches or stones.
Combat Tip: Banbaros are rather sluggish, which is why you can keep them in check with quick attacks. Attacks on their legs are effective to prevent their charge attacks. These are also one of their weak points, along with the head. The tail is severable.
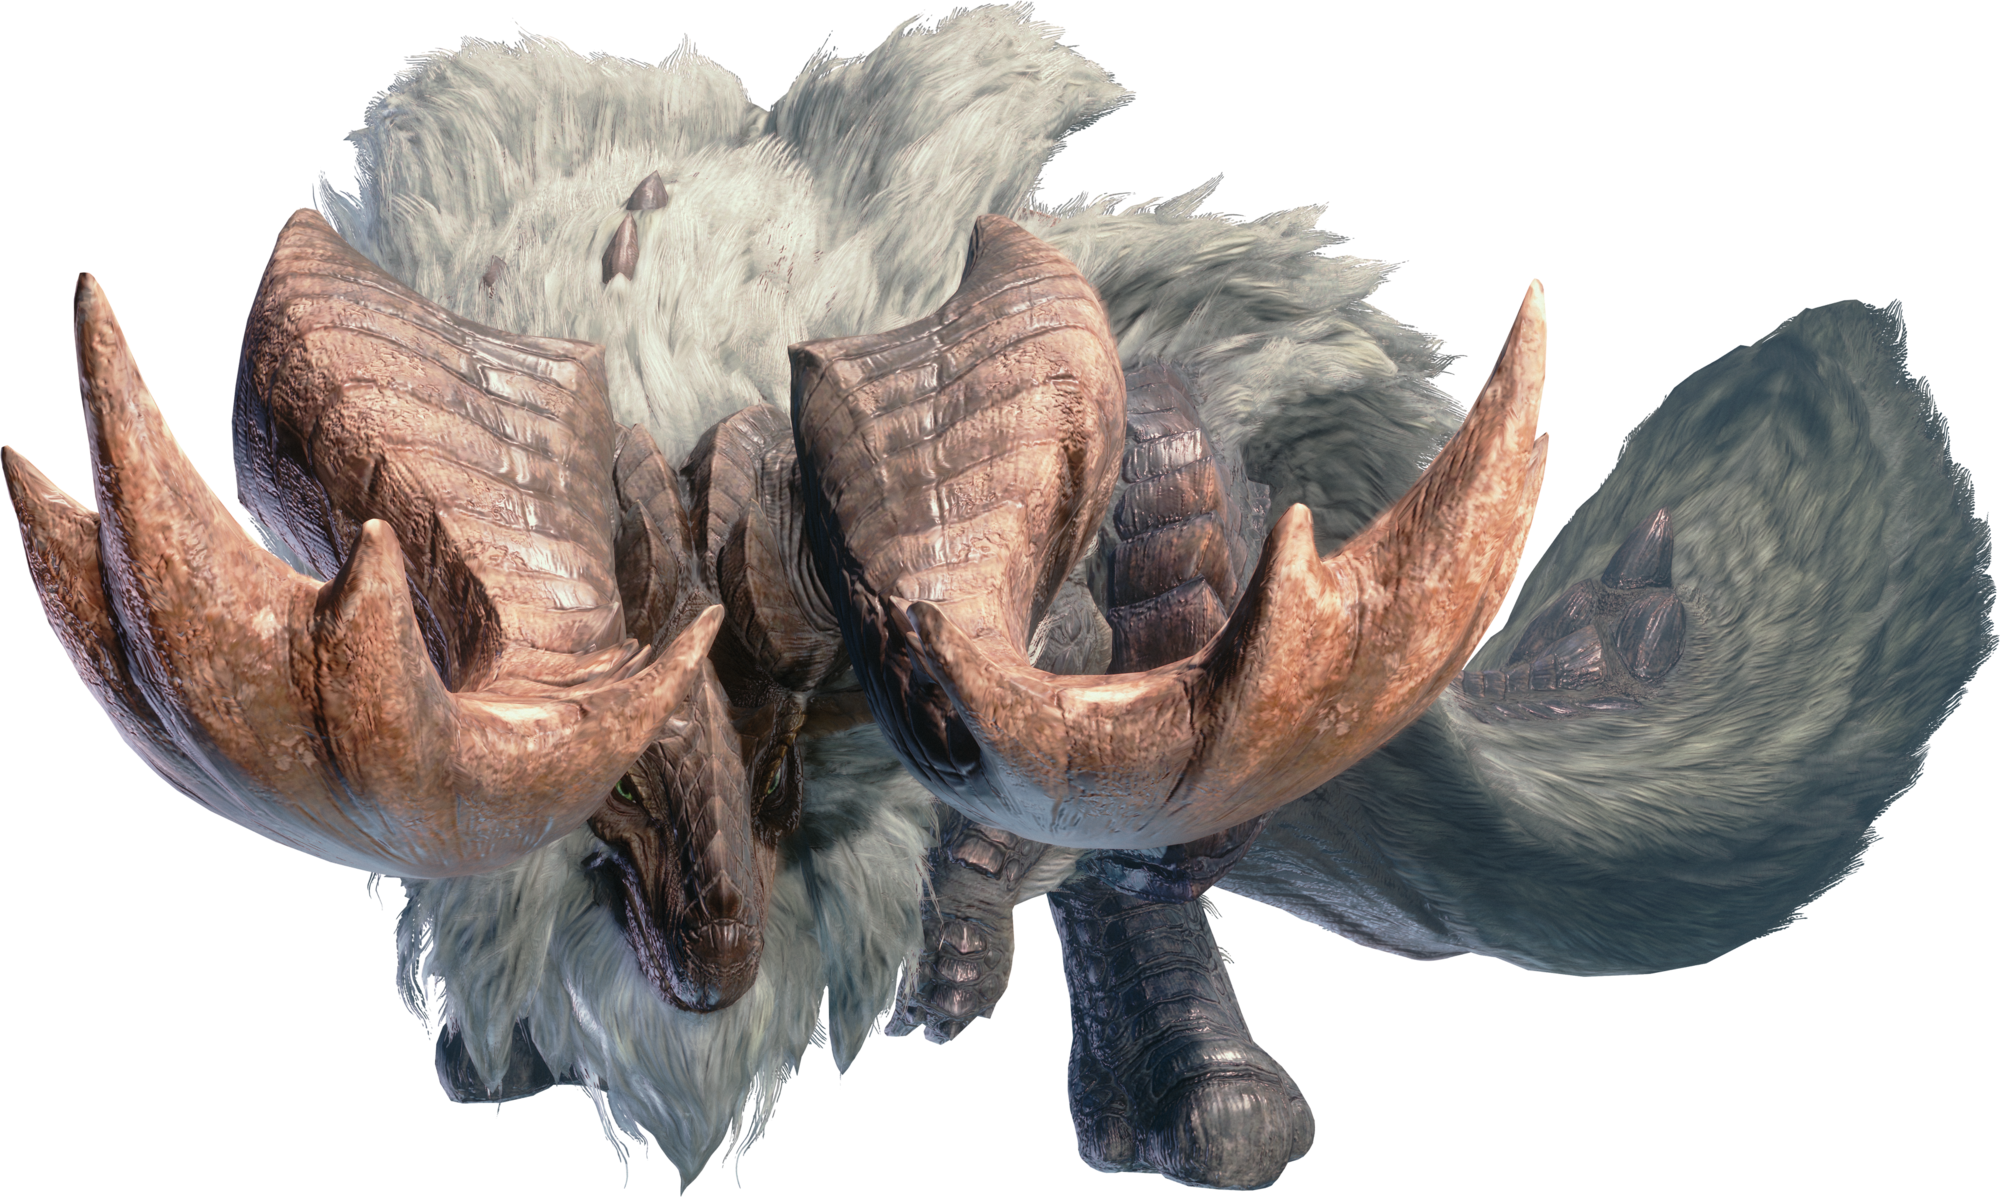
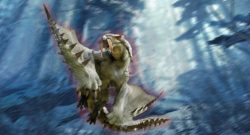
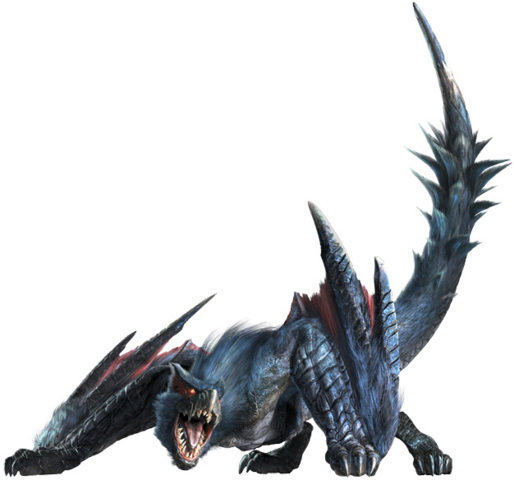
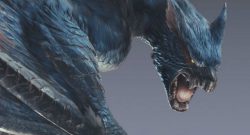
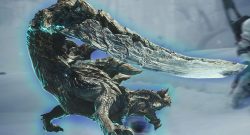
Barioth

- Type: Flying Wyvern
- Habitat: Frost Islands
- Loot:
- Barioth Thick Fur
- Barioth Hard Claw
- Barioth Cortex
- Barioth Great Spike
- Barioth Whip
- Cryo Sack
- Loot Recommendations:
- Heavy Dragonbone
- Cold-Blooded Icefang
- Spiritvein Steelbone (hardened)
- Hardened Icefang (hardened)
- Spiritvein Gem (hardened)
- Element Weaknesses:
- Fire 3
- Water 0
- Thunder 2
- Ice 0
- Dragon 1
- Status Weaknesses:
- Poison 2
- Sleep 2
- Paralysis 2
- Explosion 2
- Stun 2
Description: Barioth has large fangs and moves swiftly over ice. They use their great speed to deal significant damage with their fangs and tail.
Combat Tip: If you manage to break the beak or the forelimbs, you will restrict Barioth’s mobility. The best way to penetrate its thick hide is with fire attacks to the head, arms, or tail, which is severable.
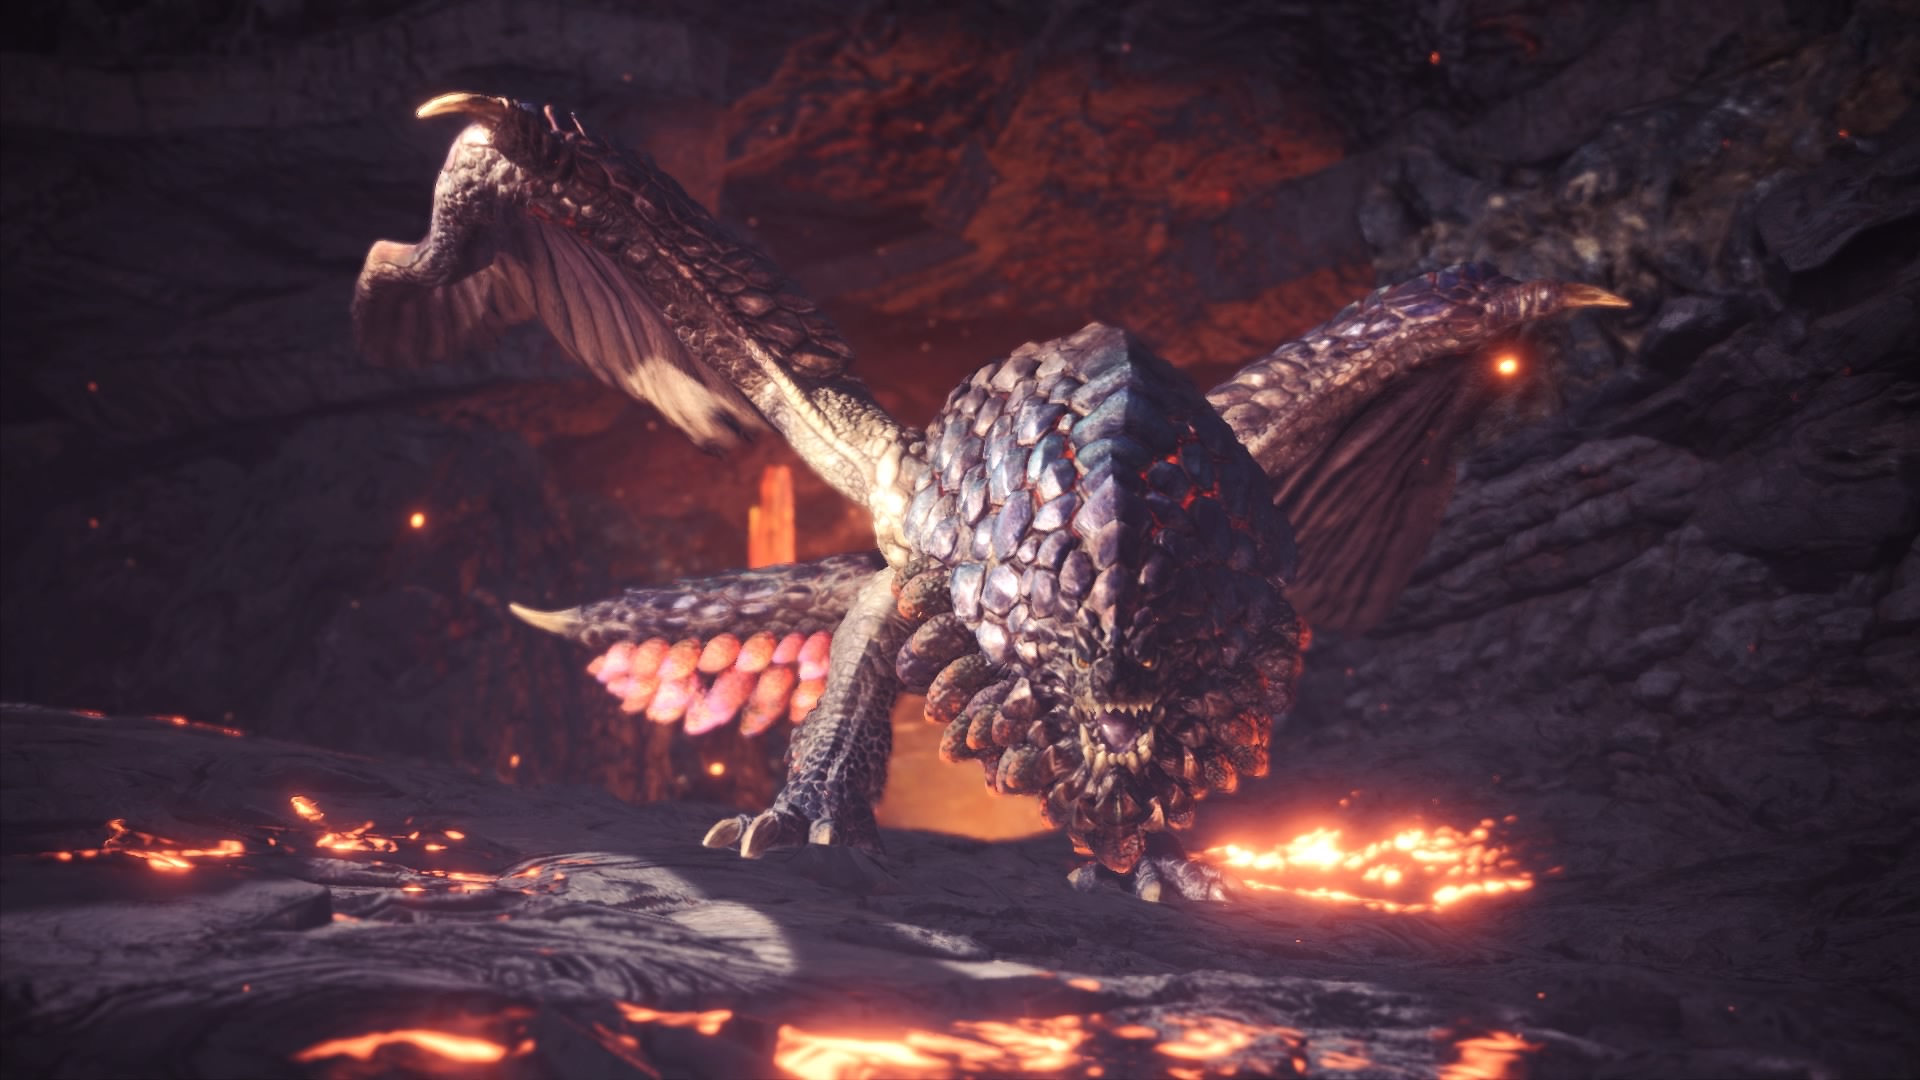
Beotodus
- Type: Fish Wyvern
- Habitat: Frost Islands
- Prey:
- Beotodus Greatfin
- Beotodus Hardthorn
- Beotodus Cortex
- Beotodus Shard
- Beotodus Hardthorn
- Beotodus Greatfin
- Large Wyvern Gem
- Cryo Sac
- Elemental Weaknesses:
- Fire 3
- Water 1
- Thunder 2
- Ice 0
- Dragon 0
- Status Weaknesses:
- Poison 2
- Sleep 2
- Paralysis 2
- Explosion 3
- Stun 2
Description: Beotodus are fish wyverns that swim in the snow. They benefit from their wedge-shaped head. Most of the time, they are covered in ice or snow and throw it around.
Battle Tip: If you manage to free the Beotodus from the snow, it will come to the surface. This can be done with your weapon, the grappling hook, or scream capsules. It is highly effective to aim for its legs whenever the opportunity arises. The head and tail are also vulnerable.
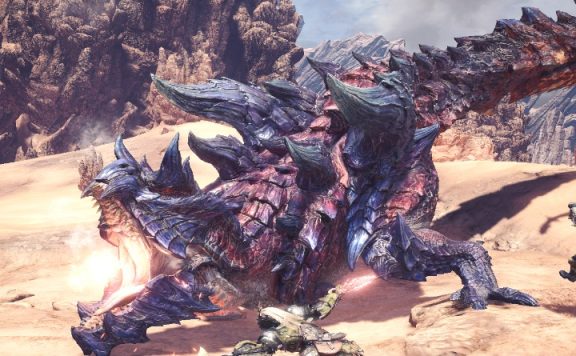
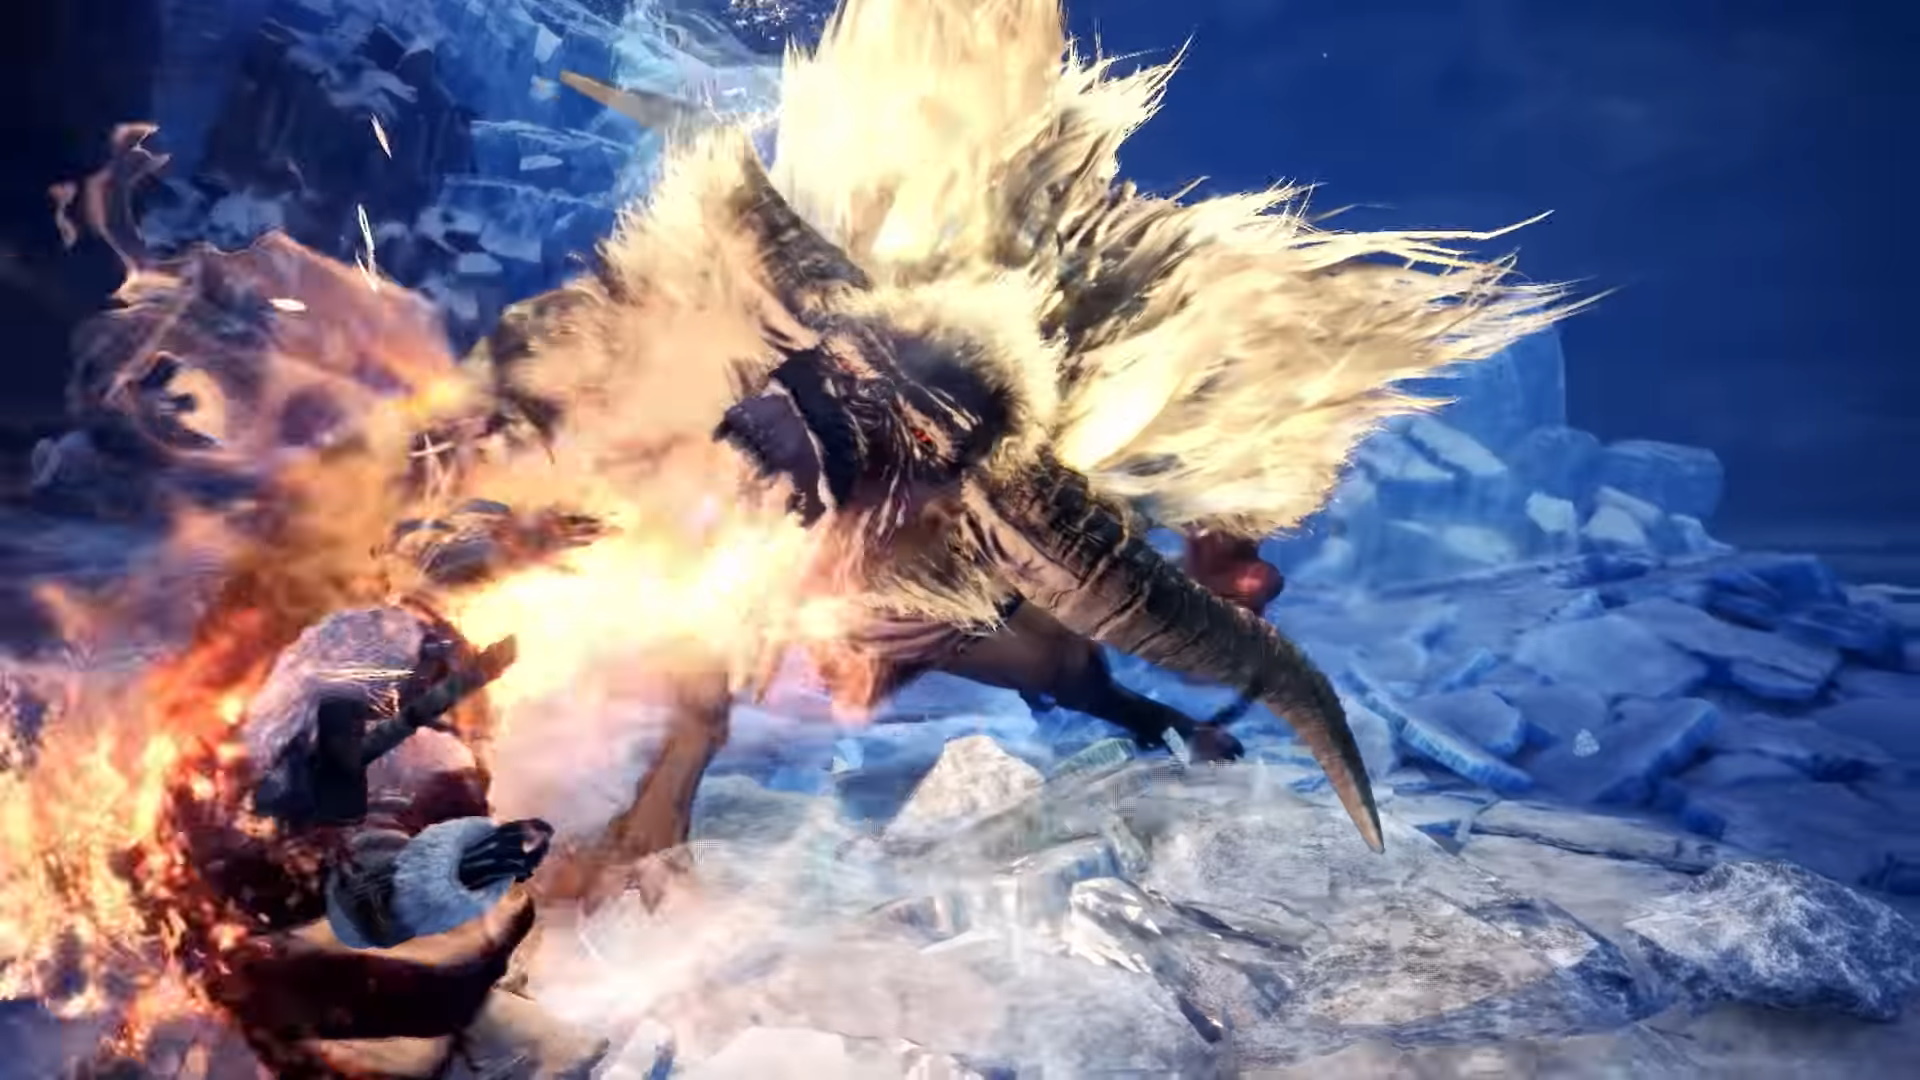
Brutal Tigrex
- Type: Flying Wyvern
- Habitat: Guiding Lands
- Loot:
- Brutal Tigrex Scale
- Brutal Tigrex Cortex
- Brutal Tigrex Hardclaw
- Brutal Tigrex Hardfang
- Tigrex Shell
- Tigrex Whip
- Monster Mighty Bone
- Guiding Lands Loot:
- Dragonite Steel Bone
- Quaking Dark Pine
- Spiritvine Steel Bone (hardened)
- Hardened Black Pine (hardened)
- Spiritvine Gem (hardened)
- Elemental Weaknesses:
- Fire 0
- Water 3
- Thunder 2
- Ice 1
- Dragon 1
- Status Weaknesses:
- Poison 2
- Sleep 2
- Paralysis 2
- Explosion 2
- Stun 2
Description: A subspecies of the Tigrex. It differs from its relative by its black-brown scales and even louder roar. It is extremely aggressive even for a Tigrex.
Combat Tip: Dodge, dodge, and dodge again, plus block as much as possible. After several attacks, it will get tired. You should also break its head, as that will weaken its roar.

Brachydios
- Type: Battle Wyvern
- Habitat: Home of the Elders
- Materials:
- Brachydios Cortex
- Brachydios Crown
- Brachydios Whip
- Brachydios Stomper+
- Fine Brachydios Black Shell
- Shiny Slime
- Quest Materials:
- Shiny Black Shell
- Heavy Dragonbone
- Spiritbone Steel (hardened)
- Hardened Black Shell (hardened)
- Spiritbone Gem (hardened)
- Elemental Weaknesses:
- Fire 0
- Water 2
- Thunder 1
- Ice 3
- Dragon 1
- Status Weaknesses:
- Poison 2
- Sleep 2
- Paralysis 2
- Explosion 1
- Stun 2
Description: Brachydios create explosive fields with their saliva, which turns sticky slime into explosives. Their arms are coated with it, and they also leave explosive fields on the ground.
Fight Tip: It’s best to fight Brachydios with ice or water attacks, as these elements dilute their slime. Weak points are their arms, head, and tail, which can be severed.
Seething Bazelgeuse
- Type: Flying Wyvern
- Habitat: Home of the Elders
- Loot:
- Bazelgeuse Gem
- Bazelgeuse Hardclaw
- Bazelgeuse Shell
- Bazelgeuse Flail
- Bazelgeuse Jewel
- Burning Silverwing
- Explosive Fluid Distillate
- Flickering Silver Armor
- Loot Guide:
- Dragonbone Steel
- Carmine Explosive Scale
- Spiritbone Steel (hardened)
- Hardened Explosive Scale (hardened)
- Large Spiritbone Jewel (hardened)
- Elemental Weaknesses:
- Fire 0
- Water 1
- Thunder 2
- Ice 3
- Dragon 1
- Status Weaknesses:
- Poison 2
- Sleep 3
- Paralysis 2
- Explosion 1
- Stun 2
Description: Seething Bazelgeuse have hotter scales than the normal variant. As a result, they glow blue and have a larger radius as well as a higher quantity.
Combat Tip: When fighting the seething Bazelgeuse, focus on its scales. These are primarily located at its weak points: head and tail, but also on the legs. The tail is also severable.
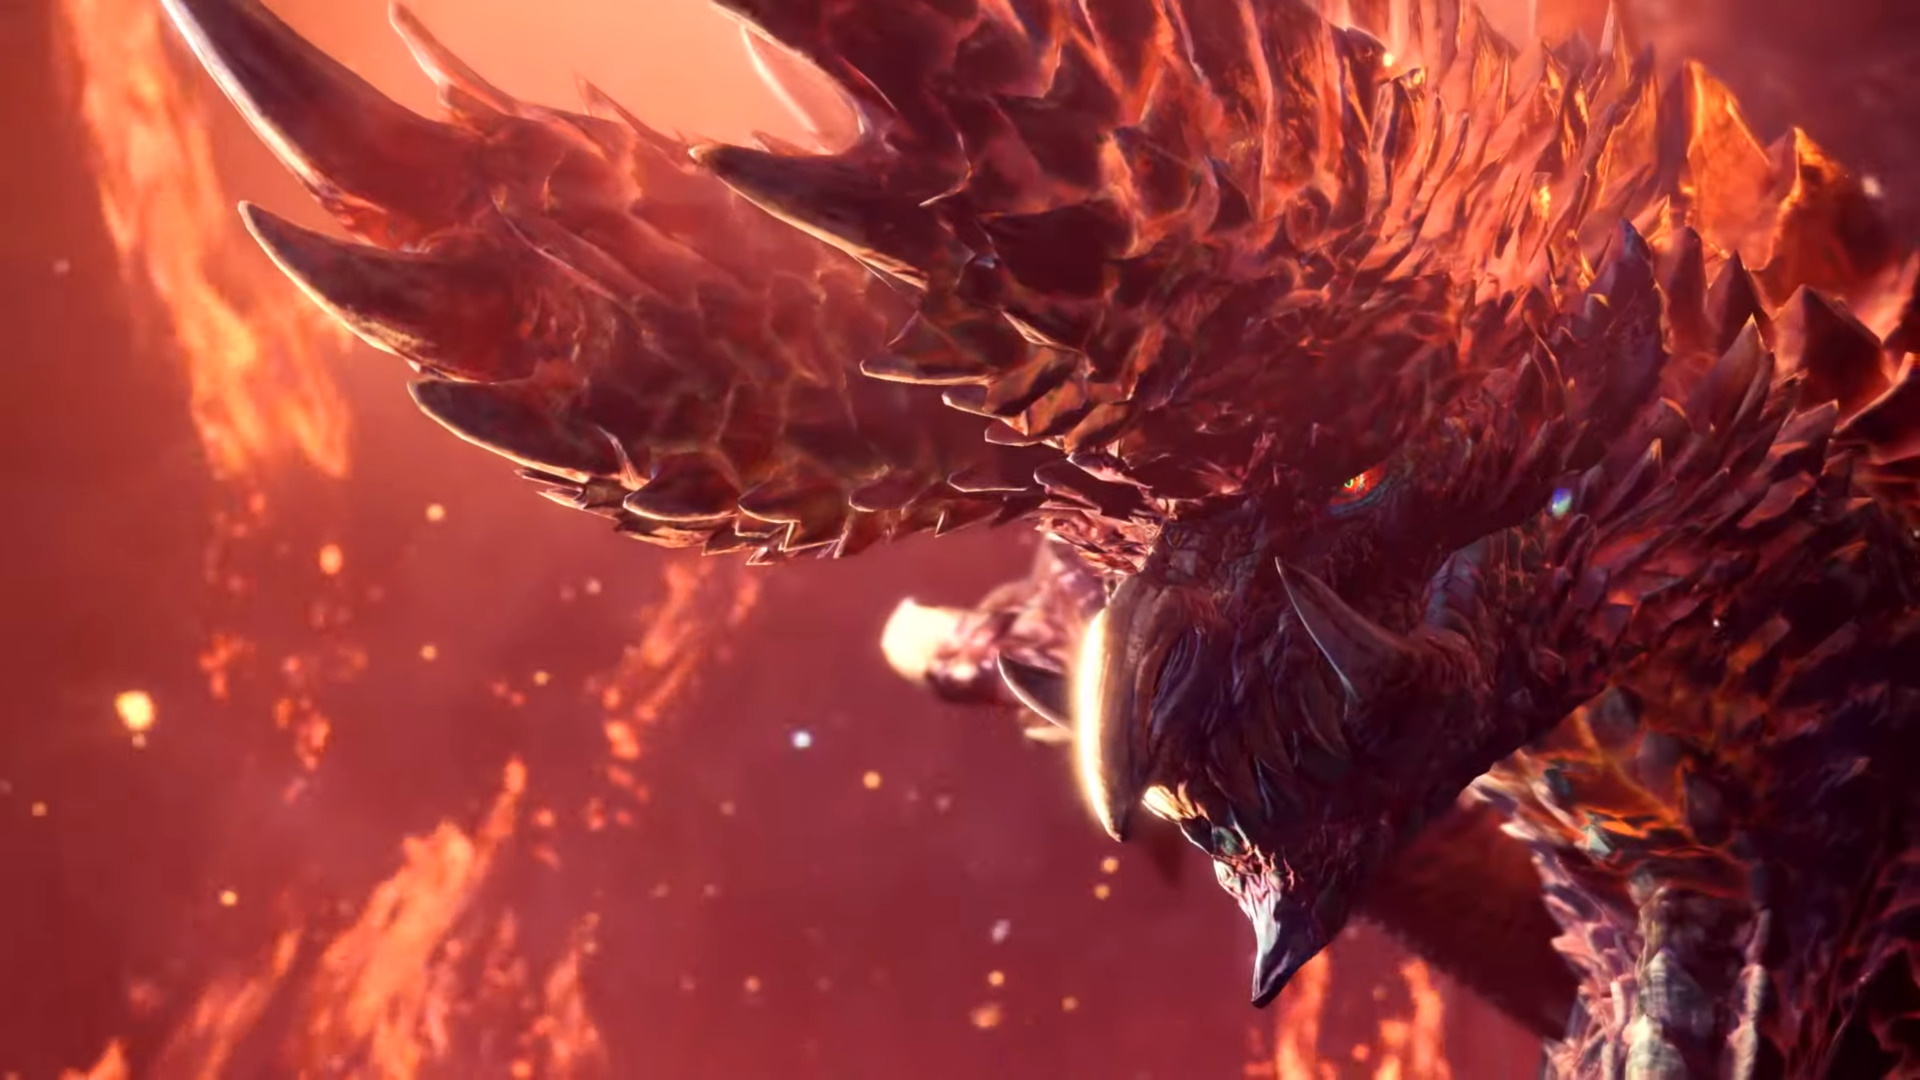
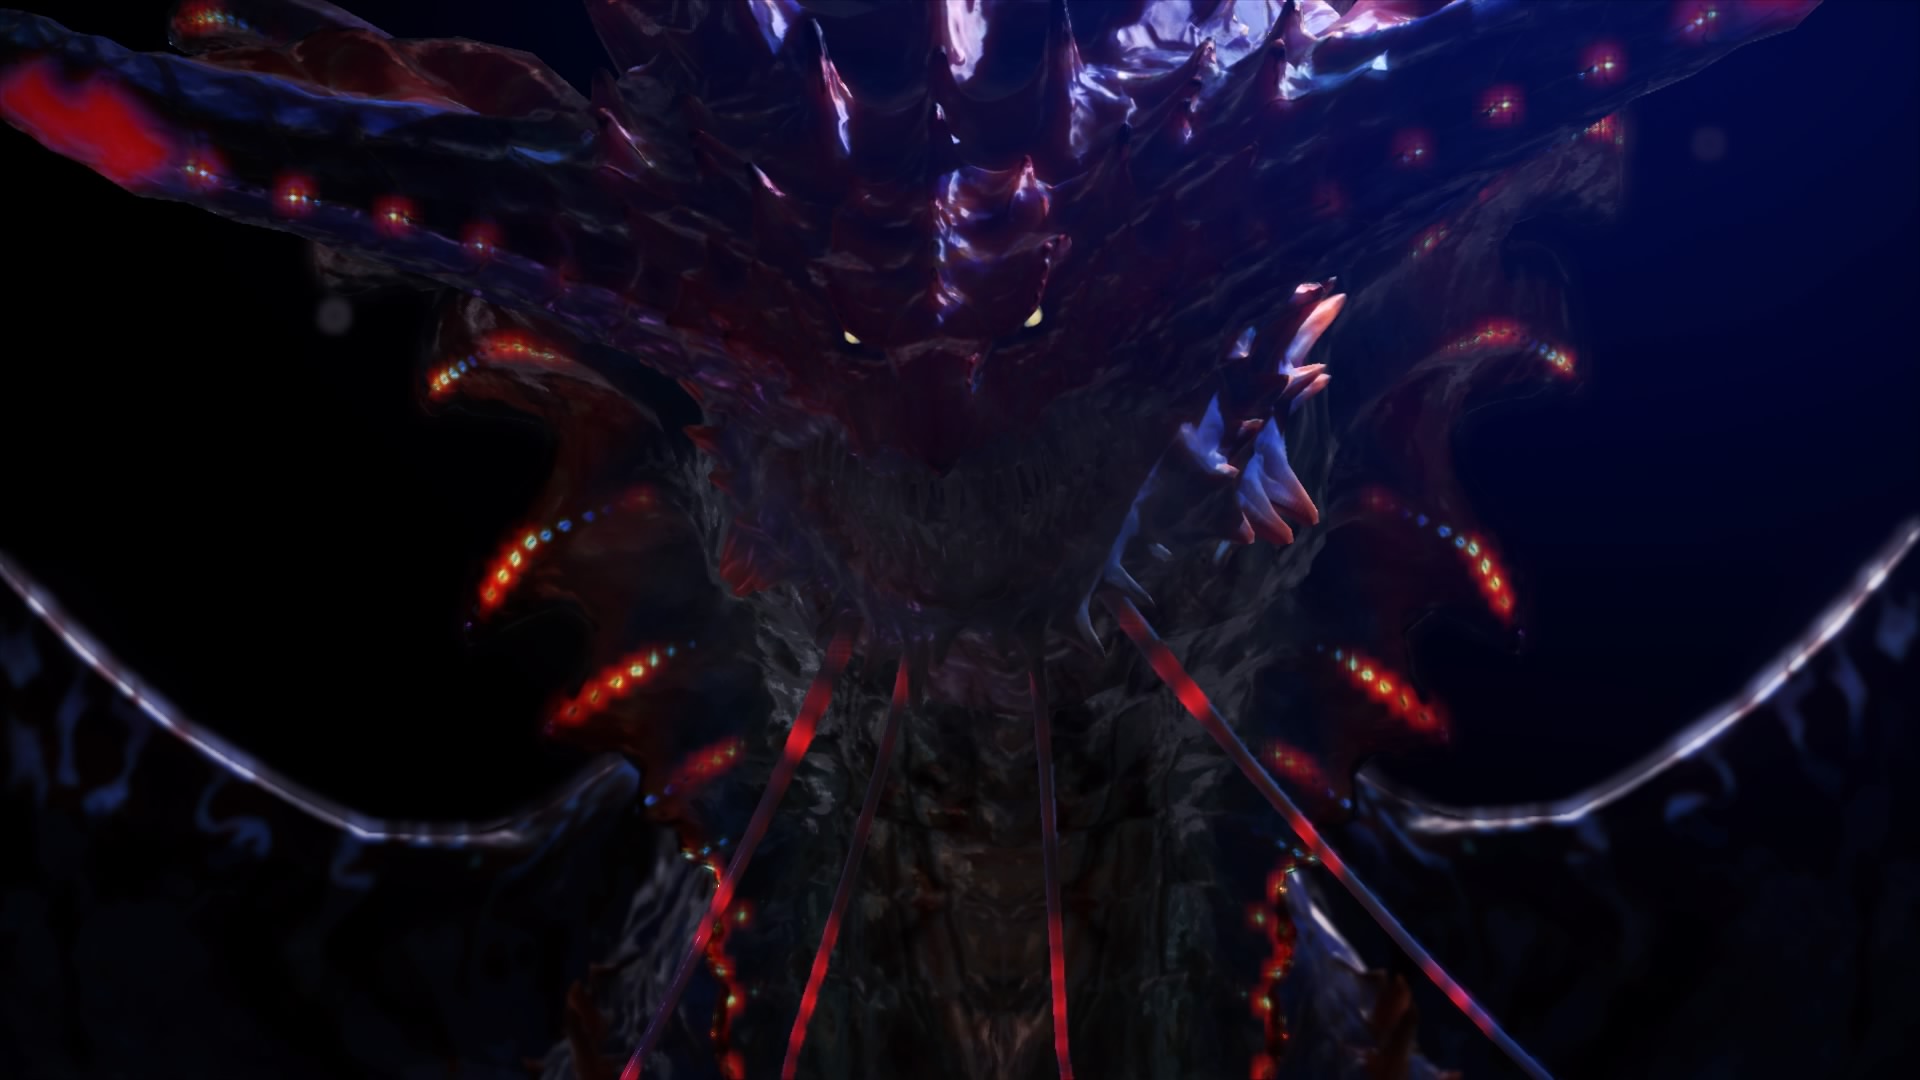
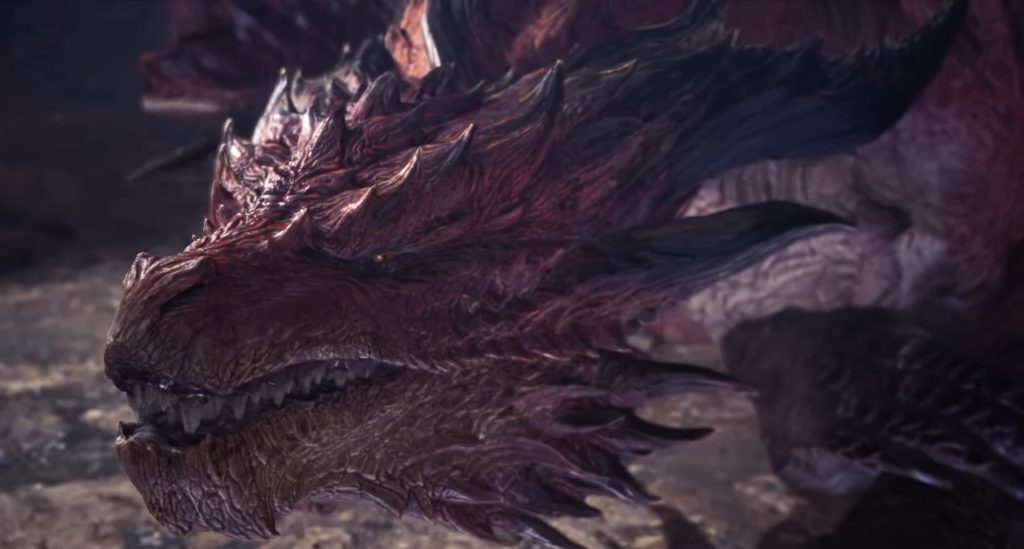
Fatalis
- Type: Elder Dragon
- Habitat: Schrade
- Loot:
- Evil Fatalis Eye
- Fatalis Skin Wings
- Fatalis Hardhorn
- Fatalis Cortex
- Fatalis Pectus
- Fatalis Scale
- Fatalis Shard
- Elemental Weaknesses:
- Fire 2
- Water 1
- Thunder 1
- Ice 1
- Dragon 3
- Status Weaknesses:
- Poison 1
- Sleep 1
- Paralysis 1
- Explosion 1
- Stun 0
Fulgur-Anjanath
- Type: Fighting Wyvern
- Habitat: Home of the Elders, Coral Highlands, Hoarfrost Reach, Valley of Destruction, Ancient Forest, Wildspire Waste
- Materials:
- Thunderbug
- Fulgur-Anjanath Pelt
- Fulgur-Anjanath Hardfang
- Fulgur-Anjanath Shell
- Fulgur-Anjanath Whip
- Fulgur-Anjanath Shard
- Heavy Fulgur-Anjanath Nosebone
- Material Locations:
- Crackling Thunderpelt
- Heavy Dragonbone
- Hardened Thunderpelt (Hardened)
- Spiritvein Gem (Hardened)
- Spiritvein Steelbone (Hardened)
- Elemental Weaknesses:
- Fire 2
- Water 2 (Charged 3)
- Thunder 0
- Ice 3 (Charged 2)
- Dragon 1
- Status Weaknesses:
- Poison 2
- Sleep 2
- Paralysis 2
- Explosion 1
- Stun 2
Description: Fulgur-Anjanath have strong jaws and thighs. They can also electrically charge their jaws and back membranes. So you must be cautious of both their physical strength and elemental damage.
Combat Tip: When facing Fulgur-Anjanath, you should focus your attacks on its head. Fulgur-Anjanath electrically charge themselves and harden, but you can disperse the charge with head attacks. Another weak point is the severable tail.
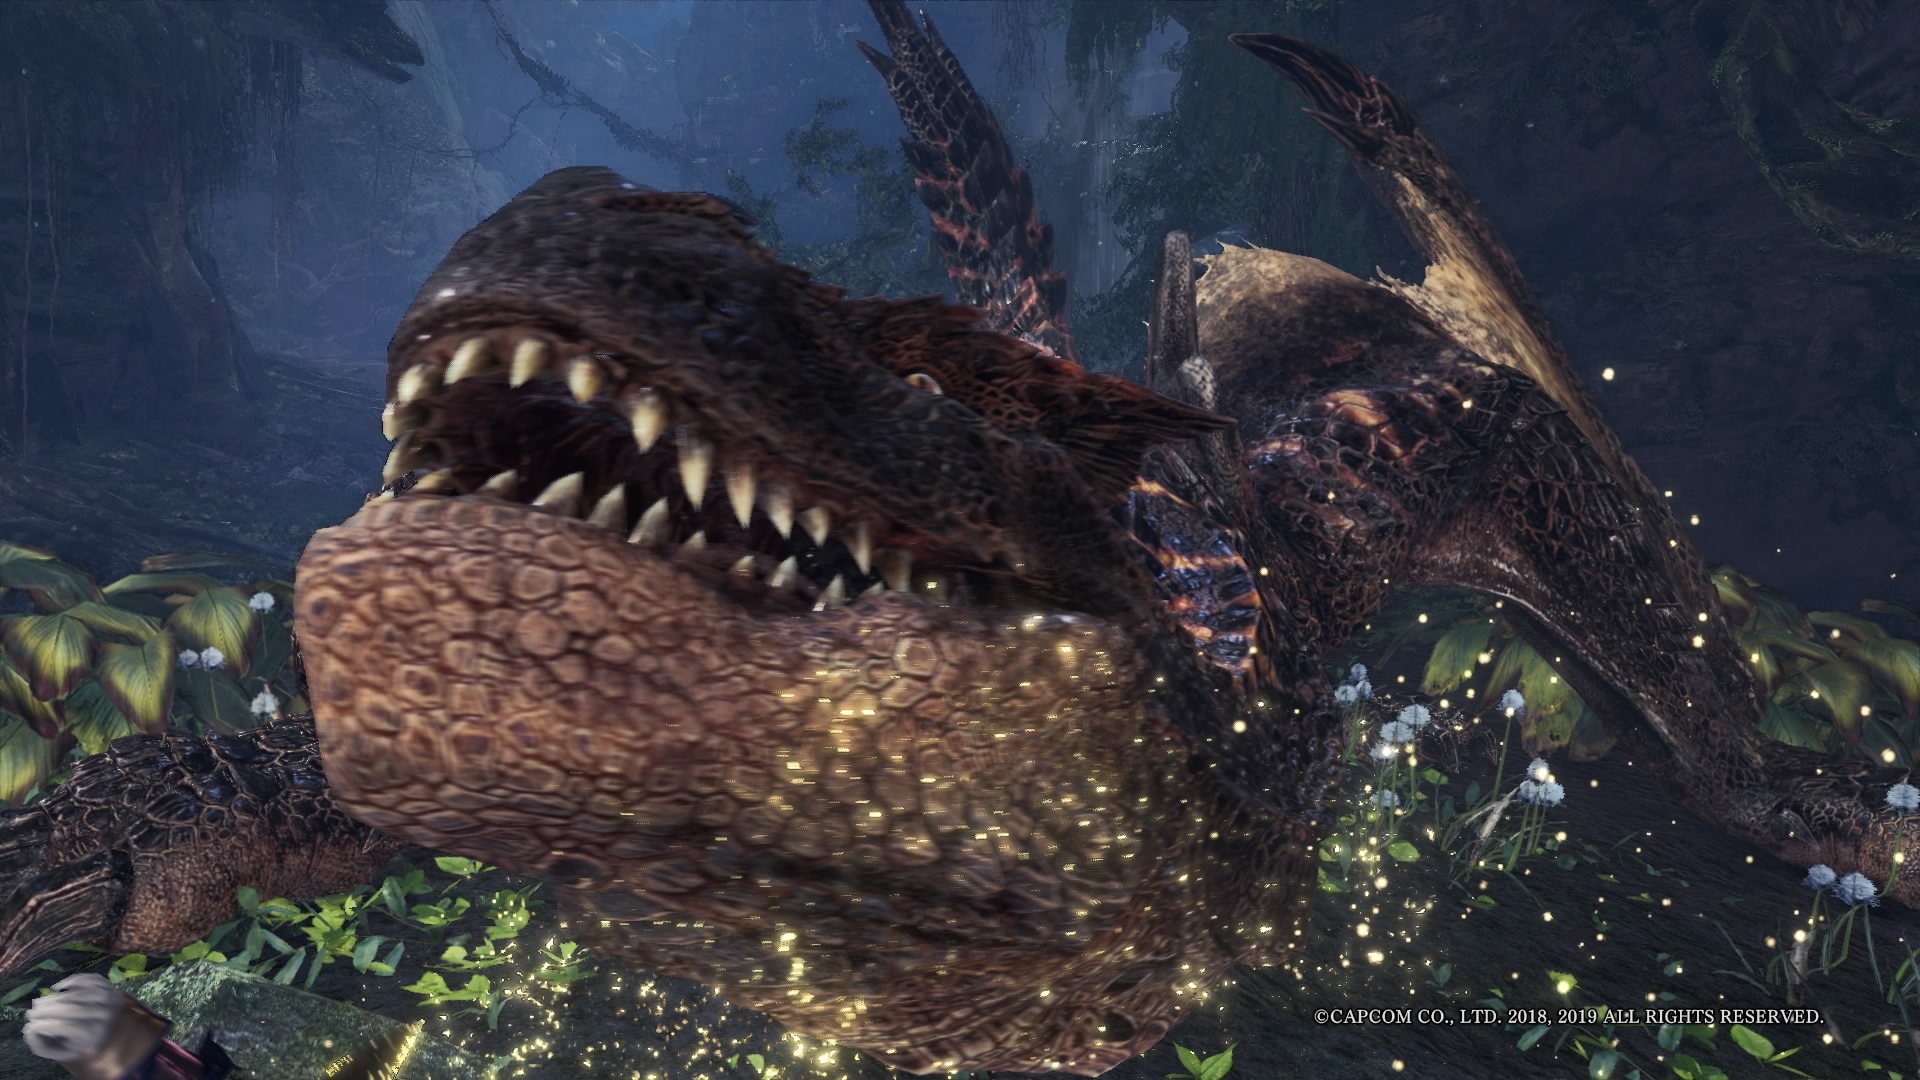
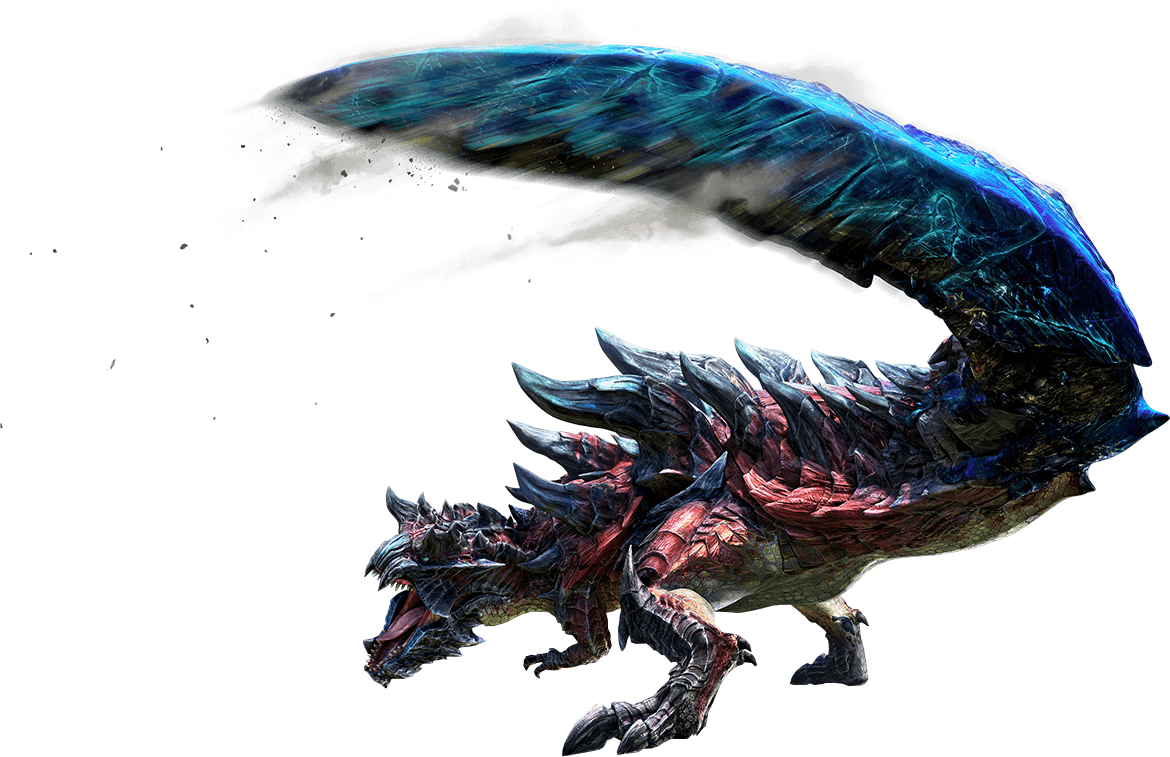
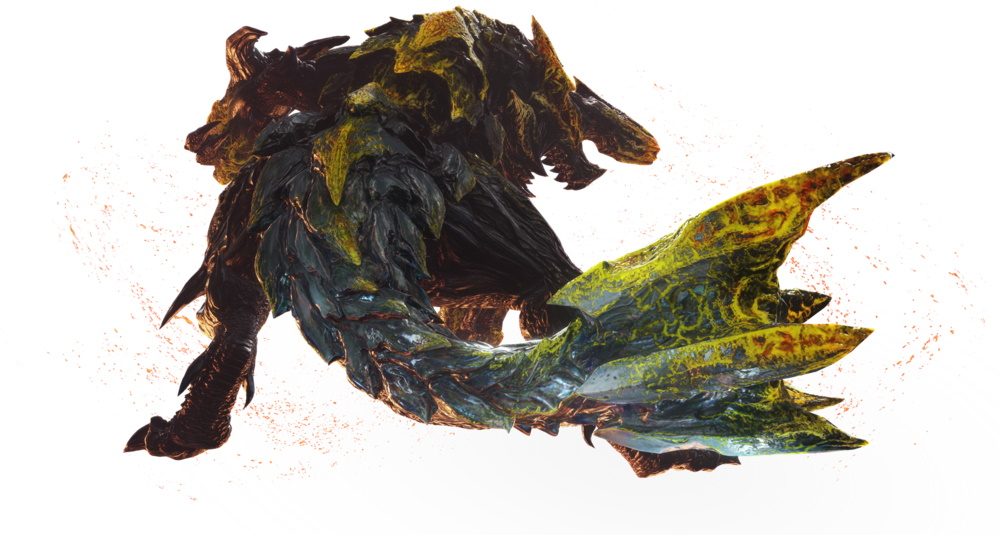
Glavenus
- Type: Battle Wyvern
- Habitat: Home of the Elders, Ancient Forest, Wilds of the Tower
- Loot:
- Glavenus Hardblade Tooth
- Glavenus Shell Armor
- Glavenus Shell
- Glavenus Blade Tail
- Glavenus Cortex
- Glavenus Shard
- Volcanic Bursa
- Loot Mastery’s Item:
- Glowing Tail Tip
- Heavy Dragonbone
- Hardened Tail Tip (hardened)
- Spiritstone (hardened)
- Spiritsteel Bone (hardened)
- Elemental Weaknesses:
- Fire 0
- Water 3
- Thunder 1
- Ice 2
- Dragon 2
- Status Weaknesses:
- Poison 2
- Sleep 2
- Paralysis 2
- Explosion 2
- Stun 2
Description: Glavenus use their sharp tail like a sword. It gets hotter each time and the damage increases. Ultimately, the sword tail glows.
Combat Tip: In the fight against Glavenus, you must watch out for their sword-like tail. In between, Glavenus sharpens their tail. When their throat glows, that’s your chance to deal real damage. The best way to do this is on the head or the severable tail.
Gold Rathian
- Type: Wyvern
- Habitat: Guiding Lands
- Materials:
- Golden Rathian Cortex
- Golden Rathian Shard
- Golden Rathian Crest
- Rathian Membrane
- Rath Wisp
- Rathian Shell
- Rath Wing Talon+
- Inferno Sack
- Guiding Lands Materials:
- Moonlight Scale
- Dragonbone Steel
- Hardened Gold Scale (hardened)
- Spiritvein Steel (hardened)
- Large Spiritvein Gem (hardened)
- Elemental Weaknesses:
- Fire 0
- Water 2
- Thunder 3
- Ice 1
- Dragon 0
- Status Weaknesses:
- Poison 1
- Sleeping 2
- Paralysis 2
- Explosion 1
- Stun 2
Description: The golden Rathian is a rare subspecies of the Rathian. Surrounded by hellfire, her breath and tail attacks become stronger.
Combat Tip: If you break the golden Rathian’s head, she cannot use her hellfire anymore. You should prioritize this area.
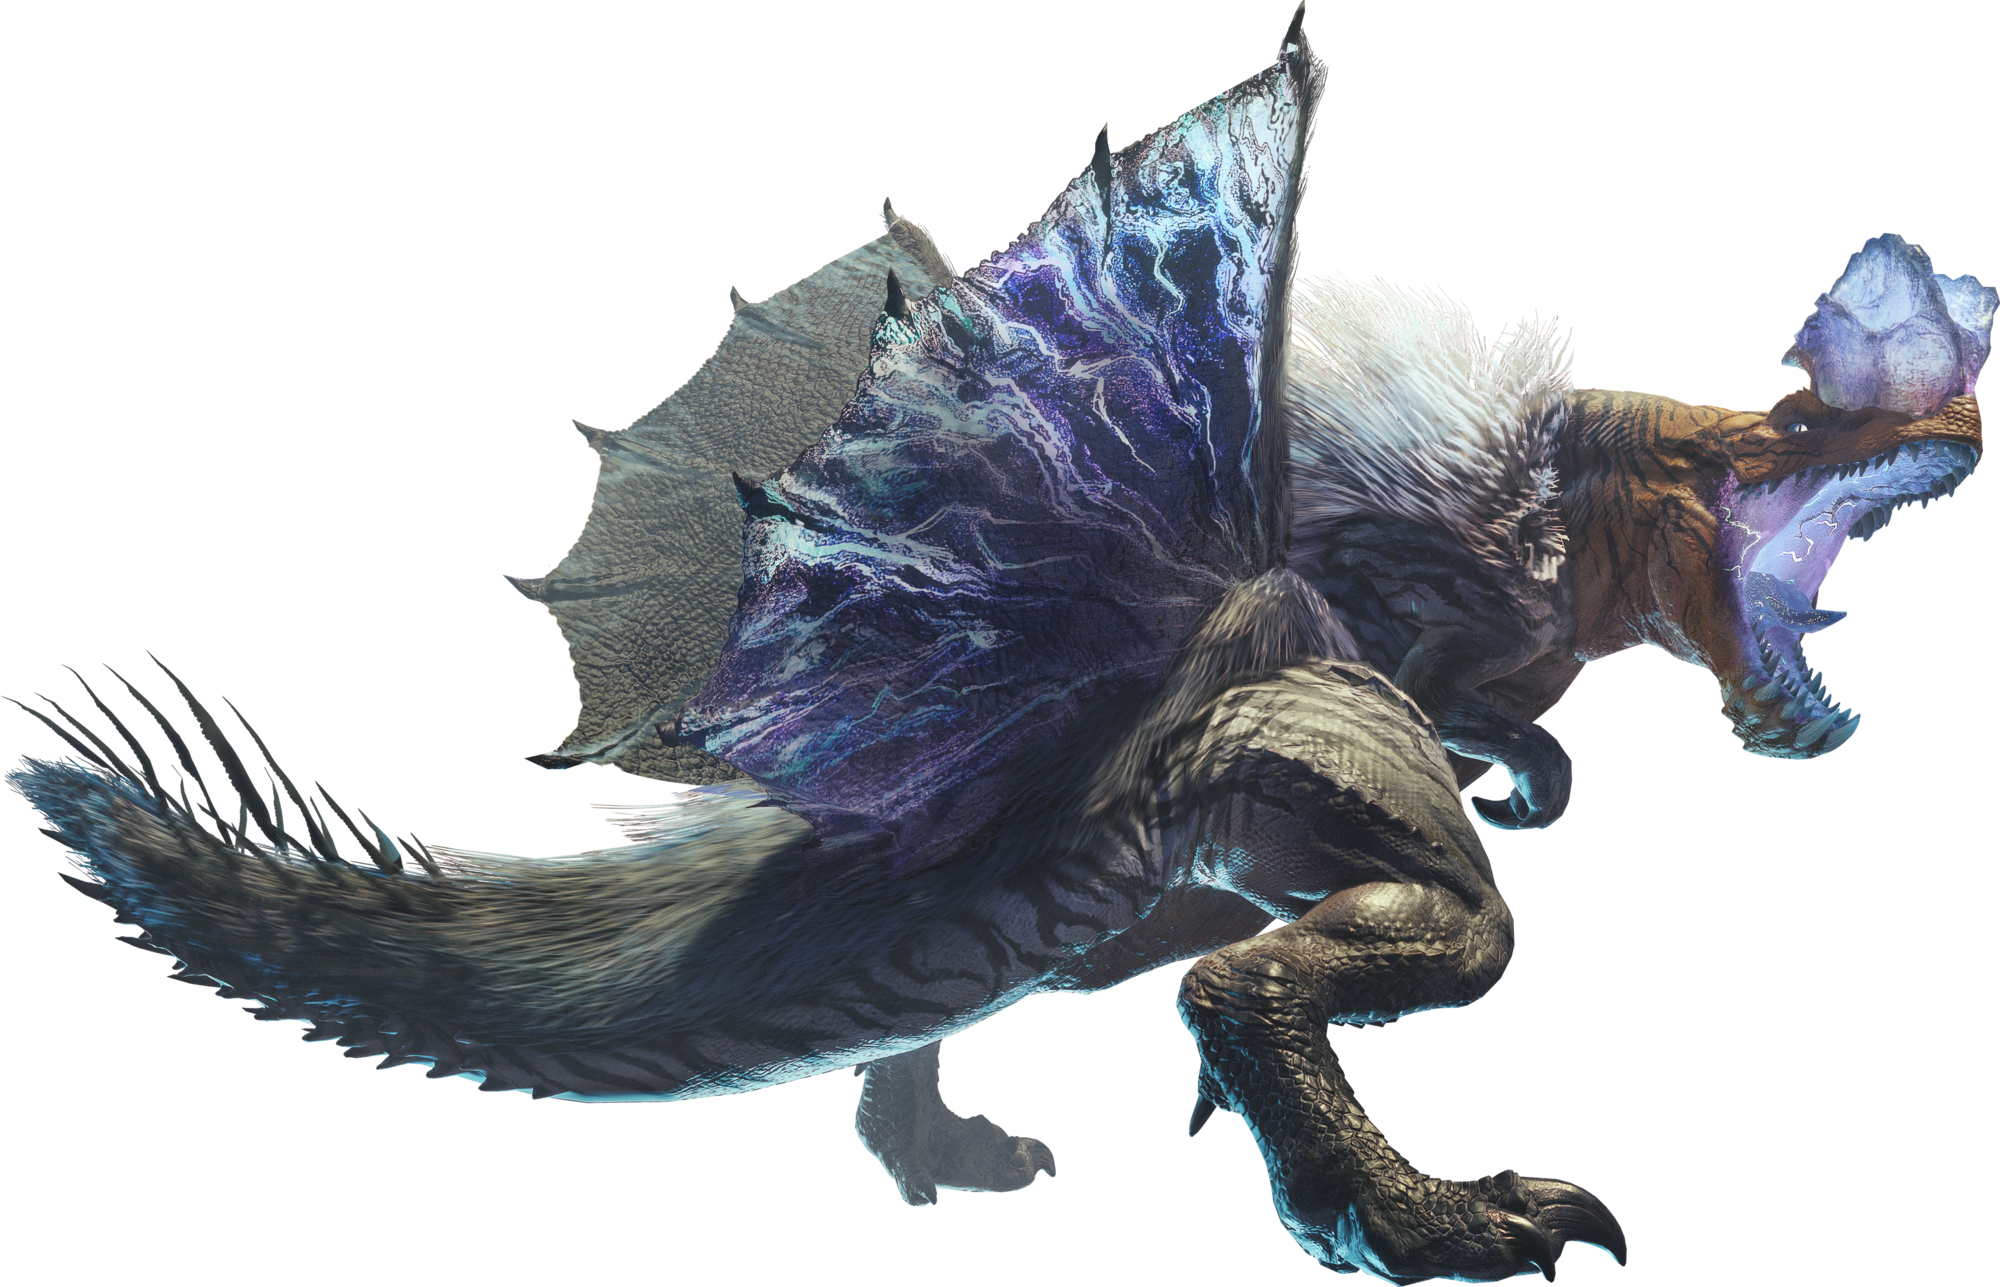
Hellfire Zinogre

- Type: Fanged Wyvern
- Habitat: Guiding Lands
- Materials:
- Hellfire Zinogre Dragonhorns
- Hellfire Zinogre Cortex
- Hellfire Zinogre Dragongem
- Hellfire Zinogre Whip
- Hellfire Zinogre Hardclaw
- Hellfire Zinogre Sky Jewel
- Pure Crystal
- Hellfire Zinogre Hardhorn
- Guiding Lands Materials:
- Dragonbone Steel
- Exuberant Dragon Clutch
- Spiritvein Steel (hardened)
- Hardened Dragon Clutch (hardened)
- Large Spiritvein Gemstone (hardened)
- Elemental Weaknesses:
- Fire 0 (when charged 1)
- Water 0 (when charged 2)
- Thunder 1 (when charged 3)
- Ice 0 (when charged 1)
- Dragon 0
- Status Ailments:
- Poison 2
- Sleep 2
- Paralysis 2
- Explosion 3
- Stun 2
Description: The Hellfire Zinogre is a subspecies of Zinogre. It has a symbiotic relationship with the Dracophag beetles. It shoots at you with them and is even more dangerous in light.
Combat Tip: You can end the charged form of the Hellfire Zinogre. For this, you need to make it flinch or topple over. Additionally, it is more susceptible to elemental attacks when its skin hardens.
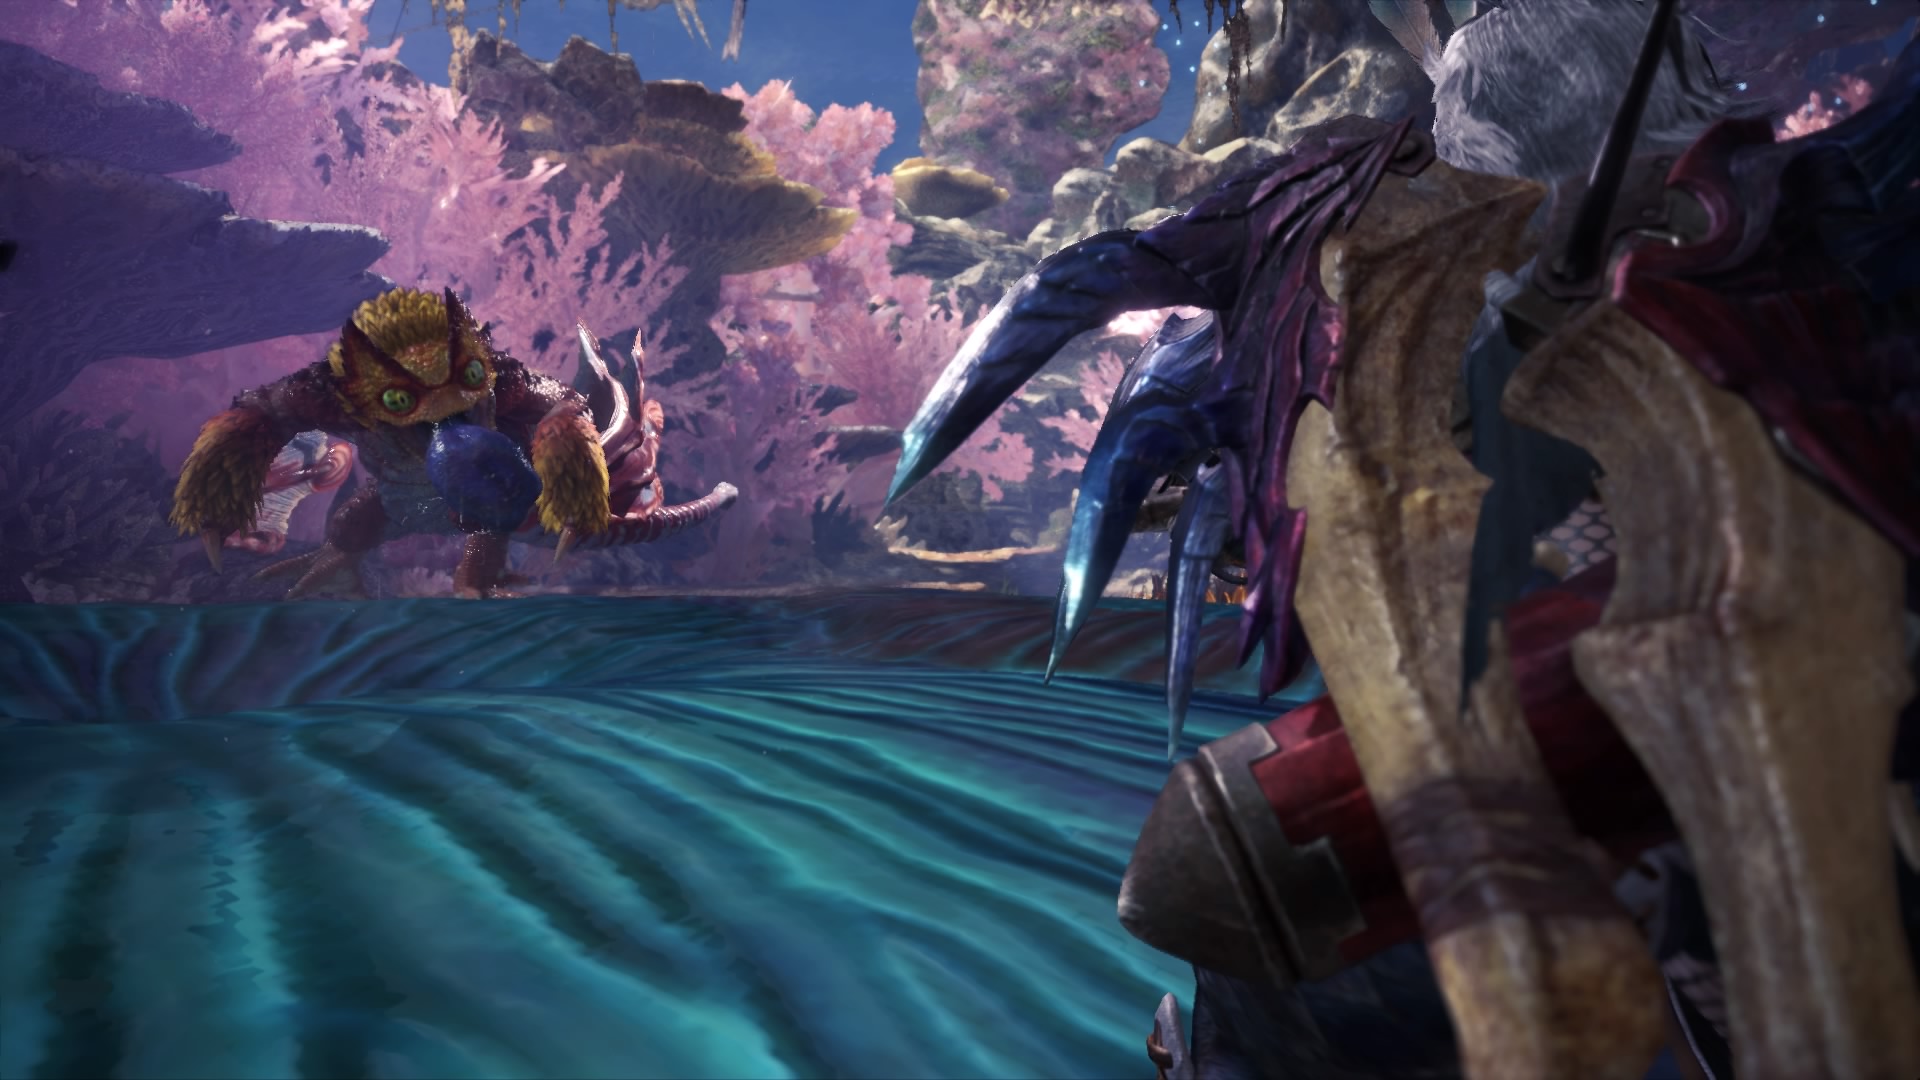
Coral Pukei-Pukei
- Type: Bird Wyvern
- Habitat: Coral Highlands
- Materials:
- Surge Sac
- Great Coral Pukei-Pukei Sac
- Coral Pukei-Pukei Cortex
- Coral Pukei-Pukei Fin
- Coral Pukei-Pukei Shard
- Coral Pukei-Pukei Whip
- Rare Wyvern Gem
- Material Drop:
- Grim Dragonbone
- Hydrated Sack
- Hardened Surge Sac (hardened)
- Spiritvein Gem Shard (hardened)
- Spiritvein Wyvernbone (hardened)
- Elemental Weaknesses:
- Fire 1
- Water 0
- Thunder 2
- Ice 3
- Dragon 1
- Status Weaknesses:
- Poison 3
- Sleep 2
- Paralysis 2
- Explosion 2
- Stun 2
Description: Coral Pukei-Pukei drink water and store it in their tail. They can then attack in a fountain-like manner. They shoot the water either from their mouth or from the tail.
Combat Tip: In battle against the Coral Pukei-Pukei, you need to pay attention to its water beam, which can deal significant damage. After the monster has drunk, it becomes particularly strong. You weaken it by focusing on the severable tail or the head.
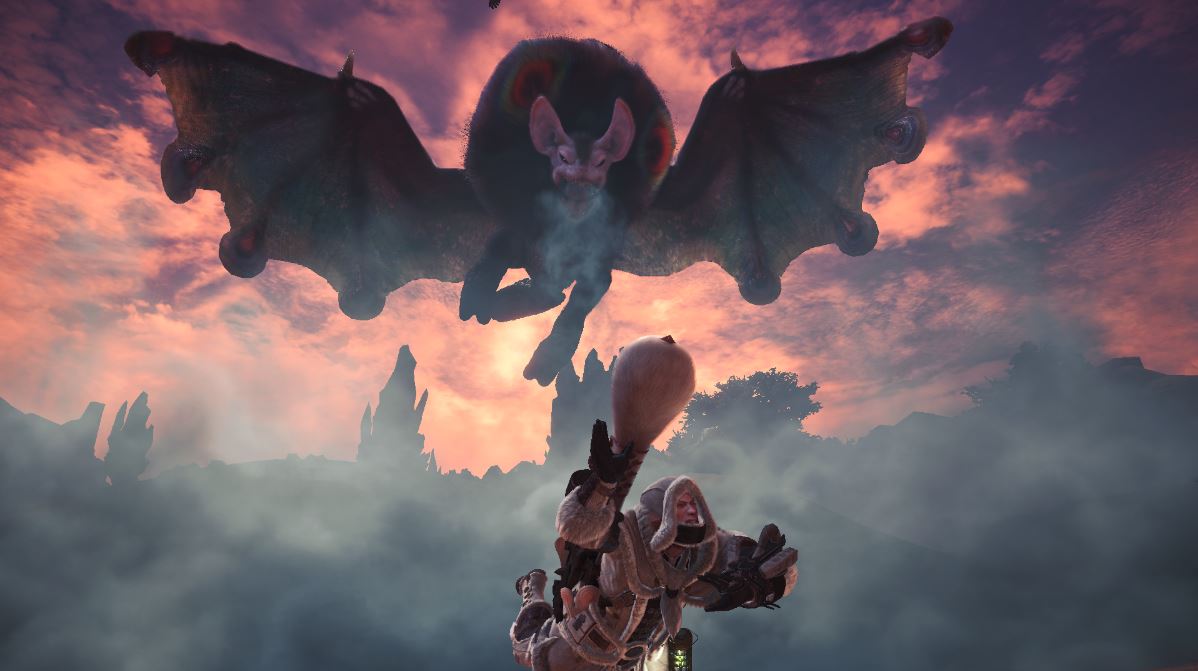
Nightshade Paolumu
- Type: Flight Wyvern
- Habitat: Home of the Elders, Ancient Forest, Wilds of the Abyss
- Materials:
- Freezing Bag
- Great Wyvern Gem
- Nightshade Paolumu Pelt
- Nightshade Paolumu Shard
- Nightshade Paolumu Wing
- Paolumu Cortex
- Wyvern Gem
- Material Drops:
- Grim Dragonbone
- Obsidian Fur
- Hardened Leather (hardened)
- Spiritvein Crystal Shard (hardened)
- Spiritvein Bone Shard (hardened)
- Elemental Weaknesses:
- Fire 2
- Water 3
- Thunder 1
- Ice 1
- Dragon 0
- Status Weaknesses:
- Poison 2
- Sleep 1
- Paralysis 2
- Explosion 2
- Stun 2
Description: Nightshade Paolumu produce sleep-inducing clouds that put you to sleep. This substance is formed in their throat sack, which they can inflate at will.
Combat Tip: When fighting the Nightshade Paolumu, it is important to stay away from the sleep clouds or bring enough Sleep Resistance. The Paolumu can manipulate these clouds with its attacks and change their position. You need to try to bring the Paolumu down from the air, dealing most damage to its head and throat sack.
Namielle
- Type: Elder Dragon
- Habitat: Coral Highlands
- Carves:
- Namielle’s Fine Hide
- Namielle’s Hardclaw
- Namielle’s Skinwing
- Namielle’s Beard Hair
- Namielle’s Whip
- Great Elder Dragon Gem
- Great Elder Dragon Bone
- Pure Dragon Blood
- Special Carves:
- Enchanting Fine Hide
- Elder Dragon Bone Aether
- Hardened Trance Leather (Hardened)
- Elder Spirit Bone (Hardened)
- Great Spirit Aether Gem (Hardened)
- Elemental Weaknesses:
- Fire 3
- Water 0
- Thunder 0
- Ice 1
- Dragon 2
- Status Weaknesses:
- Poison 3
- Sleep 1
- Paralysis 1
- Explosion 3
- Stun 2
Description: Namielle is an Elder Dragon that masters the elements of Water and Thunder. It creates water surfaces and electrifies them. It glides with its wings similar to a stingray.
Battle Tip: The more water Namielle uses, the drier it becomes, making it more vulnerable. You should focus your attacks on the head and legs. The tail is severable.
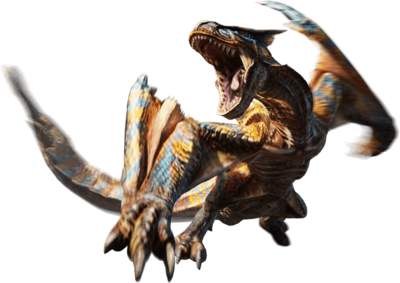
Nargacuga
- Type: Flying Wyvern
- Habitat: Coral Highlands, Ancient Forest
- Materials:
- Nargacuga Hardfang
- Nargacuga Hide
- Nargacuga Whip
- Nargacuga Shard
- Nargacuga Cutwing+
- Nargacuga Black Pelt+
- Nargacuga Tail Spear
- Harvesting Rewards:
- Assassin’s Cutwing
- Heavy Dragonbone
- Hardened Cutwing (hardened)
- Spiritstone (hardened)
- Spiritsteel Bone (hardened)
- Elemental Weakness:
- Fire 2
- Water 0
- Thunder 3
- Ice 1
- Dragon 1
- Status Weakness:
- Poison 2
- Sleep 2
- Paralysis 2
- Explosion 2
- Stun 2
Description: Although the Nargacuga has wings, it is mostly on the ground. However, due to its body structure, it is surprisingly agile and can deliver powerful attacks.
Battle Tip: In the fight against Nargacuga, you should exhaust them, as they lose their speed. You can do this by involving them in battles with other monsters. Nargacuga can destroy traps when they are not angry, so you should keep that in mind. Additionally, you should target your attacks at the head or the severable tail, as those are their weak points.
Rajang
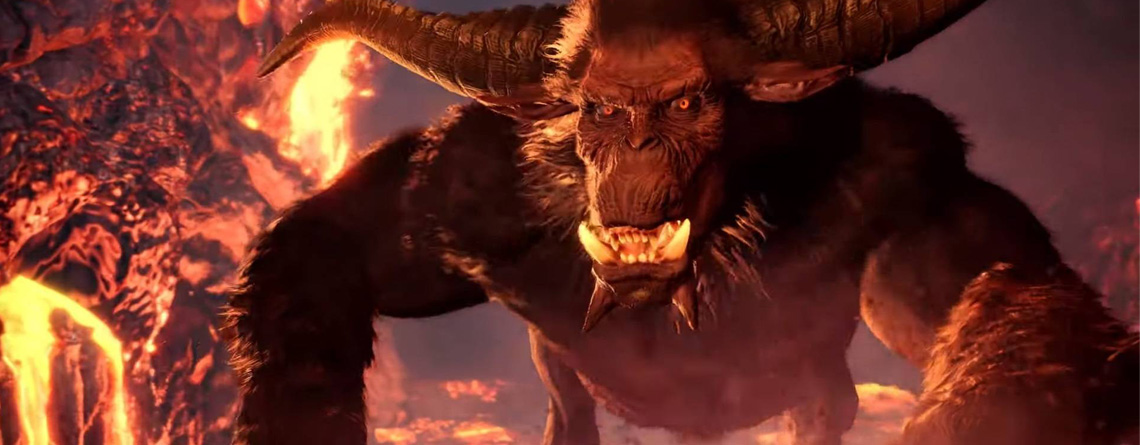
- Type: Elder Dragon
- Habitat: Guiding Lands
- Loot:
- Rajang Goldfur+
- Rajang Hardhorn
- Rajang Hardclaw
- Rajang Tail
- Rajang Wildfur
- Monster Strongbone
- Guiding Lands Loot:
- Dragonite Steelbone
- Bloodcurdling Shimmerfur
- Spiritsteel Bone (hardened)
- Hardened Shimmerfur (hardened)
- Large Spiritstone (hardened)
- Element Weaknesses:
- Fire 0
- Water 1
- Thunder 0
- Ice 3
- Dragon 0
- Status Weaknesses:
- Poison 1
- Sleep 1
- Paralysis 1
- Explosion 2
- Stun 1
Description: The Rajang is very aggressive and has many victims to its name. Additionally, it has very strong arms and its fur turns golden when it is angry.
Combat Tip: The Rajang is most dangerous when its arms are powered up, as it can destroy shock traps. Pitfall traps are effective, but only when it is angry. Generally, it attacks everything and everyone, so be careful.

Ruins Nergigante

- Type: Elder Dragon
- Habitat: Guiding Lands
- Carves:
- Evergrowth Plate
- Great Elder Dragon Bone
- Large Elder Dragon Gem
- Nergigante Crystal
- Nergigante Spike
- Nergigante Cortex
- Nergigante Hardclaw
- Pure Blood
- Immortal Shard
- Destructive Great Horn
- Guiding Lands Carves:
- Extinction Great Horn
- Elder Dragon Vein Bone
- Elder Spirit Vein Bone (hardened)
- Destructive Hardthorn (hardened)
- Large Spirit Vein Gem (hardened)
- Elemental Weaknesses:
- Fire 1
- Water 1
- Thunder 2
- Ice 1
- Dragon 3
- Status Weaknesses:
- Poison 2
- Sleep 2
- Paralysis 2
- Explosion 3
- Stun 1
Description: The Ruins Nergigante has tougher skin than the regular variant. This comes from the countless battles it has fought. It shoots its spikes with incredible speed, causing you to bleed.
Battle Tip: If you take on the Ruins Nergigante, make sure to pack Astera Jerky against bleeding. You should try to break its metallic spikes, as these do not regenerate. Then it will only attack you with the white and black spikes, which deal less damage.
Safi’jiiva
- Type: Elder Dragon
- Habitat: Guiding Lands
- Rewards:
- Pulsing Dragon Scale
- Safi’jiiva Fur Wing
- Safi’jiiva Hardclaw
- Safi’jiiva Hardhorn
- Safi’jiiva Cortex
- Safi’jiiva Crystal
- Safi’jiiva Whip
- Safi’jiiva Shard
- Zionium Crystal
- Elemental Weaknesses:
- Fire 2
- Water 2
- Thunder 2
- Ice 2
- Dragon 2 (Elder Seal Efficiency 3)
- Status Weaknesses:
- Poison 3
- Sleep 1
- Paralysis 2
- Explosion 3
- Stun 2
Description: Safi’jiiva is the adult form of Xeno’jiiva. It can heal itself by absorbing energy. It can also alter the ecosystem.
Combat Tip: During the fight, you should always seek shelter behind the pillars in the ground. They not only protect you from its fatal attack but also from smaller breath attacks. Otherwise, you should have part-breakers with you. This will help you tire it out.
Acid Glavenus

- Type: Battle Wyvern
- Habitat: Valley of Decay
- Carves:
- Acid Glavenus Shard
- Acid Glavenus Cortex
- Acid Glavenus Hardfang
- Acid Glavenus Shell
- Acid Glavenus Blade Tail
- Glavenus Hide
- Polished Acid Crystal
- Carve Research:
- Sharpened Tail Blade
- Dragon Bone Steel Bone
- Spiritvale Steel Bone (Hardened)
- Hardened Tail Blade (Hardened)
- Spiritvale Gem (Hardened)
- Elemental Weaknesses:
- Fire 3
- Water 1
- Thunder 2
- Ice 1
- Dragon 2 (if crystallized 3)
- Status Weaknesses:
- Poison 2
- Sleep 2
- Paralysis 2
- Explosion 2
- Stun 2
Description: The Acid Glavenus has, like its relative Glavenus, a sword-like tail. This subspecies additionally coats this tail with acid.
Battle Tip: Again, avoid the tail, but you can sever it. Focus your damage primarily on the head or the tail.
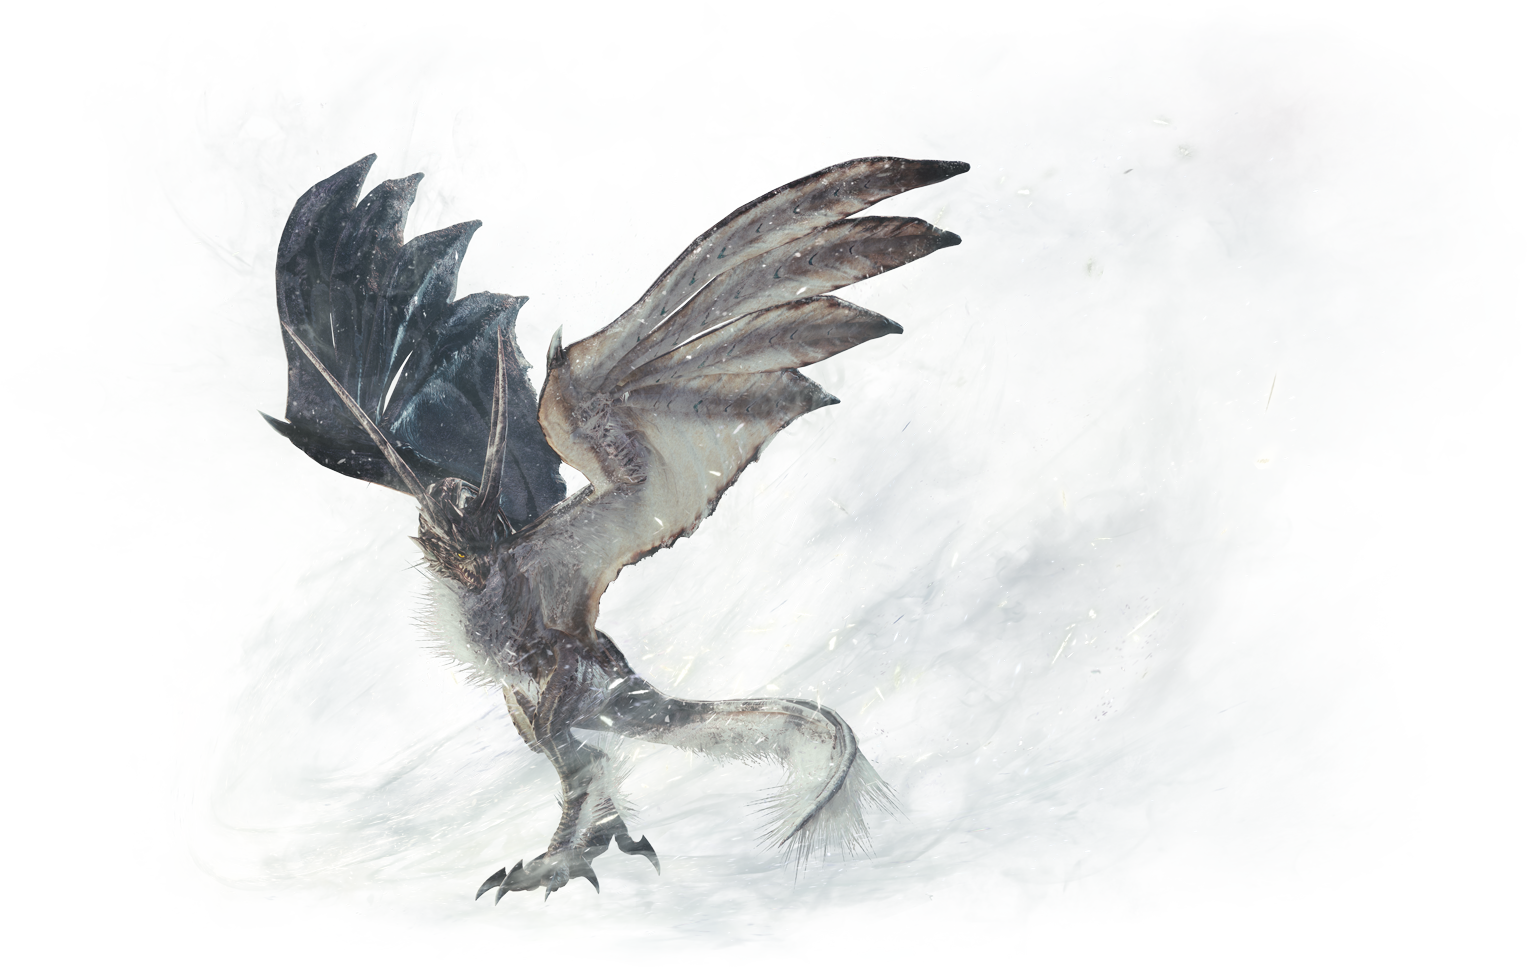
Snowstorm Legiana
- Type: Flying Wyvern
- Habitat: Hoarfrost Reach
- Materials:
- Cryo Sac
- Legiana Shell
- Legiana Shard
- Legiana Tail Webbing+
- Obsidian Iceclaw
- Frost Leather
- Sleek Wings
- Material Rewards:
- Dragonbone Steel
- Crystal Frost Leather
- Hardened Frost Leather (hardened)
- Spiritbone Steel (hardened)
- Spirit Crystal (hardened)
- Elemental Weaknesses:
- Fire 3
- Water 1
- Thunder 2
- Ice 0
- Dragon 1
- Status Weaknesses:
- Poison 3
- Sleep 2
- Paralysis 2
- Explosion 2
- Stun 2
Description: This subspecies of Legiana is completely shrouded in frost. Its attacks resemble those of the Legiana, flying at lightning speed and striking with dangerous ice attacks.
Combat Tip: Snowstorm Legiana is particularly vulnerable during a dive, so have barrel bombs ready. If you are a melee fighter, it is advisable to knock Legiana out of the sky. Focus your attacks on its head, wings, and chest.
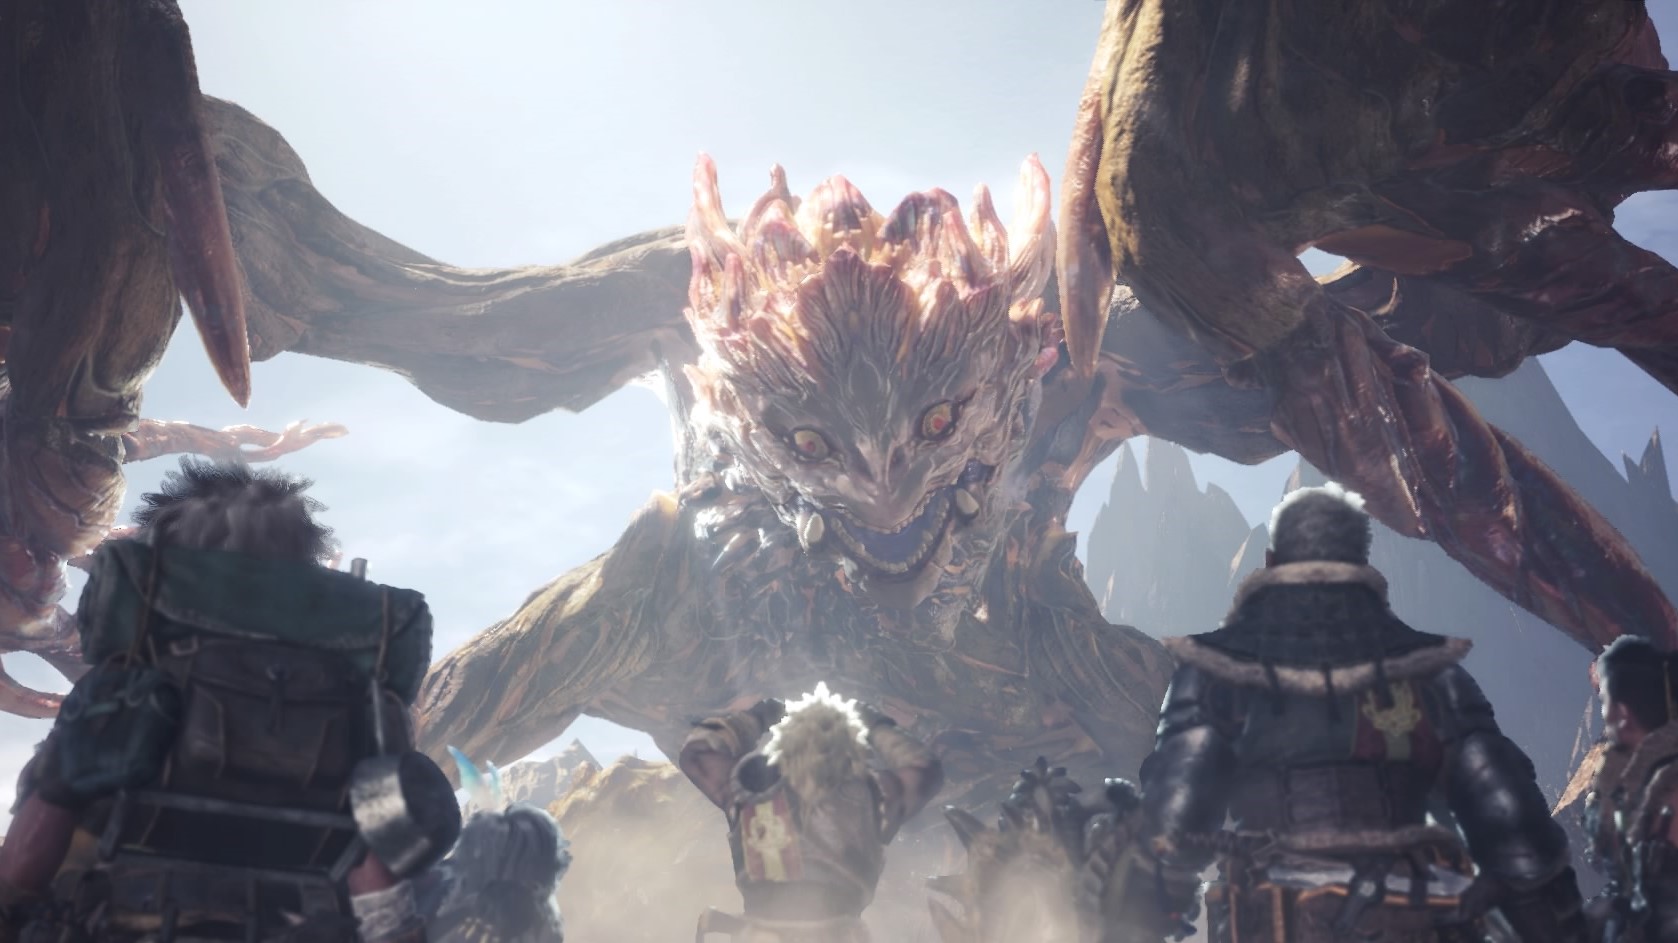
Shara Ishvalda
- Type: Elder Dragon
- Habitat: Isle of Origin
- Loot:
- Large Elder Dragon Bone
- Shara Ishvalda Gemstone
- Shara Ishvalda Plate
- Shara Ishvalda Petalum Stone
- Shara Ishvalda Softclaw
- Shara Ishvalda Softscale
- Pure Dragon Blood
- Element Weaknesses:
- Fire 1
- Water 2
- Thunder 0
- Ice 3
- Dragon 1
- Status Weaknesses:
- Poison 2
- Sleep 0
- Paralysis 1
- Explosion 3
- Stun 1
Description: Shara Ishvalda is initially completely encased in stone, the vibrations of its body sound like a song and reshape the earth. Beneath the stone shell, an Elder Dragon emerges that can control air currents with its wings.
Battle Tip: The fight against Shara Ishvalda consists of two phases. Initially, it is very sluggish, and you must gradually break its stone armor. Stay away from its rolling attacks and focus your damage on its head and chest. Later, you must watch out for its air currents and beams. Then, you should direct your attacks at its wings.
Silver Rathalos

- Type: Flying Wyvern
- Habitat: Guiding Lands
- Loot:
- Silver Rathalos Gem
- Silver Rathalos Cortex
- Silver Rathalos Wing
- Rath Flame
- Rathalos Shell
- Silver Rathalos Whip
- Flame Sac
- Loot Guiding Lands:
- Seething Scale
- Dragonbone Relic
- Hardened Silver Scale (hardened)
- Spiritvein Crystal (hardened)
- Great Spiritvein Jewel (hardened)
- Elemental Weaknesses:
- Fire 0
- Water 3
- Thunder 2
- Ice 1
- Dragon 0
- Status Weaknesses:
- Poison 1
- Sleep 2
- Paralysis 2
- Explosion 1
- Stun 2
Description: The monster is a rare and silver-colored subspecies of Rathalos. Its hellfire makes its attacks even stronger.
Fight Tip: When fighting the silver Rathalos, you should break its head first. Then it will not be able to unleash its hellfire.
Tigrex
- Type: Flying Wyvern
- Habitat: Home of the Elders, Frostfang Vale, Valley of Decay, Ancient Forest, Wildspire Waste
- Materials:
- Tigrex Hardclaw
- Tigrex Hardfang
- Tigrex Cortex
- Tigrex Whip
- Tigrex Shard
- Monster Bone+
- Material Rewards:
- Musclemancer Jaw
- Heavy Dragonbone
- Hardened Jaw (hardened)
- Spiritvine Gem (hardened)
- Spiritvine Steelbone (hardened)
- Elemental Weaknesses:
- Fire 0
- Water 1
- Thunder 3
- Ice 1
- Dragon 2
- Status Weaknesses:
- Poison 2
- Sleep 2
- Paralysis 2
- Explosion 2
- Stun 2
Description: The Tigrex terrorizes you with its loud roar. It also has strong legs, allowing it to move swiftly and deliver powerful charging attacks.
Combat Tip: In battle against Tigrex, you should dodge a lot; obstacles won’t help you against its attacks. This will tire it out and reduce its speed. Tigrex’s weak points are its head, front legs, and the severable tail.
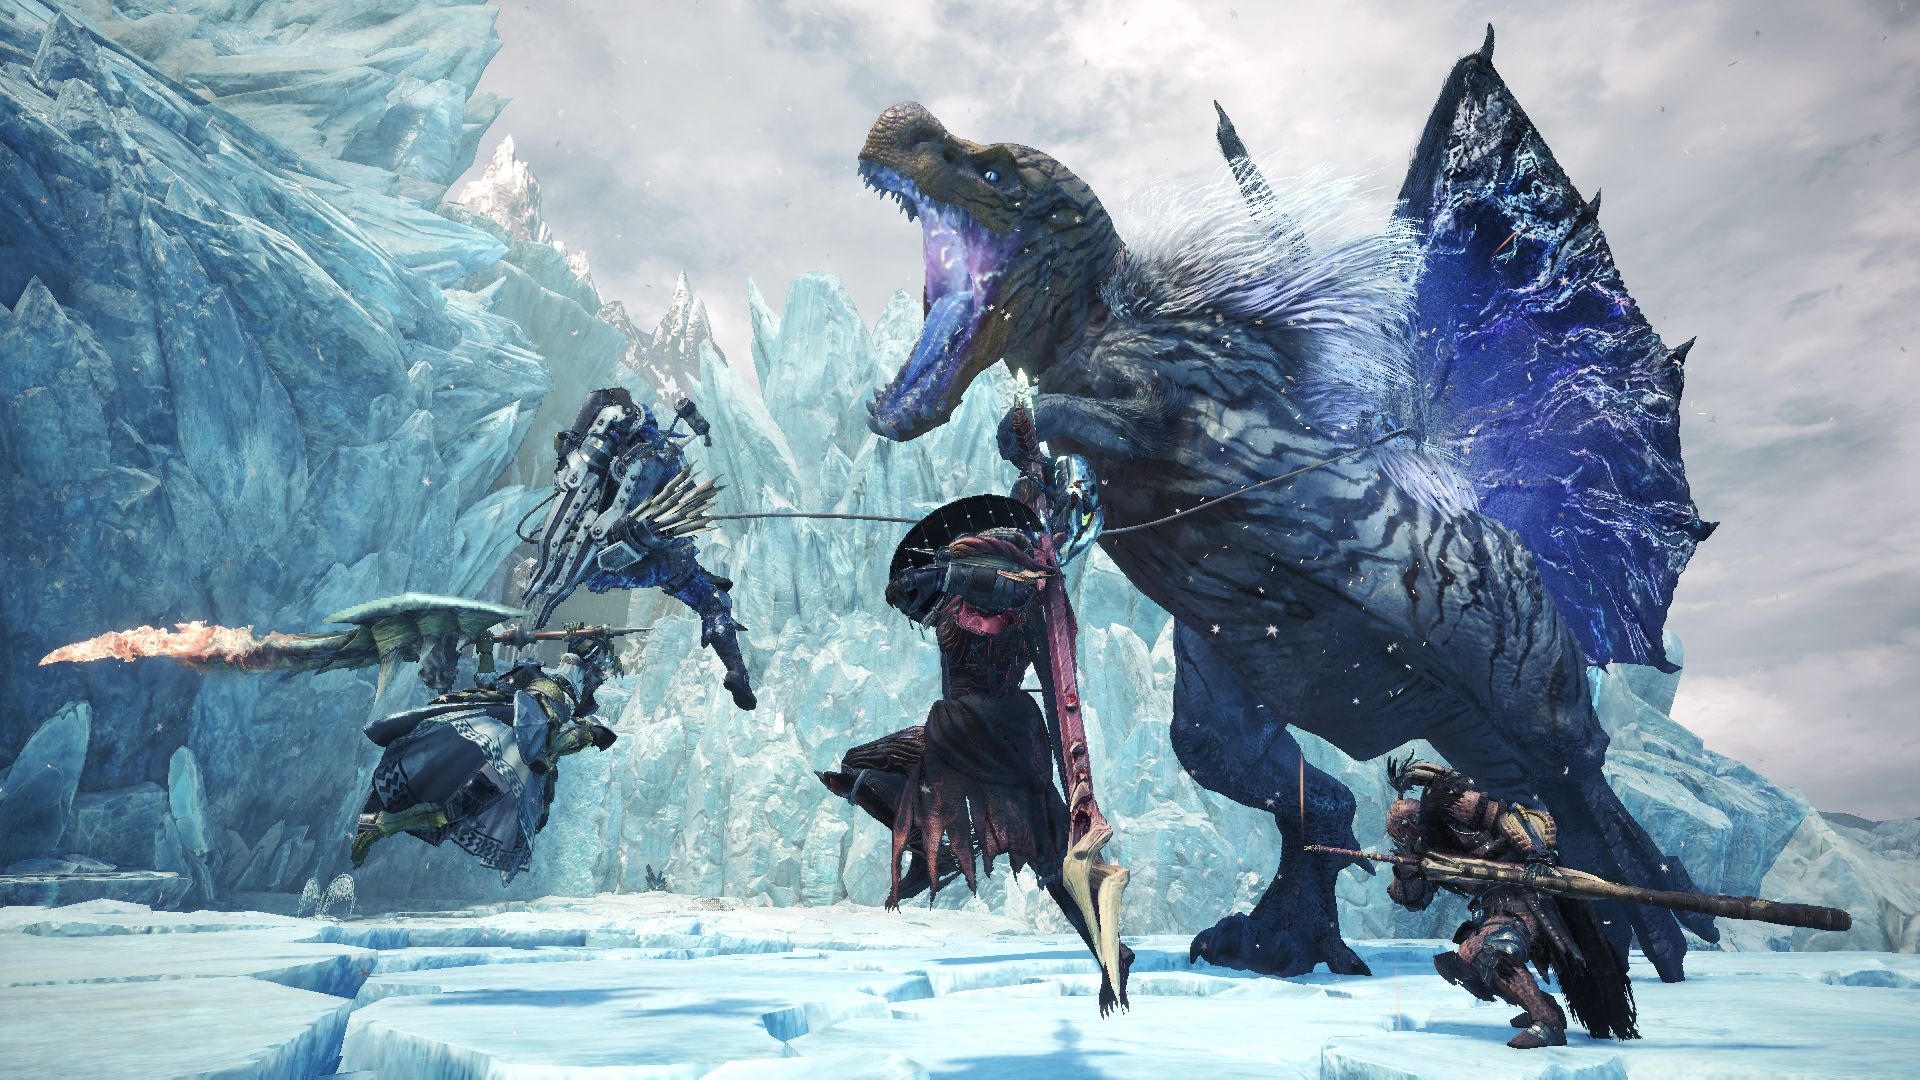
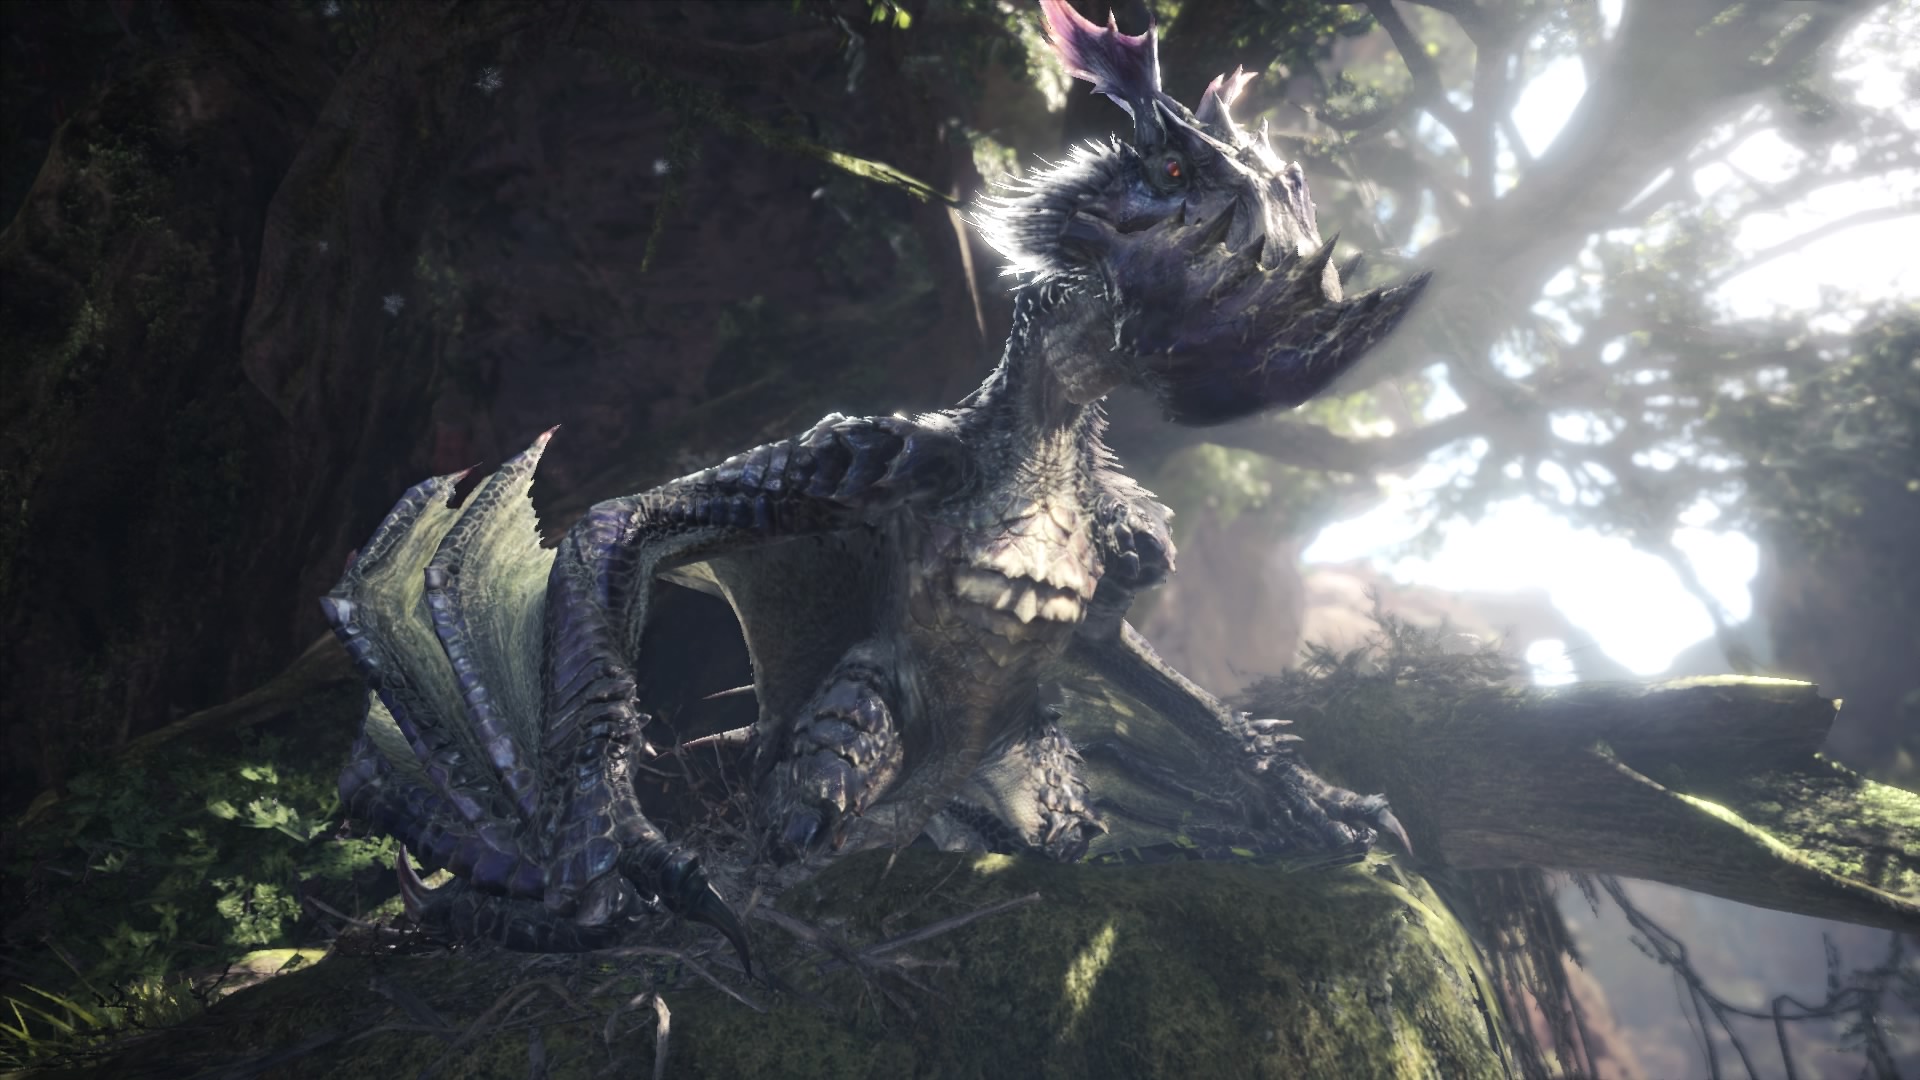
Velkhana
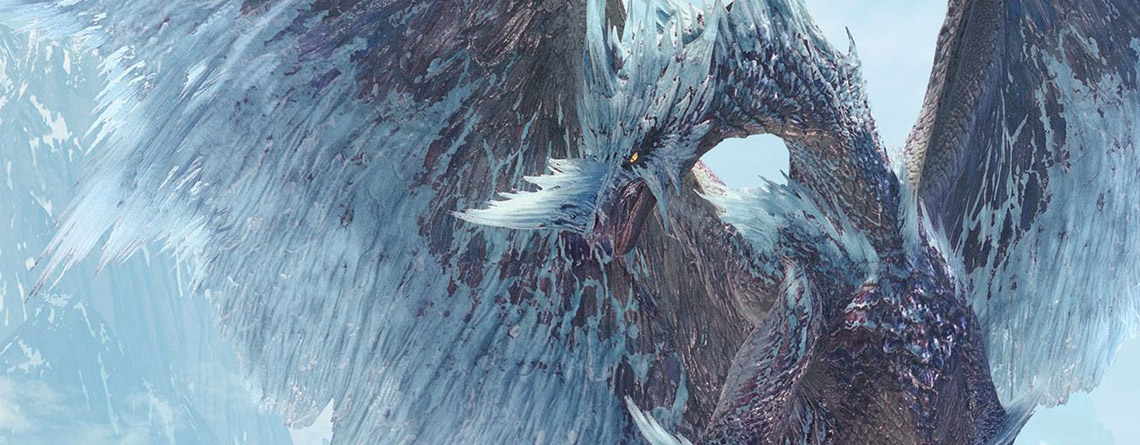
- Type: Elder Dragon
- Habitat: Hoarfrost Reach
- Loot:
- Crystal Shard
- Velkhana Wing
- Velkhana Hardclaw
- Velkhana Cortex
- Velkhana Crown Horn
- Velkhana Whip
- Great Elder Dragon Bone
- Pure Dragon Blood
- Loot Guiding Lands:
- Aurora Crown Horn
- Elder Dragonbone
- Elder Spiritvein Bone (Hardened)
- Hardened Crown Horn (Hardened)
- Great Spiritvein Gem (Hardened)
- Elemental Weaknesses:
- Fire 3
- Water 1
- Thunder 2
- Ice 0
- Dragon 2
- Status Weaknesses:
- Poison 2
- Sleep 1
- Paralysis 1
- Explosion 3
- Stun 1
Description: Velkhana is an Elder Dragon that utilizes powerful ice attacks. These can completely freeze the hunter.
Fight Tip: In the battle against Velkhana, you should destroy the ice on its body to prevent its ice breath. Its ice barriers can be broken. Additionally, always evade its ice beam and watch out for shadows of falling ice chunks on the ground.

Velum-Vaal-Hazak
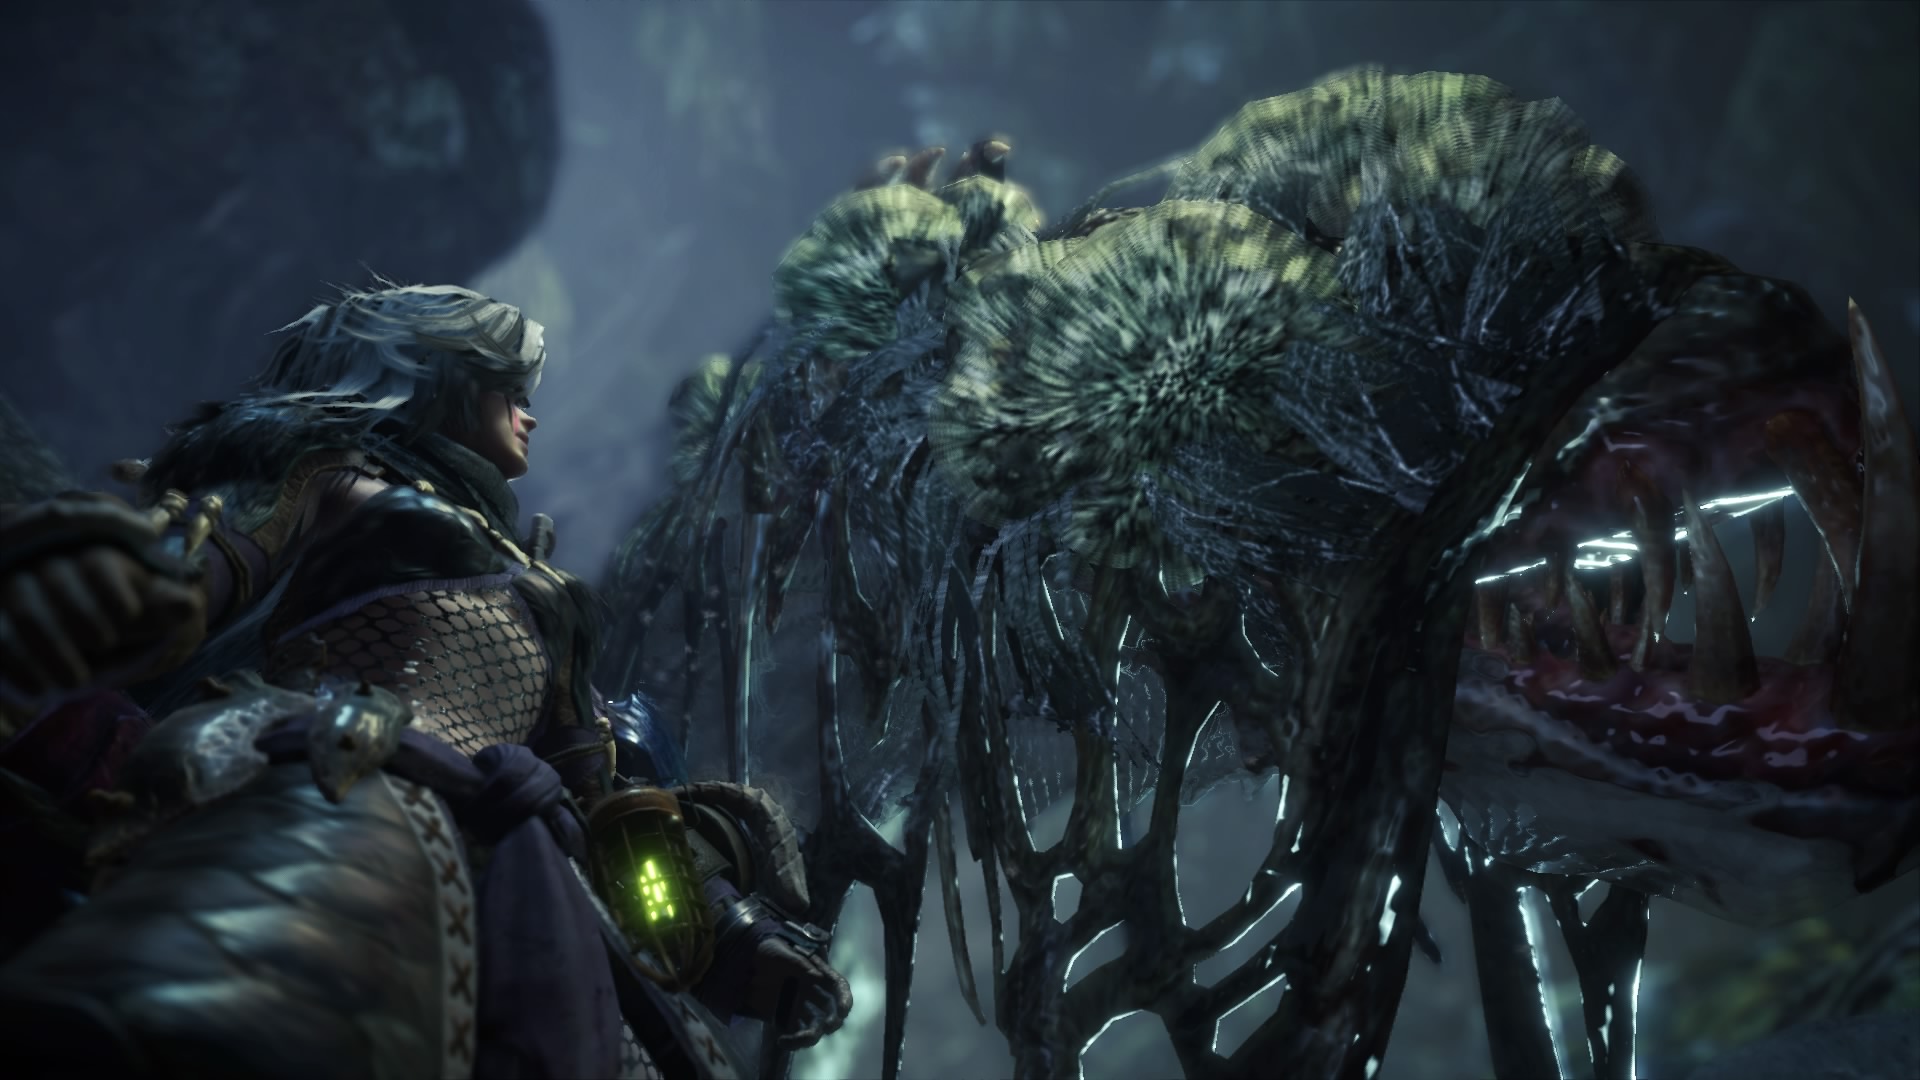
- Type: Elder Dragon
- Habitat: Valley of Decay, Ancient Forest
- Loot:
- Large Elder Dragon Bone
- Pure Dragon Blood
- Deathweaver Membrane
- Shadowpiercer Fang
- Vaal-Hazak Scales
- Vaal-Hazak Club
- Vaal-Hazak Hardclaw
- Vaal-Hazak Cortex
- Vaal-Hazak Shard
- Loot Exchange:
- Umbral Fang
- Elder Dragonbone
- Hardened Umbral Fang (hardened)
- Elder Spiritbone (hardened)
- Large Spiritgem (hardened)
- Elemental Weaknesses:
- Fire 2
- Water 0
- Thunder 1
- Ice 1
- Dragon 2
- Status Weaknesses:
- Poison 1
- Sleep 1
- Paralysis 1
- Explosion 2
- Stun 1
Description: The Velum-Vaal-Hazak is covered with spores. It can produce miasma clouds with these spores and spit them around. This creates deadly white fields on the ground.
Combat Tip: You should stay away from its poisonous clouds and the white areas on the ground and bring Miasma resistance. However, if you hit such a white area, it weakens the Velum-Vaal-Hazak. Flash Pods only work when you’ve broken its head, as its spores protect it before that. It is vulnerable at its head, legs, and the severable tail.
Viper Tobi Kadachi
- Type: Throat-Wyvern
- Habitat: Frostreach
- Prey:
- Deadly Poison Sac
- Ultra Paralysis Sac
- Viper Tobi Kadachi Pelt
- Viper Tobi Kadachi Spike
- Viper Tobi Kadachi Hardclaw
- Viper Tobi Kadachi Membrane+
- Viper Tobi Kadachi Shard
- Prey Guide:
- Grim Dragonite Bone
- Tempting Viperthorn
- Hardened Viperthorn (hardened)
- Spiritvein Bone (hardened)
- Spiritvein Gem Shard (hardened)
- Elemental Weaknesses:
- Fire 1
- Water 0
- Thunder 3
- Ice 2
- Dragon 1
- Status Weaknesses:
- Poison 1
- Sleep 2
- Paralysis 1
- Explosion 2
- Stun 2
Description: This subspecies of Tobi Kadachi has a poisonous tail and can paralyze with its bite. Additionally, the Viper Tobi Kadachi can glide without trees.
Combat Tip: Always have antidote or herbal medicine ready in the fight against Viper Tobi Kadachi. The poison of this subspecies ticks with high damage. You should focus on its head, neck, and legs to tire it out quickly.
Vulcan-Odogaron
- Type: Riptide Wyvern
- Habitat: Home of the Elders, Coral Highlands, Frostbite Reach. Valley of Decay, Ancient Forest, Wildspire Wastes
- Loot:
- Solid Vulcan-Odogaron Bowstring
- Nourishing Extract
- Vulcan-Odogaron Hardclaw
- Vulcan-Odogaron Hardfang
- Vulcan-Odogaron Whip
- Vulcan-Odogaron Shard
- Loot Leading Land:
- Veelencaller Claw
- Dragonbone Steelbone
- Hardened Claw (hardened)
- Spiritstone (hardened)
- Spiritbone Steelbone (hardened)
- Elemental Weaknesses:
- Fire 2
- Water 3
- Thunder 2
- Ice 2
- Dragon 1
- Status Weaknesses:
- Poison 3
- Sleep 2
- Paralysis 3
- Explosion 2
- Stun 2
Description: The Vulcan-Odogaron is a subspecies of Odogaron that is just as gluttonous and aggressive as its relative. At times, it even falls into a feeding frenzy. It is lightning fast and spits red dragon balls in a frenzy.
Combat Tip: In battle against Vulcan-Odogaron, you must dodge its lightning-fast attacks. With elemental attacks on the head, you can bring it out of its frenzy. Weak points are besides the head the forelegs and the severable tail.
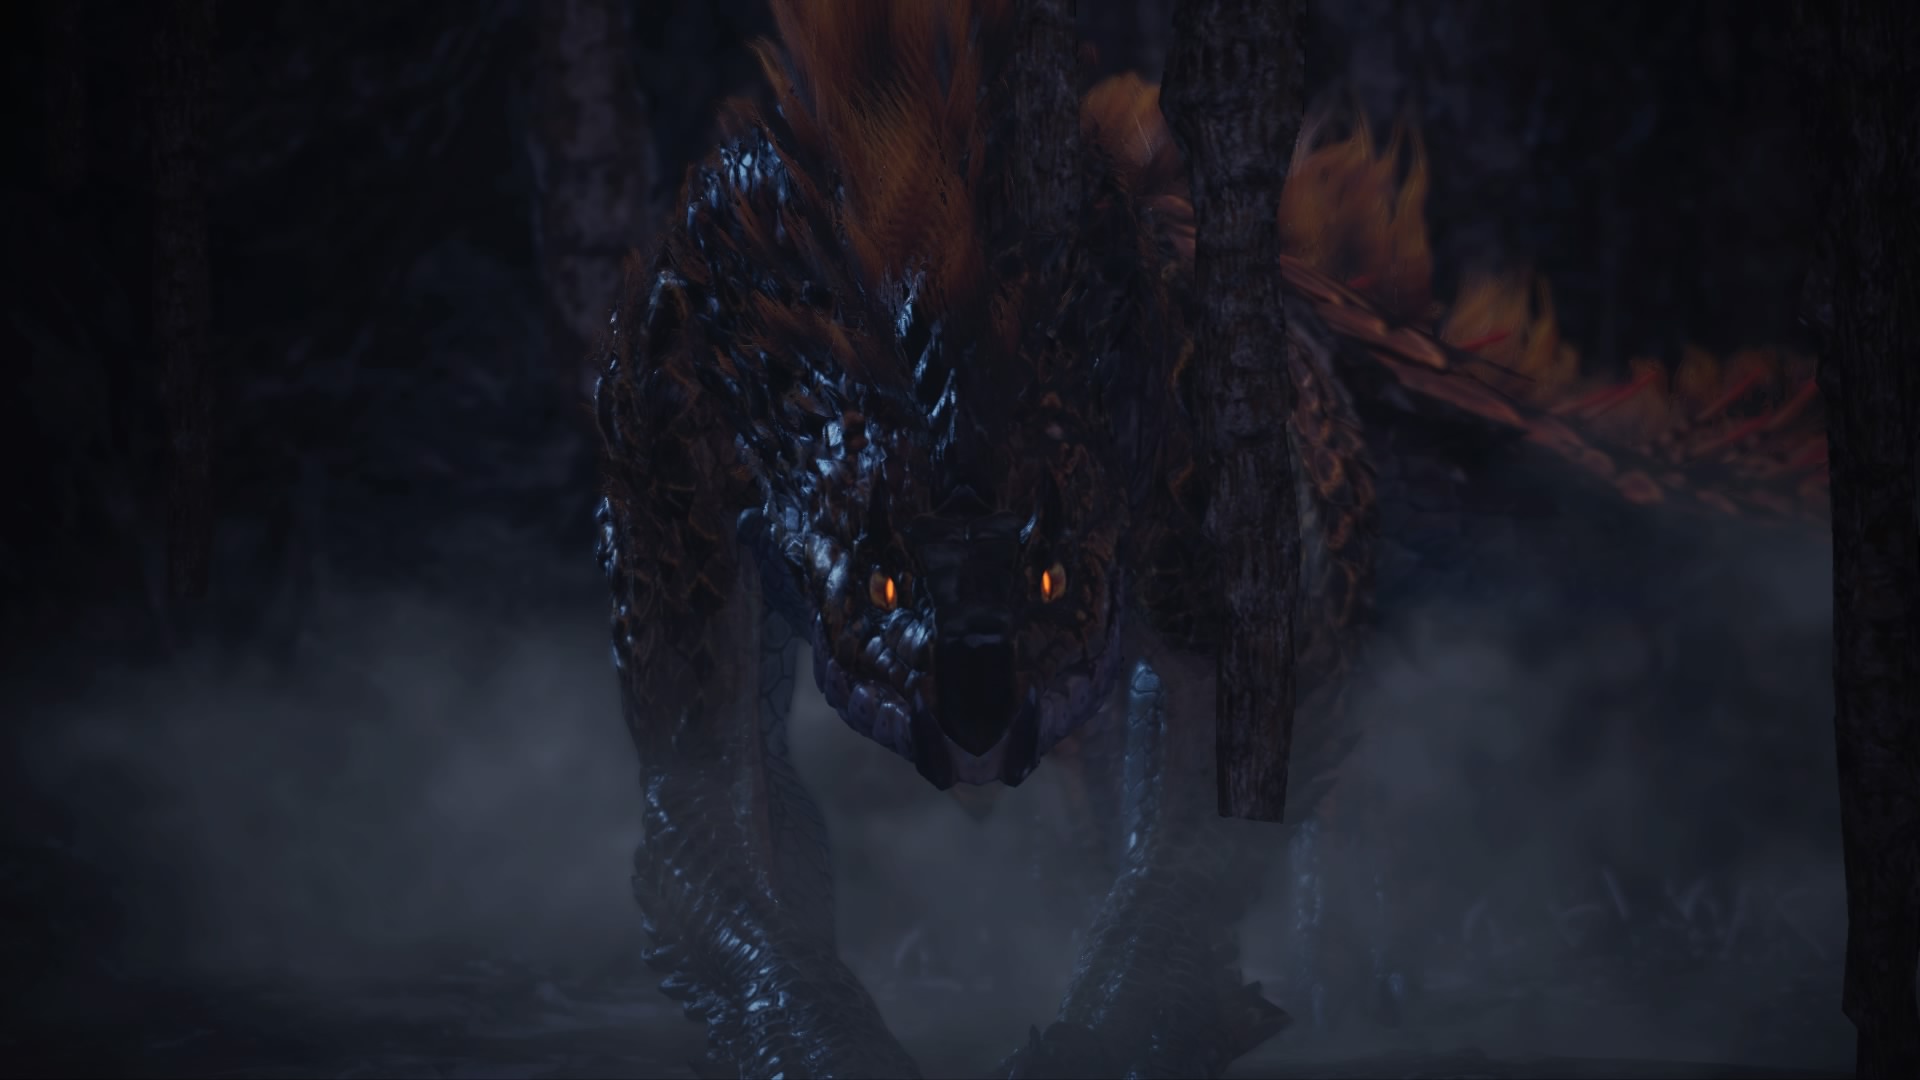
Savage Deviljho
- Type: Fighting Wyvern
- Habitat: Elders’ Home, Coral Highlands, Frostfang Forest. Valley of Decay, Ancient Forest, Wildspire Waste
- Materials:
- Vicious Fang
- Deviljho Gem
- Deviljho Club
- Deviljho Hook
- Deviljho Tear
- Deviljho Black Pelt
- Deviljho Shard
- Black Blood
- Carved Materials:
- Bloodstained Black Leather
- Dragonbone Steel
- Stained Leather (hardened)
- Spiritvein Steel (hardened)
- Large Spiritvein Gem (hardened)
- Elemental Weaknesses:
- Fire 2
- Water 2
- Thunder 3
- Ice 1
- Dragon 3
- Status Weaknesses:
- Poison 3
- Sleep 3
- Paralysis 3
- Explosion 2
- Stun 2
Description: This mutated Deviljho is in a hunger frenzy. It is even more aggressive than the normal variant and attacks anything that gets in its way.
Combat Hint: When fighting this beast, you should prevent it from eating. This makes it even stronger. Focus your attacks on its head. You can also distract it with other monsters.
Woundmark-Yiang-Garuga
- Type: Bird Wyvern
- Habitat: Guiding Lands
- Prey:
- Garuga Hides
- Garuga Shard
- Garuga Cortex
- Garuga Whip
- Garuga Silverfur
- Fashionable Beak
- Rare Wyvern Gem
- Scratched Shell
- Prey Guiding Lands:
- Hardened Silverfur
- Spiritvein Steelbone
- Spiritvein Gem
- Elemental Weaknesses:
- Fire 0
- Water 3
- Thunder 0
- Ice 1
- Dragon 2
- Status Weaknesses:
- Poison 1
- Sleep 1
- Paralysis 2
- Explosion 3
- Stun 2
Description: The Woundmark-Yiang-Garuga is a hardened version of the Yiang Garuga. It has a scar on its head from a battle and deals strong fire-based breath attacks.
Combat Tip: The head of the Woundmark-Yiang-Garuga can be broken quickly. Additionally, it doesn’t have much stamina. However, be wary of its fire attacks, which can rain down on you like a machine gun.
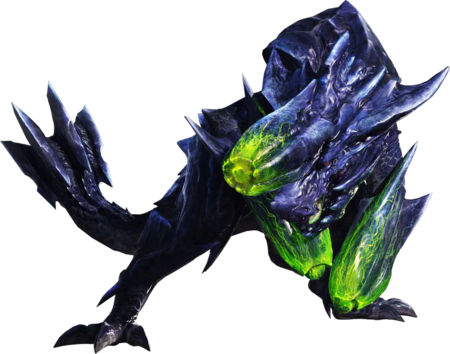
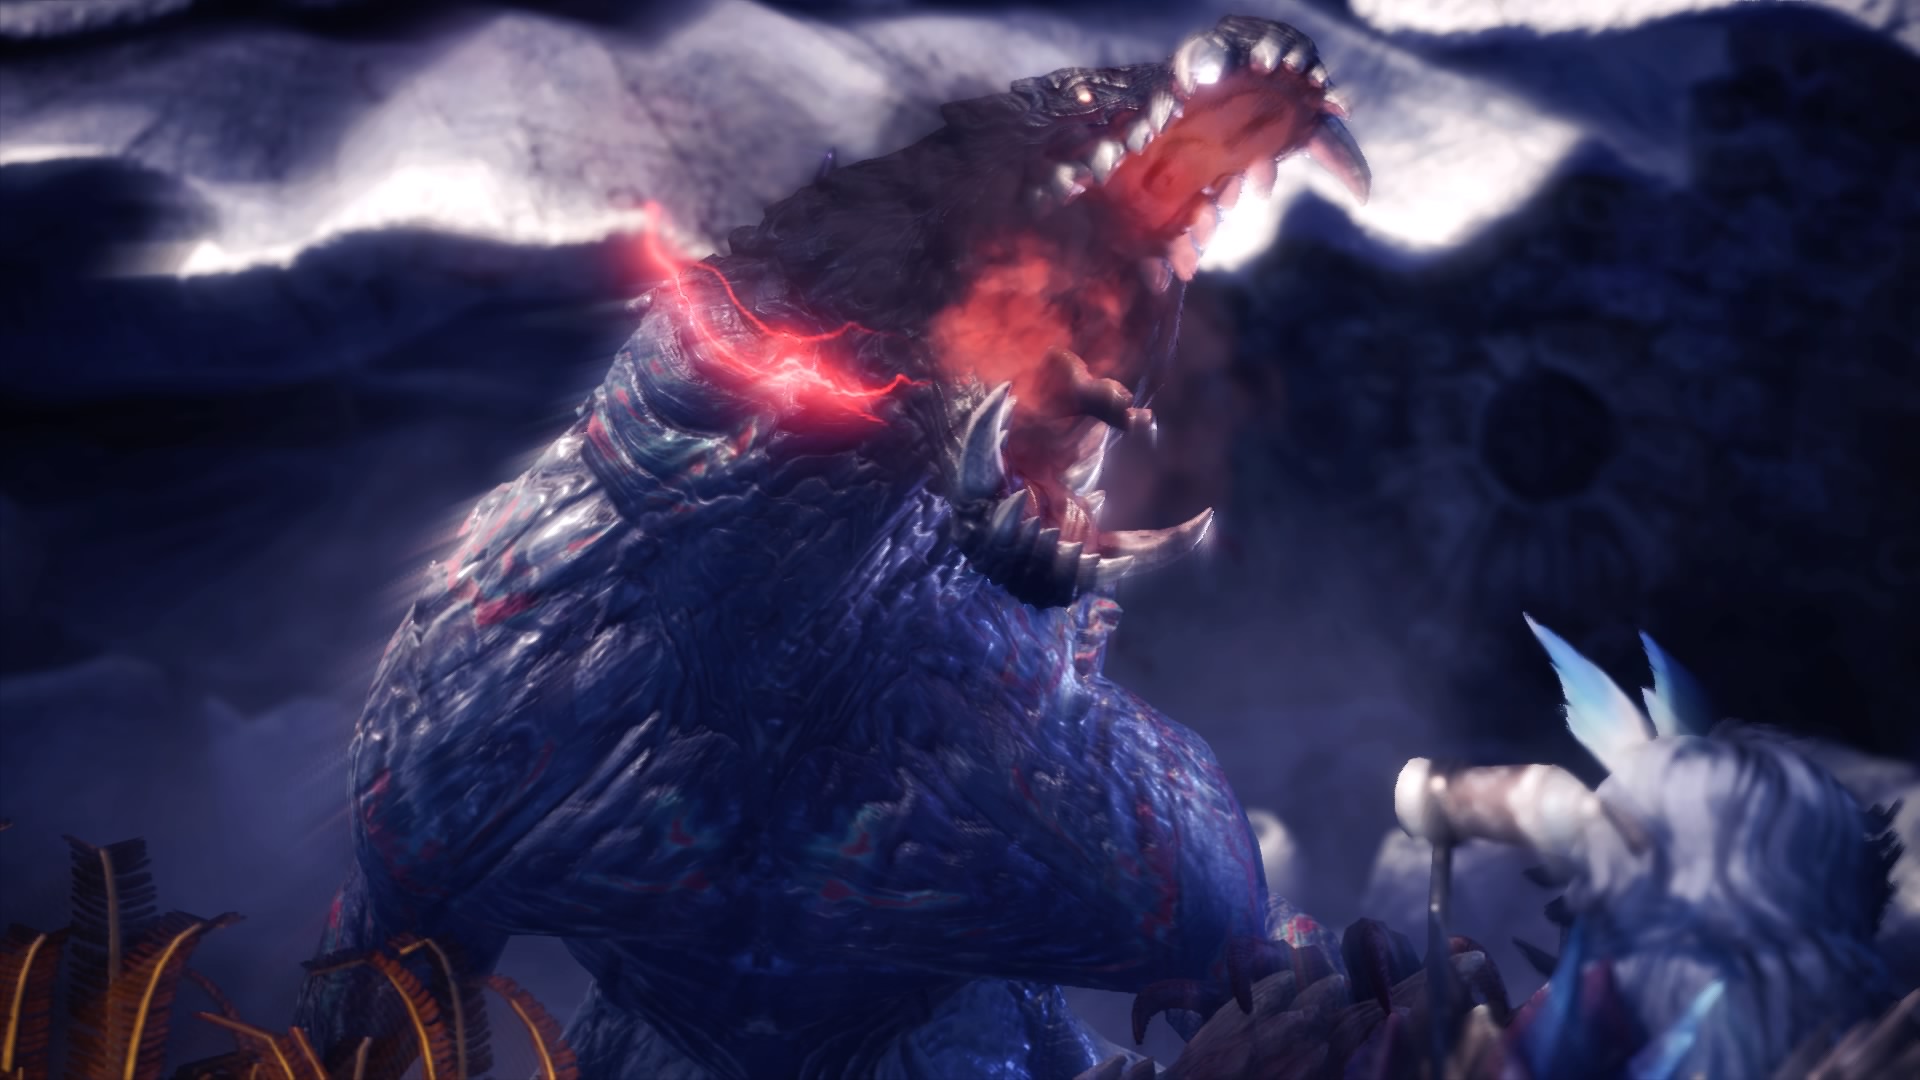
Wrathful Brachydios
- Type: Fighting Wyvern
- Habitat: Guiding Lands
- Loot:
- Brachydios Eradicator
- Brachydios Pallium
- Brachydios Whip
- Brachydios Bombardier
- Flamepoint Mucus
- Immortal Reactor
- Indestructible Black Armor
- Elemental Weaknesses:
- Fire 0
- Water 2
- Thunder 1
- Ice 3
- Dragon 1
- Status Weaknesses:
- Poison 2
- Sleep 2
- Paralysis 2
- Explosion 1
- Stun 2
Description: The slime mushrooms of the Wrathful Brachydios cover a large part of its body. Therefore, its front half is nearly completely covered with yellow-green to red slime. It can use this to cause explosions.
Combat Tip: You should best fight Brachydios with ice or water attacks, as these elements dilute its slime. You need to be cautious when the slime on its body turns red. Then it is about to explode. Weak points are its arms, forehead, and tail, which can be severed.
Yian Garuga
- Type: Bird Wyvern
- Habitat: Guiding Lands
- Loot:
- Garuga Shard
- Garuga Cortex
- Garuga Silverpelt
- Sharp Beak
- Garuga Brachial Wing
- Rare Wyvern Gem
- Garuga Whip
- Flame Sac
- Guiding Lands Loot:
- Dark Silverpelt
- Dragonbone Steel Left
- Elemental Weaknesses:
- Fire 0
- Water 3
- Thunder 0
- Ice 1
- Dragon 2
- Status Weaknesses:
- Poison 1
- Sleep 1
- Paralysis 2
- Explosion 3
- Stun 2
Description: The Yian Garuga is a subspecies of the Yian Kut-Ku. It has a hard shell, a long mane, and a poisonous spike. It can skillfully evade traps.
Battle Tip: Yian Garuga is very agile and can destroy pitfall traps. If you break its body parts, you can slow it down.
Zinogre

- Type: Fanged Wyvern
- Habitat: Guiding Lands
- Loot:
- Zinogre Electrosthread+
- Zinogre Cortex
- Zinogre Deathshock
- Zinogre Whip
- Zinogre Hardclaw
- Zinogre Sky Emerald
- Zinogre Hardthorn
- Thunderbug
- Fulgur Beetle
- Loot Guiding Lands:
- Charged Deathshock
- Dragonbone Steel
- Spiritvein Steel (hardened)
- Spiritvein Gemstone (hardened)
- Hardened Shock (hardened)
- Elemental Weaknesses:
- Fire 1
- Water 2
- Thunder 0
- Ice 3
- Dragon 1
- Status Weaknesses:
- Poison 2
- Sleep 2
- Paralysis 1
- Explosion 2
- Stun 2
Description: Zinogre’s body is infused with electricity. It has sharp claws and strong limbs, which is why they perform well in mountainous areas.
Battle Tip: When Zinogre is overloaded, its body parts become softer, but shock traps are ineffective then. If you make Zinogre flinch multiple times, you can relieve it from this overload.
Angry Rajang
- Type: Bite Beast
- Habitat: Frosty Expanse
- Prey:
- Rajang Apoplexy
- Rajang Goldfur+
- Rajang Hardhorn
- Rajang Hardclaw
- Rajang Heart
- Uncanny Goldslasher
- Elemental Weaknesses:
- Fire 0
- Water 1
- Thunder 0
- Ice 3
- Dragon 0
- Status Weaknesses:
- Poison 1
- Sleep 1
- Paralysis 1
- Explosion 2
- Stun 1
Description: The Angry Rajang is always in a normal rage mode. However, its fur shows differences compared to the normal Rajang. When it gets really angry, it enters a Super Rage mode and is surrounded by a golden aura.
Combat Tip: When facing the Angry Rajang, dodging is crucial. Otherwise, use every tool available at your disposal. It is vulnerable at the head, which is also doubly breakable.
Small New Monsters in Monster Hunter World: Iceborne
Here we introduce you to the small monsters from the expansion that you will not have any major difficulties with.
Anteka
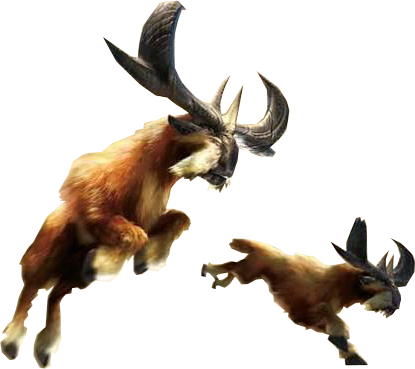
- Habitat: Frostfang Reach
- Loot: Anteka Antler, Fine Fur
Description: A somewhat more aggressive herbivore from the tundra. They use their horns to fend off attackers.
Cortos
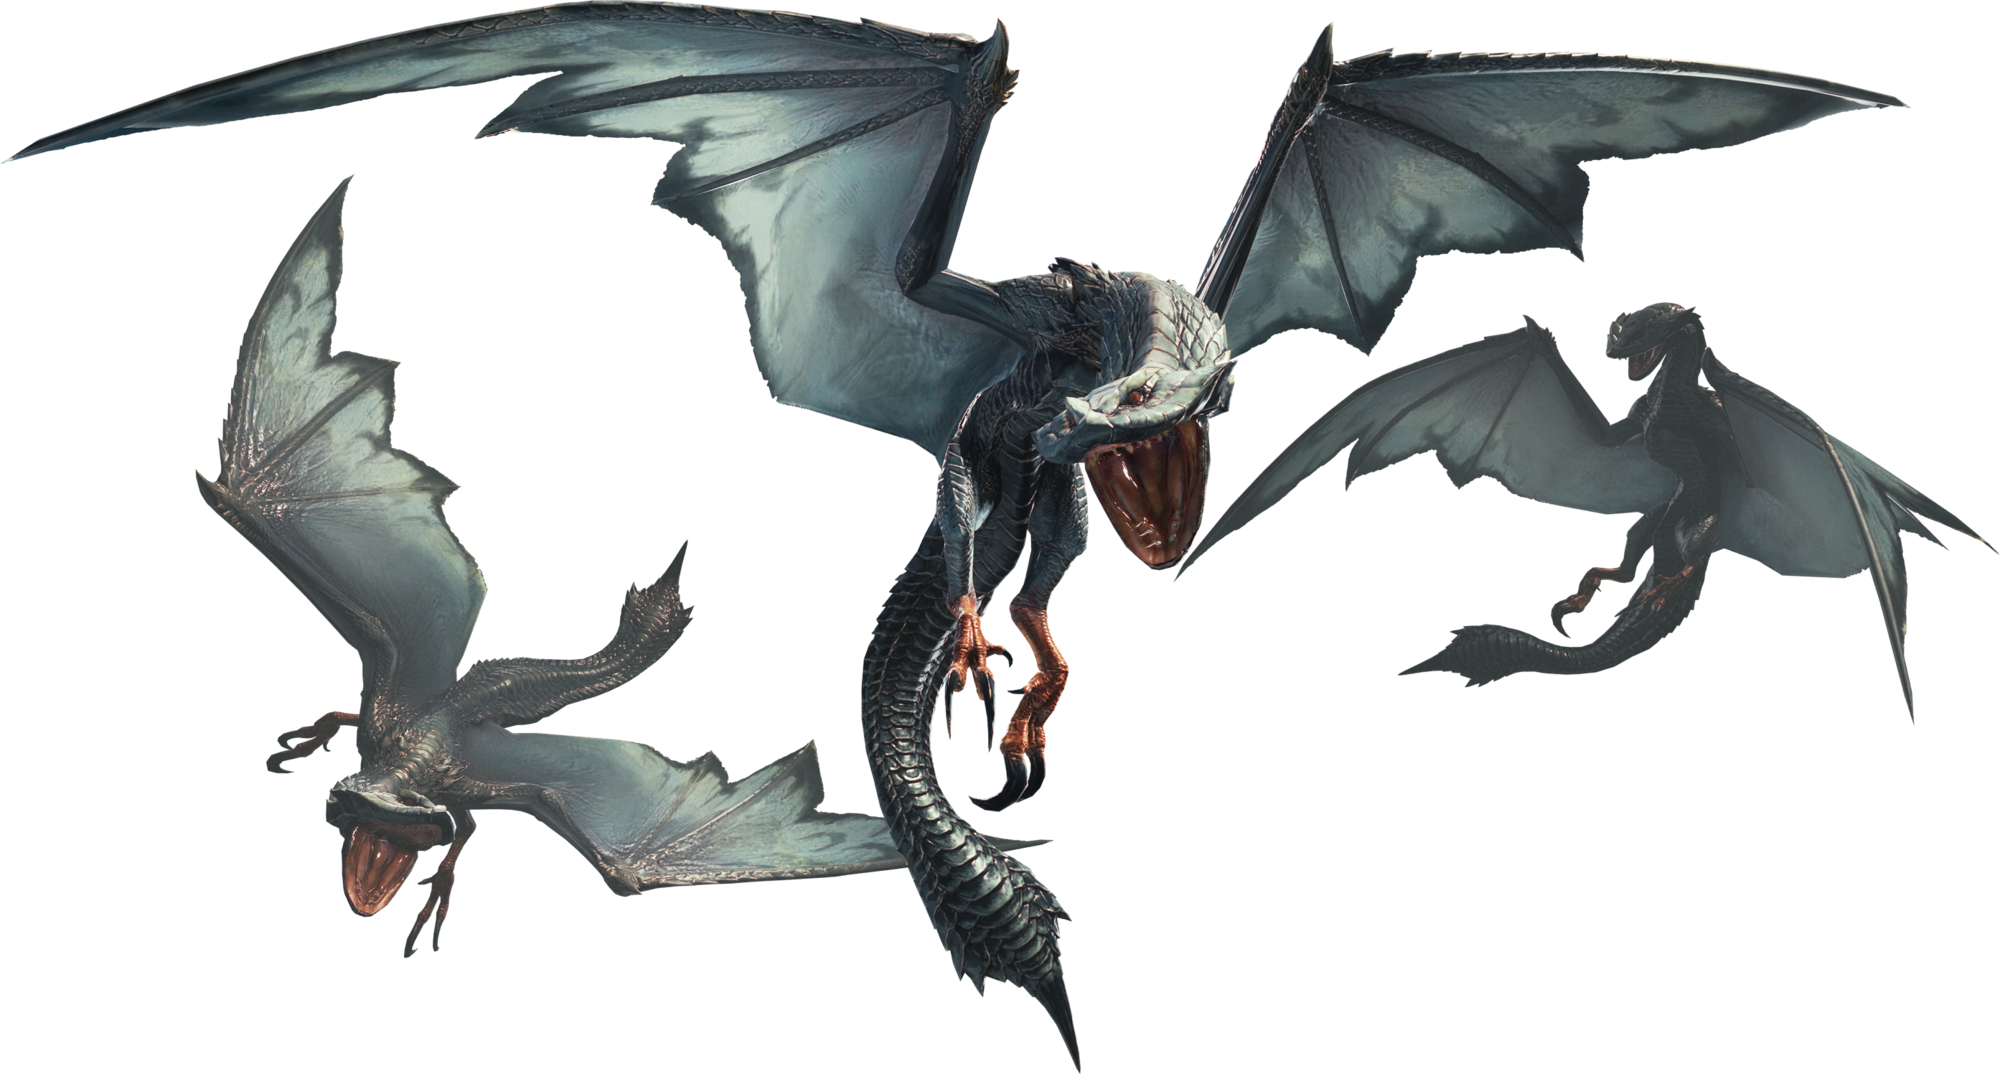
- Habitat: Frostfang Reach
- Loot: Cortos Hardclaw, Flying Wyvern Skin
Description: These flying wyverns are generally not aggressive. They only attack hunters in emergencies, and their breath lowers elemental resistance.
Pepe

- Habitat: Frostfang Reach
- Prey: Fine Fur, Raw Meat
Description: Pepe are herbivores with long fur. They have a strong flight instinct, but the males defend their young.
Wulg
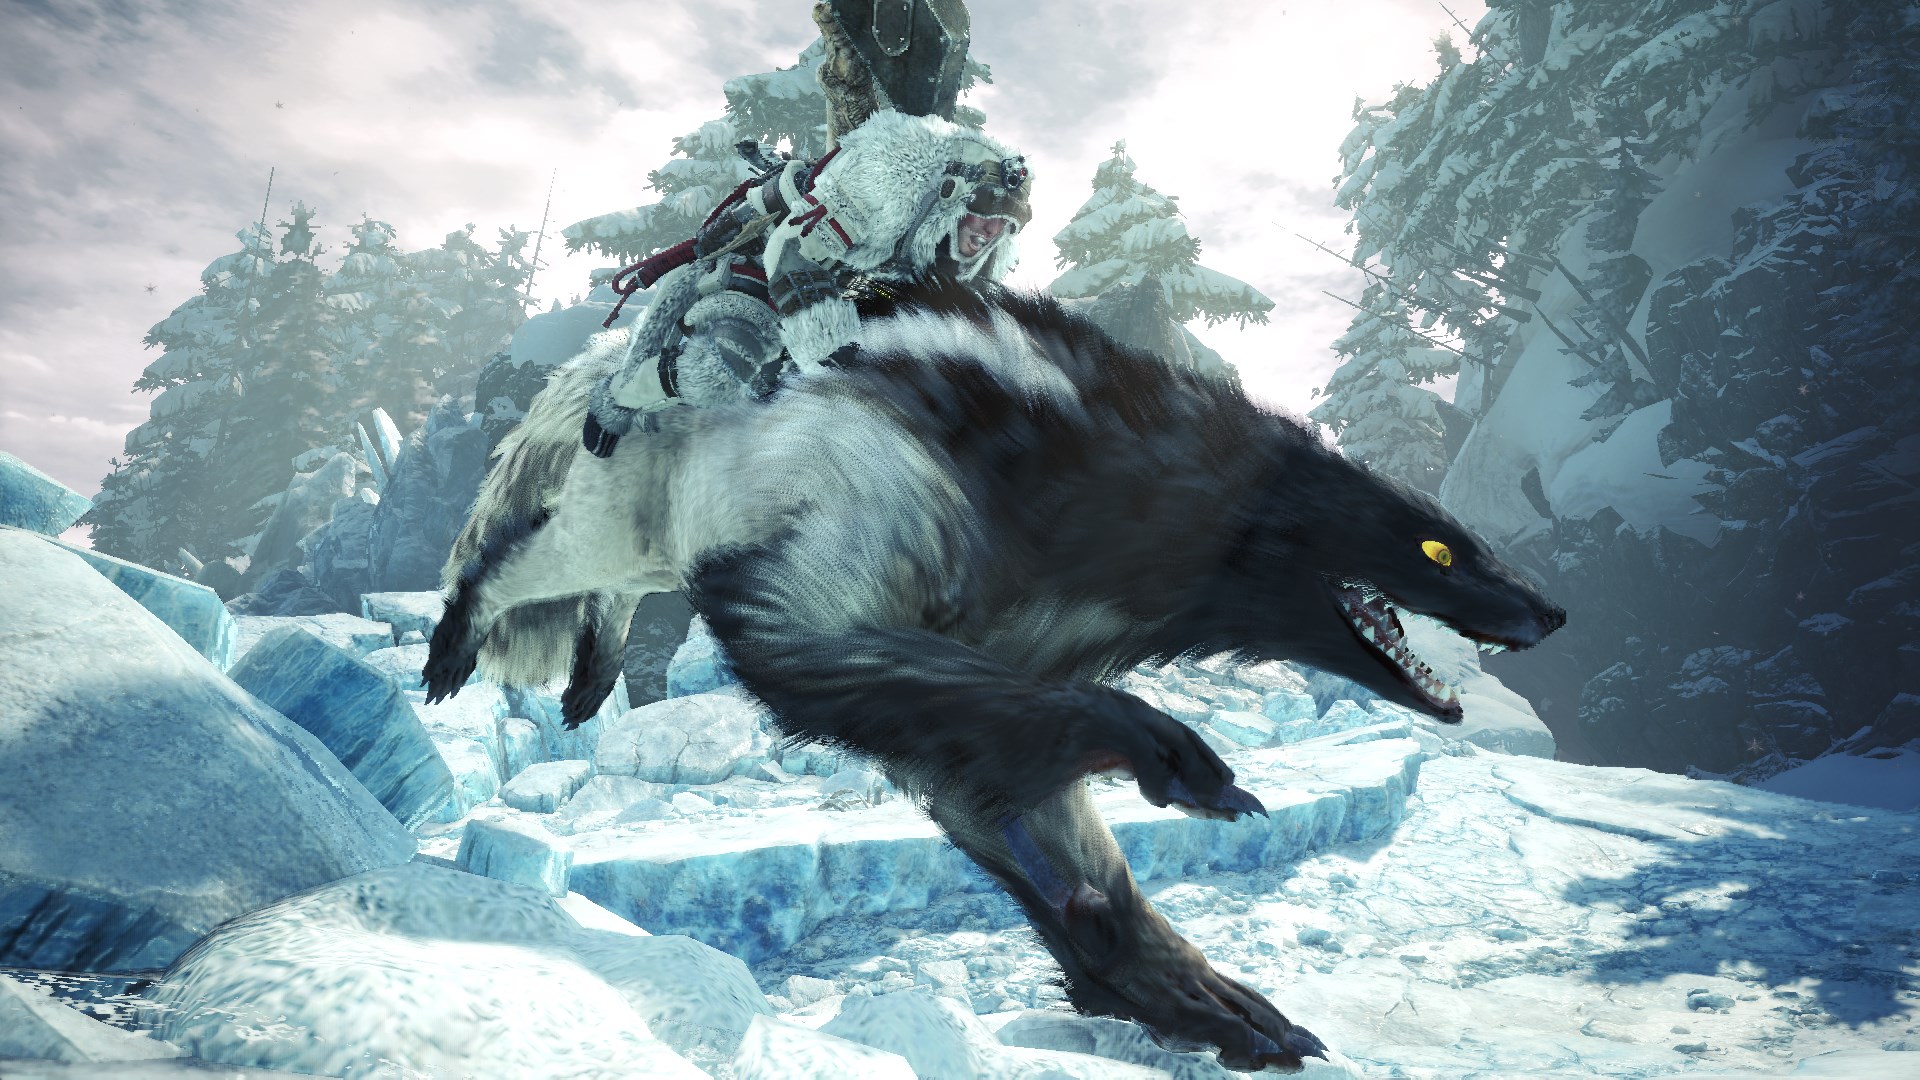
- Habitat: Frostfang Reach
- Prey: Robust Claw, Wulg Thick Fur
Description: Wulg are small fang wyverns. They hunt in packs and attack opponents that are much larger than they are.
In this guide, you will also learn how to improve your weapons and armor: