
The default settings of Call of Duty: Black Ops Cold War are not optimized for optimal gameplay in PvP. MeinMMO shows which settings can improve your performance.

What do the settings bring? In the fast-paced first-person shooters of the “Call of Duty” series, it often comes down to fractions of a second whether you smile with joy after a duel or frustration as you skip the killcam. This also holds true in Black Ops Cold War.
With the right settings, you can ensure that the opponent has no advantage here, and perhaps you can secure yourself a few more smiles in a match. Therefore, MeinMMO presents the optimal settings for the multiplayer of CoD: Cold War.
No specifications for PC graphics: In this article, we will refrain from specific graphics settings for PC. The setups of most players are as different as their play styles. In general, you should avoid choosing high graphics settings and instead focus on performance and minimizing input lag between your graphics card and monitor.
Graphics Settings
You can find these settings in the options under “Graphics”.
Field of view: 90 – 110
This setting directly affects the size of the view you get to see. The higher the value, the more of the game you can see. If you lower the slider, the view will get smaller. For the first time ever in a CoD, this setting is also available on consoles, and you should adjust it a bit. Your preferences also play a role here.
With a field of view between 90 – 110, your view is large enough, and you prevent distortions. Because if you crank up the field of view too high, you will experience a sort of fisheye effect that alters your sight slightly, making everything seem a bit faster. Give it a try; you might find it suitable or even enjoyable.
Cold War warns of performance limitations, like frame drops and graphical issues, at higher values.

Targeting field of view: Influenced
Try setting this to “Influenced” instead of “Independent”. This allows your field of view to adjust when aiming to match your field of view setting. This reduces visual recoil, but you lose a bit of zoom. An analysis of the setting with pros and cons can be found here. Again, see how it feels for you. Not every player will handle the slight recoil trick.
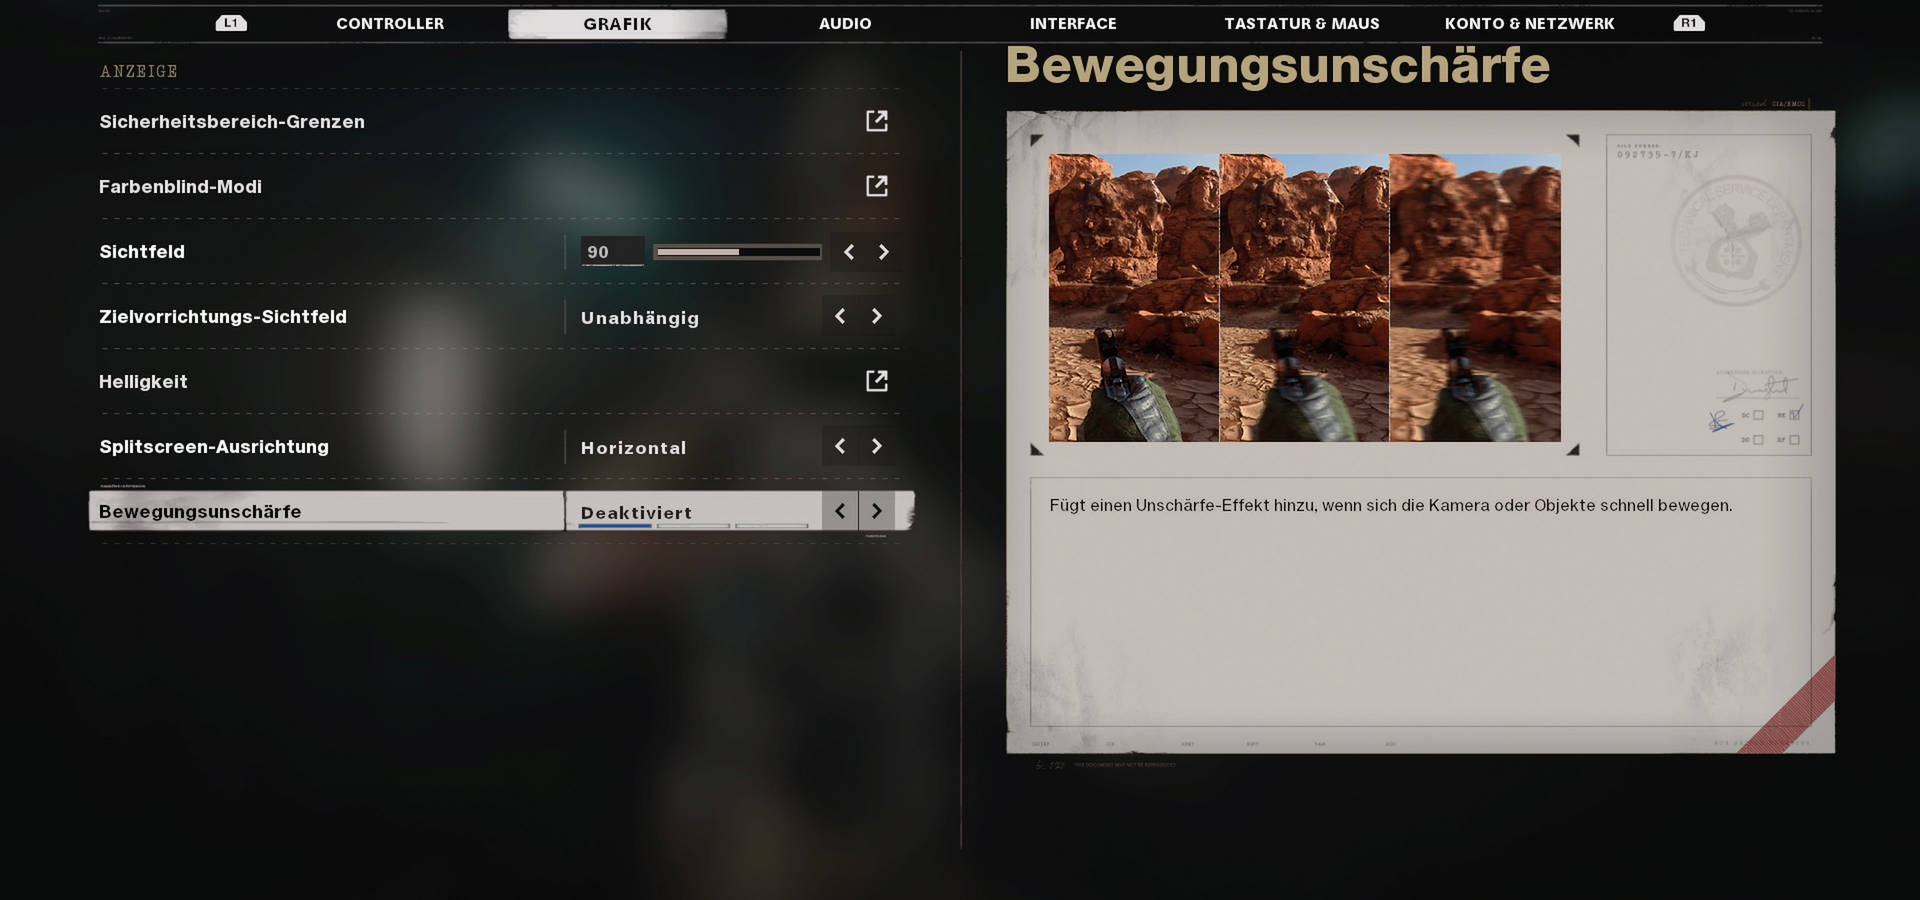
Motion blur: Disabled
There is no room for debate here; you should always disable motion blur in a PvP environment. This visual filter affects your visible image of movements, which become less accurate. Such filters have no place in multiplayer, as they are maximally suited for the story campaign.
V-Sync: Disabled
We can’t resist a small graphics recommendation for PC players. With V-Sync, the framerate of your monitor and the game is synchronized, but this often comes at the cost of a small input lag. Without V-Sync, there may be small graphical issues, but they are usually more tolerable than a delayed display.
Interface Settings
You can find these settings in the options under “Interface”.
HUD border: Set smaller
With this setting, you can modify the position of your HUD on the screen. This can help you particularly on large screens or TVs, as you can bring the mini-map further into your field of view. If you notice while playing that your view towards the map or ammo display is too far away, then shift your HUD a bit towards the center.
HUD elements: Individual
In Cold War, you can disable many HUD elements, thus cleaning up your screen a bit. If you’re playing solo most of the time, you often don’t need to see your teammates’ health displays. Scroll through the settings a bit and turn off everything that seems unnecessary for better clarity.

Audio Settings
You can find these settings in the options under “Audio”.
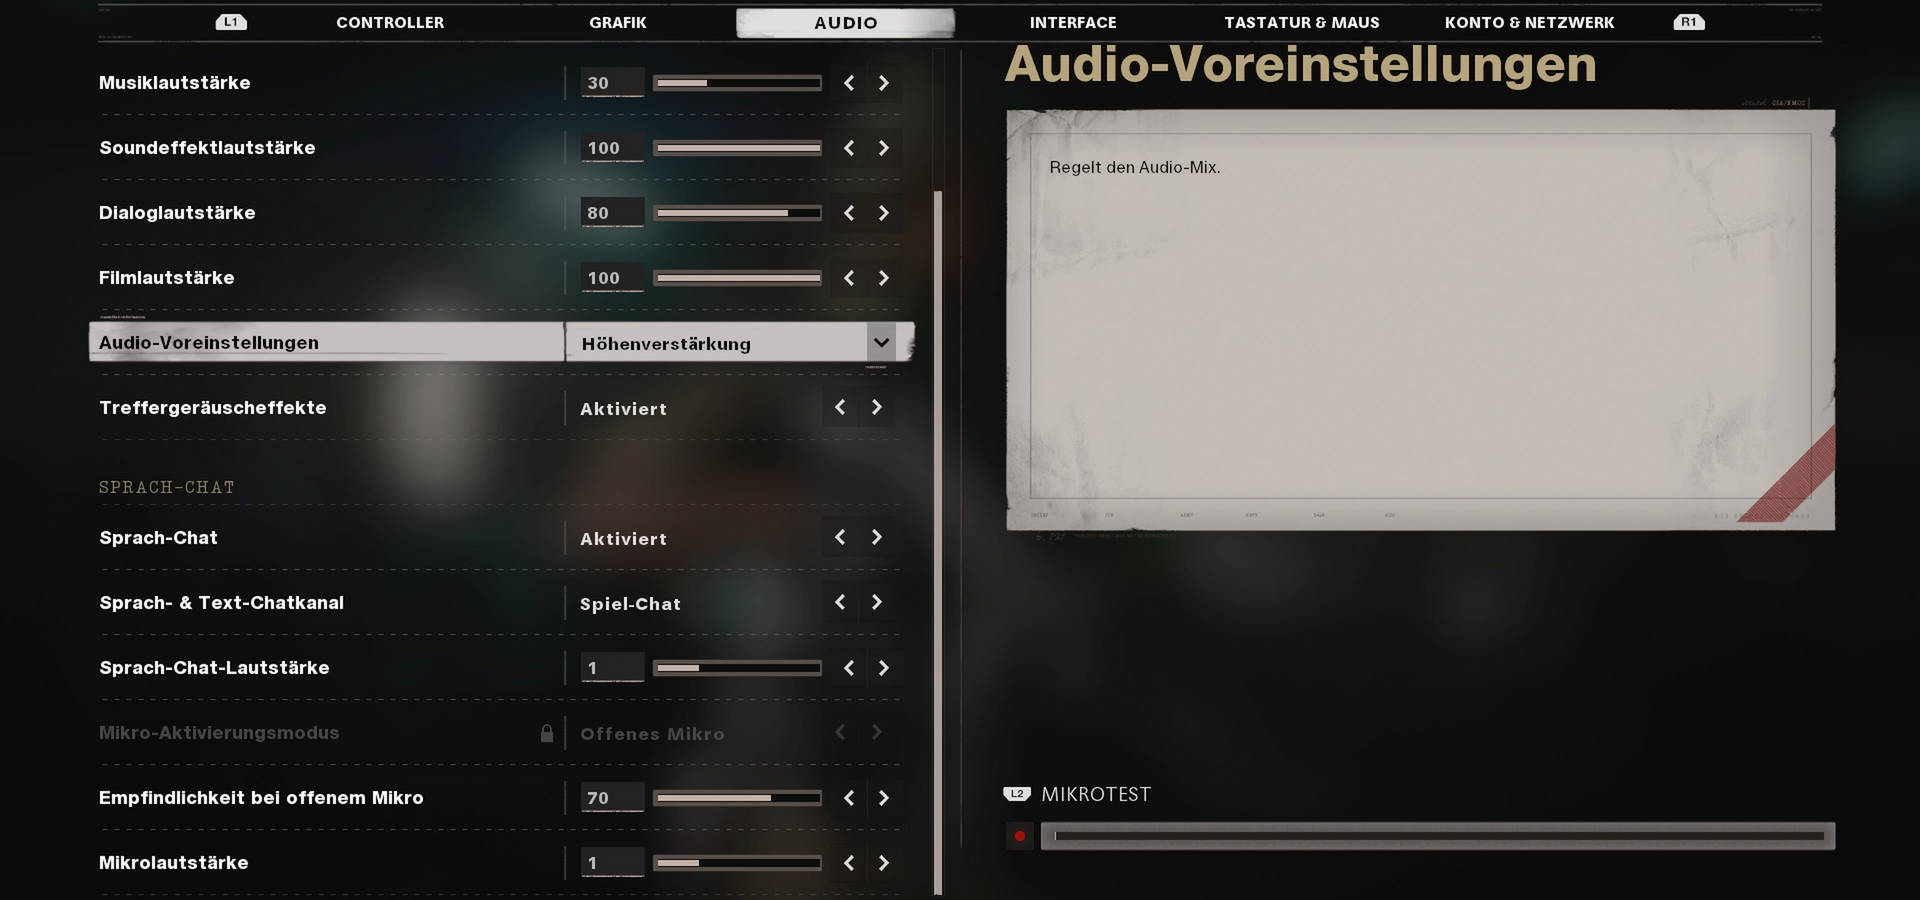
Music volume: 30 – 40 or completely off
In Call of Duty, epic melodies often come your way, which are supposed to increase the tension when capturing a point or simply serve the atmosphere. However, the music is the audio track that helps you the least in multiplayer and can even be distracting at times. After all, you ideally want to hear the sound effects, which include sounds of opponents such as footsteps or reload audio.
Dialogue volume: 80
The in-game shouts of characters can provide you with useful clues, as your teammates and even your enemies sometimes share information. So you know when the player next to you throws a grenade or when an enemy informs his camping buddy. Feel free to lower this setting a bit so that the CoD operators don’t shout at you too loudly. If you don’t like your operator’s voice, unlock a few new ones.
Audio presets: Height Boost
We have watched some videos on “Settings” and the most commonly chosen setting is “Height Boost”. With this preset, you’ll hear the “footsteps” of your enemies best, as the focus shifts from bass-heavy explosions to height-intensive sound effects.
Controller Settings / Mouse & Keyboard Settings
You can find these settings in the options under “Controller” or “Keyboard & Mouse”.
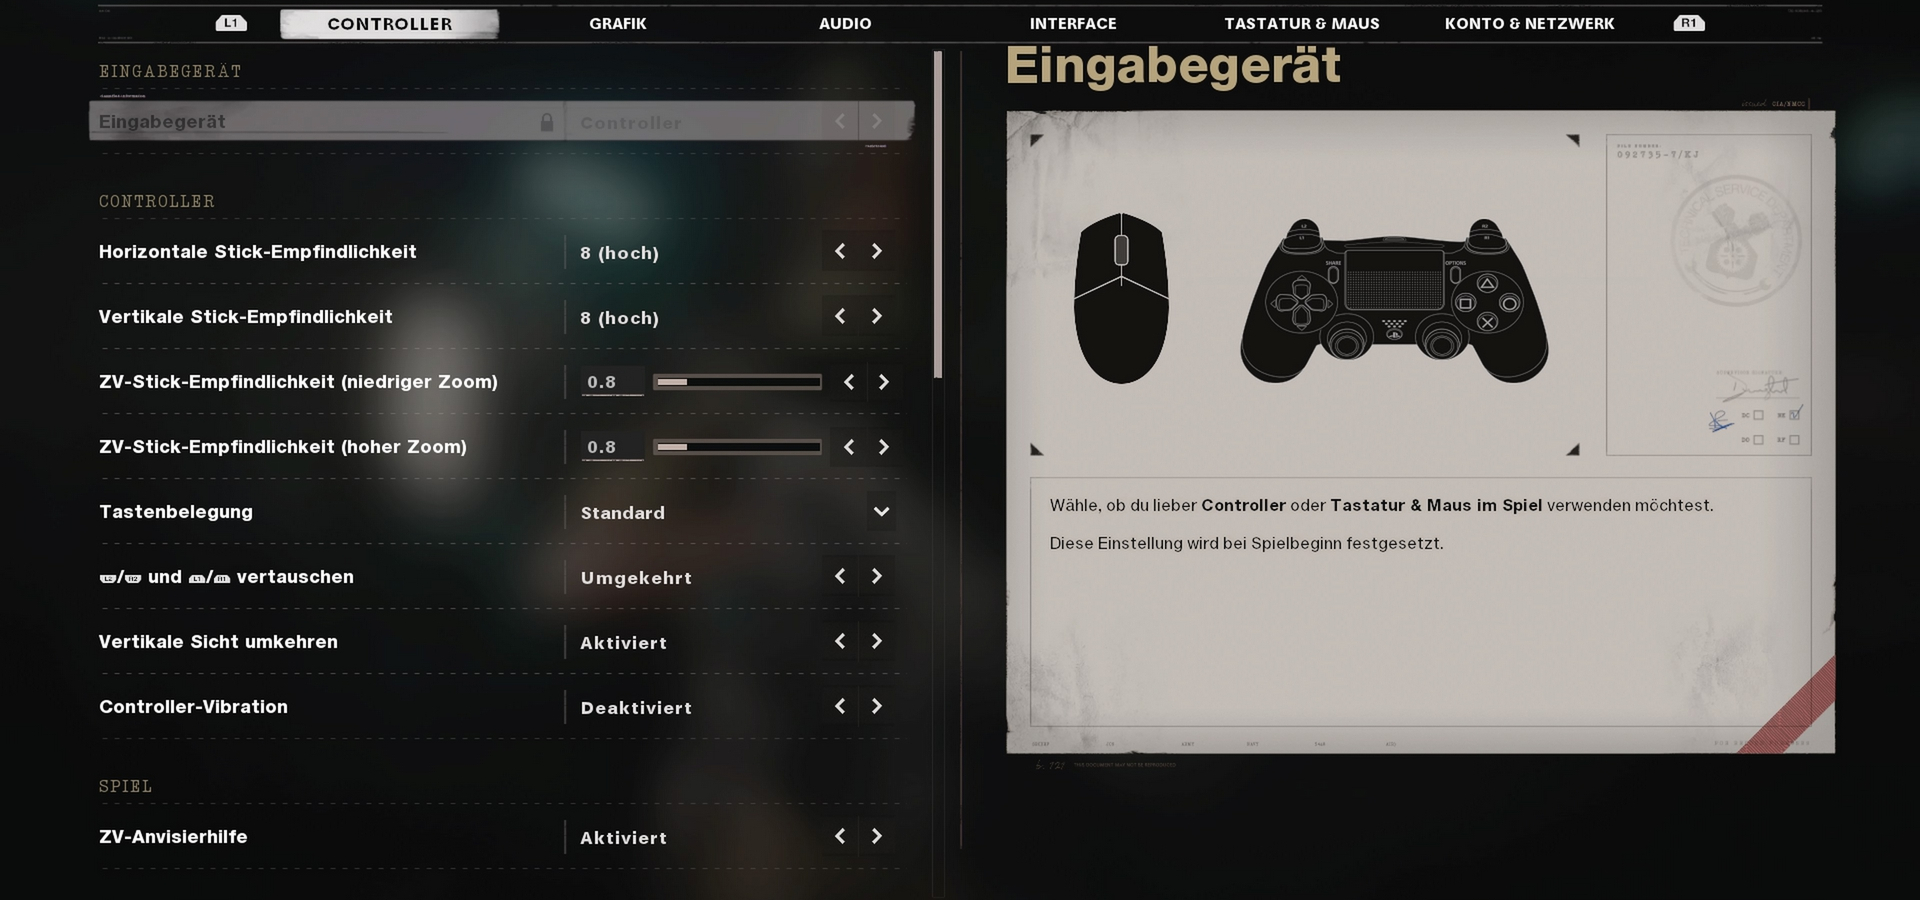
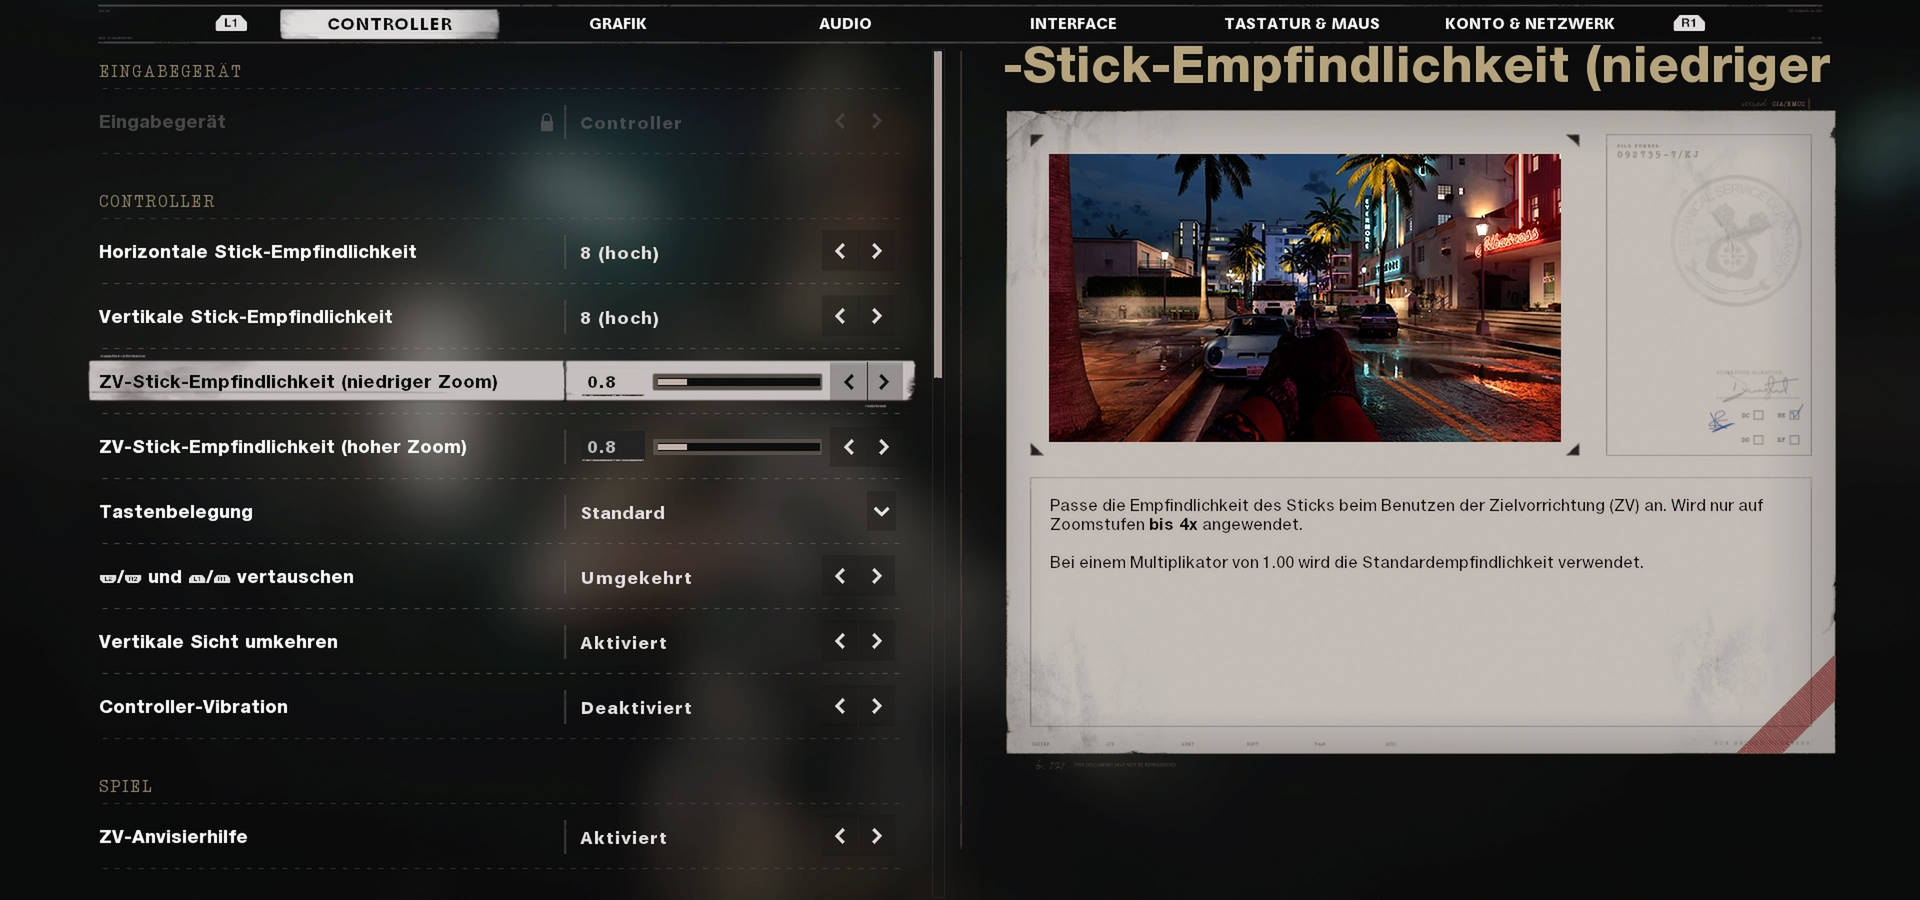
Sensitivity: Individual
Sensitivity is a very subjective setting that you should choose based on your own preferences. Higher values allow you to perform extremely fast turns, but your crosshair aiming can suffer if you’re not yet on target.
Pay attention to your sticks while gaming, and if you notice that you often hit the edges while aiming, you should raise the slider a bit. If you have trouble getting the crosshair precisely on your enemy before aiming, lower the slider.
In general, you can say this: Close-combat players using a Run&Gun style benefit from higher settings for faster movements, while long-range players can improve their aim with lower settings.
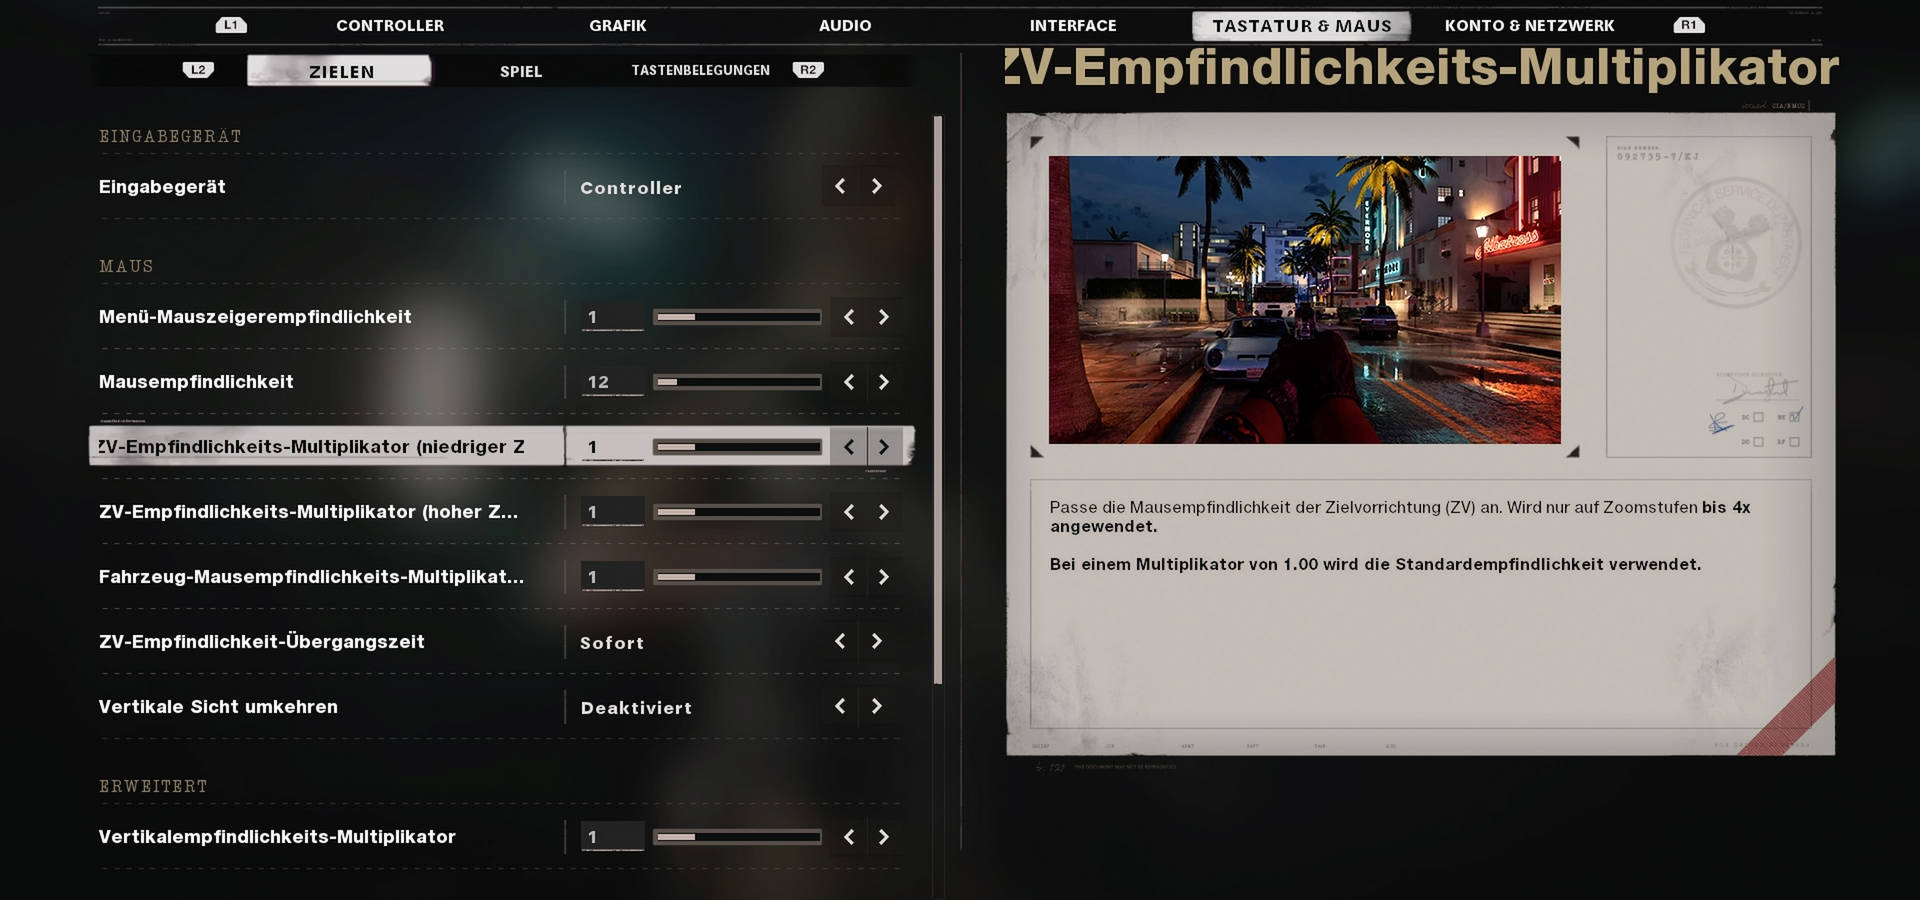
ADS sensitivity: 0.8 / 0.9
This setting gives you a small aim-boost when you scope in. For example, if you selected a value of 10 for sensitivity, while scoped in, it drops to 8. This gives you lower sensitivity while scoped in, which can help you aim better.
Higher values are quite unusual at first, and it feels like your aiming sticks a bit while scoping in. However, it can be worth it, especially if you choose high sensitivity settings for quicker rotations but want a finer setting while scoped in.
Sprinting cancels reloading: Enabled
This is an intriguing setting that allows you to cancel an ongoing reload animation. If an enemy comes at you while reloading, you are not completely stuck. However, it also carries the risk of accidentally canceling a wanted reload. Experiment a bit with this setting, but in general, the reload cancel can be quite useful.
Settings for Controller
Controller – Swap front & rear triggers: Reversed
In Call of Duty, milliseconds sometimes determine whether the enemy goes down or you hit the ground. With this setting, you might be able to gain those precious milliseconds next time. This allows you to assign your fire button to the front triggers, which often have a shorter travel distance than the rear triggers.
It sounds odd since the rear triggers simulate a gun’s trigger more closely. However, it takes a little longer to activate the rear triggers, and if you want to take every advantage you can get, assign fire/aiming to the front triggers.
Controller vibration: Disabled
Vibration can enhance the tactile atmosphere in the game, but it can also be a distraction while aiming and controlling. If you don’t want to miss out on it, the downsides are usually minimal, but it provides another opportunity to enhance your control.
Controller – Slowed aiming/side aim assist: Enabled
This is the so-called aim assist that helps you aim at enemies in multiplayer. This setting can indeed be helpful. It decreases your sensitivity while scoped in when aiming at an enemy (ADS sensitivity) and slightly adjusts your aim with the direction of the enemy when you’re running and an enemy crosses your crosshair. If you find that the automatic correction bothers you or makes the sensitivity too low while aiming, skip the aim assist. But at least give it a try first.
Controller – Minimum input threshold: 5 – 10 / Individual
This concerns the “deadzone” of your controller. Here, you set how far you need to move your sticks before the input is registered in the game. If you have a brand-new controller and are used to direct inputs, you can even set this value to 0. However, 5 – 10 feels just right, especially with respect to other shooters that often have a default deadzone above 0.
The older your controller, the more likely you will experience minor inaccuracies, causing your crosshair to move even when you don’t have your thumbs on the controller. This is a sure sign that you should raise your deadzone setting. Here you can find a small guide from the “CoD MW” days on how to set your deadzone correctly.
Settings for Mouse & Keyboard
ADS sensitivity transition time: Instant
This depends a bit on what you are used to. However, with the setting “Instant”, your mouse movements impact your aiming most directly. With “Gradual”, you won’t receive your full sensitivity immediately; it builds up (fast, but noticeable). With some practice, this can give you a small aim boost again, but it distorts your control inputs.
ADS mouse sensitivity mode: Relative
Monitor distance coefficient: Individual
These settings go together and determine how your mouse inputs can be influenced by a modified field of view while aiming. If you’ve changed your field of view and selected the setting “Targeting field of view: Influenced”, you can make fine adjustments here. You should decide on these settings and align your sensitivity settings before adjusting these sliders.
Choose “Relative” here to ensure that you cover the same visible distance in the game – whether scoped in or not. This means that if a 2 cm mouse movement moves your crosshair from one tree to another and you then scope in (which reduces your field of view), this setting ensures that with the 2 cm movement, you still travel the distance from tree to tree while scoped in.
Depending on your field of view settings, you will always cover the same distance in the game with your crosshair. The larger the field of view, the lower your rotation speed will be, but the distance remains the same whether scoped in or not. With the “coefficient”, you can then adjust this distance further. A higher value means more distance and thus a higher rotation speed.
More mouse options
This section includes the 3 mouse movement settings:
- Mouse acceleration – 0
- Mouse smoothing – Disabled
- Mouse filtering – 0
For unfiltered input, set the sliders to 0 and disable smoothing. This way, you have direct control without any game intervention.
Still, sometimes it’s worth experimenting with some settings. If you have a relatively low sensitivity, use acceleration. This increases sensitivity with quick mouse movements. If you are used to a certain delay in the mouse movement, play around with smoothing and filtering a bit.
Key mapping
Assign important keys to your mouse so you can quickly activate them without having to move your fingers greatly on the keyboard. Possible candidates for mouse buttons include:
- Ping – to indicate dangers and directions
- Grenades – to quickly throw tactical or primary grenades
- Field upgrades – for quick activation
Your creativity is only limited by the number of mouse buttons you have. Assign a few mechanics to your mouse and see what is beneficial for you.
As is often the case, many settings depend on your preferences and willingness to adapt to new settings. It’s like with the weapons – sometimes you play your favorite weapon even if it’s not among the top guns. However, if you don’t want to be at a disadvantage, you often switch. So choose one of the best 5 weapons at the launch of Cold War, disable unnecessary tweaks in your settings, and then head out to the battlefield to sweat.

Your opinion is important to us!
Do you like the article? Then let us know!