
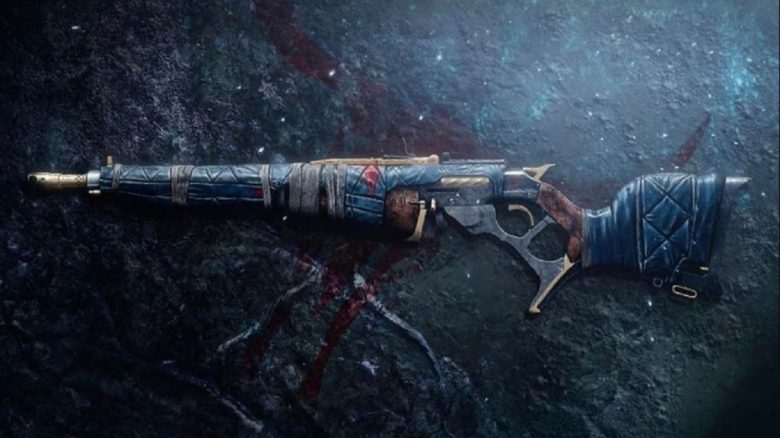
In Destiny 2 you can fight and solve puzzles in a creepy spaceship to acquire the new Exotic “Tale of a Dead Man” in Season 13. We will reveal to you, mostly spoiler-free, how to survive the horror and what the cool Western scout rifle has to offer.

This is the weapon: The Exotic scout rifle Tale of a Dead Man is a brand new weapon from the Season 13 of Destiny 2. The weapon features a lever-action design with a stylish Western look, introduces a new archetype, and is quite impressive.
You can earn Tale of a Dead Man through the quest “The Voice from Beyond” and can even acquire the weapon with random rolls. MeinMMO tells you in this guide …
- how to survive the creepy outing on the spaceship during the mission “Omens” and solve the numerous puzzles.
- what the exotic reward can do and the status of the catalyst.
A large part of the guide is spoiler-free, and surprises, fights, and mechanics will be discussed later in the text.
Why you shouldn’t miss the current best mission of Destiny 2, read here from MeinMMO author Sven Galitzki:

Find “The Voice from Beyond” and start “Omens”
Before you can hold the new Exotic in your hands and get scared in the Omens mission, you first need to find the quest “The Voice from the Other Side”. It will not be conveniently displayed via a marker.
This is what you need to do:
- Start the strike “The Arms Dealer” in the EDZ. In the Destiny week from February 15 to February 23, this is the Nightfall strike. Alternatively, you can select the strike directly from orbit in the EDZ.
- Directly in the first room, there is now an open door on the right that has been closed since 2017.
- Fight your way across the bridges to a container on the right platform. Here you will find a distress signal – interact with it.
- Then nothing suspicious happens for now. You can leave the mission now and should visit Zavala in the Tower.
Zavala will then send you on the new Omens mission. You can find it in the Tangled Shore. You can find the necessary steps for the mission in the strike “Arms Dealer” here in a short video:
Spoiler-Free Key Information about the Exotic Quest “Omens”
At this point, you don’t need to worry about spoilers yet. We only give you general tips for preparation. It’s not just a straightforward path on the ghost ship. Always look up, down, and you’ll need to occasionally return to previously visited locations, as a new path opens up there.
This is how you should prepare: The mission recommends a power level of 1,230, however, a modifier is active that makes enemies hit harder. Additionally, the radar is permanently disabled.
You can start the mission alone or bring up to 2 other guardians into your team – there is no automatic matchmaking and joining during a running mission does not work. There is no time pressure, so no timer like in other missions. However, plan for a good hour during your first visit – or two hours if you want to be cautious (subsequent runs will go faster).
Make sure to pack exotic boots that enhance your jump and mobility:
- Transversive Steps for Warlocks
- ST4MP-F3R for Hunters
- Unyielding Lion for Titans
For large portions of the mission, weapon choice doesn’t matter, as you’ll be solving puzzles or getting scared. However, you should definitely bring a long-range weapon, such as a scout rifle – you will occasionally need to shoot distant objects and deal with snipers. You will often be surprised by smaller groups of enemies in tight corridors, so a good melee weapon is also important. The Anarchy has proven to be incredibly valuable as a power weapon.
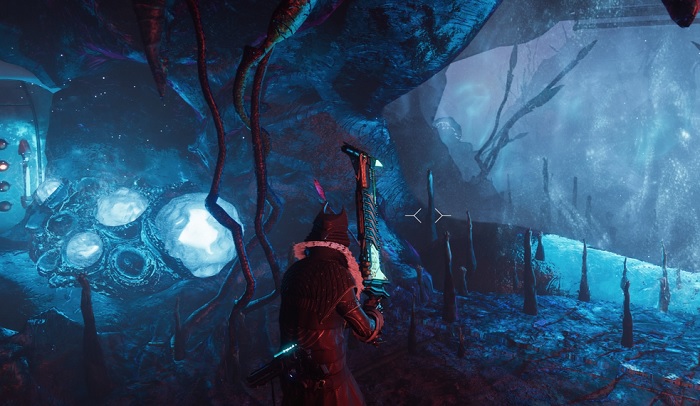
These puzzles and mechanics await you on the spaceship
This is how the spore mechanic works: You will encounter passages blocked by a blue glow multiple times throughout the mission. If you get too close, you will take heavy damage. You can only pass through the blue light with the buff “Eregor Connection”.
You will receive this buff from knobby growths. If the plants shimmer bluishly, approach closely and shoot or slash at them. For 15 seconds, you will then have the spore buff.
If you are too slow, you will have to get the buff again. It can take several seconds for the spores to glow again and for you to be able to acquire “Eregor Connection”.
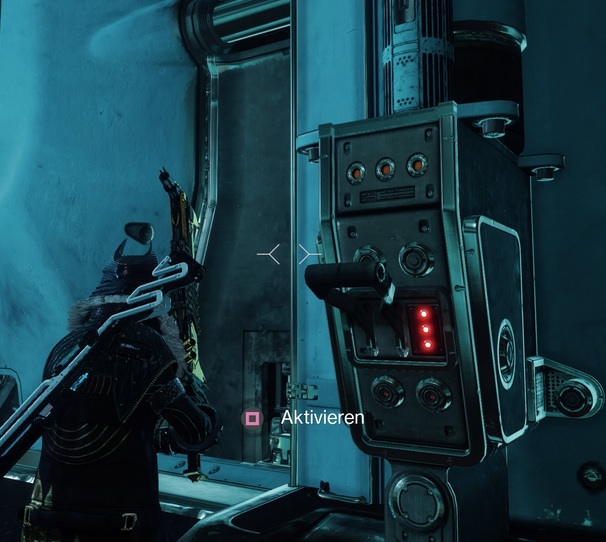
This is what you need to know about switches: Throughout the ghost ship, there are control panels with levers hidden. If the switch lights up red, you can activate it.
- Once activated, the switch will stay lit green permanently.
- Don’t worry, you only need to activate each device once, and there are no “on and off puzzles”.
- For every switch flipped, a door opens or a mechanism nearby is activated.
These destructible objects can be found: Aboard the Glykon, you will not only find switches and spores, but you must also scour your surroundings for destructible objects. These objects can be on ceilings, walls, floors, or in the distance.
- You can destroy numerous ventilation shafts and covers. A few shots from your primary weapon or a hit are enough. If you don’t see damage numbers, you cannot destroy that grid.
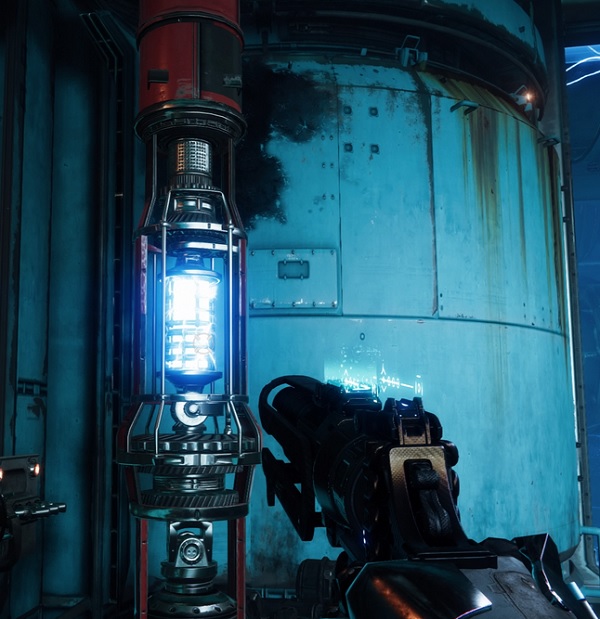
- Diodes or nodes: Keep an eye out for electrical nodes. These glow bluishly and can also be destroyed. This will open passages, trapdoors, or other previously impassable ways. Often, it’s not immediately clear which passage opens.
Occasionally, you will come across bridges. These will automatically turn when you approach. So take the leap.
The first steps in the Omens mission of Destiny 2
As mentioned, you should ideally go through your first playthrough blind and enjoy the thick atmosphere. If you don’t have the time or want an easy start, we’ll show you the first few minutes of how to escape a death trap and the boss fight.
This is how the mission starts:
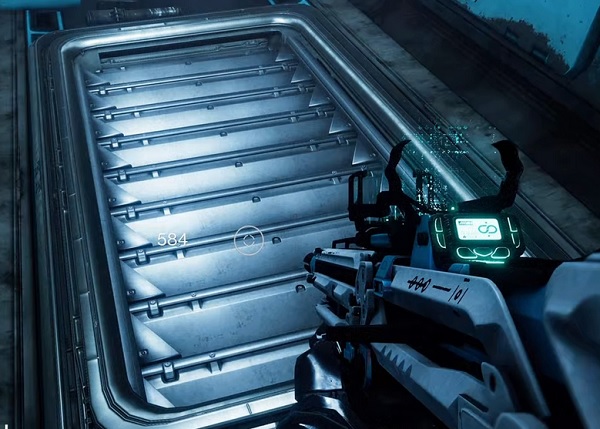
- Right when you take control after the short cutscene, you need to jump left into the vastness of space. Jump and crawl through the corridors until you reach the first switch. You will find your first destructible ventilation shafts and a lever.
- A short while later, you’ll immediately encounter the spore mechanic and should practice it briefly.
- You come to an area with a power or arc field. Now you must first go forward and back in an area. Activate the switch on the right side, collect the spore buff in the entrance area, and then jump left over the abyss.
- Then jump over the next abyss, and you will come to your first diode. Shoot it, and a hatch will open directly in front of you.

How to survive the trash compactor
When you find yourself in the massive, brightly lit room, you should activate the switch at the end. Then it gets hairy for guardians with claustrophobia. The walls will start closing in and crush you after a few seconds.
This is what you need to do:
- On the ground, you will find grates that you can shoot.
- Your goal is to destroy the 3 blue diodes behind them – and only those.
- Some sprayers will spawn in between.
- Jump up to get a better overview.
- Once the few enemies are taken care of and the compactor is stopped, shoot the red glowing grate on the ground, and you will have made it for now.
- Afterwards, there’s a short fight against a horde of Scorn. Pay special attention to the crossbowmen.
Here’s a video that guides you through the labyrinth of the Glykon and the entire mission “Omens”:
Win the boss fight against “Home of Communion” in the heating room
Just before the final battle, there’s a banner location. Refresh your ammunition and abilities here and face the Scorn boss “Home of Communion”. Throughout the fight, waves of adds will appear, so do not just focus blindly on the boss.
This is how you cool the room down: Once you have dealt enough damage to the boss and eliminated enough adds, the coward retreats down a level into the heating room. You could follow and continue to fight, but you will burn and die after a few seconds.
In the upper room, you will find 3 terminals that dispense coolant.
- One cooling station is located on each left and right side of the arena.
- The 3rd station is behind you in a combustion chamber – here you will take fire damage and need to activate quickly.
- Once all 3 cooling stations are active, you jump down a level at the outer edge and continue the fight.
- You can tell if it is safe when the surroundings turn blue – if it turns red again, then move away quickly.

After a while, the lower level will overheat again and you will have to repeat the entire cooling system process again.
A few tips:
- Beware of the melee attack. They will slam you into the damage zone and also ignite the ground.
- For an easier fight, attach 2 Anarchy mines to the boss and take care of the adds. This way, you can minimize your time on the lower level and jump back up.
- Alternatively, you can quickly kill the boss with a sword or for example the Thundercrash with the new Exotic – but it is risky.
After the fight, a path will open that will also be indicated by a quest marker. At the end, you will find a surprise. Wait here after the dialogue for a moment, only then will the mission end itself.
Then visit Zavala in the Tower, complete the first quest “The Voice from Beyond” and finally receive your reward.
On the next page, we’ll take a closer look at the exotic scout rifle and let you know how the catalyst is doing.

Your opinion is important to us!
Do you like the article? Then let us know!