You can craft weapons and armor from various items or create consumables like potions. To do this, you need to collect loot from monsters or look for resources in the surroundings. We have created an item list with all the important items from Monster Hunter World.
In Monster Hunter World, your equipment is particularly important as it determines your hunter’s strength. To be able to craft the armor and weapons, you need to deliver certain items and resources to the blacksmith.
These can be parts from monsters like poison sacs or fangs. There are also special resources from mining locations or bone piles. Below you will find a list of the items you need to craft your equipment.
- Overview of all high-rank armors from Monster Hunter World: If you want to see what you can do with the resources
- Monster list for Monster Hunter World: More information about the monsters with tips and weaknesses
The list is sorted into monster loot, bones, mining items such as ores and crystals, and resources from nature. Some of the items are also divided into high rank and low rank, as you will receive different resources from the two rank tiers.
Loot you receive from monsters in low rank
Here is an overview of the monster loot you receive from monsters in low rank. The list is sorted alphabetically.
A
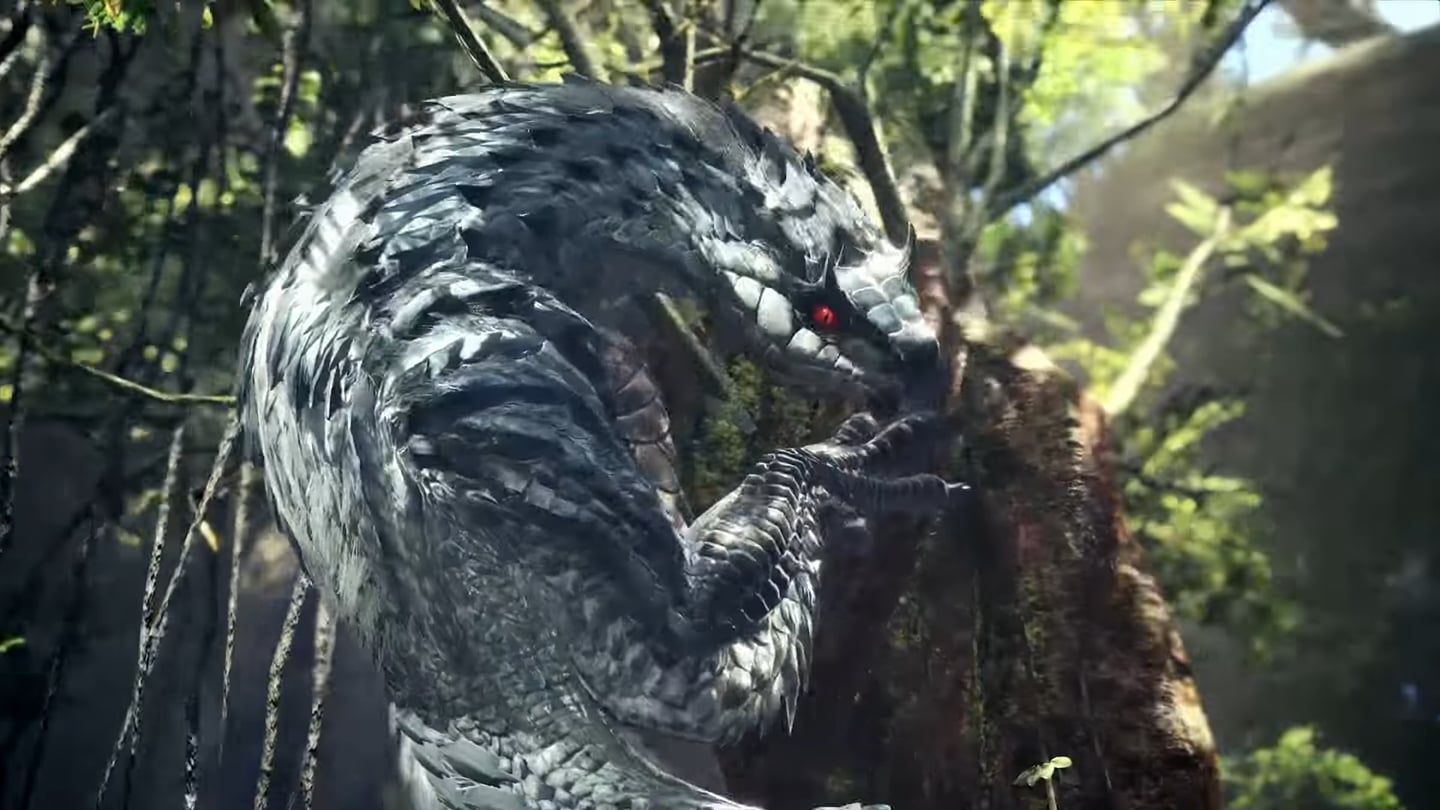
- Anjanath Nosebone: Anjanath
- Anjanath Pelt: Anjanath
- Anjanath Plate: Anjanath
- Anjanath Fang: Anjanath
- Anjanath Scale: Anjanath
- Anjanath Tail: Anjanath
- Aqua Sack: Jyuratodus
B
- Barroth Claw: Barroth
- Barroth Armor: Barroth
- Barroth Spine: Barroth
- Barroth Tail: Barroth
- Barroth Scalp: Barroth
- Diablos Armor: Diablos
- Diablos Fang: Diablos
- Diablos Medulla: Diablos
- Diablos Spine: Diablos
- Diablos Tail Guard: Diablos
E
- Iron Ore: Great Jagras
F
- Flame Sack: Anjanath, Rathian, Rathalos
- Flying Wyvern Leather: Mernos, Noios, Raphinos
- Frost Sack: Legiana
- Fertile Mud: Barroth
G
- Gajau Fin: Gajau
- Gajau Hide: Gajau
- Twisted Horn: Diablos
- Poison Sack: Pukei-Pukei
- Girros Hide: Girros
- Girros Fang: Girros
- Girros Scale: Girros
- Great Girros Hood: Great Girros
- Great Girros Hide: Great Girros
- Great Girros Fang: Great Girros
- Great Girros Scale: Great Girros
- Great Girros Tail: Great Girros
- Great Jagras Claw: Great Jagras
- Great Jagras Hide: Great Jagras
- Great Jagras Mane: Great Jagras
- Great Jagras Scale: Great Jagras
H
- Hornetaur Wing: Hornetaur
- Hornetaur Head: Hornetaur
- Hornetaur Armor: Hornetaur
J
- Jagras Hide: Jagras
- Jagras Scale: Jagras
- Jyuratodus Fin: Jyuratodus
- Jyuratodus Armor: Jyuratodus
- Jyuratodus Fang: Jyuratodus
- Jyuratodus Scale: Jyuratodus
K
- Kestodon Armor: Kestodon
- Kestodon Scalp: Kestodon
- Kirin Thunder Horn: Kirin
- Kirin Hide: Kirin
- Kirin Mane: Kirin
- Kirin Tail: Kirin
- Howling Sack: Noios
- Kulu-Ya-Ku Hide: Kulu-Ya-Ku
- Kulu-Ya-Ku Fancy Feather: Kulu-Ya-Ku
- Kulu-Ya-Ku Beak: Kulu-Ya-Ku
- Kulu-Ya-Ku Scale: Kulu-Ya-Ku
L
- Luxury Pelt: Kelbi
- Legiana Webbing: Legiana
- Legiana Claw: Legiana
- Legiana Hide: Legiana
- Legiana Plate: Legiana
- Legiana Scale: Legiana
- Legiana Tail Webbing: Legiana
- Light Crystal: Kirin
M
- Monster Fluid: Vespoid, Hornetaur
- Mosswine Mousse: Mosswine
N
- Nourishing Extract: Paolumu, Odogaron
O
- Odogaron Claw: Odogaron
- Odogaron Plate: Odogaron
- Odogaron Fang: Odogaron
- Odogaron Scale: Odogaron
- Odogaron String: Odogaron
- Odogaron Tail: Odogaron
P
- Paolumu Webbing: Paolumu
- Paolumu Armor: Paolumu
- Paolumu Pelt: Paolumu
- Paolumu Scale: Paolumu
- Pukei-Pukei Sack: Pukei-Pukei
- Pukei-Pukei Feather: Pukei-Pukei
- Pukei-Pukei Armor: Pukei-Pukei
- Pukei-Pukei Scale: Pukei-Pukei
- Pukei-Pukei Tail: Pukei-Pukei
R
- Radobaan Medulla: Radobaan
- Radobaan Oil Armor: Radobaan
- Radobaan Armor: Radobaan
- Radobaan Scale: Radobaan
- Rathalos Webbing: Rathalos
- Rathalos Armor: Rathalos
- Rathalos Plate: Rathalos
- Rathalos Medulla: Rathalos
- Rathalos Scale: Rathalos
- Rathalos Tail: Rathalos
- Rath Wing Claw: Rathian, Rathalos
- Rathian Webbing: Rathian
- Rathian Armor: Rathian
- Rathian Plate: Rathian
- Rathian Scale: Rathian
- Rathian Stinger: Rathian
- Raw Meat: Aptonoth, Mernos, Apceros, Kelbi, Raphinos
S
- Sharp Claw: Jagras, Shamos
- Sleep Sack: Radobaan
- Shamos Hide: Shamos
- Shamos Scale: Shamos
- Sprint Extract: Tzitzi-Ya-Ku, Diablos
- Shock Sack: Tobi-Kadachi
T
- Tobi-Kadachi Electrode: Tobi-Kadachi
- Tobi-Kadachi Claw: Tobi-Kadachi
- Tobi-Kadachi Membrane: Tobi-Kadachi
- Tobi-Kadachi Hide: Tobi-Kadachi
- Tobi-Kadachi Scale: Tobi-Kadachi
- Tzitzi-Ya-Ku Hide: Tzitzi-Ya-Ku
- Tzitzi-Ya-Ku Light Organ: Tzitzi-Ya-Ku
- Tzitzi-Ya-Ku Claw: Tzitzi-Ya-Ku
- Tzitzi-Ya-Ku Scale: Tzitzi-Ya-Ku
V
- Vespoid Wing: Vespoid
- Vespoid Armor: Vespoid
W
- Warm Pelt: Kelbi
- White Liver: Kelbi
- Wyvern Bone Mass: Radobaan
Loot you receive from monsters in high rank
Here is an overview of the monster loot you receive from monsters in high rank. The list is sorted alphabetically.
A
- Anjanath Gem: Anjanath
- Anjanath Nosebone+: Anjanath
- Anjanath Pelt+: Anjanath
- Anjanath Plate: Anjanath
- Anjanath Fang+: Anjanath
- Anjanath Scale+: Anjanath
- Anjanath Tail: Anjanath
- Azure Rathalos Wing: Azure Rathalos
- Azure Rathalos Back Armor: Azure Rathalos
- Azure Rathalos Scale+: Azure Rathalos
- Azure Rathalos Tail: Azure Rathalos
- Azure Kirin Horn: Kirin
B
- Barnos Claw: Barnos
- Barnos Hide+: Barnos
- Barroth Claw+: Barroth
- Barroth Back Armor: Barroth
- Barroth Tail: Barroth
- Barroth Scalp: Barroth
- Barroth Thorax: Barroth
- Bazelgeuse Gem: Bazelgeuse
- Bazelgeuse Wing: Bazelgeuse
- Bazelgeuse Claw: Bazelgeuse
- Bazelgeuse Tail: Bazelgeuse
- Bazelgeuse Back Armor: Bazelgeuse
- Bazelgeuse Scale+: Bazelgeuse
- Bazelgeuse Tail: Bazelgeuse
D
- Daora Dragon Scale+: Kushala Daora
- Daora Webbing: Kushala Daora
- Daora Horn+: Kushala Daora
- Daora Claw+: Kushala Daora
- Daora Back Armor: Kushala Daora
- Daora Tail: Kushala Daora
- Diablos Medulla: Diablos, Black Diablos
- Diablos Fang: Diablos, Black Diablos
- Diablos Back Armor: Diablos
- Diablos Tail Guard: Diablos, Black Diablos
- Diablos Thorax: Diablos
- Dodogama Jaw: Dodogama
- Dodogama Claw: Dodogama
- Dodogama Hide+: Dodogama
- Dodogama Scale+: Dodogama
- Dodogama Tail: Dodogama
- Thunder Sack: Tobi-Kadachi
- Elder Dragon Blood: Kirin, Nergigante, Xeno’jiiva, Teostra, Kushala Daora, Vaal Hazak
E
- Exalted Horn: Diablos
F
- Fire Cell Stone: Uragaan
- Dark Cloth: Expedition Safari
- Flying Wyvern Hide+: Mernos, Noios, Raphinos
- Freezing Sack: Legiana
- Fertile Mud: Barroth
G
- Gajau Scale: Gajau
- Gastodon Horn: Gastodon
- Girros Hide+: Girros
- Girros Fang: Girros
- Girros Scale+: Girros
- Great Girros Hood+: Great Girros
- Great Girros Hide+: Great Girros
- Great Girros Fang+: Great Girros
- Great Girros Scale+: Great Girros
- Great Girros Tail: Great Girro
- Great Jagras Claw+: Great Jagras
- Great Jagras Hide+: Great Jagras
- Great Jagras Mane: Great Jagras
- Great Jagras Scale+: Great Jagras
H
- High Quality Pelt: Kelbi
- Hell Sac: Anjanath, Rathian, Rathalos, Pink Rathian, Lavasioth, Uragaan, Azure Rathalos
- Hornetaur Inner Wing: Hornetaur
- Hornetaur Head: Hornetaur
- Hornetaur Back Armor: Hornetaur
J
- Jagras Hide+: Jagras
- Jagras Scale+: Jagras
- Jyuratodus Fin+: Jyuratodus
- Jyuratodus Fang+: Jyuratodus
- Jyuratodus Back Armor: Jyuratodus
- Jyuratodus Scale+: Jyuratodus
K
- Kestodon Back Armor: Kestodon
- Kestodon Scalp: Kestodon
- Kirin Thunder Tail: Kirin
- Kirin Hide+: Kirin
- Kirin Mane: Kirin
- Koma Sack: Radobaan
- Howling Sack: Noios
- Kulu-Ya-Ku Hide+: Kulu-Ya-Ku
- Kulu-Ya-Ku Fancy Feather+: Kulu-Ya-Ku
- Kulu-Ya-Ku Beak+: Kulu-Ya-Ku
- Kulu-Ya-Ku Scale+: Kulu-Ya-Ku
L
- Lavasioth Fin: Lavasioth
- Lavasioth Fang: Lavasioth
- Lavasioth Back Armor: Lavasioth
- Lavasioth Scale+: Lavasioth
- Legiana Wing: Legiana
- Legiana Claw+: Legiana
- Legiana Hide+: Legiana
- Legiana Scale+: Legiana
- Legiana Tail Webbing: Legiana
M
- Monster Broth: Vespoid
- Mosswine Mousse: Mosswine
N
- Nourishing Extract: Paolumu, Odogaron, Dodogama
- Nergigante Horn+: Nergigante
- Nergigante Claw: Nergigante
- Nergigante Growth Plate: Nergigante
- Nergigante Back Armor: Nergigante
- Nergigante Tail: Nergigante
- Novakristall: Kirin
O
- Odogaron Gem: Odogaron
- Odogaron Claw+: Odogaron
- Odogaron Plate: Odogaron
- Odogaron Fang+: Odogaron
- Odogaron Scale+: Odogaron
- Odogaron String+: Odogaron
- Odogaron Tail: Odogaron
- Omniplegia Sack: Great Girros
P
- Paolumu Wing: Paolumu
- Paolumu Pelt+: Paolumu
- Paolumu Back Armor+: Paolumu
- Paolumu Scale+: Paolumu
- Pukei-Pukei Sack+: Pukei-Pukei
- Pukei-Pukei Wing: Pukei-Pukei
- Pukei-Pukei Back Armor: Pukei-Pukei
- Pukei-Pukei Scale+: Pukei-Pukei
- Pukei-Pukei Tail: Pukei-Pukei
R
- Radobaan Medulla: Radobaan
- Radobaan Oil Armor: Radobaan
- Radobaan Back Armor: Radobaan
- Radobaan Scale+: Radobaan
- Rathalos Wing: Rathalos
- Rathalos Medulla: Rathalos, Azure Rathalos
- Rathalos Plate: Azure Rathalos
- Rathalos Ruby: Rathalos, Azure Rathalos
- Rathalos Back Armor: Rathalos
- Rathalos Scale+: Rathalos
- Rathalos Tail: Rathalos
- Rathian Wing Claw: Rathian, Pink Rathian
- Rathian Webbing: Rathian, Pink Rathian
- Rathian Plate: Pink Rathian
- Rathian Ruby: Pink Rathian
- Rathian Back Armor: Rathian
- Rathian Scale+: Rathian
- Rathian Stinger+: Rathian, Pink Rathian
- Raw Meat: Aptonoth, Apceros, Kelbi, Raphinos
- Pink Rathian Back Armor: Pink Rathian
- Pink Rathian Scale+: Pink Rathian
S
- Black Diablos Back Armor: Black Diablos
- Black Diablos Thorax: Black Diablos
- Black Spiral Horn+: Black Diablos
- Shamos Hide+: Shamos
- Shamos Scale+: Shamos
- Sprint Extract: Tzitzi-Ya-Ku, Diablos, Black Diablos
- Shock Sack: Tobi-Kadachi
- Stabbing Claw: Jagras, Shamos
- Plummeting Sack: Jyuratodus
T
- Teostra Webbing: Teostra
- Teostra Horn+: Teostra
- Teostra Claw+: Teostra
- Teostra Mane: Teostra
- Teostra Powder: Teostra
- Teostra Back Armor: Teostra
- Teostra Scale+: Teostra
- Teostra Tail: Teostra
- Tobi-Kadachi Electrode+: Tobi-Kadachi
- Tobi-Kadachi Claw+: Tobi-Kadachi
- Tobi-Kadachi Membrane: Tobi-Kadachi
- Tobi-Kadachi Hide+: Tobi-Kadachi
- Tobi-Kadachi Scale+: Tobi-Kadachi
- Tzitzi-Ya-Ku Hide+: Tzitzi-Ya-Ku
- Tzitzi-Ya-Ku Light Organ+: Tzitzi-Ya-Ku
- Tzitzi-Ya-Ku Claw+: Tzitzi-Ya-Ku
- Tzitzi-Ya-Ku Scale+: Tzitzi-Ya-Ku
U
- Immortal Dragon Scale: Nergigante
- Uragaan Jaw: Uragaan
- Uragaan Ruby: Uragaan
- Uragaan Medulla: Uragaan
- Uragaan Back Armor: Uragaan
- Uragaan Shield: Uragaan
- Uragaan Scale+: Uragaan
V
- Vaal Hazak Wing: Vaal Hazak
- Vaal Hazak Claw: Vaal Hazak
- Vaal Hazak Membrane: Vaal Hazak
- Vaal Hazak Fang+: Vaal Hazak
- Vaal Hazak Back Armor: Vaal Hazak
- Vaal Hazak Tail: Vaal Hazak
- Deceased Scale: Vaal Hazak
- Vespoid Inner Wing: Vespoid
- Vespoid Back Armor: Vespoid
- Bird Wyvern Gem: Kulu-Ya-Ku, Pukei-Pukei
W
- White Liver: Kelbi
- Wyvern Gem: Barroth, Radobaan
- Wyvern Bone Mass: Radobaan
X
- Xeno’jiiva Gem: Xeno’jiiva
- Xeno’jiiva Wing: Xeno’jiiva
- Xeno’jiiva Horn: Xeno’jiiva
- Xeno’jiiva Claw: Xeno’jiiva
- Xeno’jiiva Armor: Xeno’jiiva
- Xeno’jiiva Veil: Xeno’jiiva
- Xeno’jiiva Soul Scale: Xeno’jiiva
- Xeno’jiiva Tail: Xeno’jiiva
Z
- Zorah Magdaros Gem: Zorah Magdaros
- Zorah Magdaros Heat Scale: Zorah Magdaros
- Zorah Magdaros Comb: Zorah Magdaros
- Zorah Magdaros Magma: Zorah Magdaros
- Zorah Magdaros Pleura: Zorah Magdaros
- Zorah Magdaros Back Armor: Zorah Magdaros
Bones from monsters and bone piles
You will often need various bones to craft armor or weapons. In this section, you will learn where to find the different bones. The bones are sorted alphabetically.
A
- Ancient Bone: Bone Pile – Ancient Forest (low and high rank)
- Anonymous Skull: Bone Pile – Elder’s Home (high rank)
B
- Brutal Bone: Bone Pile – Elder’s Home (high rank)
D
- Elder Dragon Bone:
- Kirin (high rank)
- Nergigante (high rank)
- Xeno’jiiva (high rank)
- Teostra (high rank)
- Kushala Daora (high rank)
- Vaal Hazak (high rank)
- Dragon Bone Relic:
- Bone Pile – Wildspire Waste (high rank)
- Bone Pile – Coral Highlands (high rank)
- Bone Pile – Elder’s Home (high rank)
F
- Rock Bone: Bone Pile – Wildspire Waste (low and high rank)
- Solid Bone:
- Bone Pile – Coral Highlands (low and high rank)
- Bone Pile – Valley of Elders (low and high rank)
H
- High Quality Bone:
- Bone Pile – Ancient Forest (high rank)
- Bone Pile – Wildspire Waste (high rank)
- Bone Pile – Coral Highlands (high rank)
- Bone Pile – Valley of Elders (high rank)
- Bone Pile – Elder’s Home (high rank)
K
- Coral Bone: Bone Pile – Coral Highlands (low and high rank)
- Curved Bone: Bone Pile – Valley of Elders (low and high rank)