
With the last wing of Antorus, the Burning Throne, WoW: Legion also receives its final raid boss: Argus. In our guide, you will learn how to defeat Aggramar and Argus, the Unraveling!

The guides are designed for normal and heroic modes of Antorus. LFR and Mythic modes will be available at a later date.
You can find out when the individual wings open for LFR in our announcement!
Note: The basic videos are gameplay footage from the PTR version of the raid. There may be discrepancies with the release version!
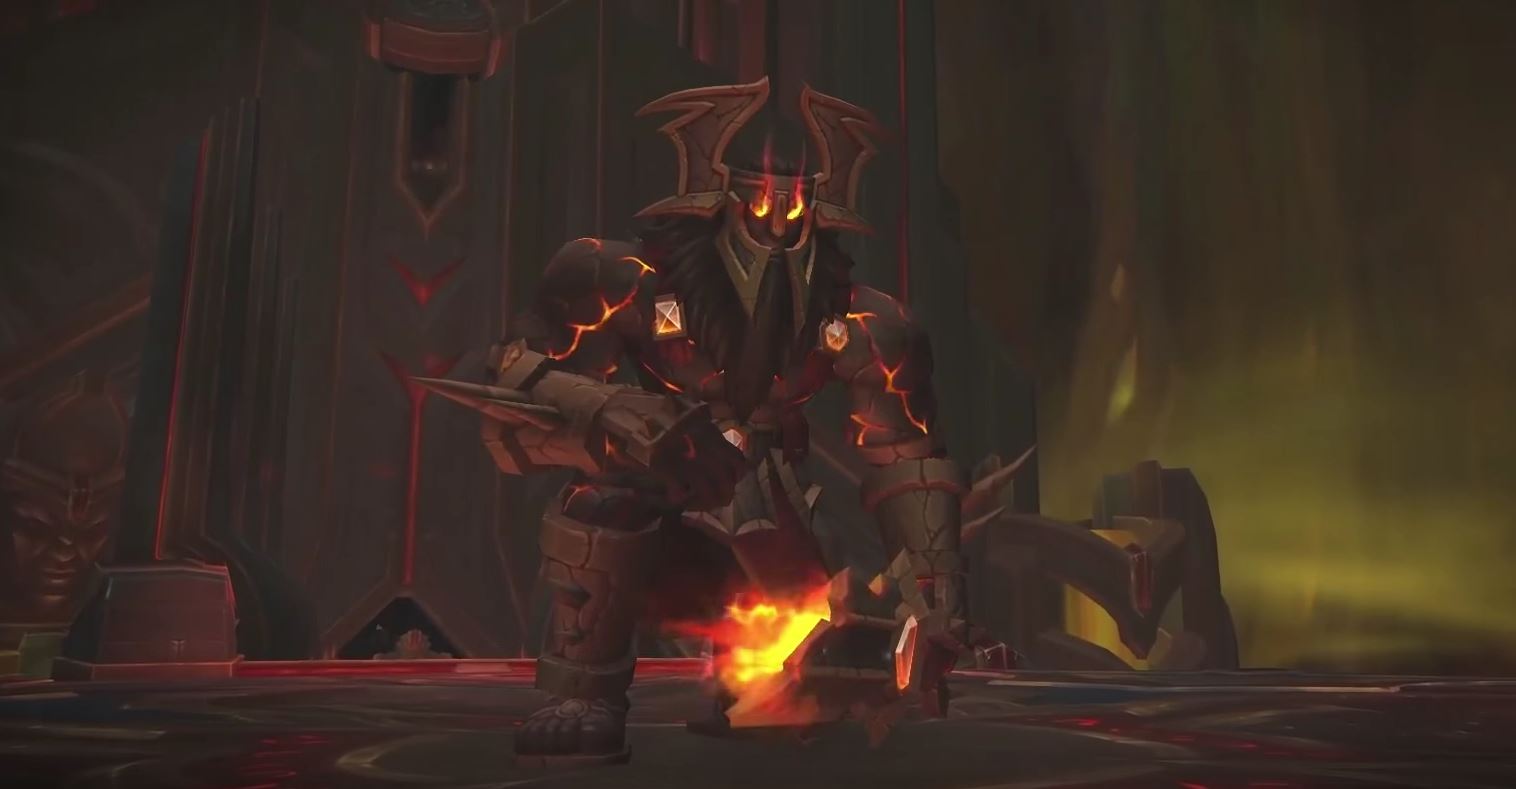
Aggramar – And the world burns!
The encounter with Aggramar takes place in three classic phases with two interruptions. The phases do not differ significantly from each other, but become increasingly challenging each time. The fight therefore steadily increases in intensity.
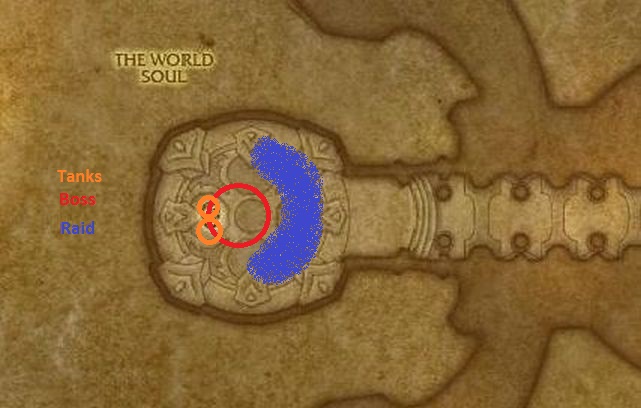
Setup: Both tanks stand close together in front of the boss and tank him in the middle, while the rest of the raid spreads loosely behind him. Melee fighters should stand at maximum range to avoid abilities.
Throughout all phases, Aggramar uses Taeshalach Technique and Taeshalach’s Grasp. Once his energy bar is filled, he uses this fixed sequence of 5 attacks, which requires special attention from the entire raid. The group immediately gathers behind the boss, with the inactive tank with them.
The procedure of the Taeshalach Technique in detail
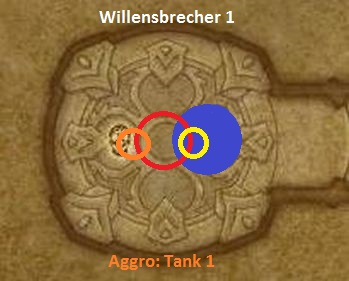
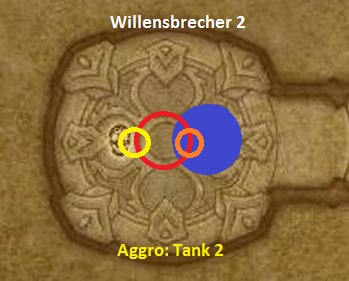
- 1. Attack – Willbreaker: Inflicts extremely high physical damage to all targets in the conical area in front of Aggramar and leaves a debuff that increases damage taken from Willbreaker by 500%.
- Only the active tank may absorb this hit with defensive cooldowns. The inactive tank must immediately taunt the boss afterwards and turn him towards the raid, which happens automatically since he is standing in the group.
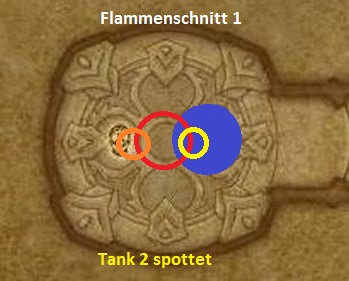
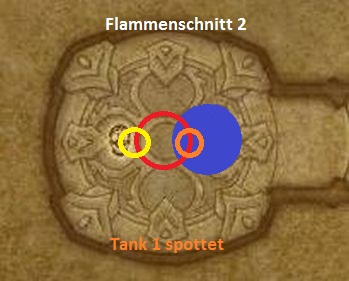
- 2. Attack – Flame Slice: Inflicts extremely high damage to all targets in front of Aggramar, which is divided among all hit targets, and pushes them back. If too few targets are hit, Aggramar gains a stack of Burning Wrath, which increases his damage by 50%. The entire raid must absorb this hit.
- After Flame Slice, the tanks switch positions, so that the one who absorbed Willbreaker first stands in the group behind Aggramar, and the now active tank stands on the opposite side.
- 3. Attack – Willbreaker: Same procedure as the first hit, so that the same tank does not absorb the hit twice. Another tank swap afterwards.
- 4. Attack – Flame Slice: Same approach as the first Flame Slice.
- 5. Attack – Scorching Storm: Aggramar channels a firestorm around him. A large red circle appears on the ground around him, which detonates shortly after and deals damage to all players within and disorients them for 5 seconds. Once he begins casting the spell, all players must move away from him.

Taeshalach’s Grasp is completely opposite to the technique. Every automatic attack from Aggramar hits the nearest target in addition to its primary target, or hits the primary target twice if no one is in range. Therefore, whenever the technique is not being cast, the inactive tank must always stand next to the active one.
The melee attacks also leave a debuff that increases physical damage taken by 5% and is stackable. At 5-7 stacks, a tank swap should occur.
Phase 1: The Wrath of Aggramar
- Scorching Fire: Random players are applied a pulsating damage-over-time effect that deals damage to them and all players within 3 meters. The group should therefore stand spread out, but close enough to allow for healing.
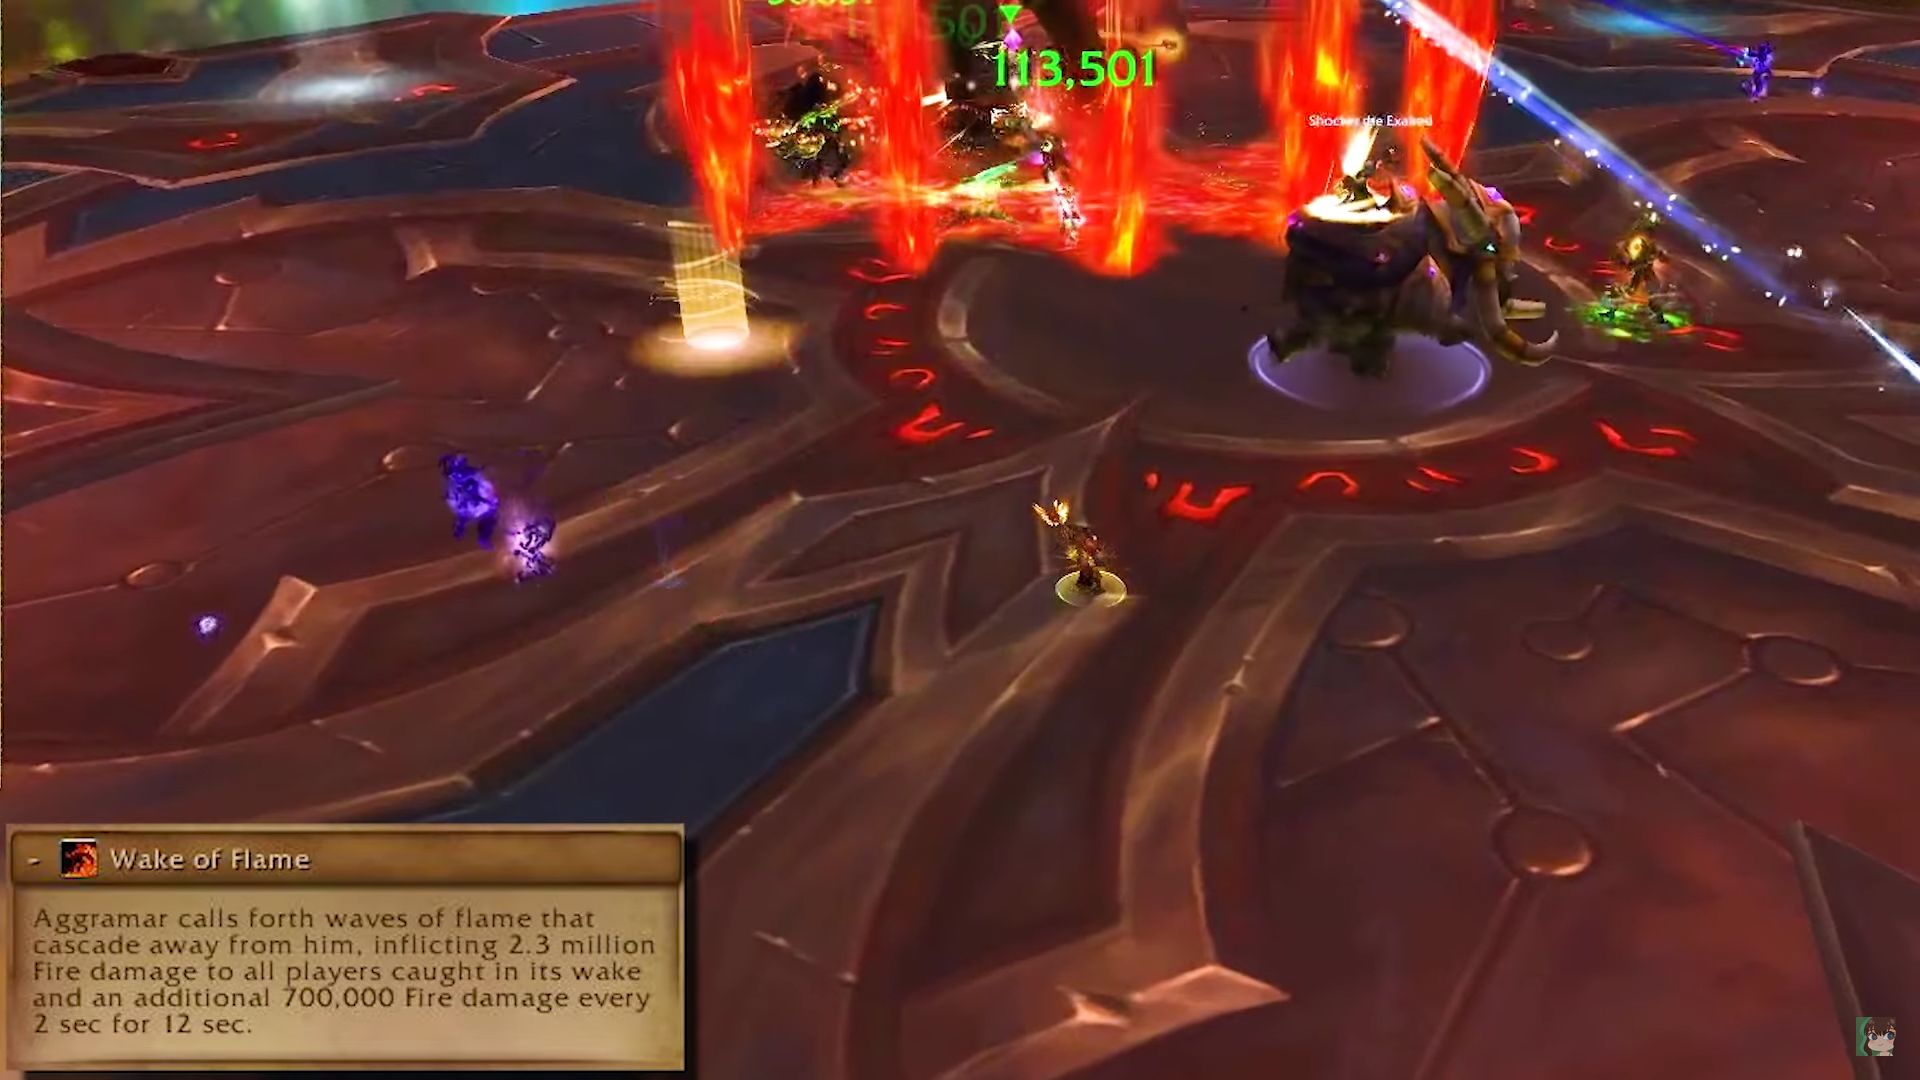
- Wave of Flame: Aggramar summons flames that briefly stay in place and then fan out in straight lines forward. Touching the waves inflicts high damage and leaves a heavy ticking damage-over-time effect.
- The flames are visible as a wall under him when he casts the wave and provide a brief moment to orient and evade.
1. Interruption: Fire of Taeshalach
Upon reaching 80% health, Aggramar wraps himself in a Corrupted Aegis, making him immune to damage and dealing damage to nearby players, pushing them back.
- Meteor Swarm (only heroic): Meteors land on players’ positions. They are announced by red circles, from which players must flee as quickly as possible to avoid damage.
- Flame of Taeshalach (Add): Two large fire elementals appear, which need to be spotted by an individual tank each. They deal increasing fire damage and increase movement speed and damage of Sparks nearby. This aura also makes the Sparks immune to crowd control effects.
- Spark of Taeshalach (Add): Smaller elementals move towards Aggramar to explode there, causing damage to the raid and leaving a damage-over-time effect. Additionally, the explosion causes a debuff that increases damage from each subsequent explosion within 20 seconds by 100%.
- The elementals are susceptible to any form of crowd control and must be killed as quickly as possible. Only after that do the larger elementals take priority, and once they are dead, the next phase begins. To best deal with the Sparks, the raid should split into four groups, each monitoring a quarter of the platform.
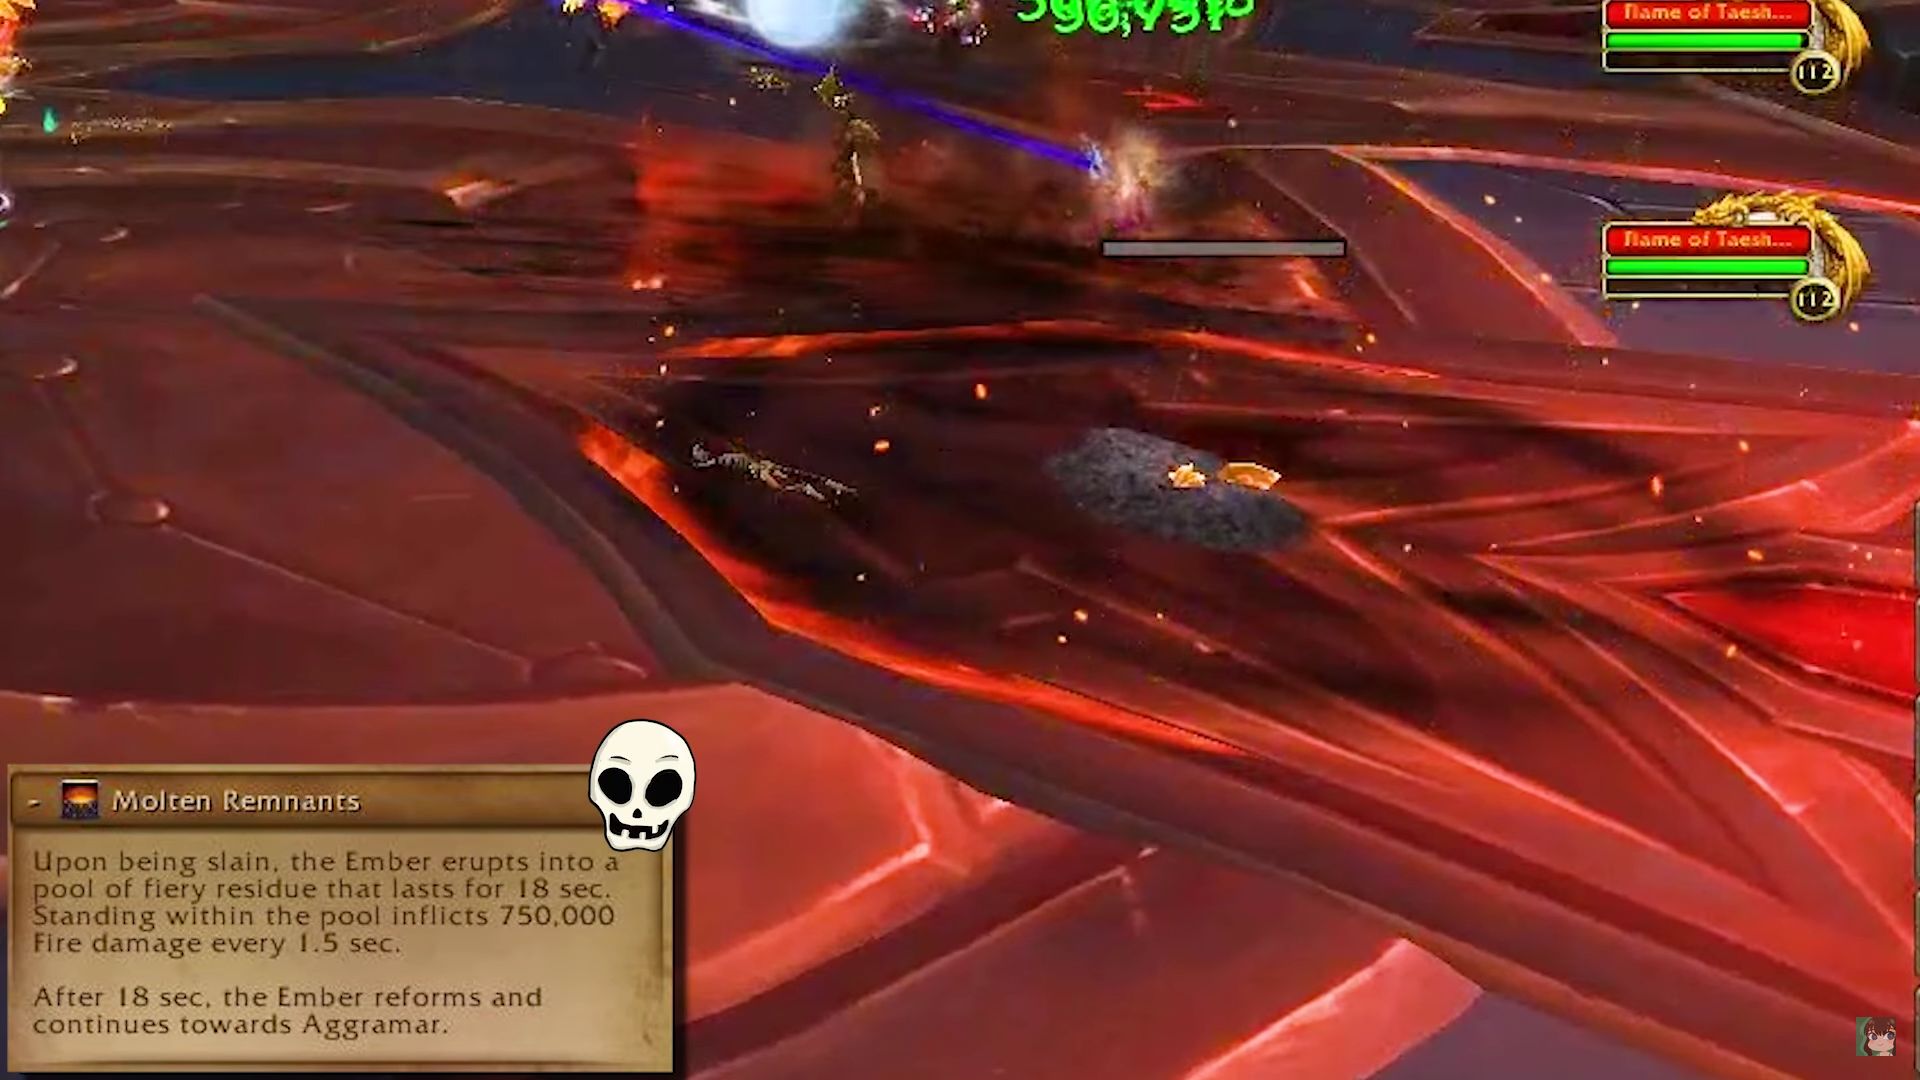
- In heroic mode, the Sparks do not disappear upon death but leave a fire puddle. This deals damage and becomes a Spark again after 18 seconds. The puddles persist until the next phase.
- In this mode, every 20 seconds (immediately after the debuff expires), a Spark must reach the boss to detonate. If this does not happen, all remaining Sparks will detonate after 3 minutes, wiping the group.

Phase 2: Champion of Sargeras
The second phase of the fight proceeds identically to the first, except that Aggramar replaces the ability Wave of Flame with Beacon.
- Beacon: Three positions are marked, causing high fire damage after 4 seconds. The areas are marked with red circles and must be vacated immediately. If the group is well spread in advance, Beacon should not pose a problem.

2. Interruption: Taeshalach’s Wrath
Once Aggramar has 40% health, the second intermission begins. This proceeds identically to the first, with a new ability added at each difficulty level. In normal mode, this is Meteor Swarm, as already seen in the first heroic interruption.
For the heroic variant, Wave of Flame is added, which Aggramar also casts in the first phase of the fight.
3. Phase: The Avenger
The third phase is also identical to the first, except that Aggramar can cast Powerful Beacon here. In heroic mode, alongside the abilities, the Sparks also need to be fought to avoid dying from their explosion after 3 minutes.
Alternatively, they can be ignored to quickly dispatch the boss with Bloodlust/Heroism. However, you will need very high damage in the raid to achieve this before the Sparks explode.
- Powerful Beacon: Aggramar marks three positions, similar to the regular variant of the Beacon. However, waves of Flame also emanate from each of these positions, which must likewise be evaded and have the same mechanics as the ability from phase 1.
The different phases of the fight do not greatly differ from each other but become increasingly difficult in the heroic variant. The greatest challenge here is to cause the Sparks to detonate exactly.

Your opinion is important to us!
Do you like the article? Then let us know!