

The Riddle Dungeon
With the “Strange Key” in your inventory, travel to the Mountain Pass of Dead Winds at coordinates 47 / 69. There you will find the entrance to the catacombs. Use the Torch from Pyrreth to uncover the portal. From there, you can enter the riddle dungeon “Catacombs of Karazhan”.

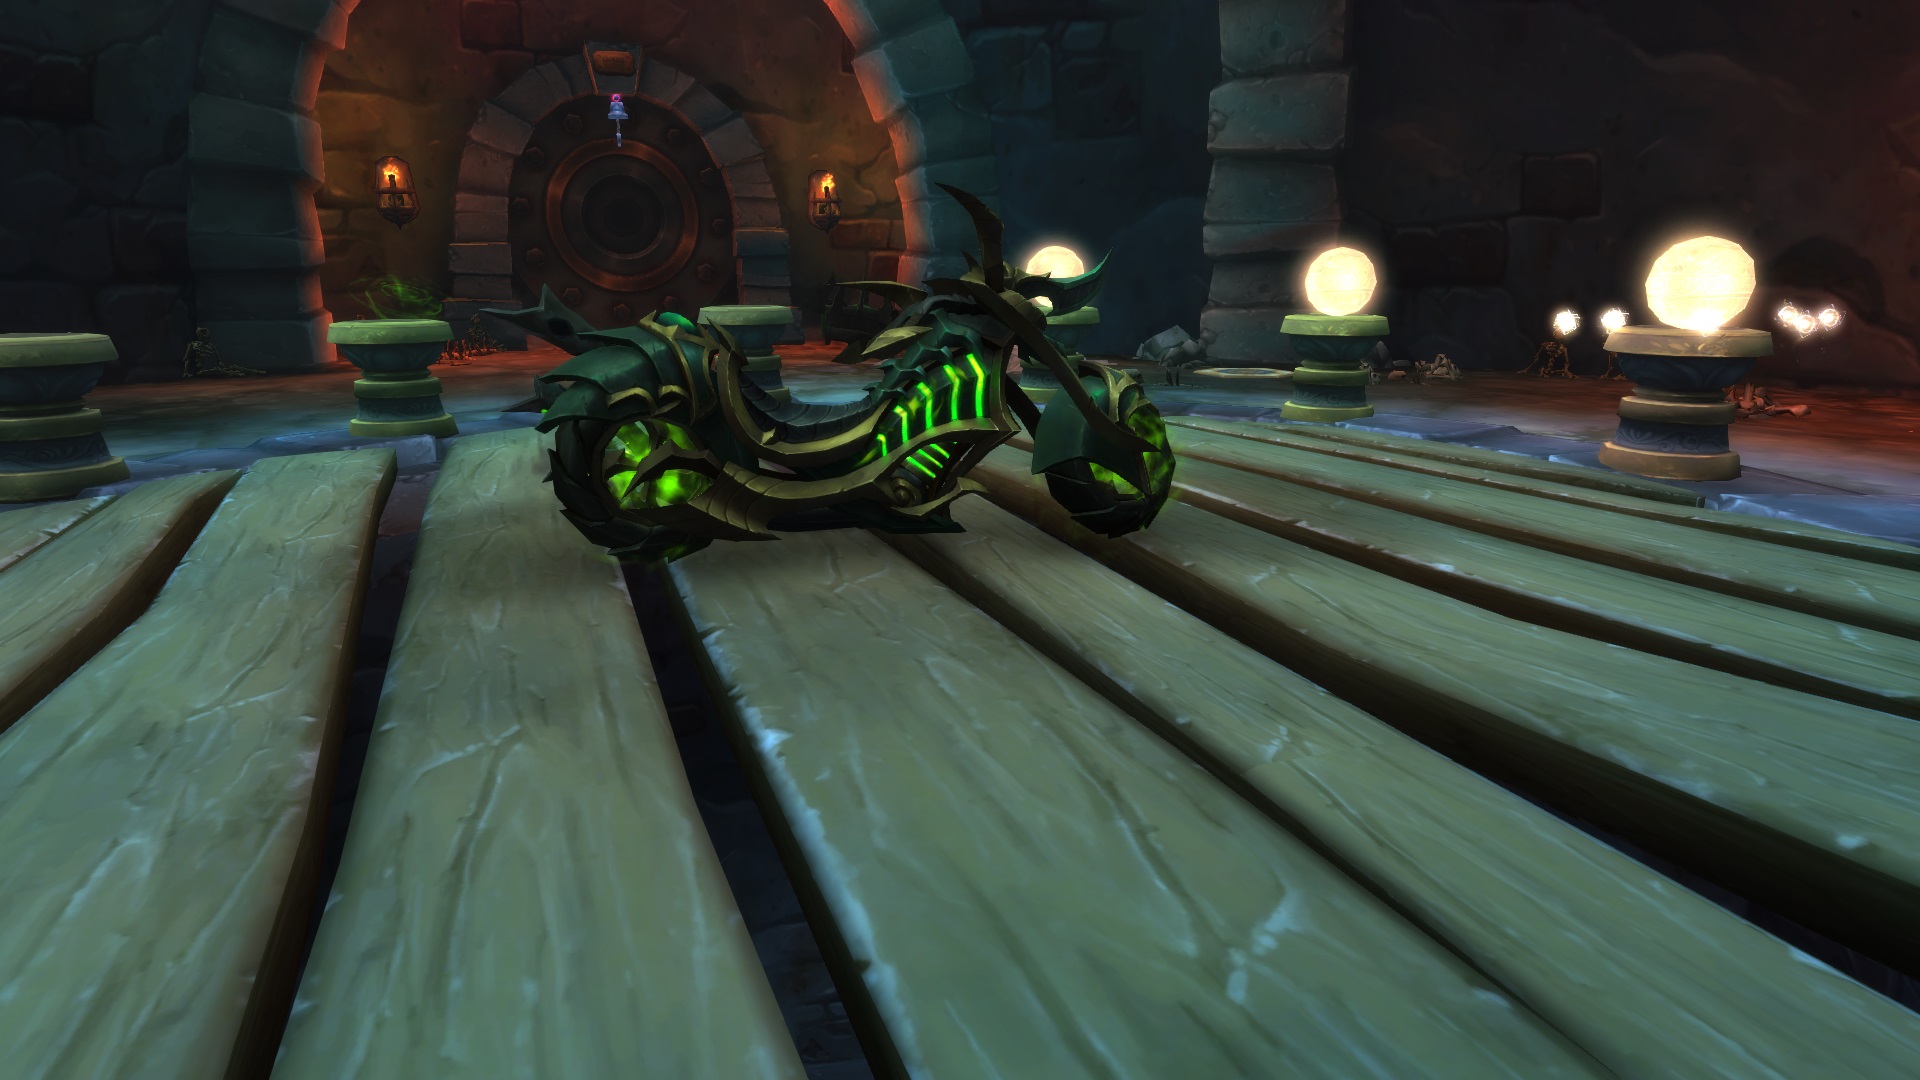
This dungeon contains numerous items and rooms, the most important one is in the northeast on the map. There stands Incognitro, the Unsolvable Demon Wheel on a pedestal – surrounded by 12 torch stands. Each stand represents one of the following riddles. In the community, these stands have been marked with a time (like the hand position on an analog clock). At the top is 12, to the right is 1, then 2, and so on. You must solve the riddles in this order, starting with 1.
1:00 AM – Love
With the Torch from Pyrreth activated, you must visit the following 3 locations. Each time you will receive a stack of “The Light of Love”. When you have 3 stacks, the quest is completed.
- A monument in Northern Barrens: 55 / 40
- Olgra in Nagrand (Draenor, Warlords of Draenor): 74 / 36 (Alternative Position: 49 / 48)
- Olgra in Maldraxxus (Shadowlands): 27 / 61
If you don’t receive a stack anywhere, log out and back in or switch characters briefly.
2:00 AM – Prayer
For this step, you need the battle pet “Pugstray”, some consumable items, and one of the various “Blessing” buffs from N’Zoth. Alternatively, you need to have a player with you who meets these criteria.
Travel to the Valley of Eternal Blossoms (Pandaria) and ensure you have unlocked the attacks from N’Zoth – for that, you must play the Battle for Azeroth campaign if necessary.
- Find the Obelisk of Ny’alotha at coordinates 84 / 28.
- Summon the battle pet “Pugstray” (or be in a group with someone who possesses the pet).
- Use a “Dogg-Saron” costume or “Yipp-Saron” costume on the pet.
- Use one of the following toys: Twitching Eyeball, All-Seeing Eyes, or still have “N’Zoth’s Gift”.
- Target the obelisk and use the /pray command.
If everything was done correctly, you will now receive the Shadow Key in your inventory. The key opens additional rooms in the riddle dungeon.
3:00 AM – Hatred
For this step, you need many “luck” items in your inventory. Most can be purchased at the auction house, others from specific NPCs. We have provided links to wowhead for each item, where you can see the origin of the items. Collect as many of the following items as possible:
- Lucky Horseshoe
- Tortollan Lucky Charm
- Lucky Dragon’s Claw
- Lucky Rat’s Tooth
- Lucky Charm
- Lucky Shirt
- Lucky Duck
After you hopefully have all these items, proceed as follows:
Enter the new room in the riddle dungeon and fish in the swarm “Astral Soup” until you receive an “Astral Key”.
Open the Arcane Chest nearby to receive “Luminous Monocle” and unlock the toy. Use the Luminous Monocle.
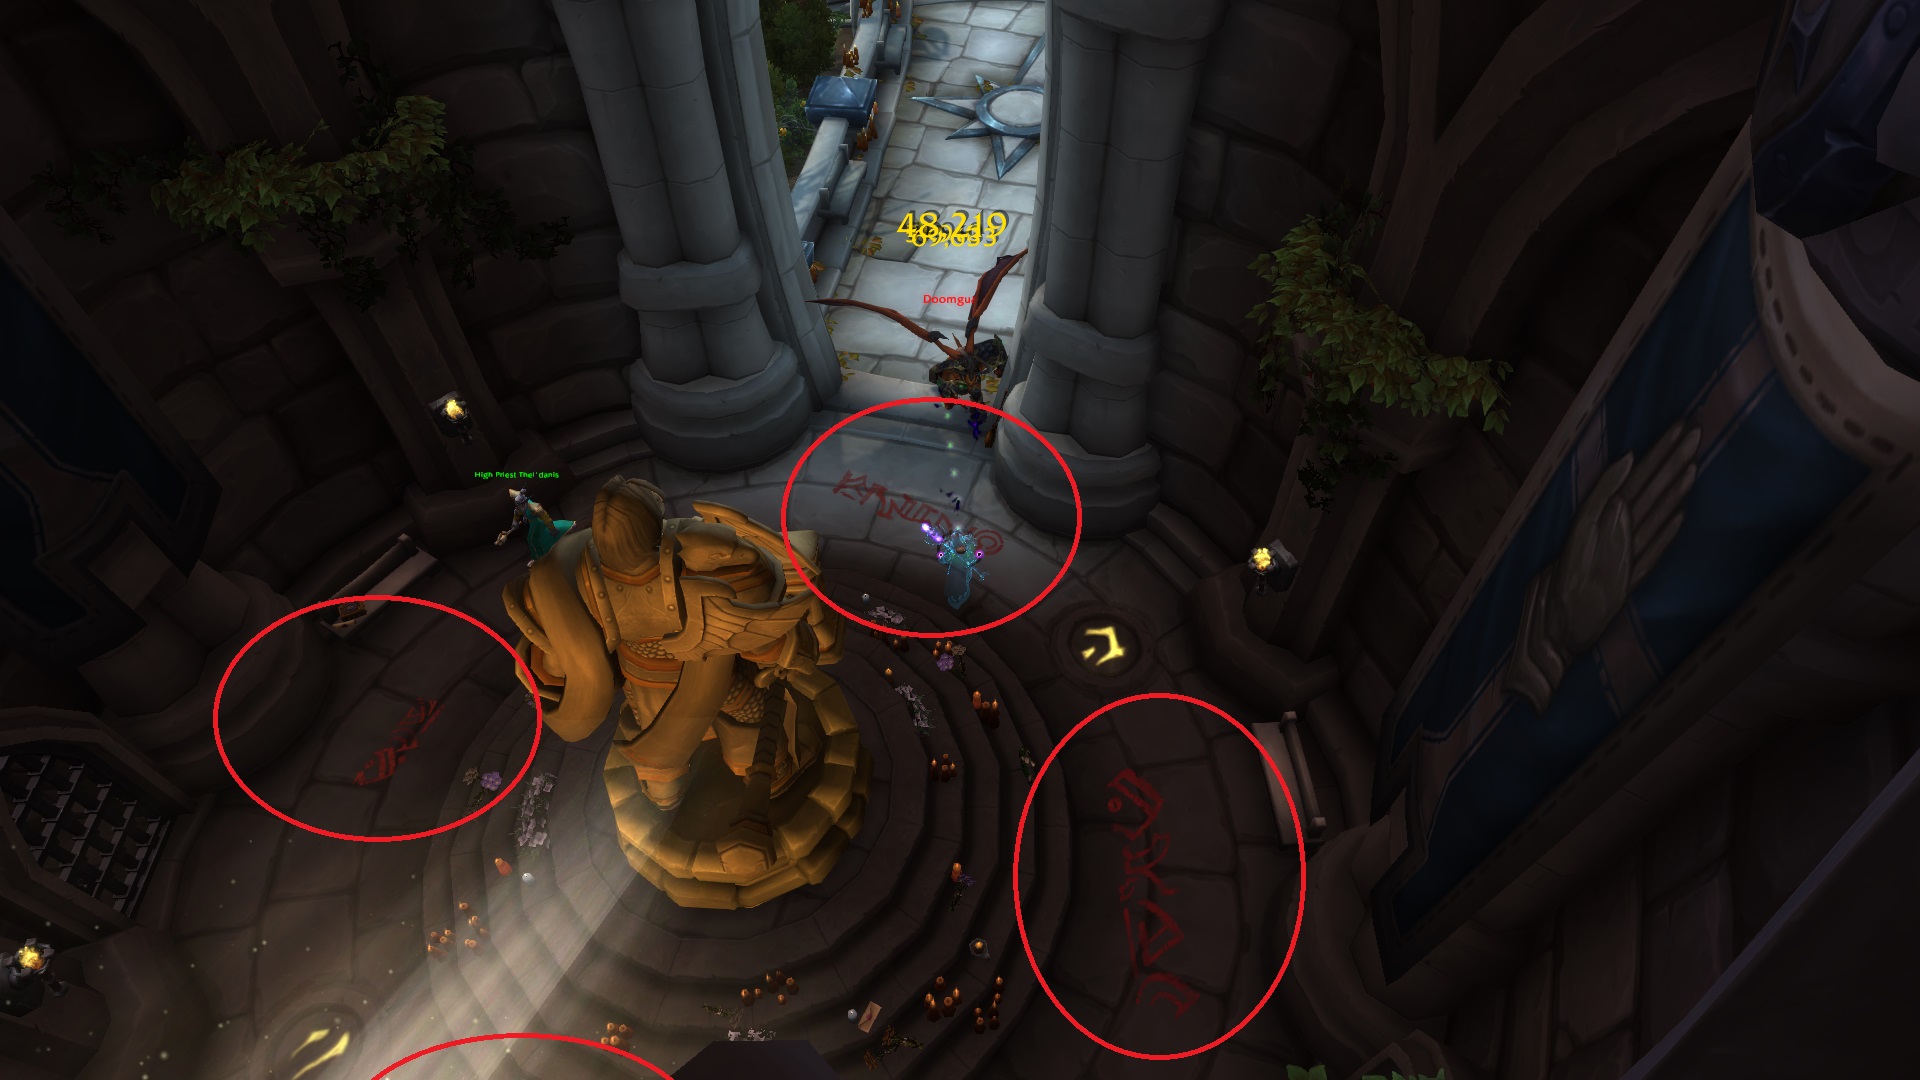
Interact with one of the machines you now see and learn the new ability “Input Sequence”. The ability is now temporarily in your spellbook while you stand at a console. It’s best to drag it to your action bar.
Now you need to enter the correct code into all consoles. If you enter a code correctly, you will receive a “Piece of Hatred”. As soon as you have 9 Pieces of Hatred, the step is complete – but don’t throw away the “Pieces of Hatred”, you will need them later. Note that you must also confirm each code with the “Input” action when selecting the numbers.
- Machine at coordinates 49 / 80 – Code: 88224646
- Machine at coordinates 43 / 70 – Code: 17112317
- Machine at coordinates 65 / 48 – Code: 52233
- Machine at coordinates 50 / 65 – Code: 10638
- Machine at coordinates 57 / 64 – Code: 5661
- Machine at coordinates 66 / 16 – Code: 115
- Machine at coordinates 68 / 84 – Code: 19019
- Machine at coordinates 70 / 54 – Code: 51567
The last machine can be found at coordinates 68 / 25 – in the room with Incognitro. Use any of the numerous consoles. There are various codes here, one of which works. Try “777” or “77777” or “7777777”. If none of these codes work, you are still missing luck items (see above).
4:00 AM – Damnation
Buy a Scroll of Demon Binding from “Vashti the Wandering Merchant”, who wanders back and forth on the northeastern coast of Azsuna (Legion).
Then travel to Uther’s Tomb in the Western Plaguelands, at coordinates 52 / 83.
Use the scroll. You will die – immediately resurrect. As long as the Damnation Guard is still alive, you will see graffiti on the ground. Click it to complete this step.
Note that the Damnation Guard only lasts for a few moments. If you have trouble, do this step with another person and take turns.
5:00 AM – Muffin
For this part of the riddle, you must complete pet battles. The twist: You may only use pets that (in the broadest sense) come from other riddles. Valid battle pets are:
- Spyragos
- Nelthara
- Willow Puppy
- Eikceps
- Terky
- Gurgl
- Glimmr
- Snow Claw Pup
- Jenafur
- Hummelbumble
- Younger Sunstarter
- Baa’l
You need at least 3 of these battle pets at level 25. The more options you have, the better.
Travel to the Timeless Isle and enter the Cave of the Lost Spirits at coordinates 43 / 41.
Speak with the rare NPC Zarhym at the entrance of the cave. If Zarhym is not there, wait a few minutes – he has a short respawn time. When you speak with him, you will enter the spirit world.
Do not open any of the chests of bone piles. Instead, work your way to the end of the cave and find the NPC “Jeremy Feasel”, whom you challenge to a pet battle with your riddle pets.
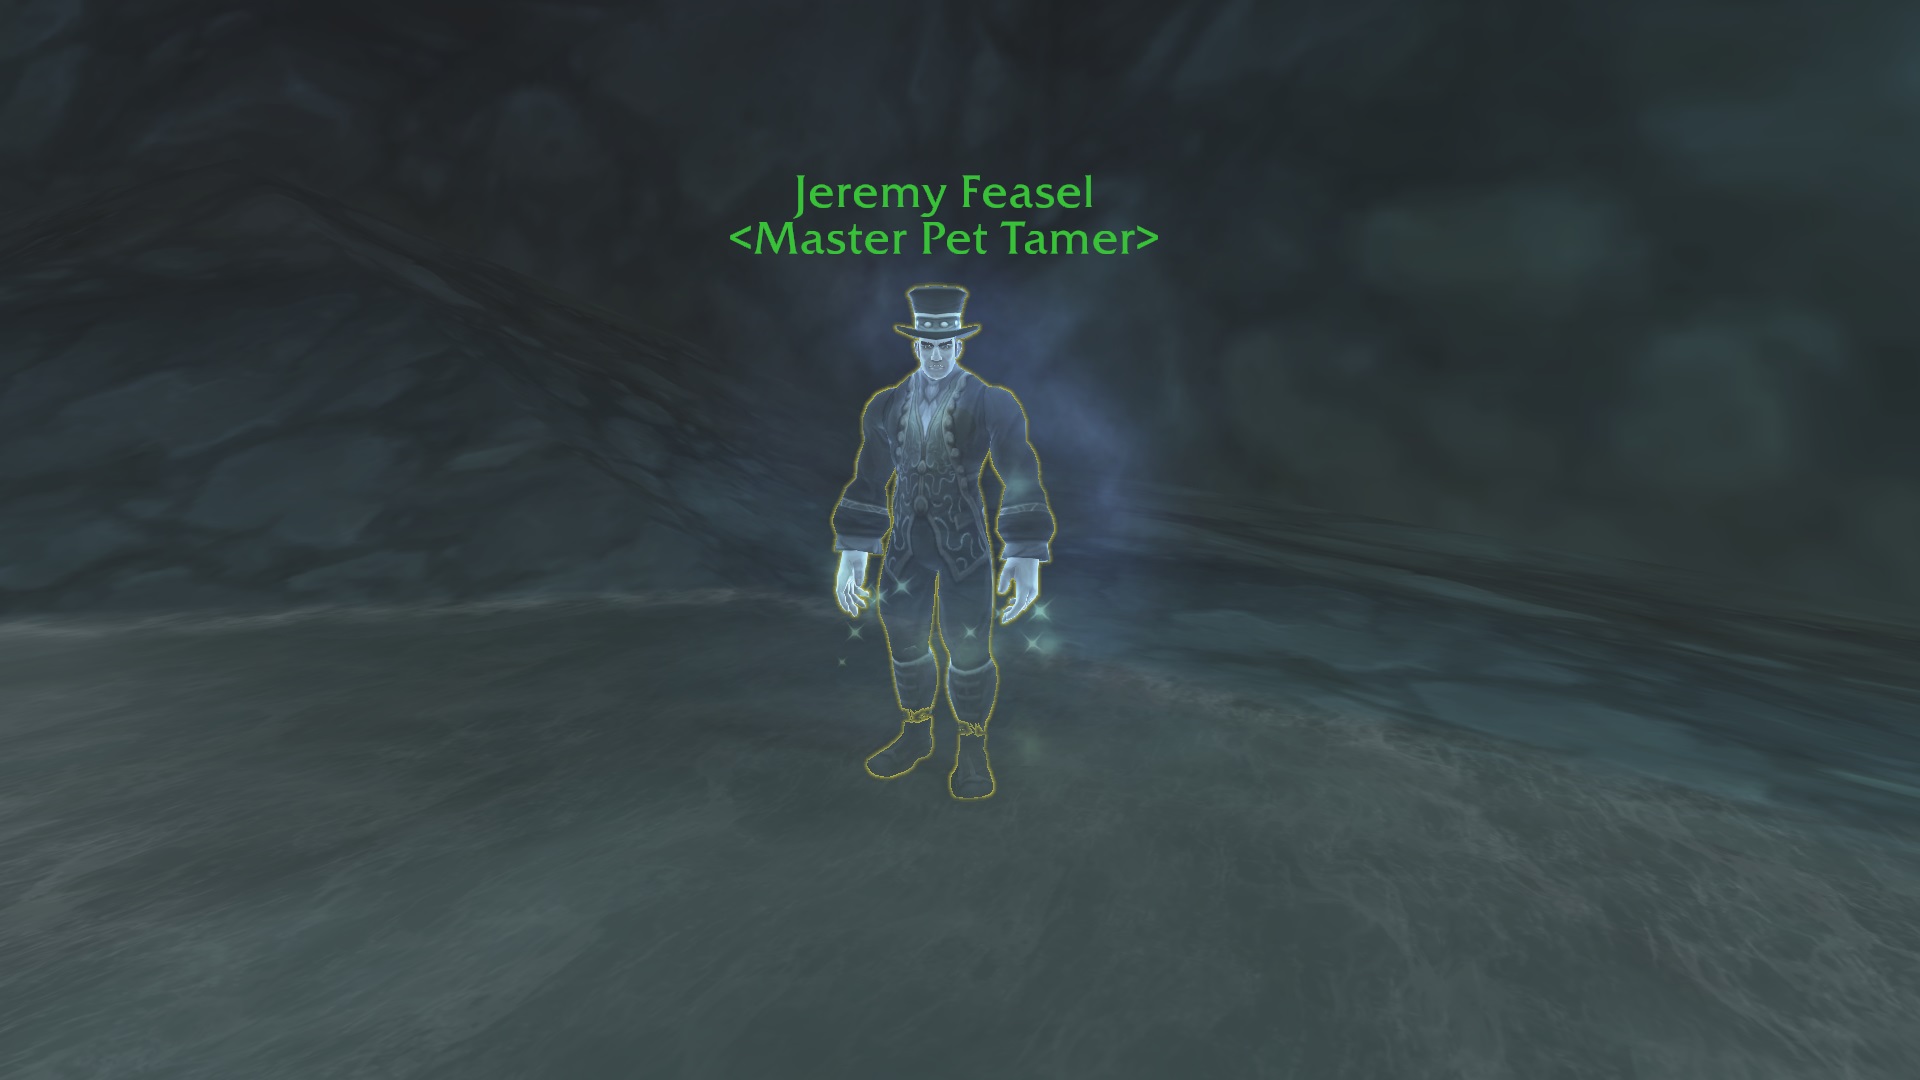
Once you defeat him, he will give you the quest “Master of Secrets”. Complete it to receive a “Golden Muffin”.
Next, travel to Shimmering Cape and fly to the statue off the coast of Booty Bay. Inside, you will find an NPC vendor (a dead skeleton), with whom you can buy a “Relic of Crystal Connections” using the muffin and your 9 Pieces of Hatred. Purchase the item to complete this step.
6:00 AM – Altars
Travel to Northern Stranglethorn Valley and fly to the non-instanced area of Zul’gurub. Here you will find 5 altars at which you need to use various items, pets, or transmog items to make progress. You must use one object from each category to placate the NPC at the altar. Note that you must always have your Torch from Pyrreth activated.
If you don’t have items from this list, a friend or teammate can also solve the riddle, as long as you are in proximity, you should also receive credit for progress.
Blood Altar
Coordinates: 77 / 46
Possible Solutions:
- Mount: Any with “Blood” in the name
- Battle pet: Any with “Blood” in the name
- Toy: Pulsing Blood Orb
Corrupted Altar
Coordinates: 77 / 44
Possible Solutions:
- Mount: Any with “Corrupted” in the name.
- Battle pet: Any with “Corrupted” in the name.
- Toy: Ring of Broken Promises
- Transmog: All cloaks with the same appearance as “Cloak of Overwhelming Corruption”
Desire Altar
Coordinates: 77 / 45
Possible Solutions:
- Battle pet: Sister of Temptation
- Toy: Slippery Romantic Novel Set
- Transmog: Completely Naked
- Toy: Moroes’ Famous Polish

Sins Altar
Coordinates: 78 / 44
Possible Solutions:
- Battle pet: Sinheart
- Toy: Conducive Sinstone
- Transmog: Any Venthyr Sinstone Cape
Void Altar
Coordinates: 78 / 46
Possible Solutions:
- Battle pet: Lesser Voidcaller, Void Stalker, Lord Dread Mrrgglton Junior
- Toy: Shadewing Disguise, Void Totem
- Transmog: Any cloak with the same appearance as “Cloak of Black Void”
After you’ve satisfied all 5 NPCs at the altars, use your “Luminous Monocle” and look at the wall between the Blood and Void altars to see a Spectral Chest. Loot “Ancient Shaman Blood” from the chest to complete this step.
The solutions for puzzles 7 to 9 are on the next page.

Your opinion is important to us!
Do you like the article? Then let us know!