
The Horrific Visions in WoW can be quite challenging. We provide you with many tips and tricks regarding loot, secrets, potions, and many more details.

The major feature of Patch 8.3 Visions of N’Zoth in World of Warcraft are the Horrific Visions of Orgrimmar and Stormwind. However, access to these visions is severely limited, which can be frustrating for some players who can achieve little in them. There are a whole set of tips and tricks to make the runs easier.
Because basically, the rule is: Those who start the Horrific Visions with a plan and careful consideration will progress further.
Update: The article was updated on 18.05.2020 and now also includes information about the decision of whether to complete the visions in groups or solo.
Horrific Visions – What are they and how to unlock them?
What are Horrific Visions? There are two Horrific Visions. One from Stormwind and one from Orgrimmar. Thematically, they represent the future of these cities as N’Zoth envisions it. As a player, you must prevent these visions from becoming reality and overcome the various challenges within the visions. The primary objective, defeating Alleria or Thrall, is quite simple. However, the visions lure with numerous side quests and multiple “hard modes” that make the experience more exciting.
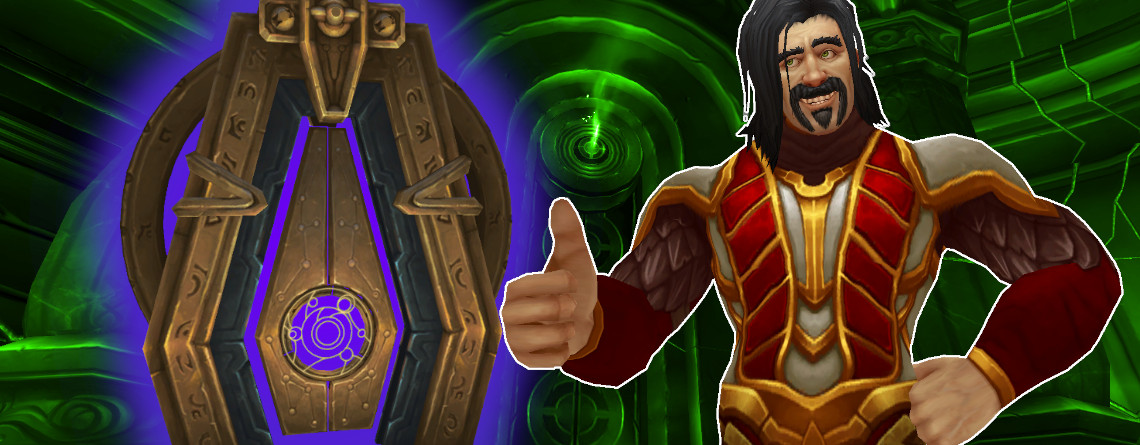
How to unlock the Horrific Visions? To be able to play the Horrific Visions, you must nearly complete the campaign surrounding the Black Empire. The quest chain takes you through Uldum and the Vale of Eternal Blossoms, along with some scenarios. In the end, you receive the legendary cloak Ashjra’kamas from Wrathion and must then play your first Horrific Vision.
If you want to visit more Horrific Visions, you need a “Vessel of Horrific Visions” for each entry. You can obtain this from the assaults of N’Zoth (Uldum or Vale of Eternal Blossoms) or purchase it directly from Wrathion in the Heart Chamber for 10,000 Manifested Visions. The Manifested Visions are a new currency you earn from daily quests and the assaults of N’Zoth. If you want to visit many visions, you should complete the quests regularly.
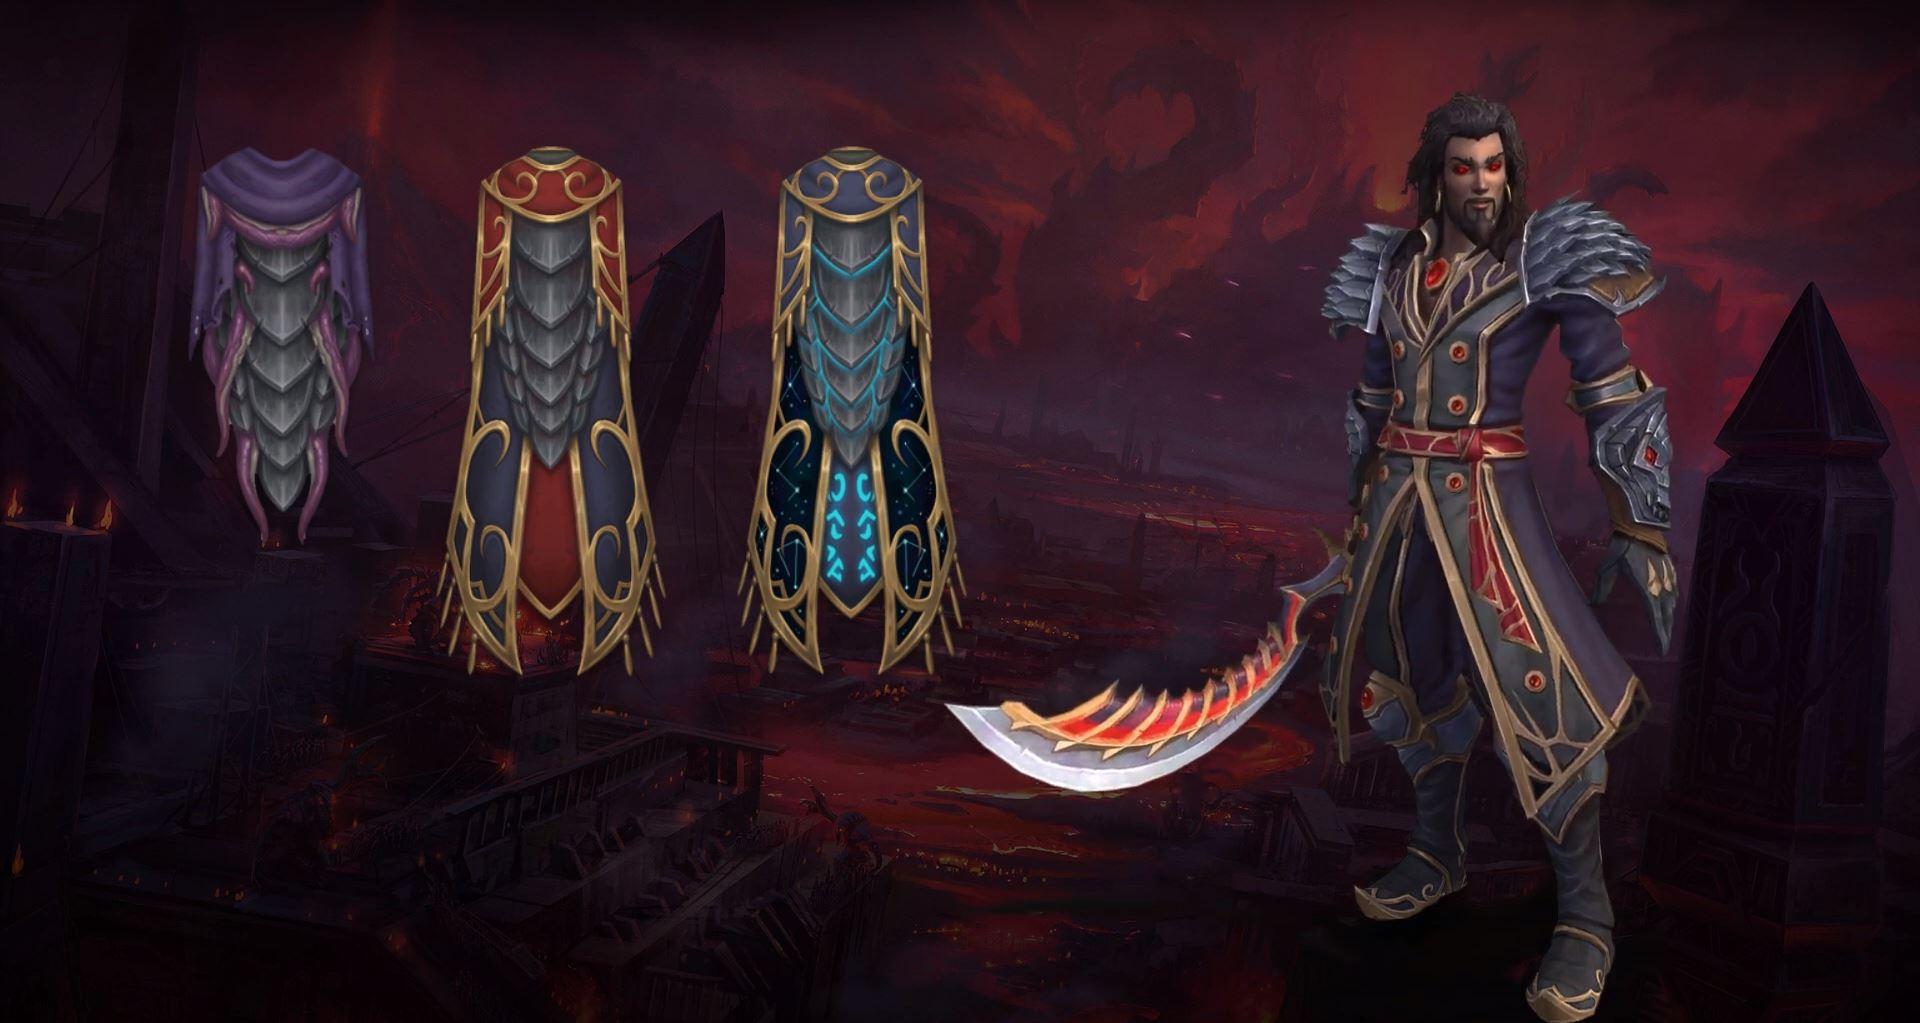
Why should you do the visions? The primary benefit of the visions is upgrading the legendary cloak Ashjra’kamas. Only in the Horrific Visions can you find the necessary items to make the cloak increasingly powerful. This not only affects the character’s strength but also enhances resistance against N’Zoth’s corruption. As a result, you can carry more corrupted items and also stay longer in the Horrific Visions.
Moreover, the visions are a reliable source for good loot. The more you achieve in a vision, the better the rewards in the final chests will be. While it requires overcoming quite difficult challenges for the best loot, items with item level 470 are enticing.
Last but not least, the visions contain plenty of pets, toys, and even mounts. Collectors will find value here.
Fundamental Considerations at the Start
The Visions of N’Zoth scale with the number of players. You can enter them alone or with a group. Whether you venture in alone or join a group should depend on several factors:
- Your gear: The enemies in the visions have static HP; they do not scale with your gear level. The higher the item level, the further you will get. Generally, an item level of 430 is recommended before entering the visions.
- Your class and specialization: The visions can generally be managed solidly with any kind of DPS specialization. However, if you love playing tank or healer, a group might help you fulfill that role as well.
- Personal challenge: Ultimately, personal enjoyment plays an important role. If you like mastering challenges alone and improving yourself, you should also dare to take on the visions solo. Especially as a rogue, druid, or demon hunter, this is recommended due to their efficiency.
The tips in this guide mainly refer to attempts you undertake alone. Most of the tips can also be applied to group play.
Important Basics
Before you begin, you should know a few important basics about the visions. This is absolute foundational knowledge, so those who have already completed some visions can skip this point.
- The vision ends when your character dies or your sanity drops to 0.
- In a group, allies can still resurrect you. However, they must sacrifice 50% of their remaining sanity!
- The vision always ends immediately after you defeat the final boss (Alleria or Thrall). Therefore, you should complete any other objectives first.
- Each vision costs one Vessel of Horrific Visions – no matter how far you get. Access is thus highly limited.
- Each area in a vision has a different insanity effect that affects your gameplay differently. You can see the effects beforehand.
Solo or Group – What to Consider
The Horrific Visions are fundamentally designed for all group sizes of 1-5 players. This means that each character can handle them alone or recruit a popular number of 1-4 fellow players. However, whether a Horrific Vision is completed solo or with a group makes a significant difference in terms of approach.
Horrific Visions in a Group
There are some advantages but also disadvantages to being in a group. On the one hand, each group member requires a Vessel of Horrific Visions, and it is advisable that all members have their legendary cloak at the same level. If Player A only has 25% resistance against the loss of sanity, but Player B already has over 60%, Player A will drop much earlier and become more of a burden to the group. Moreover, the strength and health points of the enemies increase by 120% per character – this number is slightly lower for tanks and healers.
However, the positive aspect is that research to increase maximum sanity stacks. So if all 5 group members have researched “+150 sanity,” then the group starts with 1750 sanity – a solo player has only 1150.
However, note that mobs in a vision with 5 players hit quite hard and can quickly overwhelm individual players. Having a tank or healer can be worthwhile, especially if you bring a lot of cloth classes.
Completing Horrific Visions Solo
If you go into the Horrific Visions solo, you bear the full responsibility for the success. This is both an advantage and a disadvantage. Mistakes can quickly lead to death and end the vision. As compensation, however, the enemies are significantly weaker, and the character can use all buffs from potions entirely for themselves. Additionally, the final talent “Gift of the Titans” only procs when you deliver a killing blow – as the only player, you are responsible for all killing blows, thus getting the buff as often as possible.
The First Runs – What Should One Do?
The first run is unimportant: During the quest chain, you will be sent into the Horrific Vision once. You will not yet have any additional abilities. Just try to defeat the final boss of the vision (Alleria or Thrall). Even if that is unsuccessful, the quest counts as completed.
Maximize your Corrupted Mementos: In your next runs, you should try to maximize your yield of “Corrupted Mementos.” You need these to unlock new abilities in the Titan research archive. Later, other rewards, such as additional socket slots, a backpack, or even a mount, will be tied to this.
Corrupted Mementos can be obtained in the following ways:
- Each enemy you kill drops Corrupted Mementos.
- Each completely cleared district rewards a bonus chest with Corrupted Mementos.
- In each quarter, there are chests that contain Corrupted Mementos (must be unlocked first).
- Small hidden bonus quests also provide Corrupted Mementos.
Additionally, you can also obtain the mementos from the new raid Ny’alotha, from small visions during assaults, and from companion missions.
By your second run, you should be able to check out at least one of the small “bonus areas.” You can preview the current map of the respective vision with Wrathion beforehand. Choose one of the “corrupted” areas.
The Titan Research Archive – What Should One Unlock?
After your first visit to the visions, you unlock the Titan Research Archive. This is essentially an additional skill tree with effects that are only active in the visions. You should always invest all Corrupted Mementos before starting a new run. The buffs are powerful and drastically increase your chances of success and progress.

At the beginning, we recommend unlocking this combination of talents as quickly as possible:
- Orb Management: 3x per run, you can place an orb that lasts approximately 15 seconds. The orb restores 100 sanity every second while you remain in its radius. However, be aware: You can only use the orb when not in combat. Once active, its effect remains even in combat.
- Singular Purification: Reduces the damage taken and increases the damage dealt in visions by 5%/10%/15%. Reduced by additional members in the group (3 ranks).
- Emergency Skull Defibrillation: Once per run, if you die or reach 0 sanity, you are resurrected with full health and 500 sanity.
- Clear Sight: You can discover additional treasure chests in tainted/corrupted/lost areas of the Horrific Visions (3 ranks).
- Elite Annihilation: Killing an elite enemy restores 200 sanity.
- Vision Hunter: Killing enemies increases movement speed and haste by 1%/2%/3% for 60 seconds. Stackable up to a maximum of 5%/10%/15% (3 ranks).
- Gift of the Titans: Killing enemies grants you a chance to receive “Gift of the Titans” for 20 seconds. During this time, you cannot lose sanity and your haste and movement speed are increased by 60%.
Ultimately, you will unlock all talents anyway, so it’s hard to “mis-spec”. It just delays the process a bit.
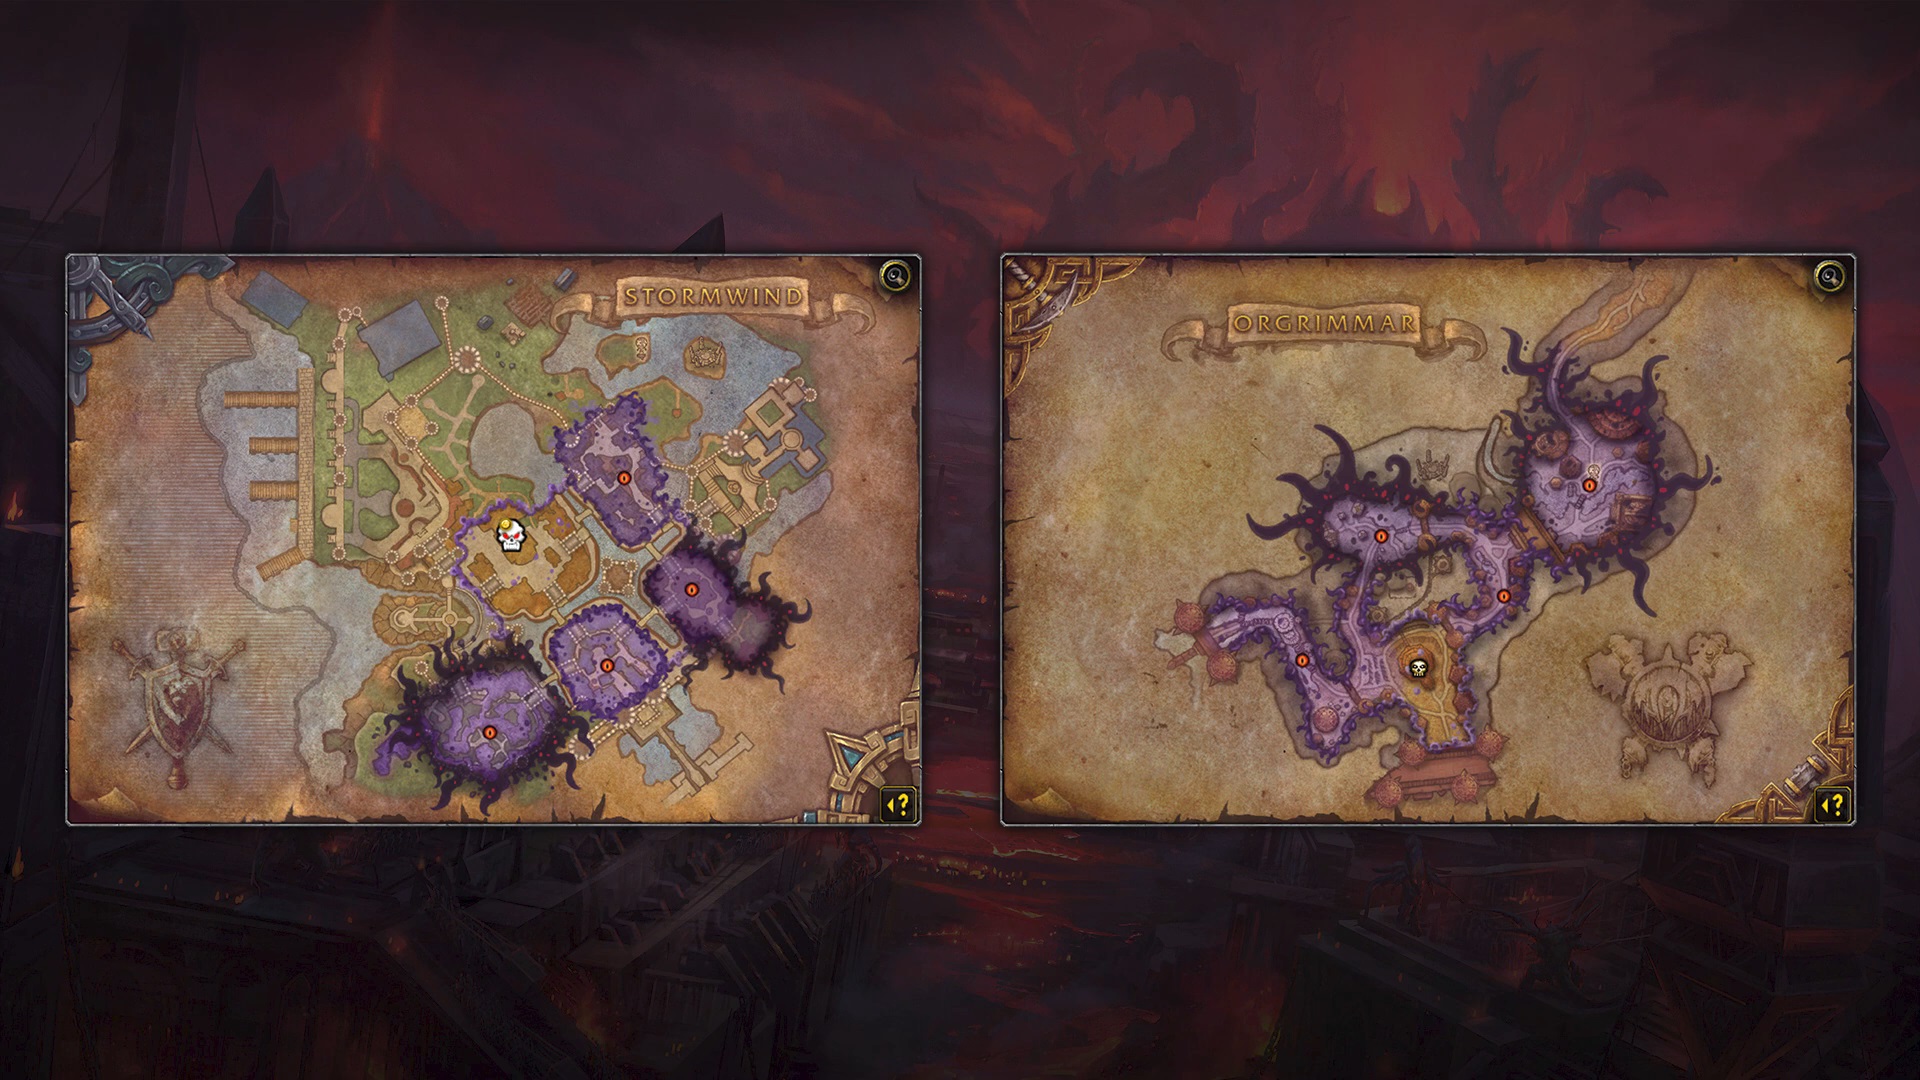
Orgrimmar and Stormwind – Guides for Both Horrific Visions
The two Horrific Visions, Orgrimmar and Stormwind, are fundamentally similar in structure but have different challenges and bosses. Overall, players find the Horrific Vision of Orgrimmar to be slightly easier. We provide you with tips and tricks for both visions and explain the biggest challenges of the bosses.
Guide for the Horrific Vision of Orgrimmar
In what order should you approach the areas? The most effective method is the following path:
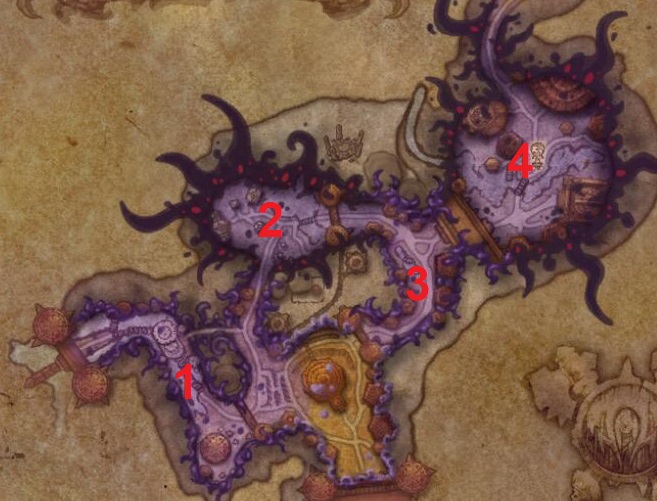
- Clear the enemies in front of Thrall’s hut and then keep left.
- Inspect the forge, kill the blacksmith if he is present.
- Go up to the Spirit Vale and begin resolving the area. After the 2nd totem, briefly check right to see if Bwemba is there – if yes, kill her. Then complete the area as usual.
- Run north into the Vale of Wisdom and fight your way to the center. Turn right and kill the large elite at the end of the path. Then turn back and take the other path at the intersection to get to the second elite.
- Once you’ve defeated both elite mobs and enough trash, the final boss of the Vale of Wisdom will appear. Kill him.
- Use the totem (at the intersection) to return to the entrance of the vision.
- Go north and enter “The Alley.” Defeat the first mob group and the mini-boss, then speak with Garona.
- Fight your way through the alley, open all houses, and check the Astral House to see if the portal is there. If so, open it and defeat the Warpweaver.
- After the end boss, turn right and enter the Valley of Honor.
- Simply follow the path northwest to the arena and defeat the two elites on your way there.
- Kill Rexxar with his boars.
- Exit the arena and use the totem to return to the entrance.
- If you still have time, turn in your crystals to the Astral and open another mailbox.
- Then go to Thrall and defeat him.
Tips for the Bosses in the Horrific Vision of Orgrimmar
Devastation Elemental (Spirit Vale): For this boss fight, you should rotate your camera to look down on your character.
- Dodge the waves. Each touch costs you sanity.
- If the boss debuffs you with hopelessness, enter the golden area to regain the ability to use skills.
Vez’okk the Lightless (Vale of Wisdom): One of the toughest bosses as he has many annoying abilities and adds.
- Do not touch the shadow spheres. These spawn around him and will be shot out in all directions.
- Kill the adds while focusing on the boss.
- Dodge “Desecrated Ground” while the boss is casting it, or you will be stunned.
Inquisitor Gnshal (The Alley): The Inquisitor is quite simple. Not much can go wrong if you stay alert.
- Save burst abilities for the moment he shields himself to break it quickly.
- During “Void Storm,” run in a big circle around the boss so the projectiles don’t hit you. Alternatively, you can hide behind the tree stump.
Rexxar (Valley of Honor): Rexxar is the strongest boss of the vision due to the many adds that drain your sanity.
- Kill the boars as soon as they appear. They continuously cast spells that drain your sanity.
- Do not step into the traps Rexxar places at the start of the fight.
- Dodge the ghostly creatures that Rexxar calls later. Touching them costs sanity.
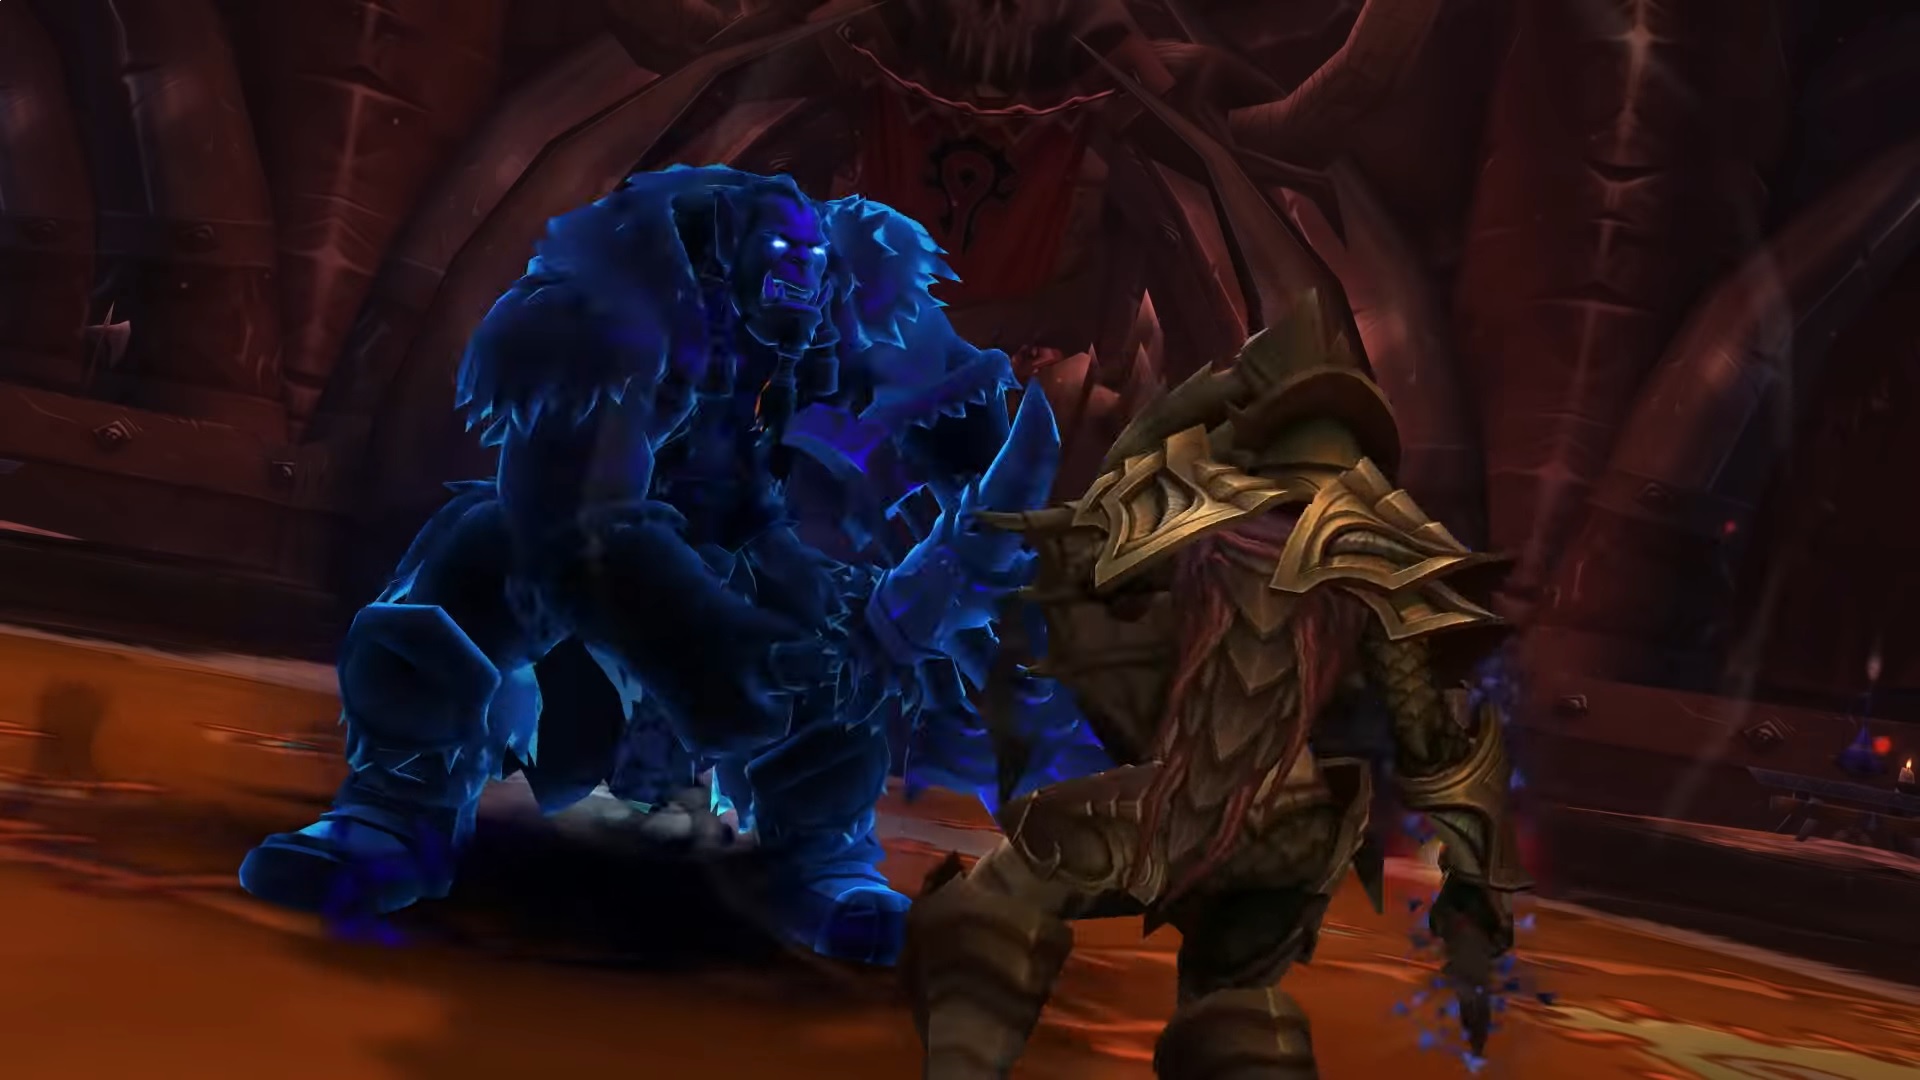
Thrall (Tal of Strength): Thrall is quite simple, but learns the abilities of the bosses you defeated before.
- Dodge the black areas during “Undulating Darkness.” It will target the middle of the room and then the outer region alternatively.
- Dodge “Seismic Strike” while Thrall is casting it, or you will be stunned.
Guide for the Horrific Vision of Stormwind
In what order should you approach the areas? The most effective method for Stormwind is as follows:

- Defeat all enemies on the way to the cathedral and the two gatekeepers.
- Search the house next to the mailbox and the house behind the orphanage. If enemies are inside the houses, kill them for strong buffs.
- Exit the cathedral square to the east and cross the bridge to the Dwarven District. Rescue the gnome from attackers.
- Enter the Dwarven District and keep left. Check the first house on the left side to see if it’s open. If so, go upstairs and step on the green mine for a strong buff.
- Place all bombs. Their locations will be shown on your minimap, and you need to defeat many weak enemies here – grouping up and using bombs can be beneficial.
- Ignite the bombs and defeat the boss.
- DO NOT enter the portal, but run through the corridor towards the Old Town, cross the bridge, and enter the Old Town.
- In the Old Town, many enemies are stealthed. After the tunnel, keep right and kill the elite enemy.
- Turn back and follow the road past the inn towards the SI:7 base. Kill the elite in the square and then the last group.
- Activate both pillars with Valeera simultaneously to open the gate to Shaw.
- Defeat Shaw and pass through the portal to return to the cathedral.
- Exit the area down towards the south and pass the bridge towards the Trade District and enter it.
- Keep left and defeat all enemies.
- Destroy the elite at the Gryphon post. Then turn around and follow the path towards the city exit. Also kill an elite here.
- Then open all cells, which will be marked on your map. Check at the bank briefly to see if the elemental is there – kill it for a strong buff.
- Exit the Trade District and head to the bridge to the Mage Quarter. Enter through the only possible entrance.
- Keep right and fight your way up the corridor to the fountain square. Kill the elite.
- Follow the path toward the mage tower. Clear the area in front of the mage tower, including the elite enemy. From here, you can reach all Void Portals and seal them, they are marked on the map.
- Then run up the mage tower and through the big portal to reach the boss Umbric.
- Kill Umbric and exit the tower through a new portal that brings you back to the cathedral.
- Enter the cathedral and kill Alleria.
Tips for the Bosses in the Horrific Vision of Stormwind
Therum Deepforge (Dwarven District): Therum Deepforge has only 2 abilities, neither of which is threatening or difficult.
- He throws bombs. Just step out of the effect and also don’t step into the burning surfaces later. Alternatively, you can “kick” the bombs by right-clicking them.
- He inhales deeply and then breathes fire. Once he starts casting the spell, change your position. Therum will not move after that.
Slave Master Ul’rok (Trade District): The Slave Master is annoying but not especially hard. He takes a lot of time.
- When he casts his chains, run away from the boss until the spell ends. If you get in melee range, you’ll be stunned and take heavy sanity damage. You can abort this ability early by building a large distance from him.
- Additionally, tentacles spawn that will strike marked areas after a short time. Dodge these too.
Mathias Shaw (Old Town): Mathias Shaw has eyes as companions, which are very annoying. They are the biggest problem in the fight.
- The boss occasionally goes stealth and then strikes at 3 marked spots. Just dodge these.
- Position yourselves so that you are never looking in the direction of the eyes. Otherwise, you lose sanity each second.
Magister Umbric (Mage Quarter): Magister Umbric is one of the most annoying and strongest bosses of the visions.
- Save interrupts for his polymorph spell.
- When he teleports away, you can only attack again when you reach melee range. Only then does his frost spell end. It’s also fine if a pet (warlock, hunter) reaches melee range. Alternatively, use movement abilities to quickly catch up to him.
Alleria (Cathedral): Alleria learns the abilities of the bosses you defeated earlier. Additionally, she has two of her own abilities, which are quite simple.
- When she teleports to the middle of the room and starts casting, hide behind one of the pillars to prevent damage.
- When she rains down black arrows, simply move out of the areas.
Hidden Buffs in Orgrimmar and Stormwind
One of the central aids in the Horrific Visions are hidden buffs with great effects. You can find these both in Stormwind and in Orgrimmar. To obtain them, you need to solve a small puzzle or defeat a specific mini-boss. We will reveal where to find these bosses and what buff they offer you.
All of these buffs last for a proud 60 minutes, covering the entire duration of the vision.
Important: Not all enemies and puzzles will be there every time. If a mob is not at the described position, then it is not present that time. Don’t waste your time looking for it.
Hidden Buffs in the Horrific Vision of Orgrimmar
Gamon: You can find this NPC in the inn of Orgrimmar. It is located right at the entrance of the vision on the right side. Gamon stands on the first floor of the inn.
- If you kill Gamon, you gain 10% additional health.
Naros: Naros is the blacksmith of Orgrimmar and is located in the forge. When you enter the vision of Orgrimmar, it is the 3rd house on the left side.
- If you kill Naros, you deal 10% additional damage.
Bwemba: You can find Bwemba in the Spirit Vale. After activating the 2nd totem, turn right (not as usual to the left). There, Bwemba is fishing.
- If you kill Bwemba, you receive 10% additional haste and 10% additional movement speed.
Warpweaver Dushar: You can find the Warpweaver Dushar in the area “The Alley” in the first shop of the Astrals on the right side. Occasionally, a portal will appear there that you can interact with.
- If you kill the Warpweaver, you gain 10% additional critical strike chance.
Hidden Buffs in the Horrific Vision of Stormwind
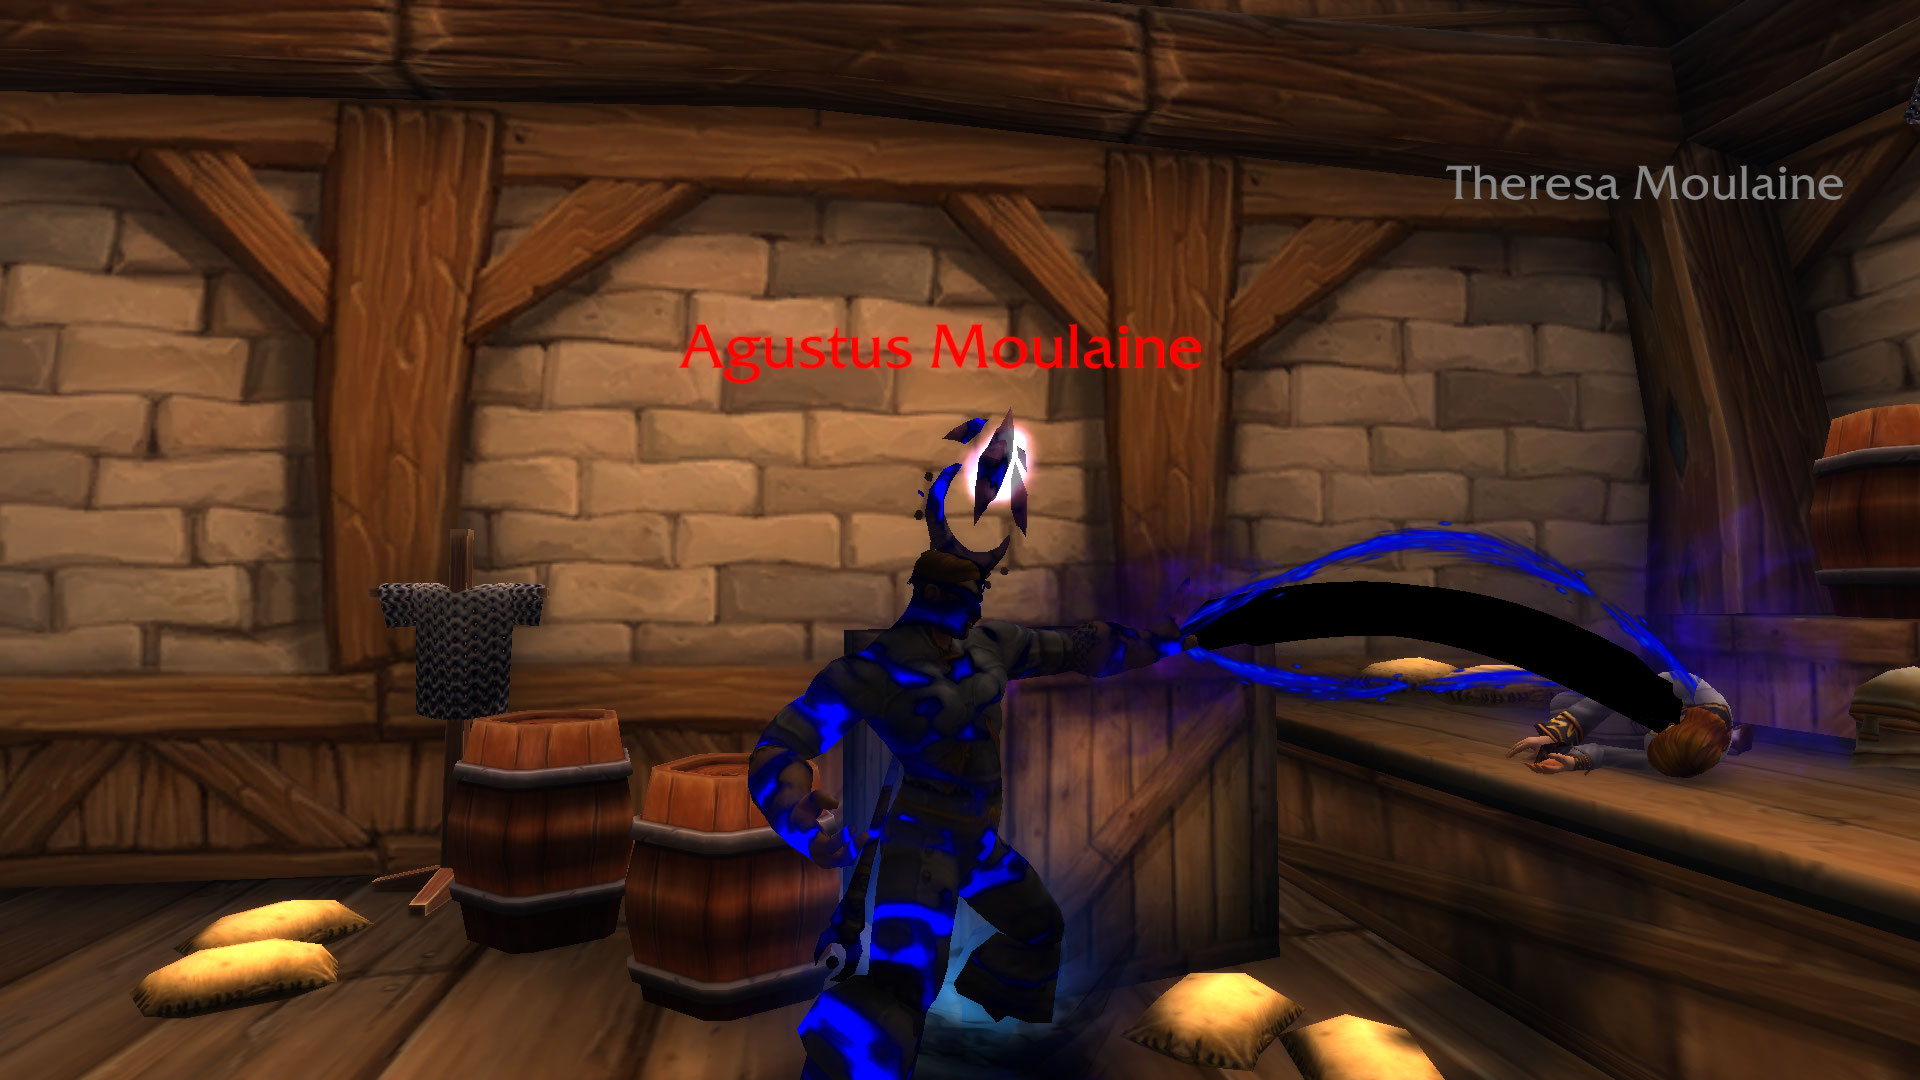
Agustus Moulaine: You can find this former merchant in the cathedral square in the building with the interactable mailbox and the sign showing a helm.
- If you kill Agustus Moulaine, you gain 7% versatility.
Angry Bear Spirit: You can find this spirit also at the cathedral square in the building behind the orphanage – the house next to the exit towards the Dwarven District.
- If you kill the Angry Bear Spirit, you gain 10% haste.
The Mine House: In the Dwarven District, go left and enter the first house on the left side – it has a pickaxe on the sign. You must reach the 1st floor of the house without touching any of the mines. So move carefully and climb over the railing of the stairs to the upper room. Step on the only green mine up there.
- If you reach the green mine, you deal 10% more damage.
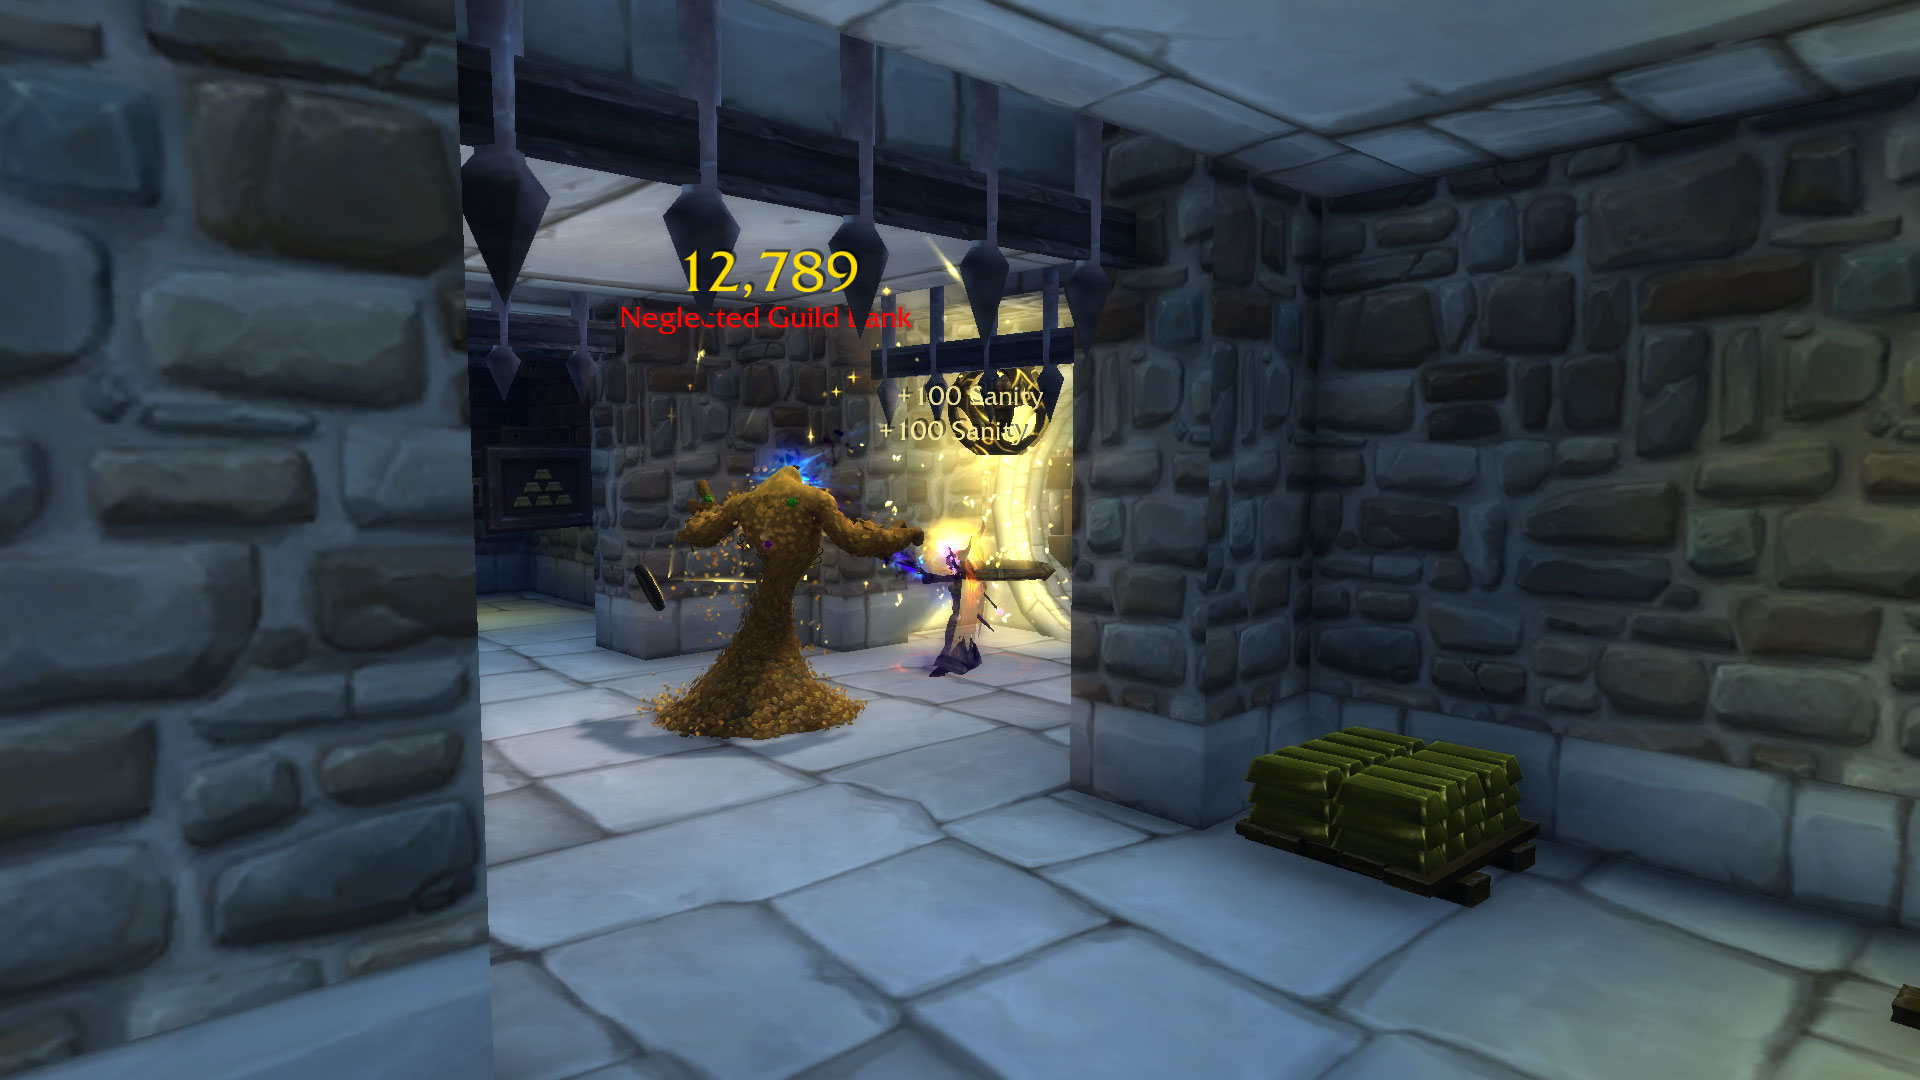
Neglected Guild Bank: In the Trade District, you should enter the bank. In the back rooms, the NPC “Neglected Guild Bank” may appear, a large elemental made of gold.
- If you kill the Neglected Guild Bank, you gain 10% critical strike rating.
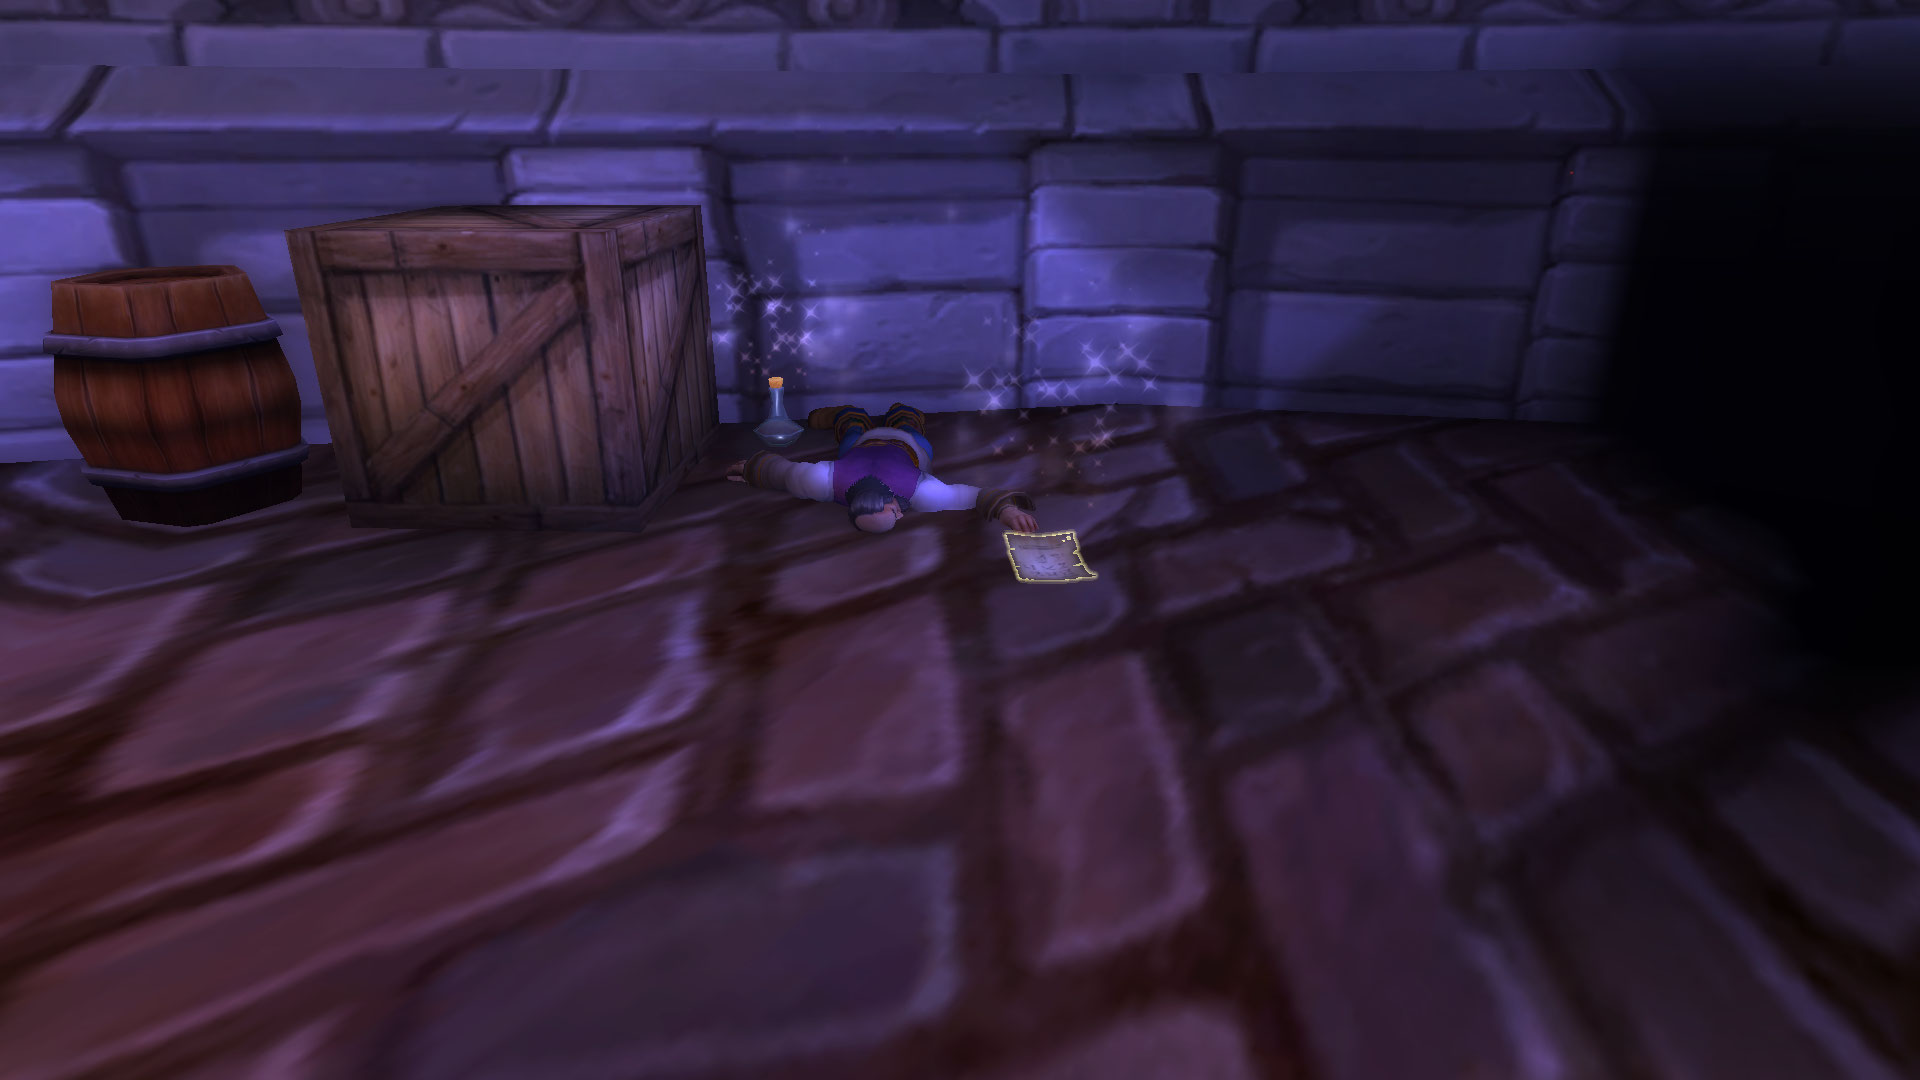
Potions and Crystals in the Visions
After about the 3rd run in the Corrupted Visions or after obtaining the achievement “Thank You for the Mementos,” you will begin to see additional items in many places in the visions marked with the typical “loot shimmer.” These include many potions and, in some cases, mysterious crystals that you can collect.
The potions come in different colors, and each color brings a specific effect. However, which color leads to which effect varies in each vision. The following 5 effects occur when you drink the potions:
- -60 sanity.
- +100 sanity.
- You take 5% less damage from all sources.
- You will be healed for 2% of your maximum health every 5 seconds.
- You occasionally breathe fire, damaging all nearby enemies.
In general, there are 4 positive effects and one negative. However, the negative effect (malus on sanity) can be quickly identified:
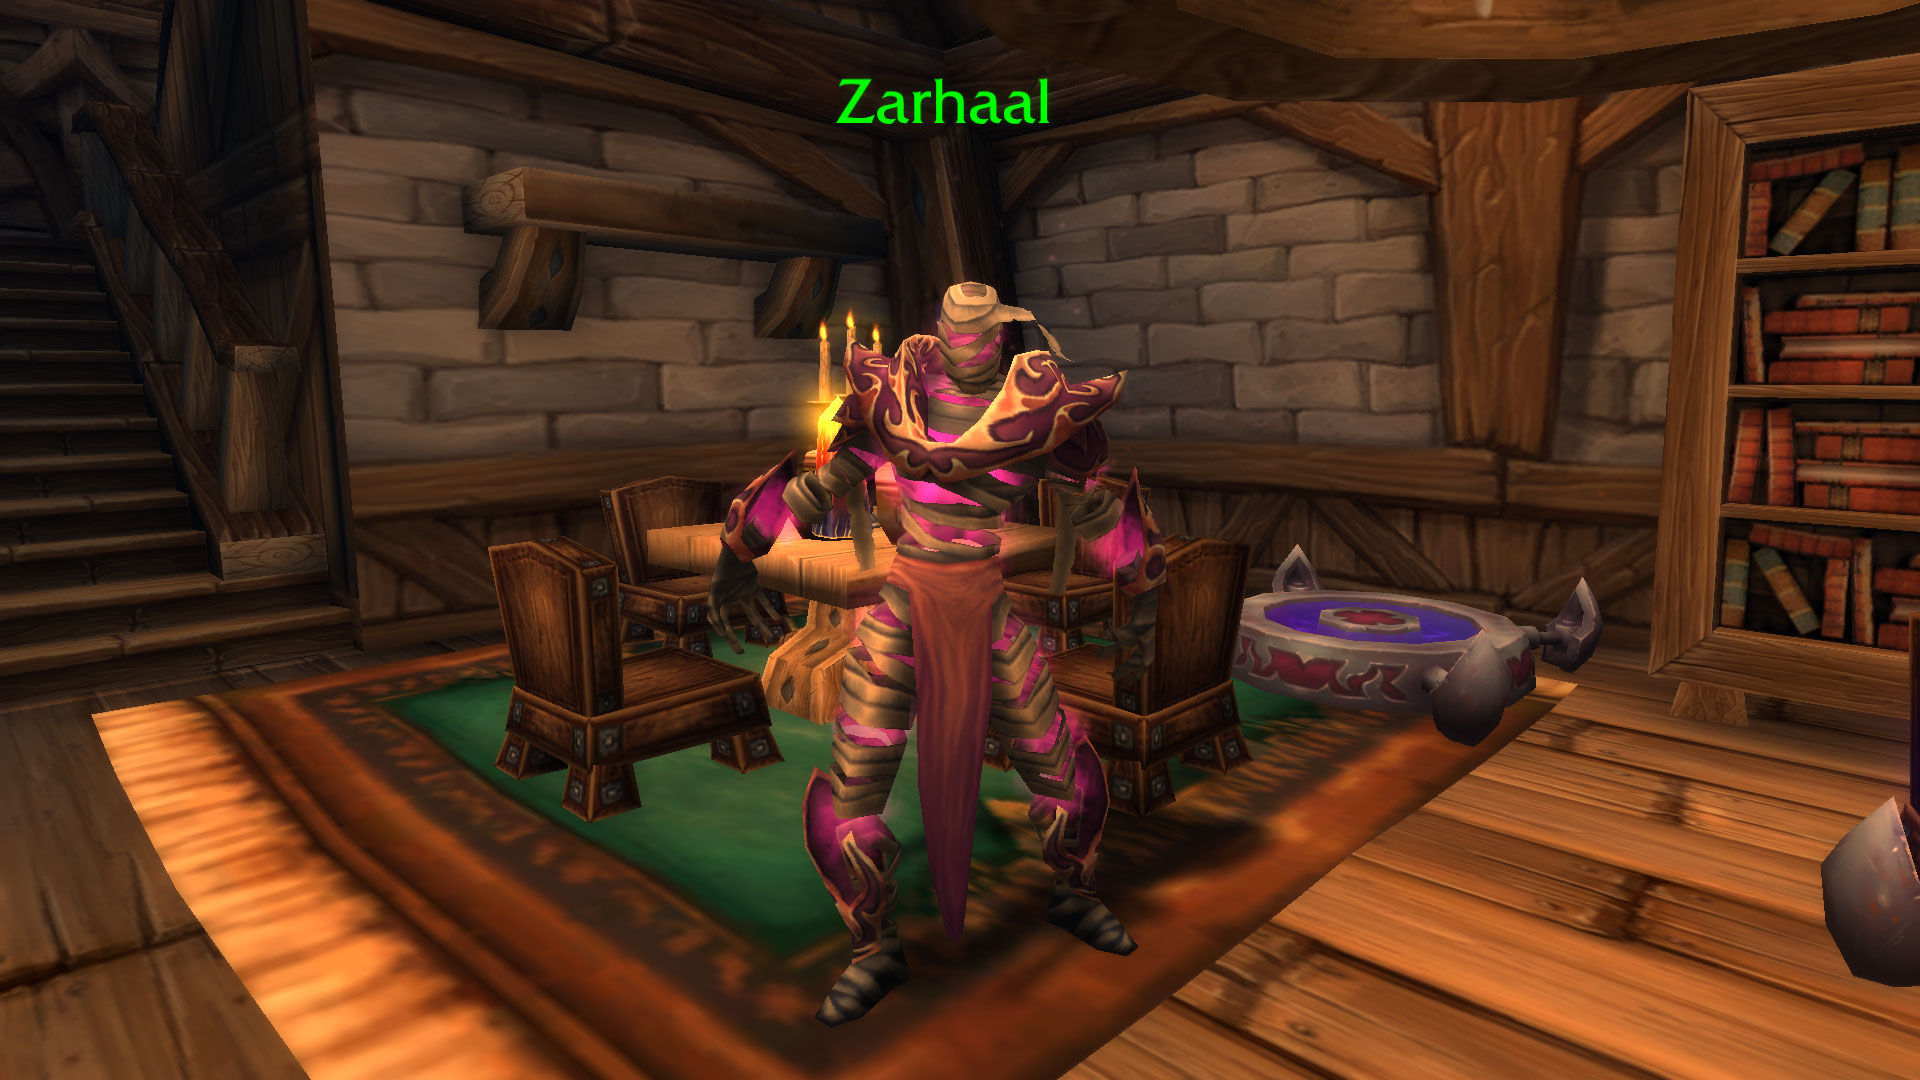
- In Stormwind, there is a dead NPC with a note next to it directly from the spawn point.
- In Orgrimmar, there is an NPC in the small hut right next to the forge; he also has a potion next to him.
The potion next to the respective NPC is the bad potion. All other colors you can (and should) safely drink during this run to receive the buffs. Potions whose color matches that next to the dead NPC should be avoided.
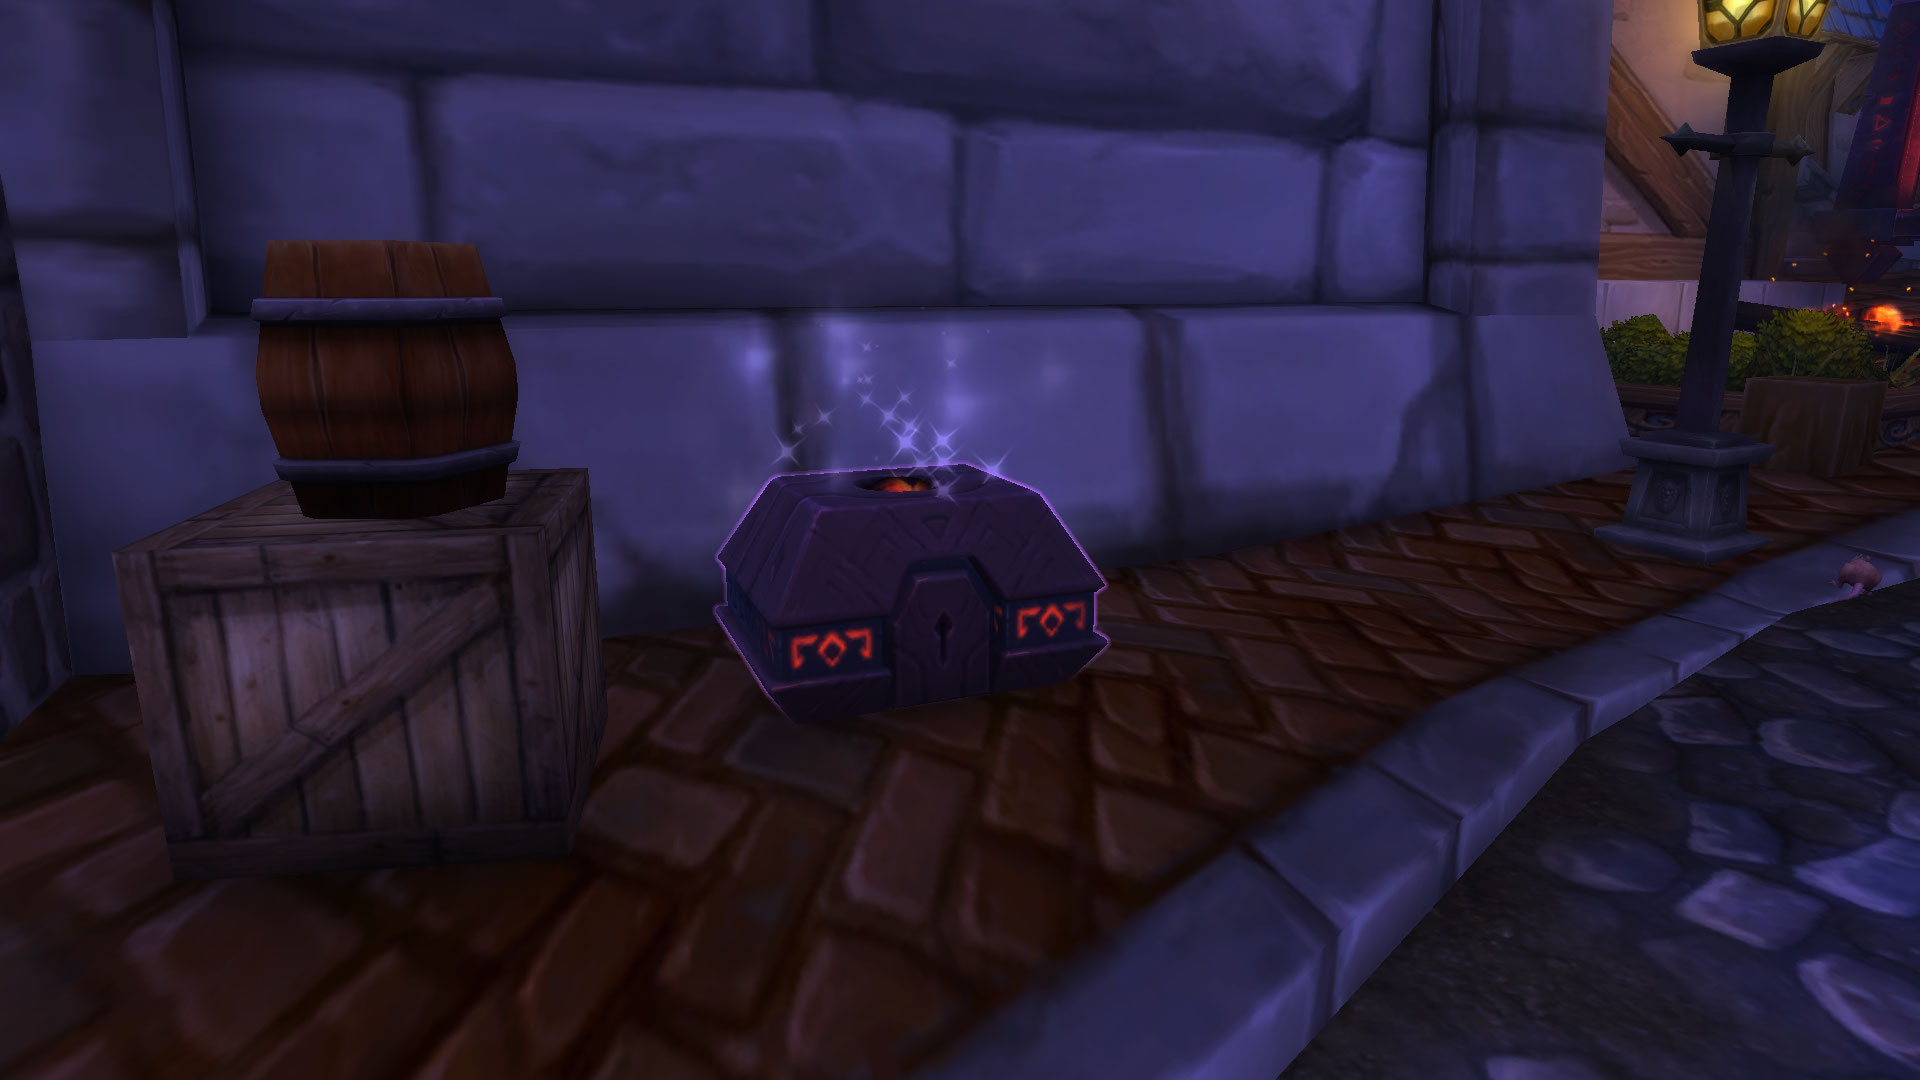
What are these crystals? In addition to the potions, you can find small crystals. These are often a bit more hidden, lying behind boxes or in houses. Clicking them has no immediate benefit, however, the game counts the number of crystals you’ve found and clicked.
Before heading to Thrall or Alleria, you should visit an NPC from the Astrals:
- In Orgrimmar, he stands slightly to the left behind the auction house by another hut.
- In Stormwind, he is in a house in the northeast of the cathedral square.
Speak to this NPC and choose the option to hand over all crystals to him. Subsequently, the NPC will leave – wait a brief moment. An additional loot chest will now appear. Loot this to receive more Corrupted Mementos. The amount of mementos increases with the number of crystals you have given to the Astral.

Powerful Buff Food with Crazy Effects
For the Horrific Visions, there are some special foods that can only be used within the visions. You learn the recipes when you kill the servants of N’Zoth during the assault on Uldum and the Vale of Eternal Blossoms – a book should drop early on that teaches you all recipes.
- Dubious Delicacy: During the visions of N’Zoth, the duration of loss of control effects is reduced by 20%.
- Baked Voidfish: During the visions of N’Zoth, you move 20% faster.
- Grilled Cruncher: During the visions of N’Zoth, you look like a K’thir, causing enemies to notice you later.
- Gruesome Goulash: During the visions of N’Zoth, you regenerate 2% of your maximum health every second.
- K’Bap: If you spend 10 seconds eating, you regenerate 100 sanity in the visions of N’Zoth. 3 minutes cooldown.
The necessary materials for these foods can be obtained in Uldum and the Vale of Eternal Blossoms. You can fish for the fish, and various wildlife drops the meat.
Which Buff Food is the Best? It depends on your playstyle. For most classes, a Baked Voidfish would be ideal so you can move faster. After all, time is a crucial factor. If you’re playing a tank class and have health issues, the Gruesome Goulash would also be worthwhile. All classes (except rogues and druids) can benefit from Grilled Cruncher and skip many groups of enemies.
K’Bap is a special case and should always be used when you can’t do anything. This is the case during long monologues from boss enemies, for instance, with Alleria. While she talks to Arator, you can snack a K’Bap and regain a bit more sanity.
You should avoid the “Dubious Delicacy.” You can avoid most loss of control effects. Better improve your playstyle rather than use this buff food.

What is the Best Approach?
The perfect strategy for achieving as much as possible in the respective visions likely does not exist. Stealth classes approach differently than classes with large AoE abilities. However, there are a few aspects to keep in mind in every run so that you can draw maximum benefits from each vision.
Clear the path to the final boss right at the beginning. The gate to Alleria or Thrall will only open once you have defeated the two gatekeepers. By doing this right at the beginning, you can plan better and won’t run into time constraints later.
Start your run with a corrupted area (the “easy” bonus areas). Here, you can first gather powerful buffs from potions or by defeating certain enemies that will help you later in the lost areas (the “hard” bonus areas).
Pay attention to open doors. In most areas, there are small “hidden” enemies which may not always be present. Defeating them can either grant access to a chest or reward you with a powerful buff that drastically increases your character’s damage, haste, or critical strike rating.
Keep in mind that the final boss (Thrall / Alleria) becomes stronger and gains a new ability for each fully completed bonus area.
As a general rule, you should remember that you need about 500 sanity for the final boss. So if you enter the boss room without remaining orbs but haven’t used Emergency Skull Defibrillation yet, that’s perfectly fine.
The Faceless Masks – Higher Difficulty for More Loot
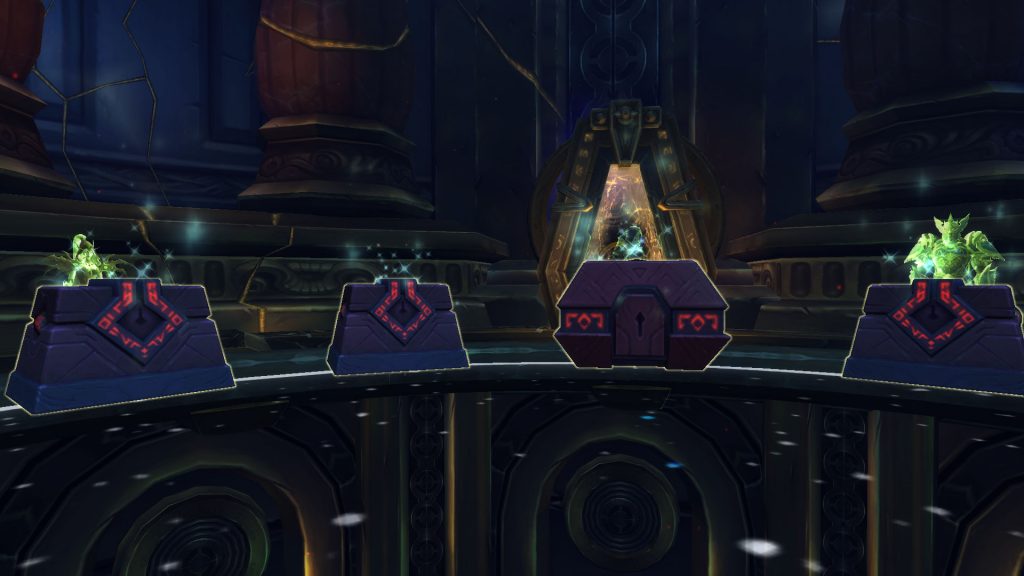
After a few weeks of practice, you have upgraded your legendary cloak to the point that a full run through Stormwind or Orgrimmar – that is, completing all 5 areas – is no longer a problem. Once that happens, you can artificially increase the challenge of your adventure and apply additional negative effects. This forces you to deal with tougher conditions, but you also receive significantly better loot. This is possible through the Faceless Masks.
What are Faceless Masks? These masks can be activated additionally before your run; they stand circularly around Wrathion in the starting area of the respective vision. You can wear multiple masks simultaneously and combine effects for a harder difficulty.
How do you obtain the Faceless Masks? The Faceless Masks can be obtained in the visions of Orgrimmar and Stormwind. The first one is automatically granted when you complete a perfect run without a mask. You must defeat all 4 bonus areas and the final boss (Alleria or Thrall). Then the first mask will be in one of your reward chests.
- Faceless Mask of the Long Night: Successfully complete all areas of a vision and then defeat the boss.
- Faceless Mask of the Burned Bridge: Wear at least one mask and defeat the boss in the Vale of Wisdom (Orgrimmar).
- Faceless Mask of the Daring: Wear at least one mask and defeat the boss in the Valley of Honor (Orgrimmar).
- Faceless Mask of the Suffering: Wear at least one mask and defeat the boss in the Old Town (Stormwind).
- Faceless Mask of the Dark Visions: Wear at least one mask and defeat the boss in the Mage Quarter (Stormwind).
What do the Faceless Masks do? Each Faceless Mask comes with a significant effect that can make your run much more difficult. Additionally, several passive effects add to the difficulty but also affect the rewards.
Each mask provides:
- 20% more Corrupted Mementos from all sources
- +25% more health for all enemies (including bosses)
- +25% more damage for all enemies (including bosses)
Furthermore, each mask has a significant effect:
- Faceless Mask of the Long Night: Your maximum sanity is permanently reduced by 50%.
- Faceless Mask of the Burned Bridge: When you move, you leave behind empty areas for a few seconds. Standing in the empty areas causes damage and drains your sanity.
- Faceless Mask of the Daring: All sanity damage caused by enemies is increased by 400%.
- Faceless Mask of the Suffering: Each area now grants you 2 different madness effects instead of just 1.
- Faceless Mask of the Dark Vision: If you are below 50% sanity, a void enemy will occasionally appear and attack you.
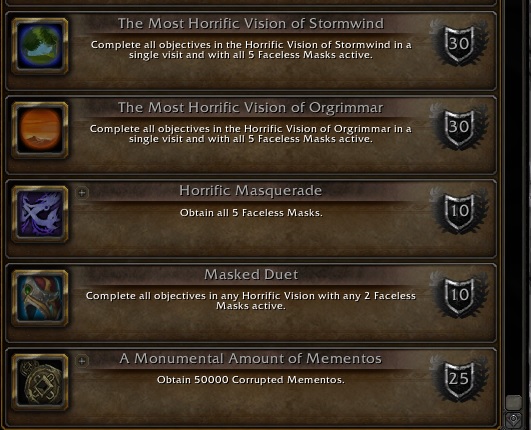
Additionally, wearing the masks comes with numerous achievements as well as the masks themselves as transmogifiable helmets when you complete a run with the respective mask.
Which masks should you wear? At first, you won’t be able to avoid the Faceless Mask of the Long Night to unlock at least one other mask. After that, you should wear the masks that impact you the least. We assess the difficulty levels of the masks as follows, from easiest to hardest:
- Faceless Mask of the Burned Bridge: The empty areas do not last very long, and you can easily avoid them. For most players, this mask has little negative impact.
- Faceless Mask of the Dark Vision: The creature that appears due to this mask is quite weak. However, it can become a problem if it appears exactly when you want to use a healing orb.
- Faceless Mask of the Daring: Most sanity damage can be avoided through creatures. Only very few bosses have hard-to-avoid effects, like Rexxar or Umbric.
- Faceless Mask of the Suffering: Especially in the lost areas, having 2 madness effects can be a huge problem, as the combinations can be extremely nasty.
- Faceless Mask of the Long Night: This mask effectively reduces your lifespan by 50% and is by far the biggest issue.
Loot and Rewards of the Horrific Visions
Of course, there are numerous rewards you can earn by completing the visions. The cream of the crop is, of course, the gear scaling up to item level 470 – this is among the best loot you can find in all of WoW! However, there are also many pets, toys, and even a mount waiting for you.
What gear rewards await? Wearing the Faceless Masks increases both the number of Corrupted Mementos (20% per mask) and the gear reward you receive for a complete vision. The cool thing is: the reward is always a corrupted item!
The following levels apply:
| Achieved Performance | Item Level of the Reward |
| Defeated final boss (Alleria or Thrall) | 420 |
| Defeated final boss and completed 2 bonus areas | 430 |
| Defeated final boss and completed all 4 bonus areas (full run) | 445 |
| Full run with 1 mask active | 450 |
| Full run with 2 masks active | 455 |
| Full run with 3 masks active | 460 |
| Full run with 4 masks active | 465 |
| Full run with 5 masks active | 470 |
Keep in mind that you can only earn each tier of gear reward once per week. So if you have already completed a run with 2 masks active, you cannot receive an item of level 455. You would then receive a lower quality item that you have not yet obtained this week.
What other rewards are there? In addition to the equipment, you can also earn toys, pets, and even a mount. Most pets are obtained randomly or by completing a particularly tough difficulty with Faceless Masks. You can find toys at the following locations:
- Void-Touched Skull: This skull can be found in the vision of Stormwind in the cathedral district. It lies behind the orphanage near the playing children next to a box. You just need to click it, and it’s yours.
- Haubenlocke’s Shaving Kit: This toy can be found in the vision of Orgrimmar. Enter the barber’s shop at the transition between the Spirit Vale and the Vale of Wisdom. There’s a box lying on a table. You need to click it twice to receive the toy.
Small Tips and Tricks for the Finish:
Finally, we have some general tips here that can save you a few seconds or improve your yield. Many of these are self-explanatory, but perhaps they can be forgotten in the rush of a vision:
- Use the sanity restoration orbs in such a way that you can already attack the next group. Just stay in the radius of the orb and kill the next group to achieve maximum efficiency.
- Essence of the Focusing Iris is the perfect Azerite ability for the visions. It allows you to pull multiple groups together and bomb them away extremely quickly.
- DOT classes should not linger on weak enemies. Just dot and move on. This is especially true for the corruption growths between the different quarters of the city.
- Emergency Skull Defibrillation also resurrects you during a fight. The enemies won’t

Your opinion is important to us!
Do you like the article? Then let us know!