To fulfill the dream of having my own gaming PC, MeinMMO editor Jasmin Beverungen had to wait many years. Since she has no idea about PC components, she simply went by the appearance of the parts. She reports on how well that worked out.
Since my youth, I’ve dreamed of having my own gaming PC. At fairs like Gamescom, I admired the custom-designed cases every year and knew that I wanted to have such a cool PC eventually. Last year, I was able to fulfill that wish, took 2,000 euros in hand, and bought a beautiful PC.
The problem: I have absolutely no idea which components fit well together and what to pay attention to regarding hardware. MeinMMO colleague Christos Tsogos took a noticeably smarter approach because he thoroughly informed himself about how to design his PC.
However, I didn’t want to wait any longer, and pre-built PCs that I found visually appealing were too expensive for me. Since 7,000 euros for a stylish PC was too much, I took a fraction of that price and tried my luck.
The PC was also necessary because Final Fantasy XIV increased its system requirements:
Social media and tools helped me avoid stupidity
Since I primarily wanted to buy my gaming PC for its appearance, I looked at various setups on TikTok. There were adorable gaming PCs with well-designed rooms, and their owners sometimes revealed which hardware they used for their PCs.
I picked four gaming TikTokers whose setups I liked and who are registered on pcpartpicker.com. This is a site that calculates the approximate price of all hardware components and indicates whether the parts are compatible with each other.
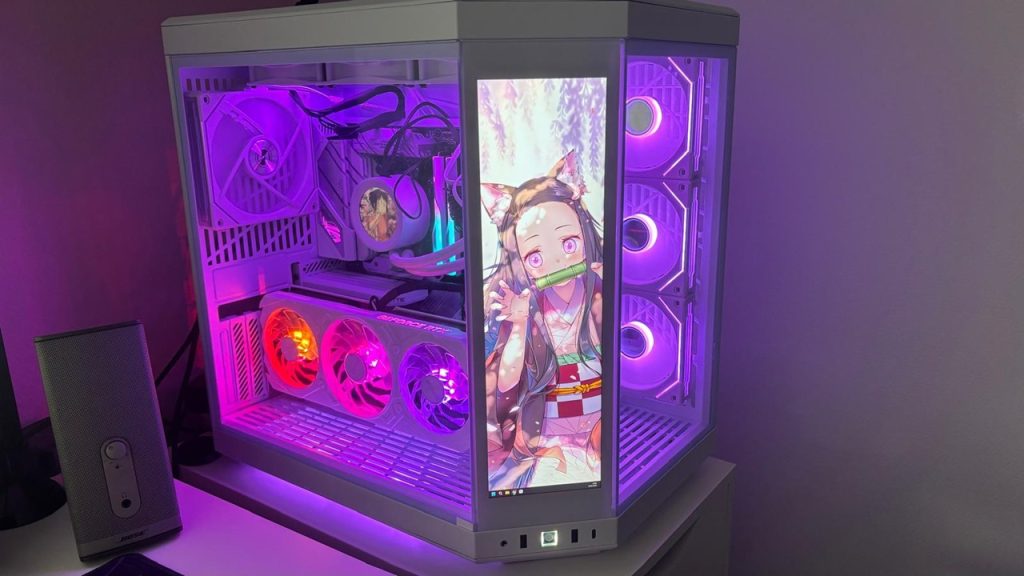
Of the four setups I selected, only two actually had exclusively compatible components. In the end, I chose the setup from pcpartpicker user yeorenxo. Since I wanted a snow-white PC where the RGB lighting would stand out better, I opted for mostly white components.
You can find the hardware installed in the PC here:
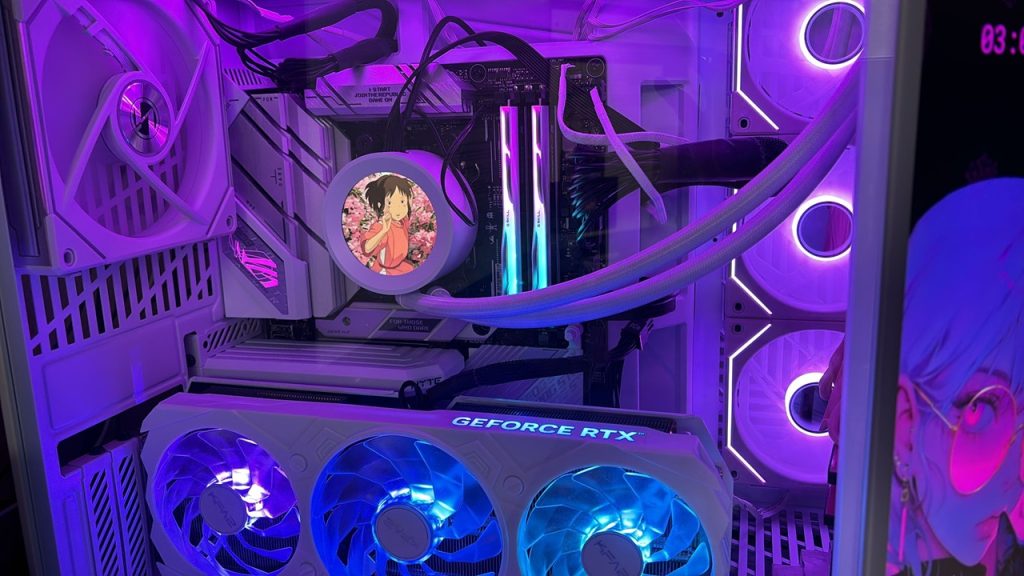
- CPU: AMD Ryzen 7 7800X3D
- CPU cooler: NZXT Kraken Elite 360 RGB 78.02 CFM
- GPU: NVIDIA GeForce RTX 4070
- RAM: 2x G.Skill Trident Z5 RGB 16 GB DDR5-6000 CL36
- Motherboard: ASUS ROG STRIX B650-A Gaming Wifi
- Power supply: Corsair RM1000x Modular 80+ Gold (1000 W)
- Storage: Samsung SSD 980 Pro 2 TB
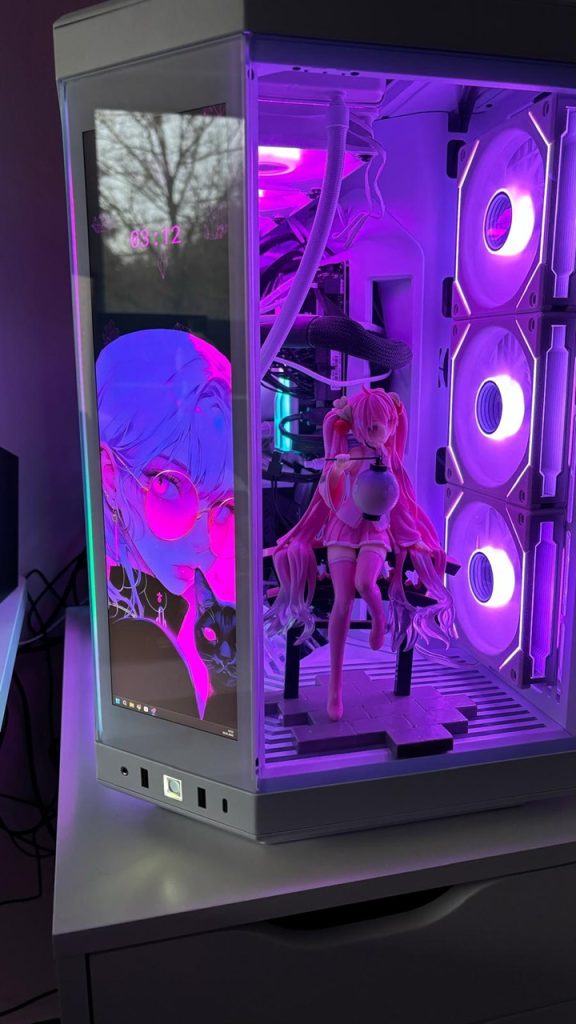
- Case: HYTE Y70 Touch ATX
- Fans:
- 1x Lian Li UNI FAN SL-INF 140 ARGB Reverse Blade PWM
- 3x Lian Li UNI FAN SL-INF 120 ARGB Reverse Blade PWM
- 2x Lian Li UNI FAN SL-INF 120 ARGB PWM
- Operating system: Windows 11 Pro
For me, it was important that the PC lights up as colorfully as possible and shows what a big anime fan I am. That’s why I decided to install a CPU cooler on which I can project an image. The tower also has a touchpad where I can set a background with icons as I like.
Additionally, the case has large windows that allow a view inside. Another point that was important to me and that I researched thoroughly was the airflow in the PC. Since I wanted to fill the case not just with hardware but also with figures, many fans were needed to cool the PC well.
However, some flower garlands, like I saw in various TikTok videos, were not an option for me. I fear that small particles would loosen over time and get into the hardware or fans. I don’t want to risk that.
The conclusion: Have someone on hand who can help you
I mostly trusted myself to assemble it. Thanks to YouTube tutorials, I quickly screwed the parts together, and the manuals showed where to plug in each component.
Only when it came to attaching the CPU cooler did my brother help me, as he has significantly more experience with PC building and also took care of the final checks.
However, that was the end of the work I could do without any knowledge. The startup of the PC was handled 100% by my brother. I had no idea what he was clicking around in the BIOS system to make my PC light up and function properly.
But what can I say: The PC runs. However, there are some issues that I haven’t been able to resolve to this day, simply because I’m not knowledgeable:
- Unfortunately, I didn’t fully understand the reverse system of the fans and bought the 140 cm fan the wrong way around. Now it’s unfortunately positioned so that the cover faces forward.
- The fan also does not light up. When I connected it elsewhere for testing, it lit up. Why it doesn’t light up in the final setup – no idea.
- My graphics card lights up in colorful rainbow colors, although I would prefer pink or turquoise. I probably forgot a cable here because all my programs for adjusting the lights can’t control it.
- After a few weeks, the PC began to flicker and wouldn’t turn on. Here I had to get technical help from my hardware-savvy brother, who told me over the phone that I had to change something in the BIOS, as the RAM was causing issues over time.
Therefore, I cannot recommend building a PC without any hardware knowledge. I was lucky that my brother could support me a lot and save me from several messes. Without him, I would have had to return the PC or have it built by a professional – which would have cost me again.
But for me personally, it was worth taking the step. I am excited every time the PC is booted up and watch the tower curiously while I’m stuck on loading screens or waiting for multiplayer opponents.


However, it’s still not completely finished. I still plan to buy fan covers in cherry blossom shape or with other motifs. I also want to buy a film for the plastic front that has cherry blossoms or another motif on the edges.
If you want to build your own gaming PC, you should definitely inform yourself even better than I did or seek help. However, the articles from MeinMMO can already help avoid silly beginner mistakes. Therefore, before assembling the PC, you should definitely read the following tips: 5 beginner mistakes you should avoid when assembling a new gaming PC