
In the survival game Valheim , a workbench is essential. MeinMMO shows you in this guide how to build and upgrade it.

What is a workbench good for? You need it to craft items like weapons and to build a house in Valheim. You can also use it to repair tools and other items. That’s why you should make one as early as possible.
If you are just starting out, you should also check this out: 11 beginner tips in Valheim that I wish I had known earlier
What do you need for that? You need a shelter, wood, and a hammer. First, it is advisable to craft a stone axe. With a stone axe, you can chop down trees and thus be more effective in gathering materials.
For the axe, you need 5x wood and 3x stone. Then you can start gathering materials for the workbench. You can best mine stones with a pickaxe: This is how you get the pickaxe in Valheim to mine stones

Why do I need to upgrade the workbench? After you have built your workbench, you will want to upgrade your tools and weapons. However, you’ll need an upgraded workbench for that. We will show you step by step how to do it.
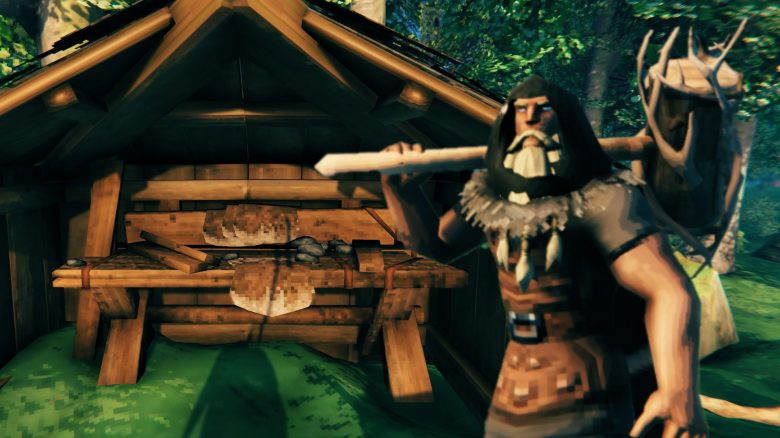
Building and upgrading the workbench – You need lots of wood
What you need to do to build a workbench:
- You first need to craft a hammer. For that, you need 3x wood and 2x stone.
- Once you have done that, the blueprint for the workbench will be unlocked.
- Then open the building menu via the hammer.
- Select the crafting tab and find a suitable spot for the workbench.
After building the workbench, you will get a notification that you need to build a shelter for it. This is where the stone axe becomes useful. Because with it, you can get the materials you need for a roof faster.
Once you have done that, it’s best to start building a small hut.
- For wooden walls, you need 2x wood per wall.
- For the roof, you also need 2x wood per part.
- Place the walls directly around the workbench and position the parts of the roof (26°) directly above.
Now you have built your first workshop. Next, you can upgrade your workbench.
Upgrading the workbench – here’s how: In total, there are 5 levels for your workbench. You also need specific materials to unlock the recipes. Then you can upgrade it.
- Level 2: Chopping block – 10x wood and 10x flint. You unlock the recipe as soon as you find flint. You’ll find it near water sources.
- Level 3: Tanning rack – 10x wood, 10x flint, 20x leather scraps, and 5x deer hide. You get the recipe by killing a deer.
- Level 4: Adze – 10x fine wood and 3x bronze. You unlock the recipe as soon as you craft bronze in the forge.
- Level 5: Tool rack – 4x iron, 1x fine wood, 4x obsidian – the recipe is unlocked by gathering fine wood from birch trees, mining obsidian, and smelting iron scraps. You can find obsidian in mountains, iron in swamps.
If you place these upgrades next to the workbench, you can craft better tools and other useful items. If you build multiple houses, you need a separate workbench for each. Keep that in mind if you want to expand.
If you don’t know how your house should look, check out these examples: 3 cool bases in Valheim that you can use as inspiration for your own

Your opinion is important to us!
Do you like the article? Then let us know!