
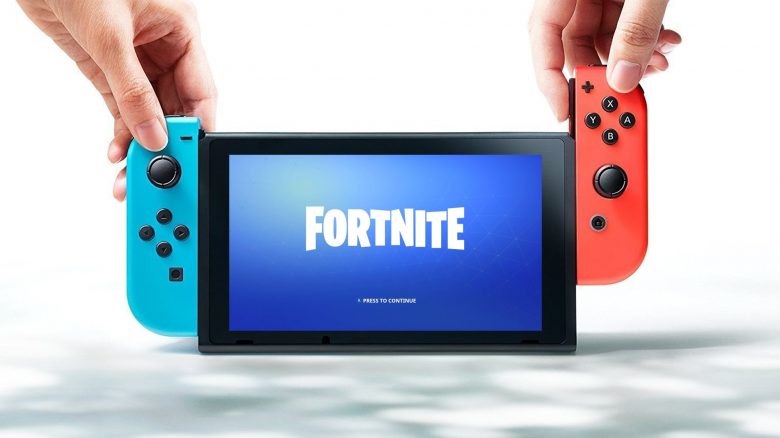
Still, Fortnite is an absolute hit on all platforms. And on the Nintendo Switch, the title from Epic Games is still hugely popular. So if you’re wondering what settings the professionals use to play Fortnite on the console, we have the answer for you.

Despite poorer graphics and a lower framerate, Fortnite has a huge player base on the Nintendo Switch. For this reason, we have decided to give you an overview of the best possible settings, so you can catch your opponents off guard in Battle Royale in the future.
We have based our recommendations on the settings of large and well-known Fortnite players on the Switch.
Where do our information come from? Our information comes from several YouTubers and websites that report on Fortnite. Additionally, our own experiences have contributed to this guide.
How can I adjust my settings? To access the settings for Fortnite, press the + button on your Switch in the main menu and scroll down to the gear symbol. In the now appearing “menu,” logically go to “Settings.” Next, the first settings page will open up right away. To switch between the different tabs of the settings, use the R and L buttons on your Switch.
Now we come to the various settings options that we can adjust. We have categorized them as follows:
We will explain the most important settings in detail under the mentioned points.
Graphics
As with other games, the rule of thumb for Fortnite is: the lower the graphic settings, the better the performance. If you want to improve this, it’s definitely worth taking a look at the settings.
Graphics Options
A lot of professionals recommend increasing the brightness to 125%-150%. Additionally, it may make sense to set the colorblind mode to “Protanopia.” Some of the best Fortnite players use exactly these configurations. Both settings are aimed at ensuring that you can locate your opponents in a timely and precise manner.
Graphic Quality & Advanced Graphics Options
If you want to play Fortnite not just occasionally, but also competitively, the following settings are absolutely essential for you.
Set “High-Resolution Textures Automatically Download” and “Reminder for High-Resolution Textures” under Graphic Quality to “Off”. It is also extremely important that you turn off the power-saving mode under the advanced graphics options.
These two settings are designed to prevent further framerate drops on the already quite low 30 FPS on the Switch. On all other platforms, you can generally play Fortnite at 60 FPS – even on Android and iOS devices. Although this makes your game look a bit worse, these settings make a huge difference in performance.
Gameplay
Under this tab, you can make specific settings for aspects such as movement in the game, combat, or building. Therefore, these are absolutely essential for the dedicated player.
Movement
There are differing opinions among some well-known players here. While for example, YouTuber “Zenterr” has enabled his settings for “Toggle Sprint” and “Automatically Open Doors,” other players swear by turning them off. This makes sense when you are in a house with an opponent. The last thing you want is to mistakenly open a door behind which an enemy might be lurking. Just try out what works best for you.
Combat
There are also different preferences when it comes to enabling “Hold for Weapon Swap”. The majority of well-known and professional Fortnite players on the Switch have this disabled, and we would personally recommend the same.
We also recommend disabling “Toggle Aim”; however, “Mark Danger While Aiming” should definitely be enabled. Good communication with your teammates is essential in Fortnite, after all.
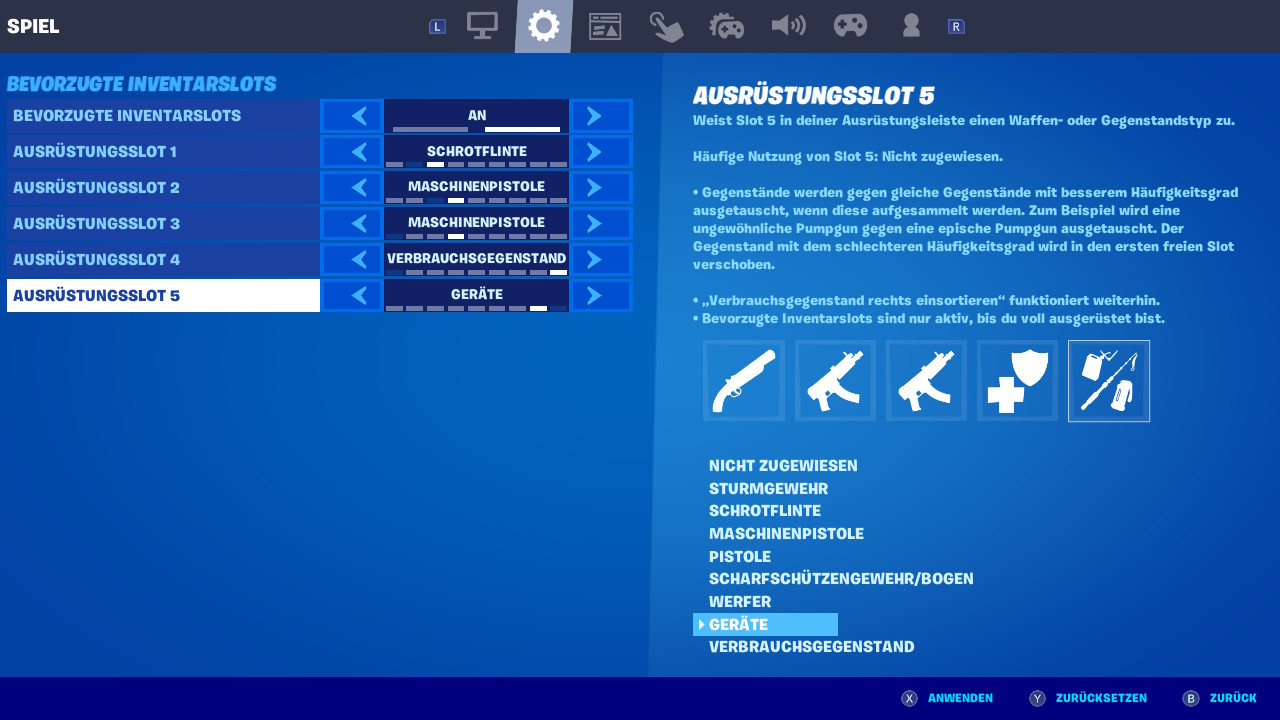
Another point that can be very individually customizable is the mapping of the “Preferred Inventory Slots”. In the following screenshot, however, you will find a setup that some well-known players use and which we can also recommend.
Building
For this sub-point, both options “Reset Building Choice” and “Disable Pre-Editing” should definitely be turned off. On the other hand, you should definitely enable the options “Turbo Building” and “Confirm Edit on Release”. Both clearly ensure that you build even faster.
In-Game User Interface
Under this tab, you can primarily adjust the HUD of the game. This refers to the interface that you can see on your screen during your matches. This includes the mini-map, your health bars, or your inventory slots.
HUD Options
The “HUD Size” is set by most professional players on the Switch to about 70-80%. It is very important that you turn off the “Show Number of Observers” option. This not only reduces unnecessary clutter on your HUD but also speeds up the gameplay a bit, making the game run more smoothly.
Controller Controls
Under this tab, you can make fine adjustments for your controller or the Joy-Cons. These are crucial if you want to be truly successful in Battle Royale.
Control
The first two settings “Auto Sprint with Controller” and “Instant Build (Builder Pro)” are activated by most of the well-known Fortnite players on the Switch. And for good reason: you are already somewhat faster in the already very hectic game.
Another setting that many professionals use is to shorten the “Hold Time for Editing” from the default 0.200 seconds to the minimum of 0.100 seconds. This will surely help you become faster.
The “Vibration” is turned off for many Fortnite professionals. Although the additional stimulation makes the game generally more immersive, it can unfortunately also be annoying during combat – especially when it comes to precise aiming.
Sensitivity
The settings for the various sensitivities are initially set to 4 by default. However, we would recommend setting this to 6 initially. You should also adjust the “Sensitivity Multiplier (Building Mode)” to 1.5x.
With these settings, you can then experiment to see if you want to adjust them further.
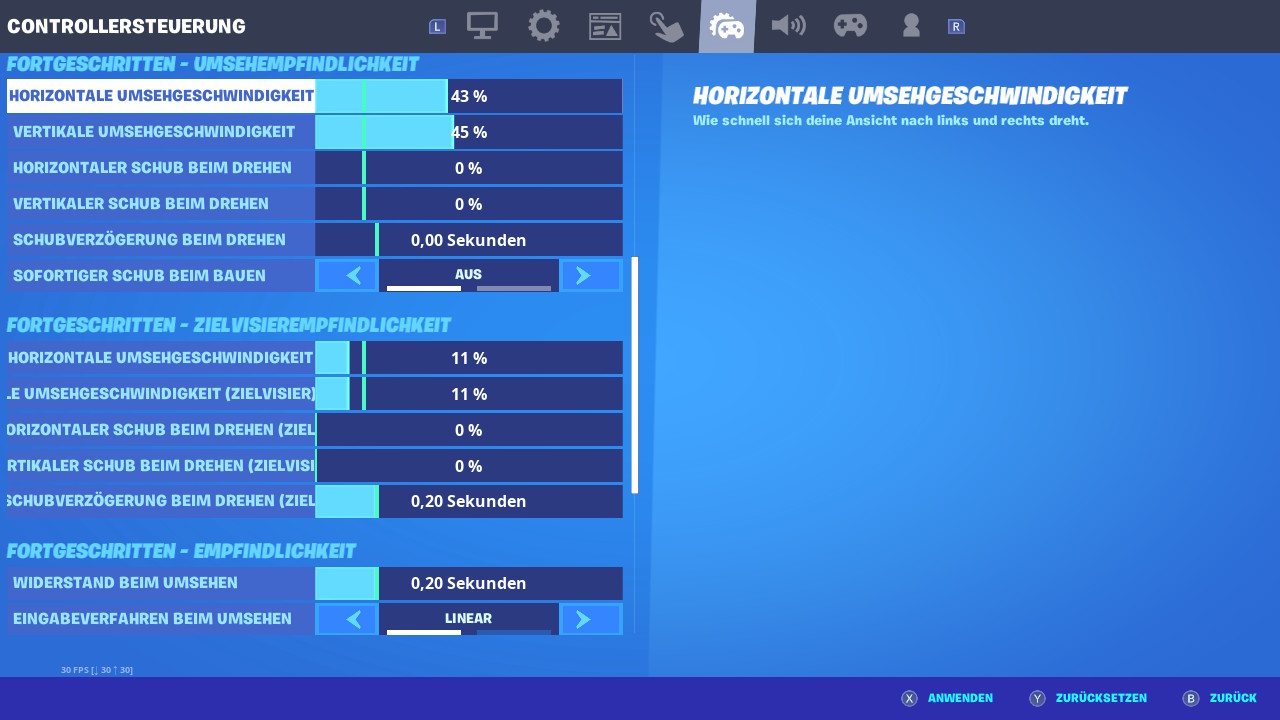
Alternatively, there are also many advanced sensitivity configurations available that you can customize for yourself. However, since the sensitivity sliders in the Switch version of Fortnite are not that easy to adjust, as even the smallest change can significantly affect gameplay, we would advise against it for now.
For experienced and curious players, we will nevertheless show you advanced settings in the following screenshots that are inspired by some professional players.
Controller
Here, you can change the controller configuration, i.e., the mapping of the buttons on your controller.
Many successful players rely on “Combat Pro” when choosing the controller configuration. It not only fits best with the Joy-Cons, but it also closely resembles the Fortnite versions for other platforms. This can help you if you have played Fortnite before on the PS4, for example.
In addition to the mentioned settings, your Fortnite experience on the Switch can also be further optimized through tweaks, such as reducing the TV screen resolution to 720p in the system settings or using gadgets like an Ethernet dongle, which allows a direct internet connection of the standard console via a LAN cable:
However, the OLED model of the Switch already has a built-in LAN port in the docking station.
More recommendations regarding the Nintendo Switch: Are you looking for more tips regarding the Nintendo Switch? Then check out the following article: Here we explain how you can significantly improve your console with around 15 euros:
For 15 euros, I significantly improved the Nintendo Switch – you should do it too

Your opinion is important to us!
Do you like the article? Then let us know!