
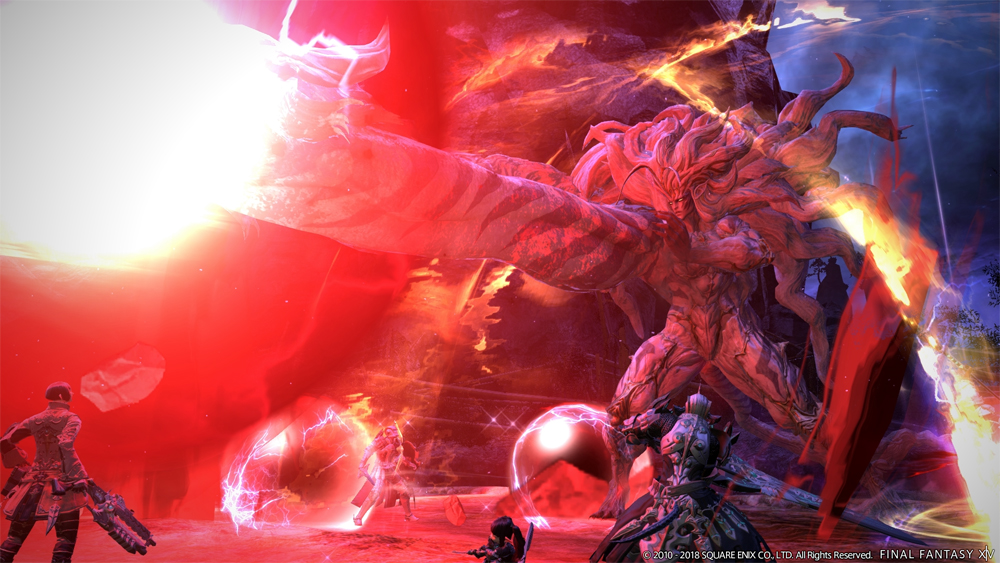
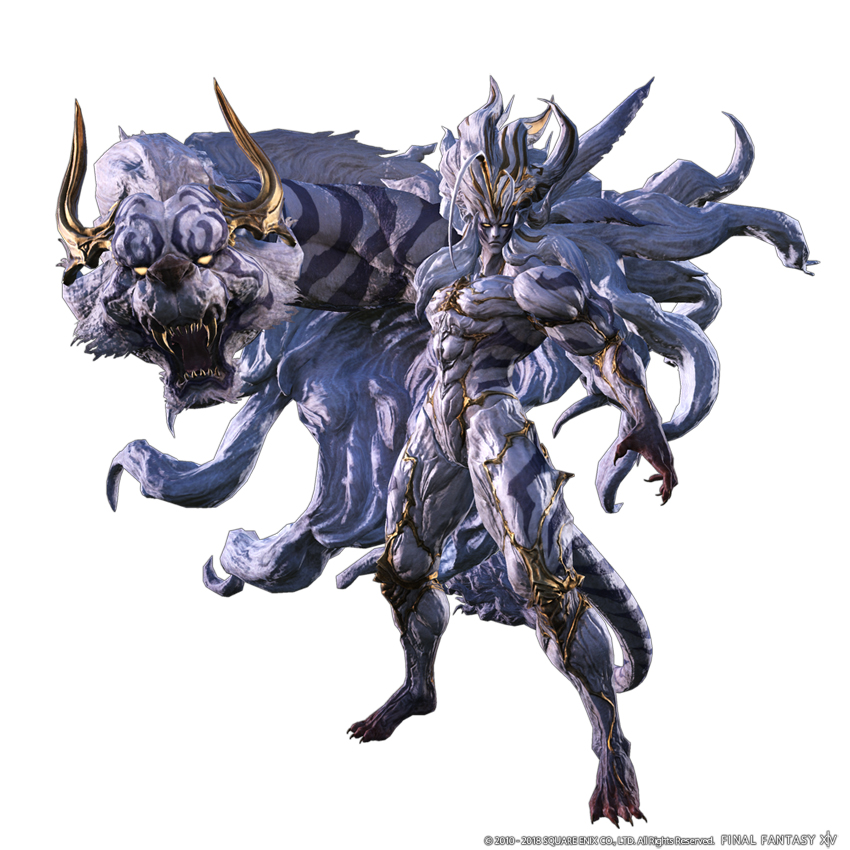
With the battle “Soulstorm – Byakko”, players received a new trial in patch 4.2 of Final Fantasy XIV, where they can farm weapons, mounts, or materials for furniture and companions. To successfully navigate through the battle, here is a guide to fighting Byakko.
Before the Countdown

There are two important things to do before the fight to make your life easier:
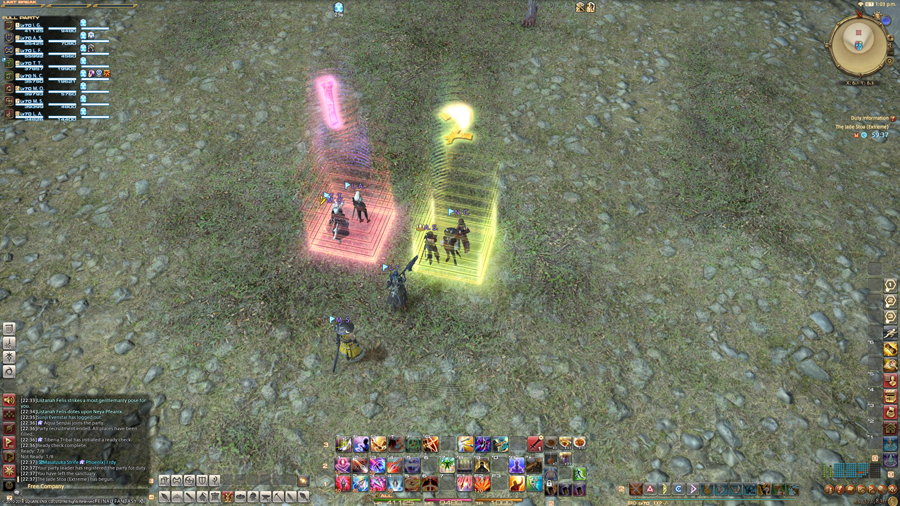
- Around the arena, markers should be placed equidistant from each other. Later, players of the different roles will place their AOEs at these spots. Tanks on A, healers on B, and DPS on C (the distribution can obviously be different).
- The group must be split into two smaller groups, with one tank, one healer, and 2 DPS in each. The groups are assigned numbers 1 and 2 accordingly. In the group search, this can be done using the markers:
The battle itself lasts a maximum of about 11:30 minutes, after which Byakko enrages and kills the group with AOE.
Depending on the players’ DPS, individual attacks from Byakko can be skipped.
List of Attacks
| Thunderwave | AOE on the entire group. |
| Heavenly Strike | Tankbuster attack.
Hits all near the tank. Also kills fairies and summons. |
| Banish Lightning | Byakko stuns and grabs the player with the highest enmity. |
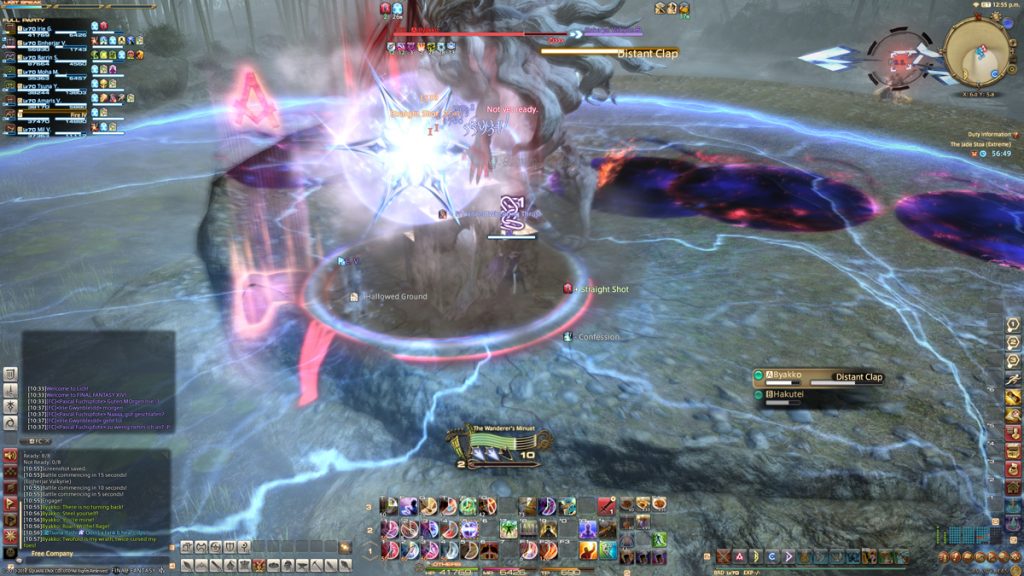
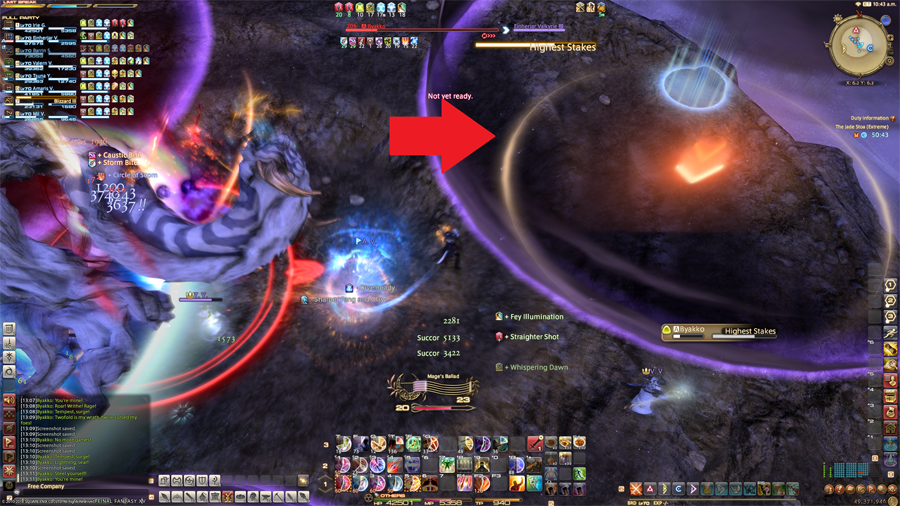
| Highest Risk | An AOE circle appears on the field, into which the caught tank is thrown. Three other players must stand inside to share the damage. Affected players receive a vulnerability debuff. |
| Pandemonium | Red orbs will slowly spread out in a spiral from the center. Affected players receive a vulnerability debuff that increases over time.
Three players will receive the red “Maleficent Wind” aura. They must not touch each other, otherwise they will explode and receive a vulnerability debuff. |
| Fire and Lightning | A wide ground AOE. |
| Hakutei | Tiger add, held by the off-tank. |
| Impact | Three small AOEs on two random players, remaining as purple puddles on the ground. Touching them causes strong DoT damage. |
| Autumn Gale | AOE on the off-tank. |
| Thunder Rolling | Huge AOE around Byakko with a safe spot within his hitbox for the tank and melee. |
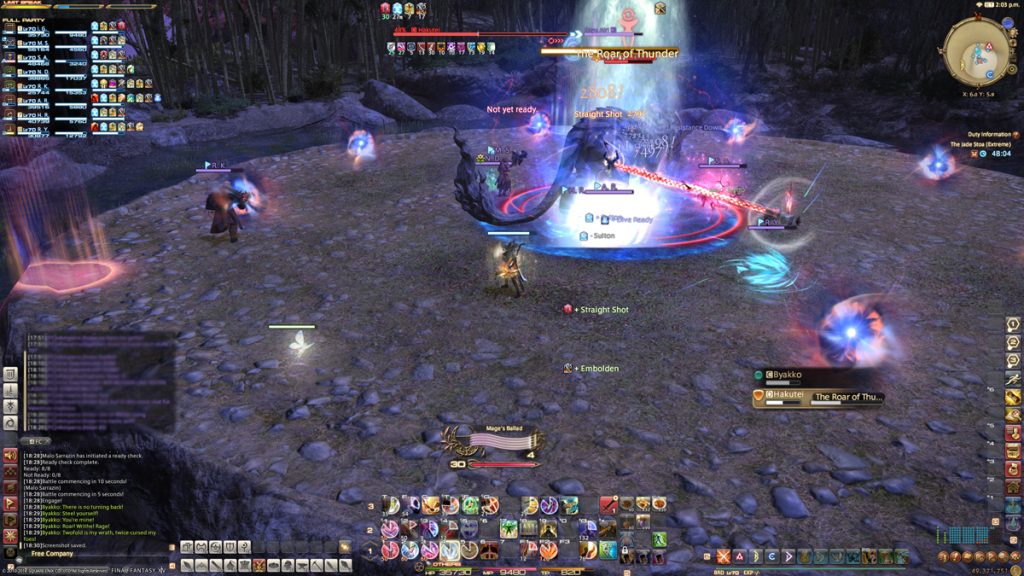
| Roar of Thunder | AOE from Hakutei. The strength depends on how many HP Hakutei has left at the end of the preparation. |
| In One Stroke | The ultimate attack of Byakko. |
| Hundredfold Devastation | Cross-shaped AOE that spreads from the center. |
| Verticality | 270° AOE attack in front of Byakko. |
| Vacuum Claw | Each tank, healer, and DPS are marked with AOEs. After impact, they start to grow and must not touch or overlap. |
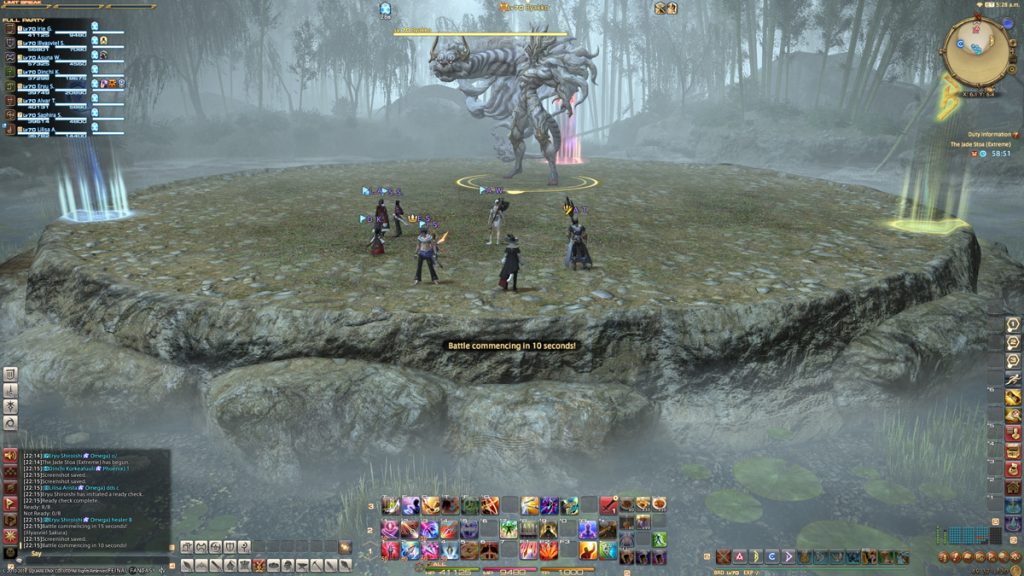
Phase 1 in the Boss Fight Against Byakko in Final Fantasy XIV
The fight opens with a Thunderwave AOE on the entire group, followed by a Heavenly Strike that should be intercepted by the tank with a cooldown.
Banish Lightning -> Highest Risk
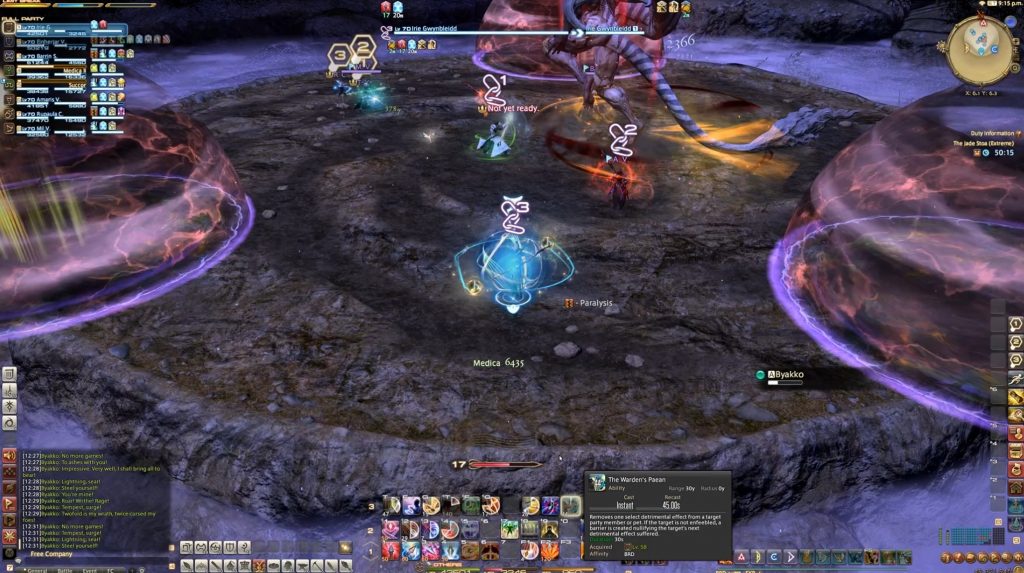
Next is the first mechanic: it is a more complex version of the Banish Lightning from the normal mode of the fight.
Byakko starts casting Banish Lightning and grabs the main tank of the group. This is immediately followed by “Highest Risk”.
The 3 players from the first group must now stand in the stack circle that appears in the fight arena to catch their tank. Otherwise, he will be killed.
Additionally, the main tank loses all his aggro. Therefore, the second tank should provoke Byakko during the time he is preparing for “Highest Risk” and draw his attention.
Immediately afterward, Byakko will turn around and cast Banish Lightning again. This time, he grabs the person who is now at the top of the aggro list, ideally the second tank.
The second group repeats this process.
It doesn’t really matter who stands in the stack circle. It could also be 3 DPS and one tank. As long as 4 players are there, everyone will survive. Later, as the average item level increases and players have more HP, 3 people will also be sufficient.
WARNING! At this point, a bug may occur. Players have repeatedly reported that their tanks were immediately killed as soon as Byakko caught them with Banish Lightning.
Short Form:
Tank 1 is grabbed -> Group 1 positions in the stack AOE -> Tank 2 provokes
Tank 2 is grabbed -> Group 2 positions in the stack AOE -> Tank 1 resumes Byakko (as needed).
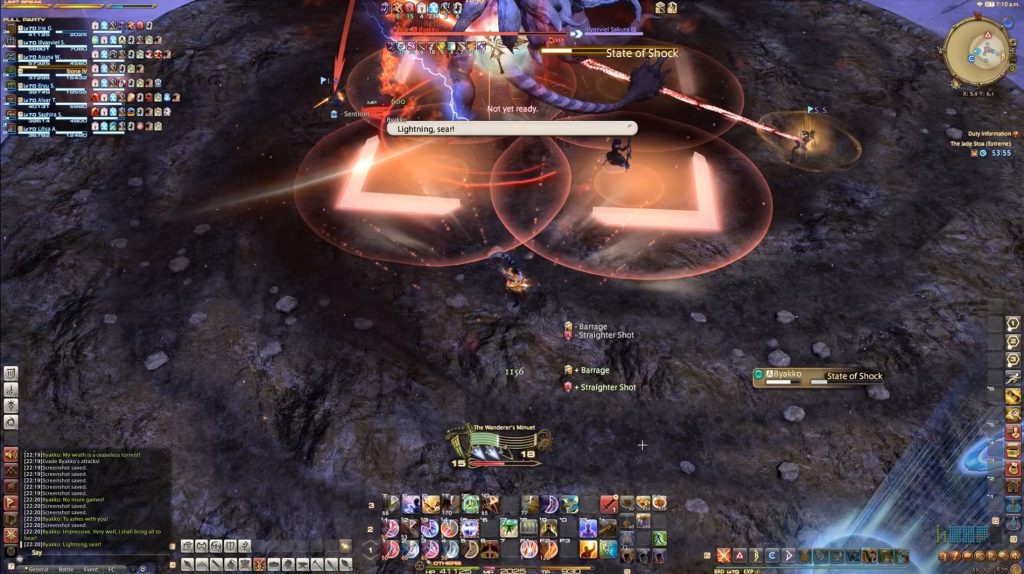
Pandemonium
The Pandemonium attack differs little from that in normal mode. The orbs that Byakko shoots deal low damage, but give a vulnerability debuff on contact. From 3 onwards, it can hurt badly.
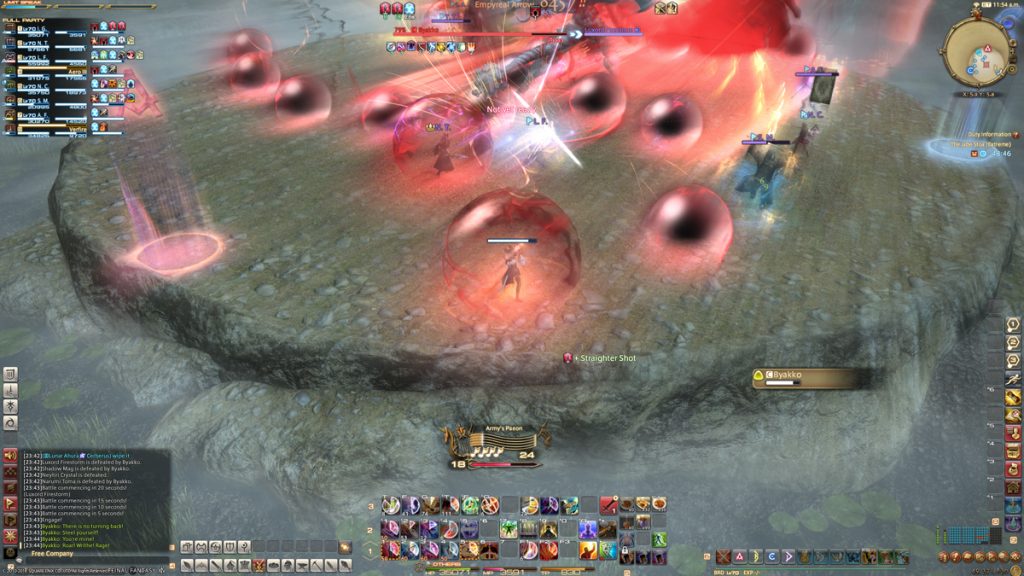
The new mechanic in the fight is a red aura called “Maleficent Wind”, which is randomly cast on three players. These players must not get too close to each other or their auras will touch, otherwise, both will explode and receive multiple vulnerability stacks.
During the Pandemonium attack, Byakko will target a random player with the Fire and Lightning AOE from the middle.
Afterward, a short Thunderwave AOE follows, and the fight proceeds to the next phase.
Short Form:
Byakko spreads orbs in the arena -> Players spread out, red auras must not overlap.
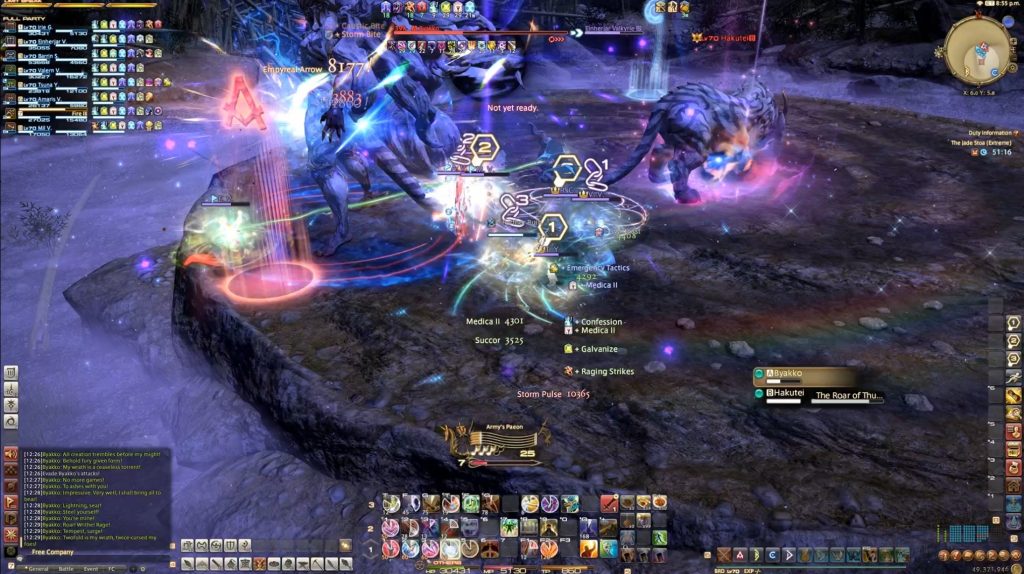
DPS Check: Hakutei
This phase is the traditional DPS check. Byakko will release his tiger Hakutei, which must be brought down to about 25% HP or less as quickly as possible while the group performs various mechanics simultaneously.
The tiger will be taken by the second tank and tanked roughly in the middle of the arena. All DPS should switch from the boss to the add immediately.
He should also be turned away from the group, as Hakutei also has a very strong cleave.
Meanwhile, Byakko will randomly target two non-tanks and throw three AOEs on them one after the other. These remain as puddles on the battlefield and should therefore be placed at the edges.
Players who step into these AOEs receive a dot tick that deals approximately 6000 HP damage and can potentially die from it.
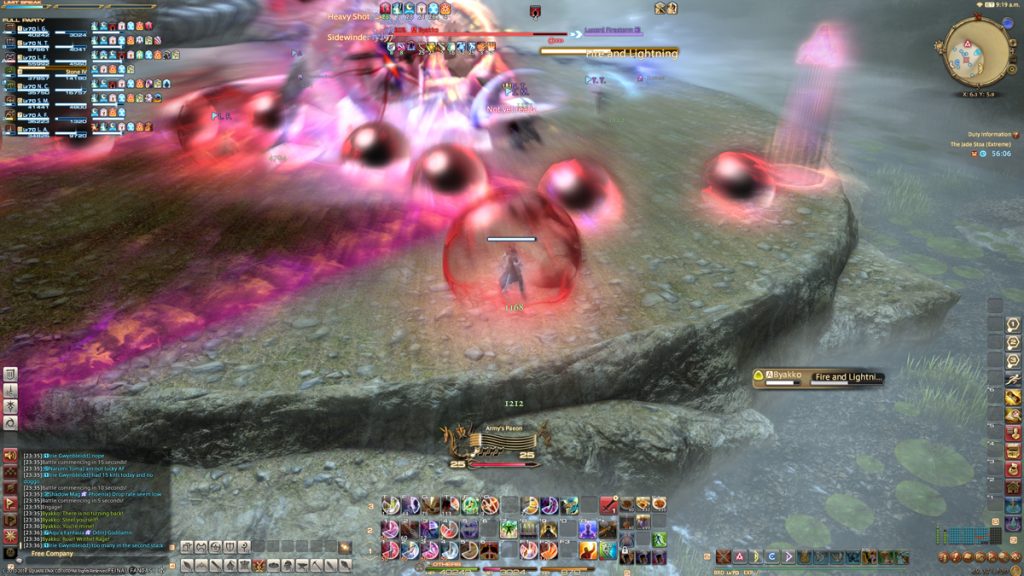
Autumn Gale -> Thunder Rolling
Next comes a Thunderwave, and shortly thereafter, Hakutei jumps away.
Hakutei will now target the off-tank with an AOE that deals more damage to players near him. The OT should therefore try to move as far away from the rest of the group as possible to reduce damage.
At the same time, the large AOE “Thunder Rolling” will appear around Byakko. The AOE covers a large part of the arena, but it is safe within Byakko’s hitbox.
Once Hakutei disappears from the battlefield, the entire group except for the OT must run to Byakko and stand within his hitbox. After the Autumn Gale and Thunder Rolling are over, Hakutei will shoot Fire and Lightning at the group again.
Then Byakko will briefly cast a Thunderwave and then completely disappear. The group can now deal with the tiger. He will begin to cast the Roar of Thunder.
During this time, orbs will appear at the edges of the arena, moving toward the tiger. They heal a significant amount of his HP. To prevent this, players must stand in their path.
The orbs deal only minor damage, but remove 300 TP. Therefore, they should be intercepted by healers and mages as much as possible. Ranged players can also take one or two as long as their Reckless ability is available.
Ideally, you should hit Hakutei down to about 25% HP or lower to survive the attack. During this time, healers should use their regenerative spells like Sanctuary and various shields on the group to reduce damage.
After the attack, the group is immediately thrown high by Byakko.
Short Form:
Hakutei appears -> targeted DPS drop their AOEs at the edge of the arena -> all DPS on Hakutei for DPS check
Hakutei jumps away -> entire group except OT to Byakko in the hitbox -> Hakutei comes back -> everyone back on him -> intercept orbs.
Free Fall
This phase also does not differ much from the normal mode. Byakko will teleport under the group and fire projectiles from there.
The orbs will come in groups of 3-4 and change direction in flight. However, this is not as scary as it sounds, as most will explode near the center.
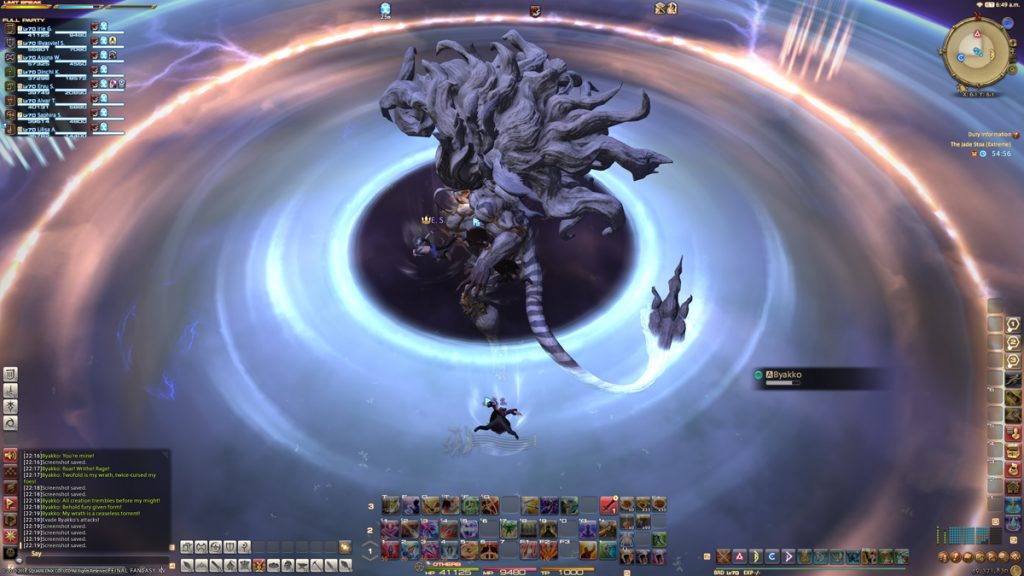
After some time, Byakko will rise up to the group and create an AOE around himself. To avoid this, the entire group must move to the center of the arena.
Immediately after that, Byakko disappears. Meanwhile, Hakutei will dash across the middle of the arena. Affected players will be thrown to the edge of the arena and die. One should also avoid touching the edge.
Finally, Byakko will make a circular AOE, for which the group must move to the center, and Hakutei will then dash through the middle one last time.
After that, the group lands roughly on the ground, and Byakko uses his ultimate attack “In One Stroke”. The group has enough time to heal and use all necessary shields.
Short Form:
Avoid orbs -> to the middle to Byakko -> avoid orbs -> avoid Hakutei -> avoid more orbs -> to the middle to Byakko -> avoid Hakutei
Phase 2 in the Boss Fight Against Byakko in Final Fantasy XIV
Now the real party begins.
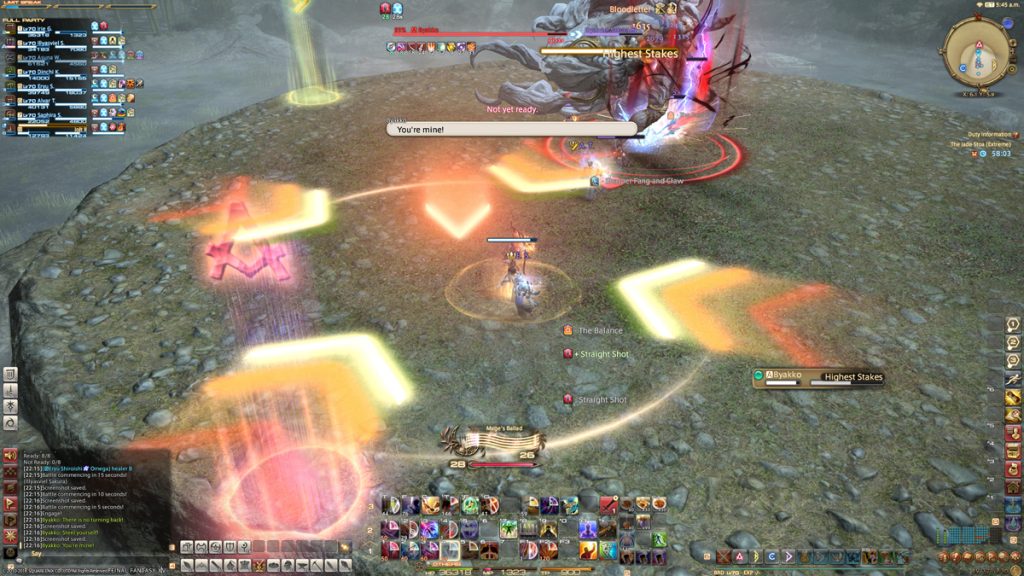
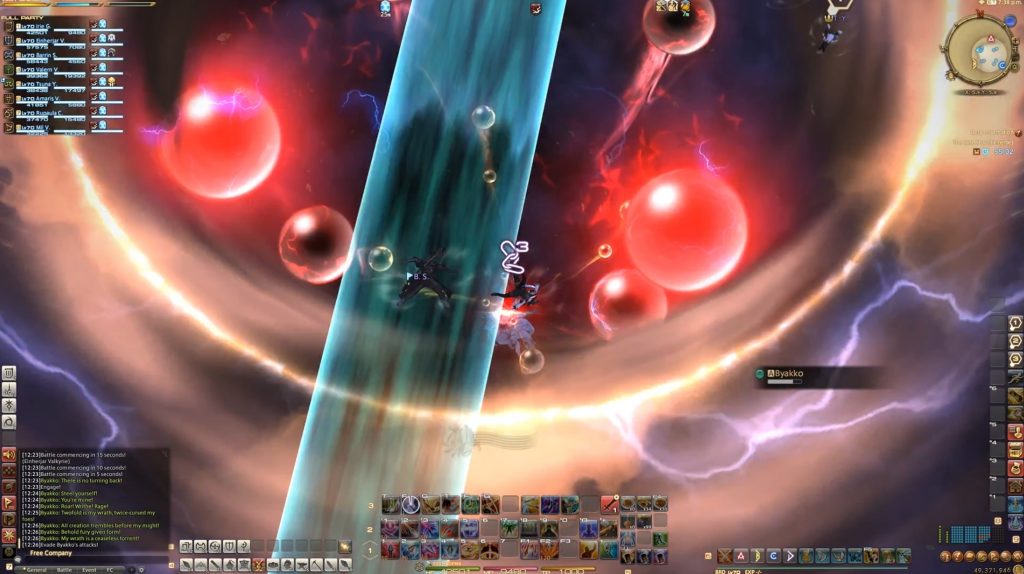
The phase opens with a Heavenly Strike. Immediately after, Byakko introduces a new combat mechanic and combines it with the Banish Lightning. This is the Hundredfold Devastation. It works as follows:
- The first 4 arrows will appear in a cross shape on the ground, indicating the direction in which the AOE will move. From there, 4 circular lightning strikes will now come in every direction, overlapping and moving towards the edge of the arena with each strike.
- Simultaneously, 4 more cross-shaped AOE markers will appear in the middle, rotated by 45° and overlapping with the first ones. They will also move toward the edge of the arena.
To dodge correctly now, players must stand in the gaps between the circles of the first AOE wave (see pictures).
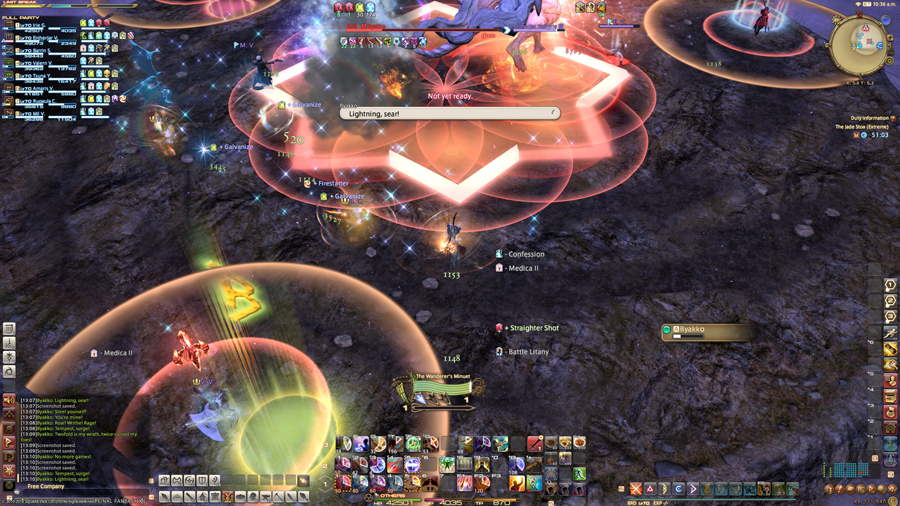
This spot is initially safe. Don’t worry about the fact that the circles of the second AOE wave point directly on them. This will only begin after the last strike of the first wave is over.
Once the first two strikes are over, run to the spot where they hit.
At the end of these AOEs, Byakko will cast Banish Lightning + Highest Risk on the first tank. This mechanic works just like in the first phase.
After the second Highest Risk attack, Byakko will execute Verticality. The whole group should therefore position themselves directly behind him, precisely where there is a gap in his hitbox.
But it all sounds more complicated than it is: You have plenty of time to orient yourselves on the field. Just don’t panic. In case of doubt, it’s better to be hit by a Lightning attack than to be out of the stack for Highest Risk.
The lightning strikes deal low damage, but cause an annoying paralysis effect. And in an emergency, you can ask the healer or bard to remove the paralysis.
Short Form:
The first wave of cross AOEs appears on the ground -> stand between the AOEs
The first wave of cross AOEs begins -> the second wave appears on the ground
Wait until the first wave is over -> run to the safe area
Tank 1 is grabbed -> Group 1 positions in the stack AOE -> Tank 2 provokes
Tank 2 is grabbed -> Group 2 positions in the stack AOE -> Tank 1 resumes Byakko.
Everyone runs behind Byakko
Pandemonium -> Fire and Lightning
After the last mechanic, Byakko gives your group about 10 seconds of break. After that, the next sequence of boss mechanics begins.
Byakko starts with Pandemonium, closely followed by two Thunderwaves, which the healers should prepare for. Just like in the first phase, three players will also receive the Maleficent Wind auras here.
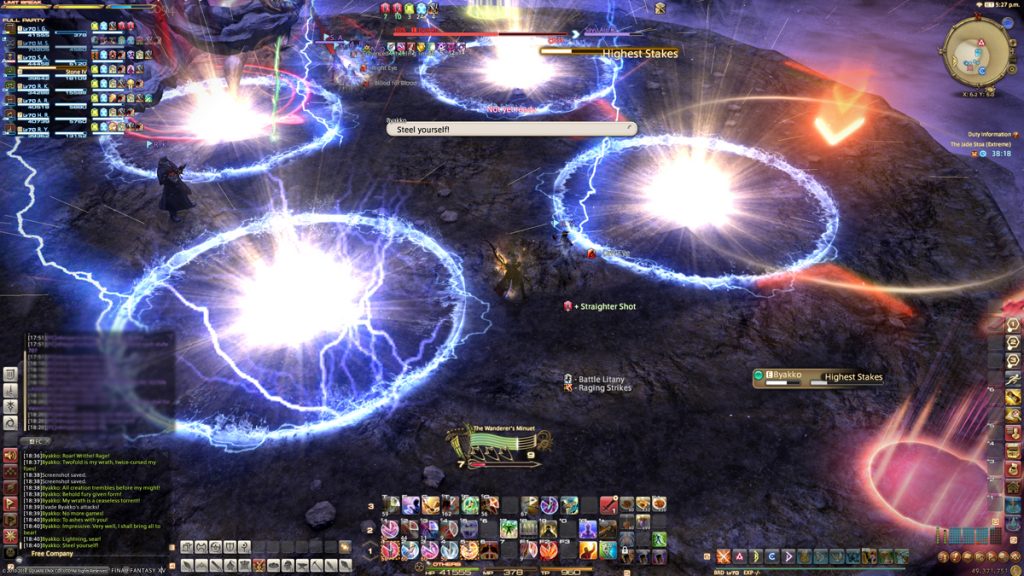
This is where the markers come into play that were established at the beginning of the fight in the arena. Each tank, healer, and DPS will receive a “Vacuum Claw” AOE circle around them.
Once placed, the AOEs start to grow (like in the Sephirot fight). Their areas must not touch or overlap under any circumstances, otherwise they will explode and wipe the group. Accordingly, the Vacuum Claw AOEs must be positioned as far apart as possible.
According to our agreement above, the tank would thus go with his Vacuum Claw to A, the healer to B, and the DPS to C.
While the AOEs grow, Byakko will use Fire and Lightning according to the known pattern. Once from the center towards the edge and once across the center of the arena. At this point, care must be taken not to be pushed into the corner by the Pandemonium orbs and the Vacuum Claws.
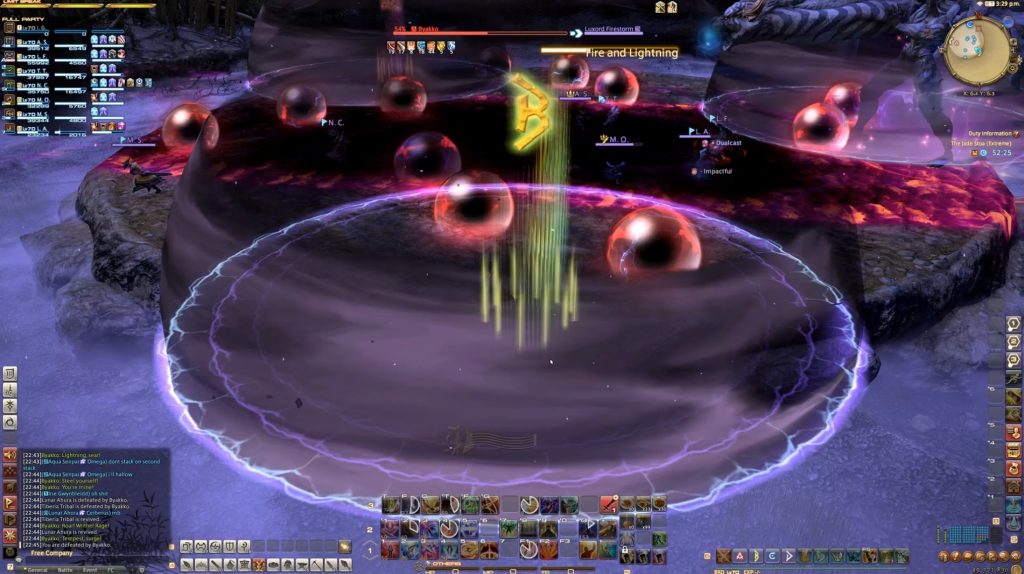
It’s better to eat a Pandemonium orb than to get hit by Fire and Lightning. Touching the Vacuum Claw AOEs causes a rising vulnerability debuff.
Here too, you have enough time to orient yourself. For the placement of the AOEs, you have a whole 7 seconds, and with Sprint you will definitely get to your position quickly enough.
Short Form:
Pandemonium -> Players position themselves next to their markers -> Players drop their AOEs
AOEs begin to grow -> Byakko uses Fire and Lightning from the center -> Byakko jumps and uses Fire and Lightning across the center of the arena.
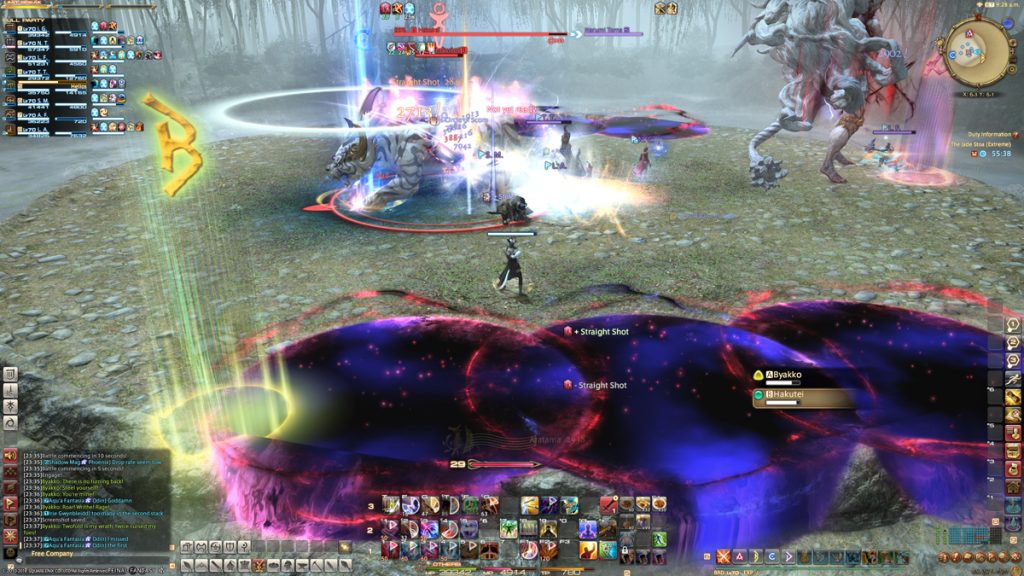
Hakutei Returns
Byakko will now release his tiger again. Actually, this is also a strict DPS check, but there is a much simpler strategy for this phase: You ignore Hakutei.
It is again up to the OT to pull the tiger away from Byakko and hold it there. The rest of the group does not need to care anymore.
Two players will be marked again with impact AOEs that will leave puddles and should be placed at the edge of the arena.
After that, everyone can return their focus to Byakko and stay near him.
Hakutei will again use Autumn Gale on the off-tank, followed by Byakko’s Thunder Rolling. The entire group except for the OT should stand directly in Byakko’s hitbox at this point.
Immediately after he lands and after Thunder Rolling activates, the tiger will target the group with Fire and Lightning.
Once that’s over, the next round of Thunder Rolling will follow, along with another Fire and Lightning attack from Hakutei. The sequence of attacks is very fast, and the group must keep running out of AOEs.
Afterward, the tiger will hit the off-tank several times and jump to the center. Now his Roar of Thunder begins. The entire group continues to focus on Byakko and ignores the orbs while healing the tiger.
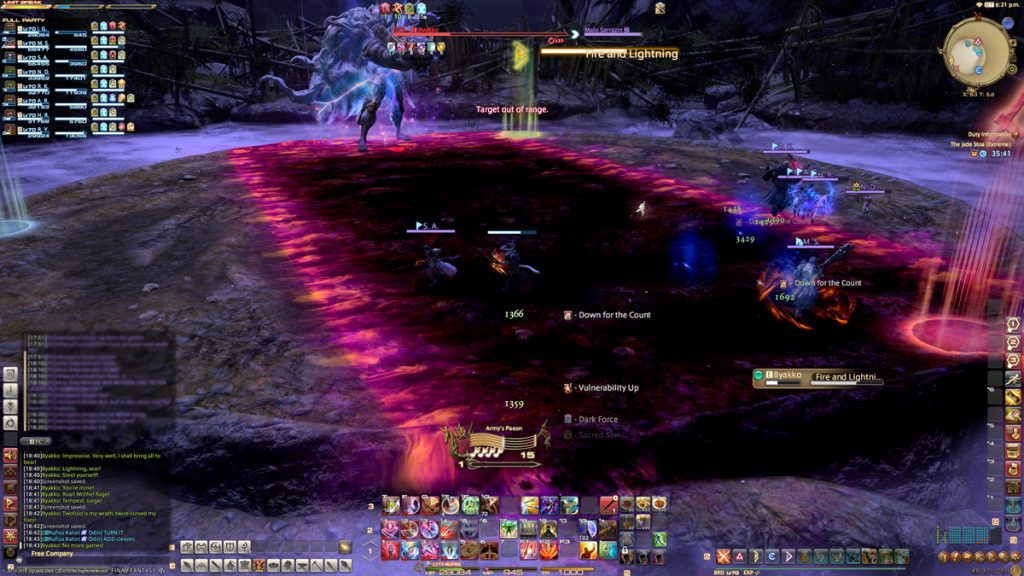
Once the progress bar of the Roar of Thunder is filled to about 60% – 70%, one of the tanks must use the Level 3 Limit Break. This will effectively protect the group from the attack.
After that, Hakutei disappears and does not return. The group will be briefly stunned and must then run out of the Fire and Lightning AOE from Byakko.
Short Form:
Hakutei appears and is pulled away from the OT -> marked players drop their AOEs at the edge of the arena -> the group focuses on Byakko.
Autumn Gale on OT -> group positions in Byakko’s hitbox for Thunder Rolling -> run out for Fire and Lightning -> back in for Thunder Rolling -> out for Fire and Lightning
Hakutei begins to cast Roar of Thunder -> group stays on Byakko -> Tank Limit Break at around 60%
Evade Fire and Lightning
Vacuum Claw -> Hundredfold Devastation -> Banish Lightning
You’re almost done. After the tiger is away, Byakko launches the final combination of attacks. Players should already position themselves near their assigned markers.
After Byakko has used two Thunderwaves, he will again mark 1 tank, 1 healer, and 1 DPS with the Vacuum Claw AOEs.
This time, however, this mechanic is combined with the Hundredfold Devastation and Banish Lightning + Highest Risk. The devastation goes out while the Vacuum Claw AOEs are placed.

Players must dodge this while simultaneously positioning themselves in groups for Highest Risk.
Warning: It may and will happen that the stack marker for Highest Risk is inside a Vacuum Claw AOE. In that case, you must position yourself in front of it and wait until it disappears, then immediately run into the marker.
In conclusion, Byakko will again use Verticality.
Short Form:
Tank, healer, and DPS are marked with AOEs and position themselves accordingly -> the cross AOE appears in the middle
Tank 1 is grabbed -> Group 1 positions in the stack AOE -> Tank 2 provokes
Tank 2 is grabbed -> Group 2 positions in the stack AOE -> Tank 1 resumes Byakko.
The group goes directly behind Byakko
And that’s it. From this moment on, the sequence follows Heavenly Strike on Thunderwave x2 on Thunder Rolling on Heavenly Strike. After that, the rotation from the beginning of the second phase starts.
Two attack combinations will come, and after about 11:30 comes the enrage.
On the second page, you will find the list of attacks from Byakko in the order in which they are used in the fight.
Good luck!

Your opinion is important to us!
Do you like the article? Then let us know!