
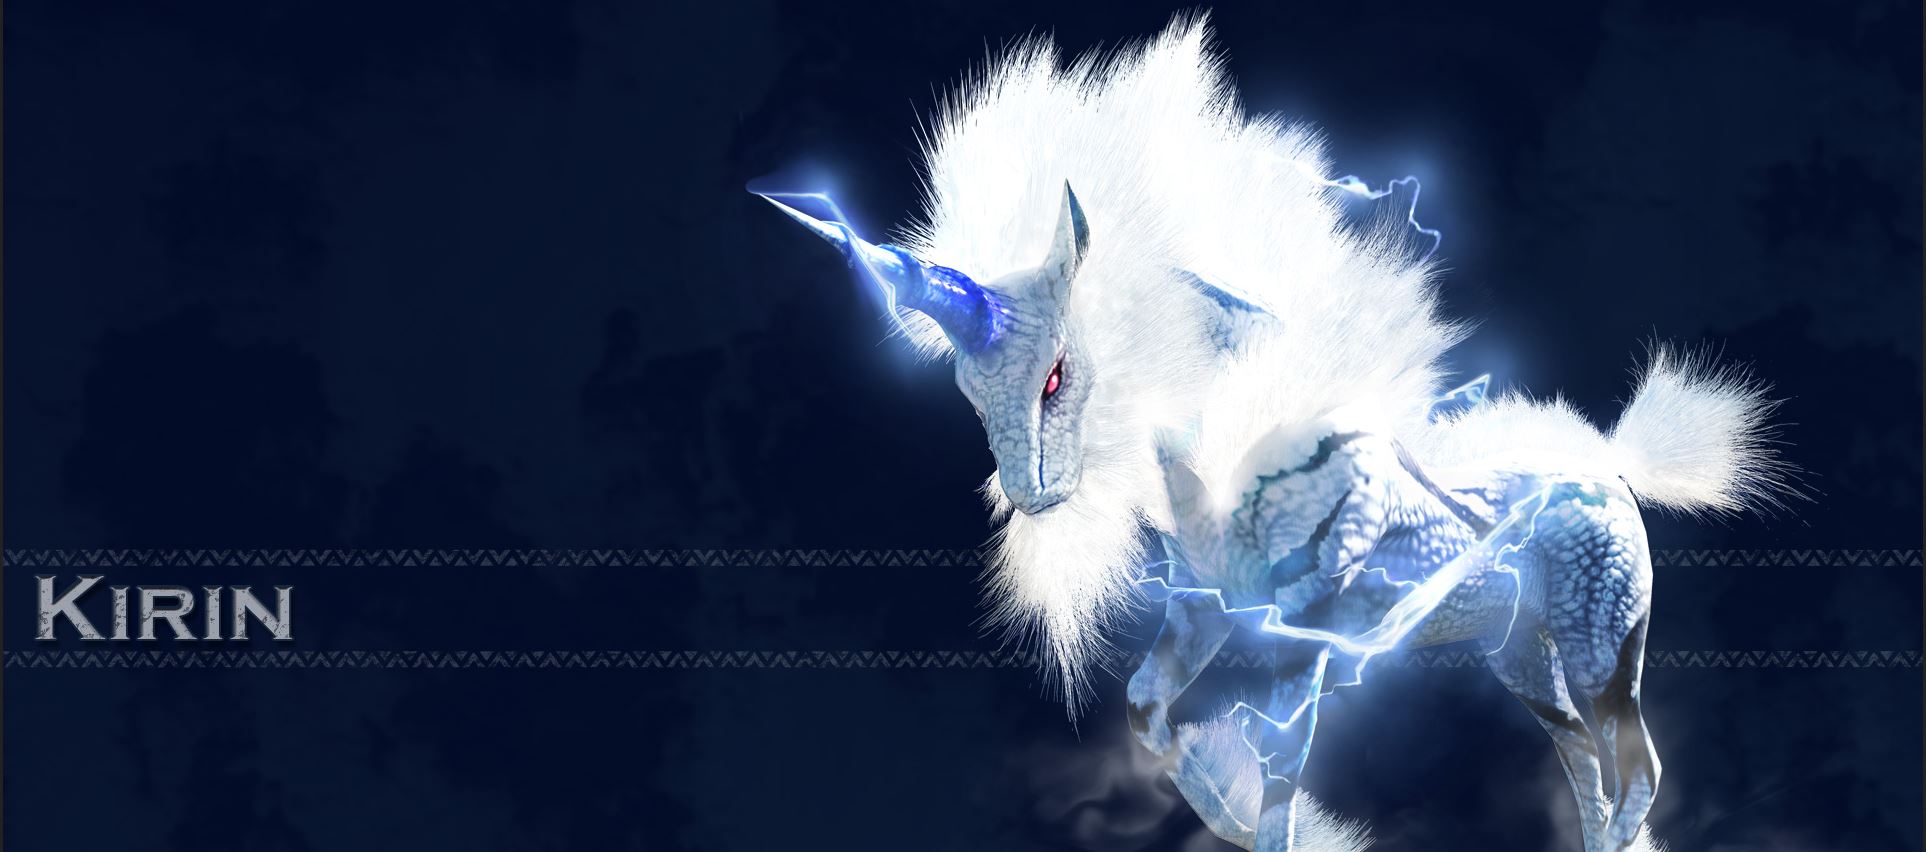
In this guide, you will learn about the strengths and weaknesses of the Kirin, learn about its attack patterns, and get tips for a build for the tempered monster. The Kirin is an Elder Dragon in Monster Hunter World, with lightning-fast attacks that pose a great challenge for many hunters.

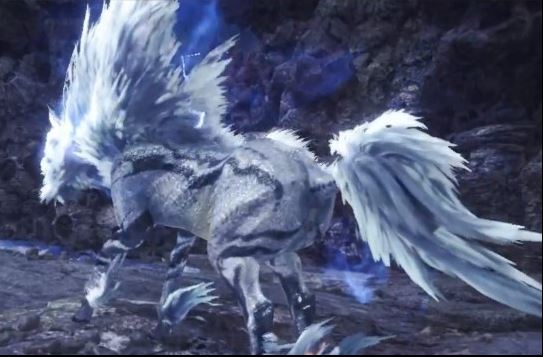
Kirin is a male unicorn enveloped in lightning, white and blue in color. Since the first Monster Hunter installment, it has been one of the Elder Dragons. Kirin is surrounded by lightning, which enhances its body during its rage phase.
Kirin uses few different types of attacks:
- In its offensive attacks, Kirin swings its horn to summon lightning or charges at its opponents with its lowered horn.
- In its passive attacks, it casually walks around, creating electrifying, linear fields. These create sparks that strike sideways or leave lightning that randomly rains down around Kirin. During the rage phase, they also appear in small waves.
From the Monster Encyclopedia: “The key to victory is weapons with Elder Seal properties and dodging the lightning attacks or at least ensuring protection against them.”
At a Glance: Weaknesses, Gear, and Location of Kirin
Important Tips:
- The body is very hard when Kirin is angry, and weapons often bounce off.
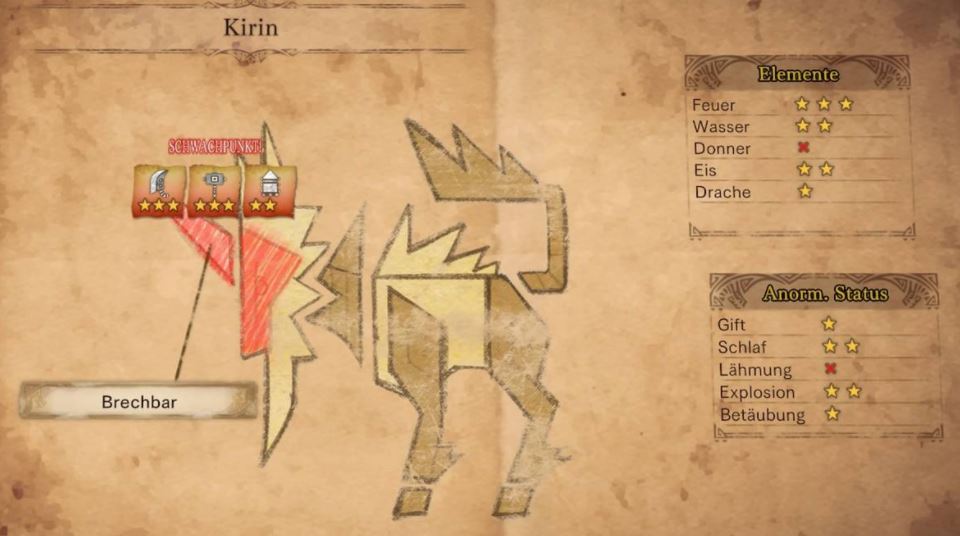
- The head (the horn) is breakable, where Kirin takes the most damage in every phase.
- Type: Elder Dragon
- Habitat: Coral Highlands (Areas 2, 8, 12, 13, 15)
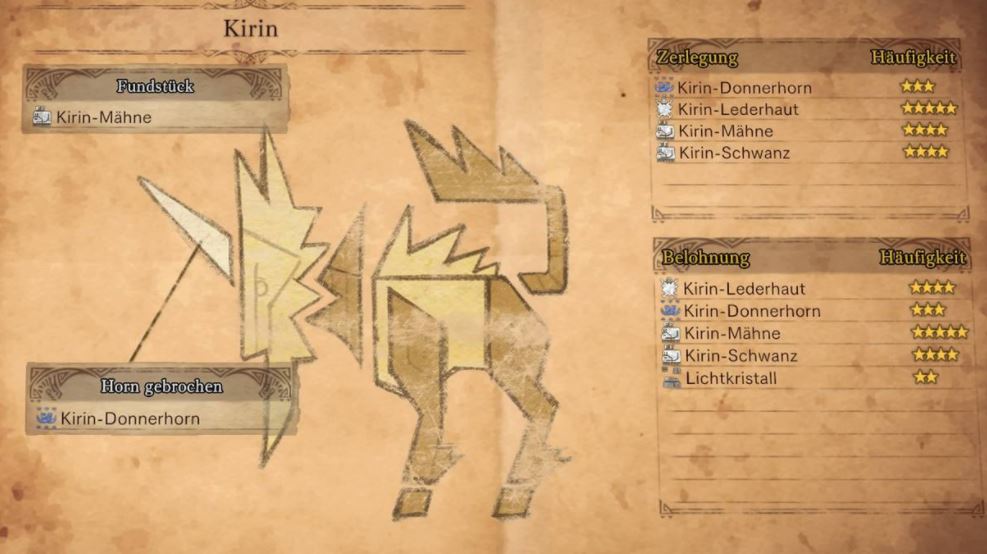
- Loot:
- Kirin Lightning Horn
- Kirin Leather
- Kirin Mane
- Kirin Tail
- Light Crystal
Elemental Weaknesses:
| Fire | High |
| Water | Medium |
| Thunder | Immune |
| Ice | Medium |
| Dragon | Low |
Status Weaknesses:
| Poison | Low |
| Sleep | Medium |
| Paralysis | Immune |
| Explosion | Medium |
| Stun | Low |
How do I know if Kirin is in normal or rage mode?
When Kirin becomes angry, it generates a lightning strike that hits itself and charges up. The charge hardens its body, causing attacks to bounce off. Ranged weapons deal almost no damage to the body when Kirin is in the rage phase. You can also recognize the rage phase by the blue veil that surrounds Kirin.
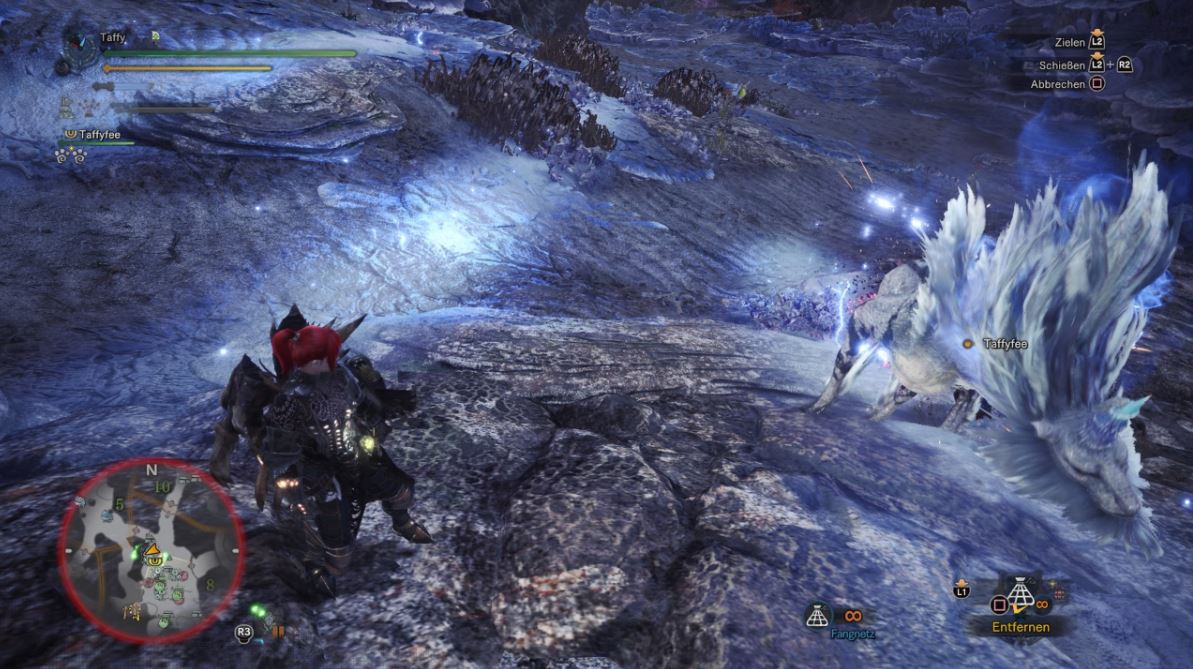
Kirin in Normal Mode
The mane of Kirin is reasonably flat.
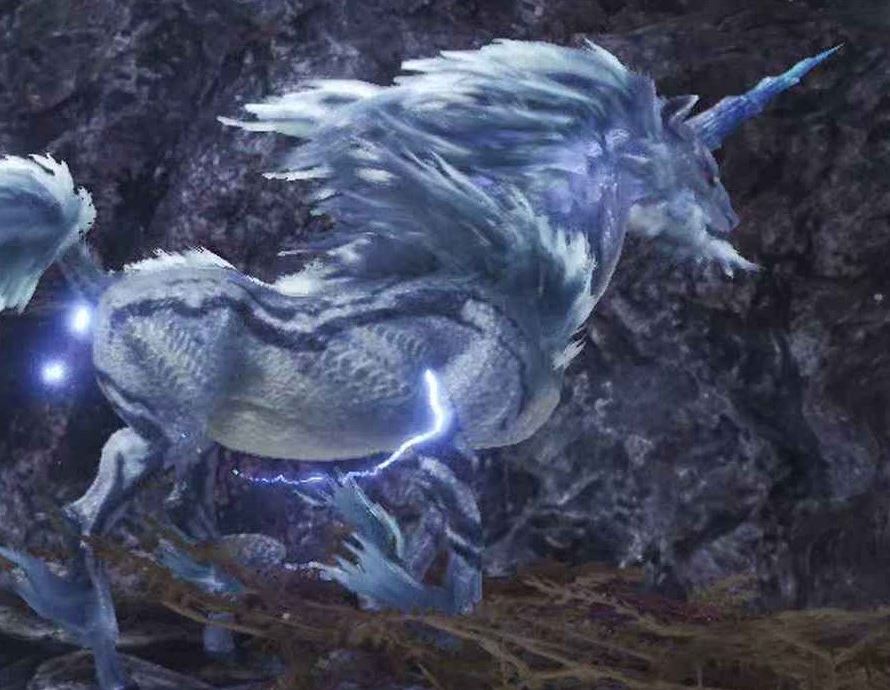
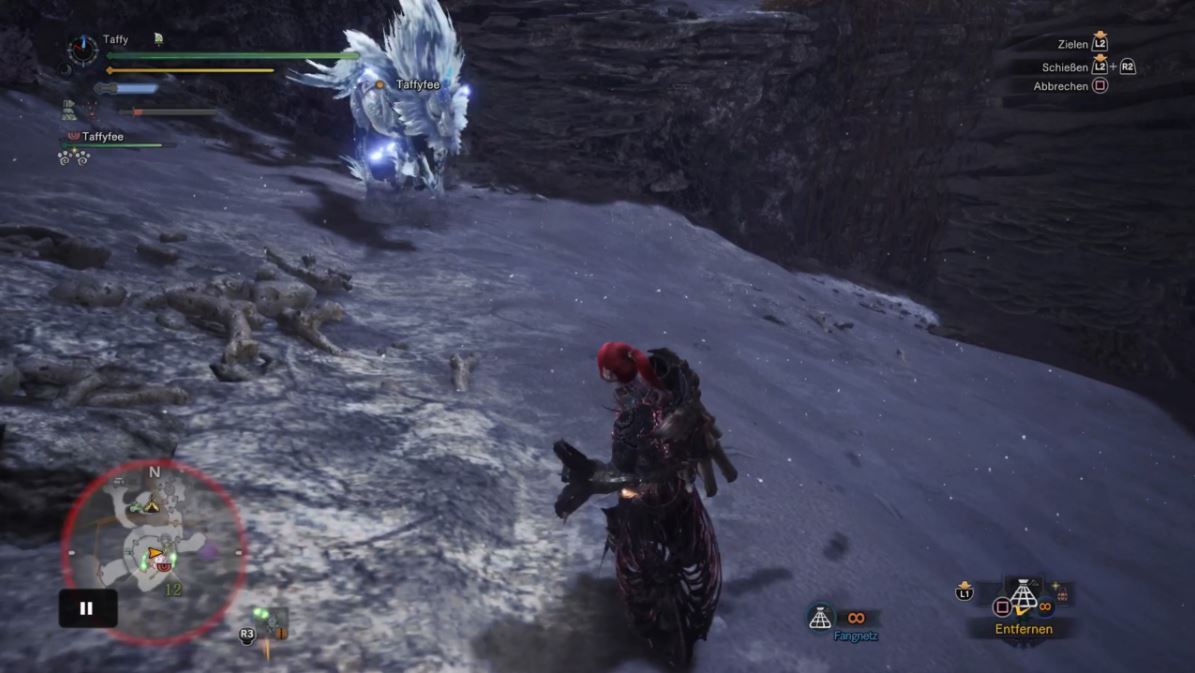
Kirin in Rage Mode
The mane is statically charged and sticks up more. Kirin is also surrounded by a blue aura.
What are Kirin’s attacks and how can I recognize them?
Below you will find a list of all attack patterns of Kirin, along with the corresponding images. To successfully defeat a monster, you should be able to “read” its attacks.
Light Head Swing
You can recognize the light head swing by the fact that Kirin does not lift its front hooves off the ground.
If Kirin performs only a light head swing, it generates only a few weaker lightning strikes. The lightning that Kirin generates in this attack has two possible variations and a recognition pattern:
- If Kirin uses the light head swing and its head does NOT face a player, then the lightning is summoned close around Kirin. So keep your distance from its body.
- If Kirin is looking in the direction of a player, then it could be a ranged attack. The lightning will either go further away from Kirin towards the player or land in front of Kirin’s head. If the player is further away, the lightning will hit the player. If the player is close to Kirin, the lightning will land in front of the Elder Dragon’s head.
The best position during this attack is to stand to the side of it, but not too close. Ranged fighters can step back further.
Heavy Head Swing
If Kirin uses the heavy head swing, it raises its hooves and swings its horn widely.
This attack has two possible variations:
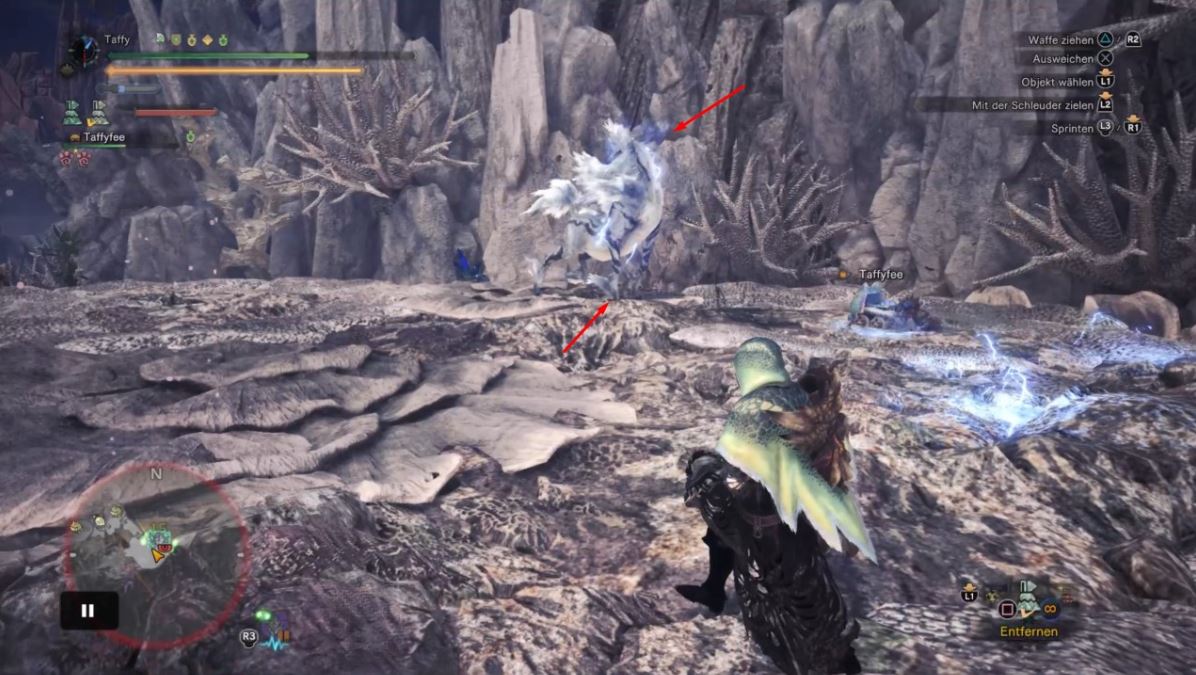
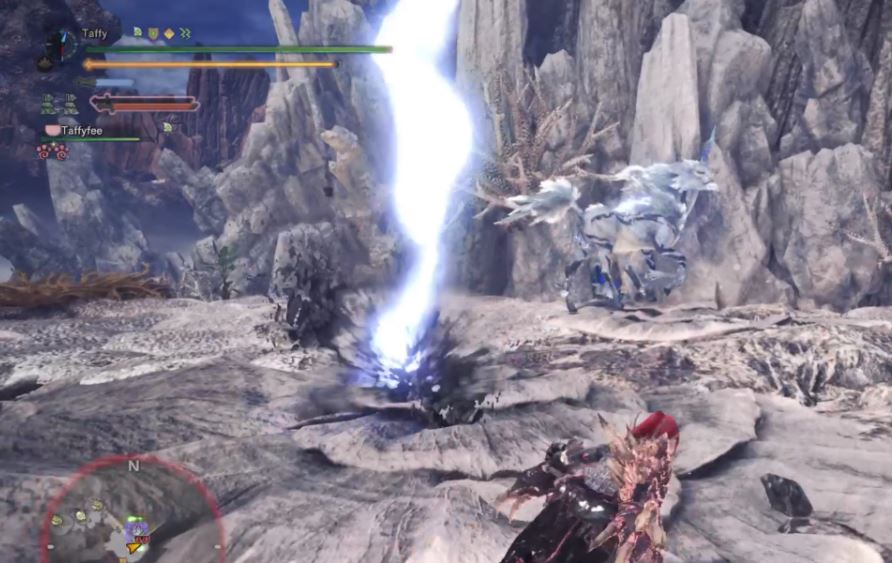
- The first variation creates a large blue shining circle (as shown in the image) on the ground either in front of it or further away. After a short time, a strong lightning strike will hit there.
- The second variation involves lightning striking in a circular rotation around Kirin at medium distance. If Kirin is angry during this, a second wave will follow immediately after.
Storm Attack
Kirin’s storm attack is easily recognizable. If it scratches the ground with one of its front hooves, it will then charge straight forward with its horn pointed down.
If it is in the rage phase, alternating lightning strikes will occur on the left and right at the same distance.
Horse Kick

If you attack Kirin from behind, it is likely that it will rear up to deliver a powerful kick with its hind legs.
If you do not have paralysis resistance in your armor, the kick can leave you susceptible to confusion. So be careful when attacking from behind.
The Lightning Fields
Kirin often likes to stand still. In the landscape, it creates a linear, glowing area. This will soon be filled with several lightning strikes hitting sideways.
You have enough time to leave these areas, so you should use that! If Kirin is in rage mode, it will create three such areas at once.
Tips and Tricks for Defeating Kirin

Kirin is easier alone than in a group: Try to face Kirin in battle as much as possible alone, as it becomes unpredictable very quickly in multiplayer. It targets different players, making it hard to tell which player it is attacking. If players also join through an SOS signal, there is a high risk of making too many mistakes that could cost you the quest.
Attack Kirin from the side: Always try to position yourself to the side of him so you can immediately tell if he wants to target you with a lightning attack. This will help you better read the variations he applies during head swings.
Focus on the head and horn: Here, Kirin takes the most damage in every phase.
Sleep element is effective against Kirin: A weapon with a sleep element is recommended, as Kirin often falls asleep from it, allowing you to wake it up with Mega Barrel Bombs! You can carry a total of 9 Mega Barrel Bombs, and just need to bring materials for crafting more. Otherwise, you can go to a camp in your tent at any time and restock your inventory.
Short attacks are better for mobility: Always make short attacks and no full combos to keep moving! The more you practice, the more confident you will become against Kirin.
Helpful items against Kirin: Try to build 3 Thunderproof Jewels into your armor and if possible, equip Resistor Jewels to avoid becoming electrified (Thundermark in the status bar). If you become electrified, quickly eat a Nullberry or you will be very susceptible to thunder damage and quickly paralyzed!
As a Palico gadget, you should bring the Coral Orchestra: This gadget provides many resistances that are very useful against Kirin!
Kirin in Rage Phase: How to Prevent Weapon Bounce
In the rage phase, Kirin’s body becomes extremely hard, causing your weapons to bounce off. Here are a few tips on what you can do against it:
- 4 Pieces of Rathalos Armor: This grants you a set bonus that prevents bouncing.
- Spirit Eye Jewel 2: It gives you the ability “Inner Eye/Ballistics.” It prevents bouncing from attacks and shortens the distance before ammunition and arrows reach maximum power.
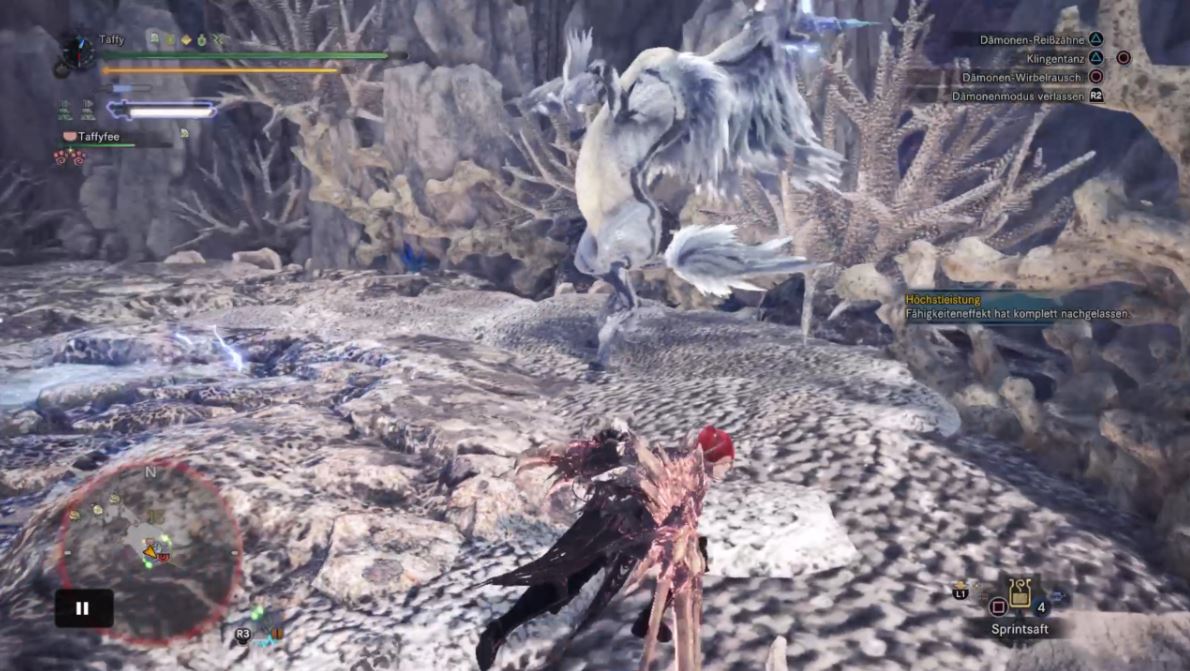
- Use weapons that prevent bouncing: Some weapons inherently prevent bouncing with certain attacks or modes. This includes Dual Blades in Demon Mode.
Defeating the Tempered Kirin: An Armor Suggestion
The tempered Kirin hardly differs from the other stages. The tempered Kirin simply inflicts significantly higher damage and punishes your mistakes more precisely.
Therefore, I would like to present to you an armor set that will allow you to make a few mistakes if you are struggling with the tempered Kirin.
The armor is designed to regenerate damage taken quickly and additionally restore more health than usual. This allows you to afford more missteps.
Especially practical: The armor is weapon-independent! – You can play any weapon with it. The armor is very easy to farm and requires few decorations to reveal its effectiveness, leaving much room for flexibility.
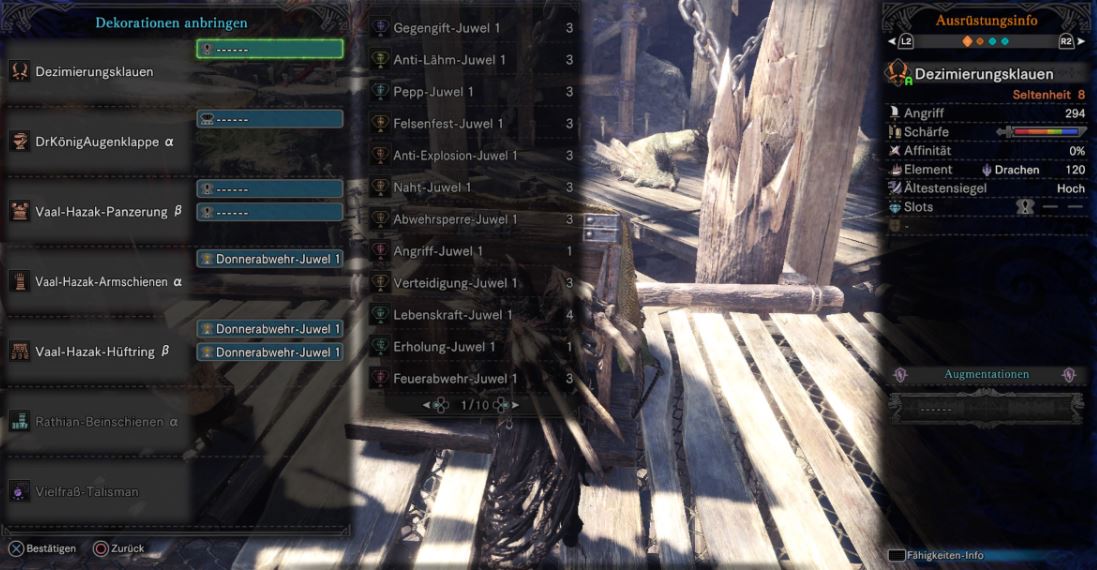
The Armor:
- Dragon King Eyepatch – Alpha
- Vaal Hazak Armor – Beta
- Vaal Hazak Vambraces – Alpha
- Vaal Hazak Waistband – Beta
- Rathian Greaves – Alpha
- Glutton Talisman
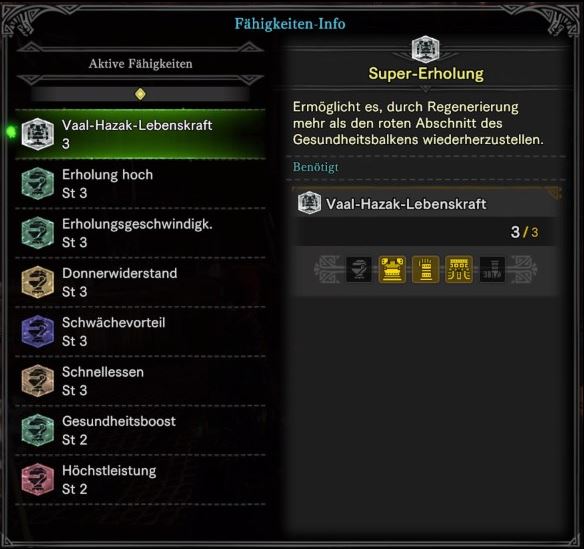
The Skills:
- Vaal Hazak Health St. 3
- Recovery Boost St. 3
- Recovery Speed St. 3
- Thunder Resistance St. 3
- Weakness Exploit St. 3
- Quick Eat St. 3
- Health Boost St. 2
- Peak Performance St. 2
You can find more about the monsters from Monster Hunter World in our comprehensive Monster List – including habitat and loot of the beasts
This guide was created by our community author “Taffyme,” who has been playing Monster Hunter since 2006. Back then, his parents gifted him the action RPG for the PSP for Christmas. Overall, the veteran now boasts over 8,000 play hours when combining the playtime from the titles MHF1, MHF2, and MHFU. His favorite weapon is the Gunlance.
At the time of creating the guide, “Taffyme” was a Hunter Rank of 139 in Monster Hunter World and studied Kirin specifically for us.
You want more tips and tricks for Monster Hunter World? Then take a look here:

Your opinion is important to us!
Do you like the article? Then let us know!