We have created a list of all monsters from Monster Hunter World and summarized what is known about them and what loot can be obtained from them. The list is current as of December 2019.
The most important thing in Monster Hunter World is hunting the various monsters, all of which have special characteristics.
In the monster list, you will see:
- where you can find the creatures
- what loot they drop
- which elements and statuses they are weak against
- a brief description of the monsters, where you will also find some tips on fighting them.
What do NR, HR, MR, and the Plus stand for? In the list, you will see these abbreviations next to the loot. NR stands for Low Rank, HR for High Rank, and Plus also applies to High Rank. You can undertake quests at Low or High Rank, which changes the loot of the monsters.
Since the Iceborne expansion, there is a third rank. The Master Rank is abbreviated as MR. Additionally, you can now also find the monster materials from the endgame area Guiding Lands.
Update January 6, 2021: This list was published in 2017 and updated in 2018 to include all DLC monsters. In January 2021, the last items of the Master Rank were added.
Where can you find monsters from the Iceborne expansion? If you are currently playing the new addon and looking for new monsters, check out our list of new monsters from Iceborne.
Large Monsters in Monster Hunter World
These are the “bosses” in Monster Hunter World that you should have a battle strategy ready for.
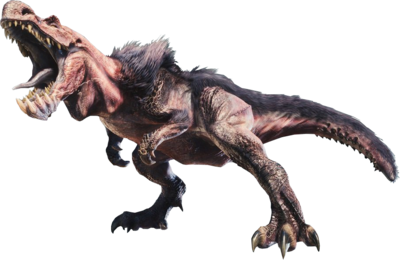
Anjanath
- Type: Fighting Wyvern
- Habitat: Ancient Forest, Wildspire Wastes
- Rewards NR and HR:
- Anjanath Gem
- Anjanath Nosebone/+
- Anjanath Hide/+
- Anjanath Plate
- Anjanath Claw/+
- Anjanath Scale/+
- Anjanath Tail
- Flame Sac (NR) / Hell Sac (HR)
- Monster Bone L
- Rewards MR:
- Anjanath Pelt
- Anjanath Shard
- Anjanath Hardclaw
- Heavy Anjanath Nosebone
- Anjanath Gem
- Anjanath Shell
- Anjanath Whip
- Flame Sac
- Leitlande Rewards:
- Grim Dragonbone
- Flickering Flamefur
- Spiritvein Crystal (hardened)
- Hardened Flamefur (hardened)
- Spiritvein Gem Shard (hardened)
- Elemental Weaknesses:
- Fire 0
- Water 3
- Thunder 2
- Ice 2
- Dragon 1
- Status Weaknesses:
- Poison 2
- Sleep 2
- Paralysis 2
- Explosion 1
- Stun 2
Description: Anjanath have strong jaws with which they tear enemies apart and a keen sense of smell. They breathe fire and have a significant weakness to the elements of water and ice.
Battle Tip: Anjanath are ruthless hunters that will not let their prey escape easily. They are highly aggressive and attack anything that comes within their grasp. Their arms, legs, head, and nose are vulnerable. The tail can be severed.
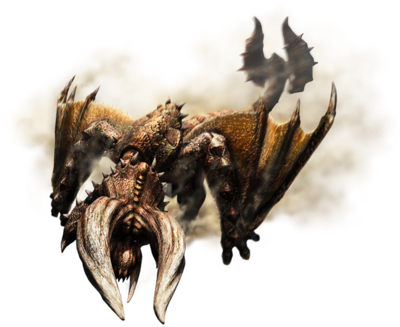
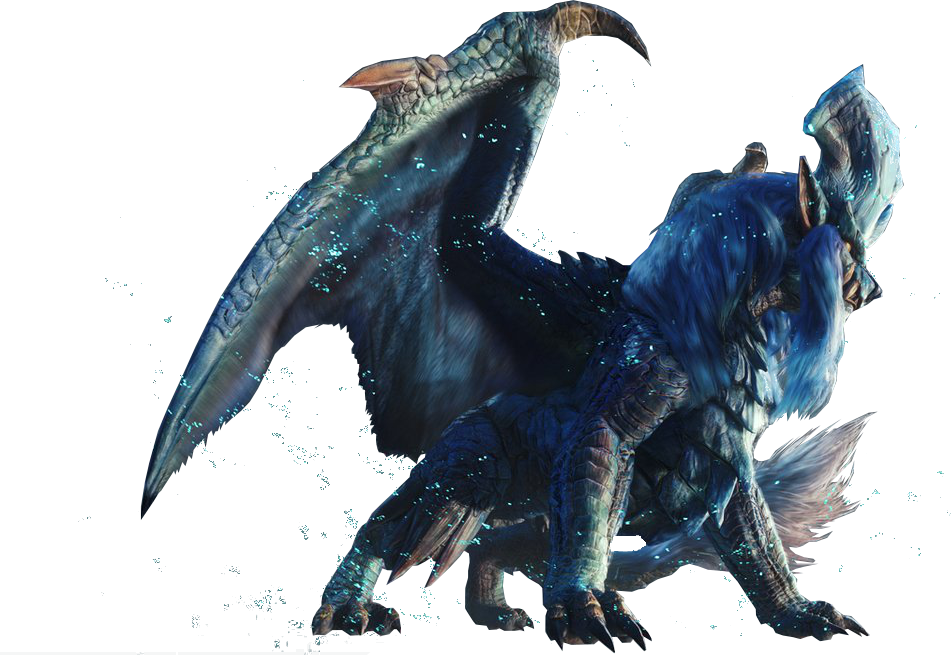
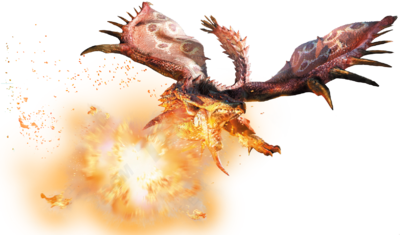
Azure Rathalos
- Type: Flight Wyvern
- Habitat: Ancient Forest, Home of the Elders
- Carves HR:
- Azure Rathalos Wing
- Azure Rathalos Back Plate
- Azure Rathalos Scale+
- Azure Rathalos Tail
- Hellfire Sac
- Monster Hardbone
- Rathalos Medulla
- Rathalos Plate
- Rathalos Ruby
- Rath Wing Talon
- Carves MR:
- Azure Rathalos Shard
- Azure Rathalos Cortex
- Azure Rathalos Winged Mantle
- Rathalos Medulla
- Rathalos Ruby
- Rathalos Shell
- Azure Rathalos Lash
- Rath Wing Talon+
- Flame Sac
- Carves Guiding Lands:
- Dragonbone Steelbone
- Azure Blue Scale
- Spiritbone Steelbone (hardened)
- Hardened Azure Scale (hardened)
- Spirit Gem (hardened)
- Elemental Weaknesses:
- Fire 0
- Water 1
- Thunder 2
- Ice 1
- Dragon 3
- Status Weaknesses:
- Poison 1
- Sleep 2
- Paralysis 3
- Explosion 1
- Stun 2
Description: The Azure Rathalos shares most traits with the Rathalos but has higher stamina, more health, and stronger attack power. It has a wider range of attacks than the regular Rathalos and is even more aggressive.
Combat Tip: For the Azure Rathalos, the wings and head are its weak points. These should be targeted as soon as the beast is on the ground. It is possible to bring down the Azure Rathalos with a slinger or thunderbomb from the air.
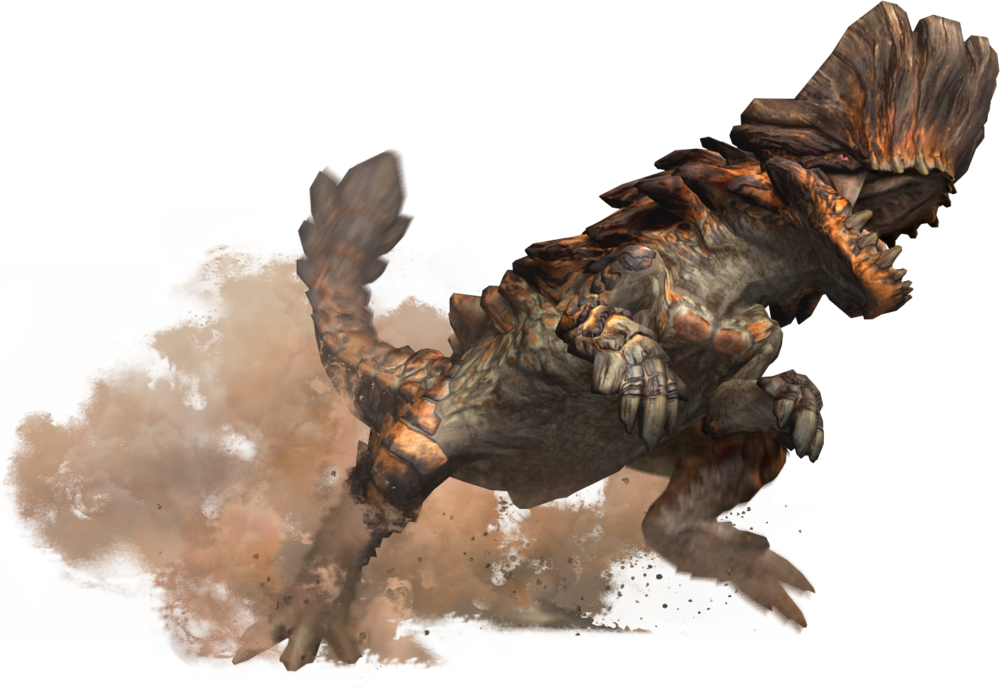
Barroth
- Type: Battle Wyvern
- Habitat: Wildspire Wastes
- Carves NR and HR:
- Barroth Claw/+
- Barroth Shell (HR)
- Barroth Carapace (NR)
- Barroth Tail
- Barroth Scale
- Barroth Thorax/+
- Fertile Mud
- Monster Bone M (NR) / Monster Bone+ (HR)
- Wyvern Gem (HR)
- Carves MR:
- Barroth Back Ridge
- Barroth Hardclaw
- Barroth Cortex
- Barroth Whip
- Barroth Crown
- Large Wyvern Gem
- Gleaming Mud
- Carves Guiding Lands:
- Grim Dragonbone
- Muddy Crown
- Spiritvein Solidbone (hardened)
- Hardened Crown (hardened)
- Spiritvein Gemstone Shard (hardened)
- Elemental Weaknesses:
- Note: The values in parentheses indicate the monster’s state when covered in mud.
- Fire 3 (0)
- Water 0 (3)
- Thunder 0
- Ice 2
- Dragon 1
- Status Weaknesses:
- Poison 3
- Sleep 2
- Paralysis 3
- Explosion 3
- Stun 1
Description: The Barroth has a massive bone plate on its head that it uses to ram through anything that stands in its way. Before the Barroth attacks, it lets out a warning roar, as it is normally peaceful.
Combat Tip: The Barroth rolls in mud and lets it dry to increase its defense. The hard mud should be attacked with water elements to soften and nullify it.
Bazelgeuse
- Type: Flying Wyvern
- Habitat: Home of the Elders, Ancient Forest, Wildspire Waste, Coral Highlands, Vale of Corruption
- Prey:
- Bazelgeuse Gem
- Bazelgeuse Wing
- Bazelgeuse Claw
- Bazelgeuse Mantle
- Bazelgeuse Carapace
- Bazelgeuse Scale+
- Bazelgeuse Tail
- Monster Hardbone
- Elemental Weaknesses:
- Fire 0
- Water 1
- Thunder 3
- Ice 2
- Dragon 2
- Status Weaknesses:
- Poison 2
- Sleep 2
- Paralysis 2
- Explosion 1
- Stun 1
Description: The Bazelgeuse has no territory where it stands firm, instead it wanders through all maps of Monster Hunter World. The Bazelgeuse has explosive scales that it drops on its opponents.
Combat Tip: The legs of the Bazelgeuse are its weak point. Hunters should only attack its legs when the Bazelgeuse is not currently dropping its explosive scales.
Behemoth

- Type: Elder Dragon
- Habitat: Home of the Elders
- Loot:
- Behemoth Mane
- Behemoth Bone
- Behemoth Claw
- Behemoth Large Horn
- Behemoth Tail
- Aethryte Crystal
- Elemental Weaknesses:
- Fire: 1
- Water: 2
- Thunder: 1
- Ice: 2
- Dragon: 3
- Status Weaknesses:
- Poison: 2
- Sleep: 2
- Paralysis: 2
- Explosion: 2
- Stun: 2
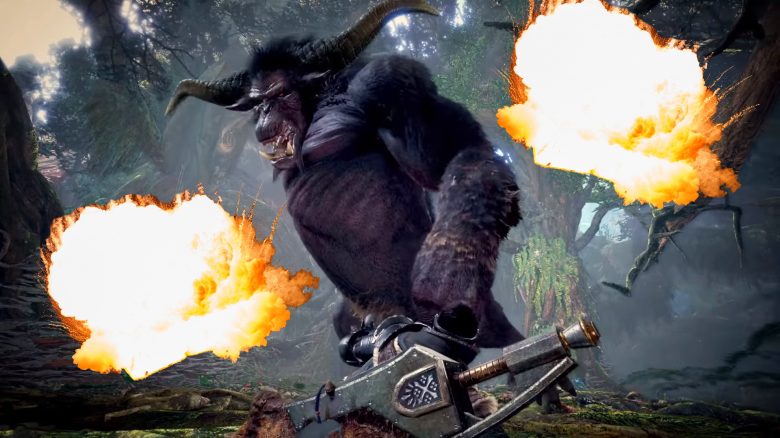
Description: The Behemoth originates from Final Fantasy and has two mechanics that are atypical for Monster Hunter: spells and aggro. The spells are particularly dangerous for you and every hunter should be well aware of them. Once the monster has built up aggro, it focuses all its attention on just one player.
Combat Tip: The Behemoth has a total of four phases and five spells. Each new phase is heralded by the meteor. Here, the Behemoth casts a meteor on random players. When the Behemoth casts “Summon Comet,” it lays large rocks on the battlefield. These must be used to survive its strongest attack “Ecliptic Meteor.” Hunters can hide behind the rocks here.
- Monster Hunter World: Defeating Behemoth – Weaknesses and Combat Tips
- How to farm the Behemoth armor solo
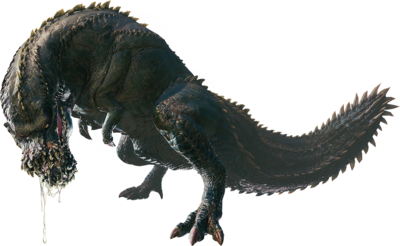
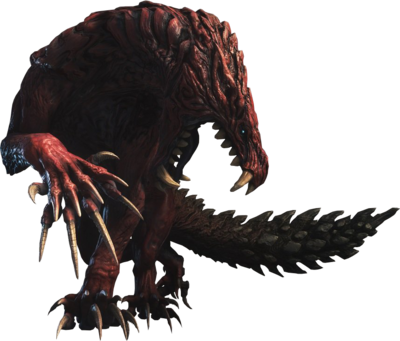
Deviljho
- Type: Fight Wyvern
- Habitat: Elder’s Recess, Ancient Forest, Wildspire Waste, Coral Highlands, Rotten Vale
- Loot:
- Deviljho Gem
- Deviljho Claw
- Deviljho Hide
- Deviljho Jaw
- Deviljho Scale
- Deviljho Tail
- deviljho Pelt
- Deviljho Spit
- Monster Hardbone
- Elemental Weaknesses:
- Thunder 3
- Dragon 3
- Fire 2
- Water 2
- Ice 1
- Status Weaknesses:
- Poison 2
- Sleep 2
- Paralysis 2
- Explosion 2
- Stun 2
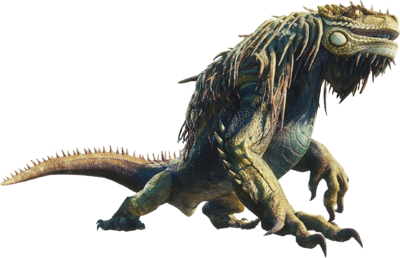
Description: The Deviljho wanders like the Bazelgeuse through all areas searching for flesh due to its insatiable hunger. It generally attacks all monsters and hunters as well. The Deviljho has a similar attack pattern to the Anjanath, but is considerably faster in movement and executes its attacks for longer periods.
Battle Tip: The Deviljho is weak to Thunder and Dragon, these elements should be on your weapons. In rage mode, a mist flows from the mouth of the Deviljho, which causes Dragonblight to you. This can be countered with Nullberries or at least 20 Dragon Resistance on your armor. For the corrosive saliva, Diamond Seeds help. Under the belly of the Deviljho is the safest position.
Diablos
- Type: Flying Wyvern
- Habitat: Wildspire Waste
- Carves NR and HR:
- Diablos Medulla
- Diablos Hardtail
- Diablos Mark
- Diablos Fang
- Diablos Backspine+
- Diablos Shell (HR)
- Diablos Armor (NR)
- Majestic Horn
- Monster Bone+ (NR) / Monster Hardbone (HR)
- Sprint Extract
- Twisted Horn
- Wyvern Gem
- Carves MR:
- Diablos Backspine
- Diablos Cortex
- Diablos Tailguard+
- Diablos Medulla
- Large Wyvern Gem
- Wyvern Gem
- Twisted Stronghorn
- Sprint Extract
- Carves Guiding Lands:
- Heavy Dragonbone
- Twisted Muthorn
- Spiritvein Steelbone (hardened)
- Twisted Hardhorn (hardened)
- Spiritvein Gem (hardened)
- Elemental Weaknesses:
- Fire 0
- Water 2
- Thunder 1
- Ice 3
- Dragon 2
- Status Weaknesses:
- Poison 2
- Sleep 2
- Paralysis 3
- Explosion 2
- Stun 1
Anesthesia: The Diablos preferably lives in the desert and burrows into the ground there. The horned beast ambushes hunters from underground and attacks from hiding as soon as it hears them. The Diablos has little pause between its attacks, making it a challenging opponent. It either strikes with its tail or tries to knock down its foes with its massive horns.
Combat Tip: The Diablos uses a charge attack where it burrows and quickly rushes at hunters from underground – as a hunter, it is important to keep moving. The Diablos also has a powerful roar that can temporarily stun hunters. The “Earplugs” skill, found on some armor, can help here. The horns can be broken and the tail can be severed.
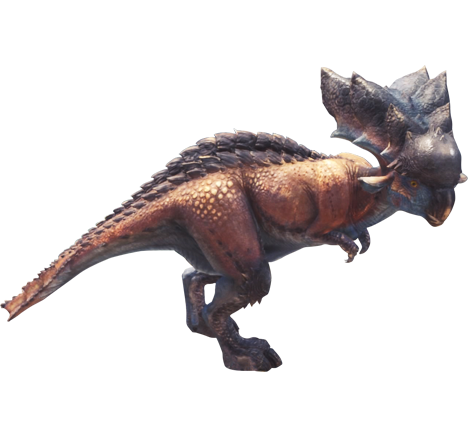
Dodogama
- Type: Fighting Wyvern
- Habitat: Home of the Elders
- Carves HR:
- Dodogama Jaw
- Dodogama Claw
- Dodogama Hide+
- Dodogama Scale+
- Dodogama Tail
- Monster Bone+
- Nourishing Extract
- Carves MR:
- Dodogama Pelt
- Dodogama Lower Jaw
- Dodogama Shard
- Dodogama Whip
- Dodogama Hardclaw
- Hard Armor Sphere
- Nourishing Extract
- Carves Guiding Lands:
- Grim Dragonbone
- Heavy Jaw
- Elemental Weaknesses:
- Fire 2
- Water 2
- Thunder 2
- Ice 2
- Dragon 2
- Status Weaknesses:
- Poison 3
- Sleep 0
- Paralysis 1
- Explosion 2
- Stun 1
Description: The Dodogama has special saliva that allows it to cause stones to explode. It spits these at hunters to attack them. The creature is peaceful and will only attack if provoked.
Combat Tip: When the Dodogama is carrying heated stones in its mouth, hunters can attack them. The attacks will cause the stones in Dodogama’s mouth to explode and deal significant damage to it.
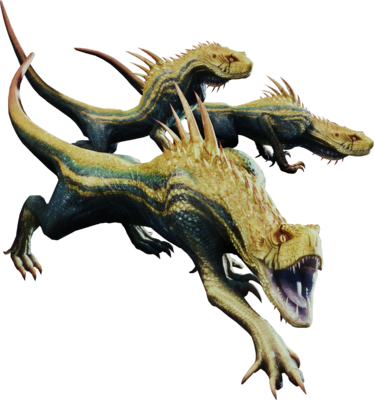
Great Girros
- Type: Toothsome Wyvern
- Habitat: Valley of Decay
- Carves NR and HR:
- Great Girros Mane/+
- Great Girros Hide/+
- Great Girros Tooth/+
- Great Girros Scale/+
- Great Girros Tail
- Monster Bone L (NR) / Monster Bone+ (HR)
- Omniplegia Sac (HR)
- Great Jagras Hide (NR)
- Paralysis Sac (NR)
- Carves MR:
- Great Girros Pelt
- Great Girros Hard Mane
- Great Girros Shard
- Great Girros Whip
- Great Girros Hard Tooth
- Ultraplegia Sac
- Carves Guiding Lands:
- Grimm Dragonvein Bone
- Midnight Hood
- Elemental Weaknesses:
- Water 3
- Fire 2
- Ice 2
- Dragon 1
- Status Weaknesses:
- Sleep 3
- Poison 2
- Explosion 2
- Paralysis 2
- Stun 1
Description: Great Girros are usually surrounded by a pack of smaller Girros and lead them. It has gigantic teeth in the front of its mouth that can paralyze hunters.
Tips for Combat: Once the Great Girros’ teeth are broken, it weakens its paralysis attack. The smaller Girros should be slain before hunters take on the Great Girros.
Great Jagras
- Type: Toothless Wyvern
- Habitat: Ancient Forest
- Rewards NR and HR:
- Great Jagras Claw/+
- Great Jagras Hide
- Great Jagras Mane
- Great Jagras Scale/+
- Monster Bone L (NR) / Monster Bone+ (HR)
- Iron Ore (NR, Quest Reward)
- Rewards MR:
- Great Jagras Pelt
- Great Jagras Shard
- Great Jagras Mane+
- Great Jagras Hardclaw
- Monster Strong Bone
- Rewards Guiding Lands:
- Grim Dragonbone
- Ruffled Mane
- Elemental Weaknesses:
- Fire 3
- Water 0
- Thunder 2
- Ice 2
- Dragon 1
- Status Weaknesses:
- Poison 3
- Sleep 3
- Paralysis 3
- Explosion 3
- Stun 3
Description: Great Jagras resemble iguanas and even swallow large monsters whole. They use their gained weight to scare off enemies. They are peaceful monsters and only attack when disturbed or threatened.
Combat Tip: When hunters hit them in the belly, Great Jagras will vomit and become weakened.
Jyuratodus
- Type: Fish Wyvern
- Habitat: Wildswept Wastes
- Low Rarity and High Rarity Loot:
- Jyuratodus Fang/+
- Jyuratodus Fin/+
- Jyuratodus Shell (Low Rarity) / Jyuratodus Back Shell (High Rarity)
- Jyuratodus Scale/+
- Monster Bone M (Low Rarity) / Monster Sharp Bone (High Rarity)
- Aqua Sac (Low Rarity) / Flood Sac (High Rarity)
- Medium Rarity Loot:
- Jyuratodus Shard
- Jyuratodus Cortex
- Jyuratodus Hardfang
- Jyuratodus Large Fin
- Large Wyvern Gem
- Wyvern Gem
- Flood Sac
- Elemental Weaknesses
- Note: The values in parentheses apply to the monster when it is engulfed in mud
- Fire 1 (0)
- Water 0 (3)
- Thunder 3 (0)
- Ice 1
- Dragon 1
- Status Weaknesses
- Poison 2
- Sleep 1
- Paralysis 2
- Explosion 1
- Stun 3
Description: Jyuratodus cover their bodies with mud and protect themselves this way. They also spit water at enemies and can become aggressive beasts once attacked.
Combat Tip: Jyuratodus leave behind mud piles that hunters can use to escape from swamps. Weapons with the water element are recommended against the Jyuratodus. The face and the tail fin can be broken.
Kirin
- Type: Elder Dragon
- Habitat: Coral Highlands
- Carves NR and HR:
- Azuros Kirin Horn
- Elder Dragon Bone (HR)
- Elder Dragon Blood (HR)
- Kirin Thunder Horn
- Kirin Thunder Tail
- Kirin Hide/+
- Kirin Mane
- Kirin Tail
- Light Crystal (NR) / Nova Crystal (HR)
- Carves MR:
- Azuros Kirin Horn+
- Kirin Fine Hide
- Kirin Silver Mane
- Kirin Thunder Tail+
- Pure Crystal
- Pure Dragon Blood
- Great Elder Dragon Bone
- Carves Guiding Lands:
- Elder Dragon Vein Bone
- Festive Blue Horn
- Elder Spirit Vein Bone (hardened)
- Hardened Azure Horn (hardened)
- Great Spirit Vein Gem (hardened)
- Elemental Weaknesses:
- Water 2
- Ice 2
- Dragon 1
- Fire 3
- Thunder 0
- Status Weaknesses:
- Poison 1
- Sleep 2
- Paralysis 1
- Explosion 1
- Stun 0
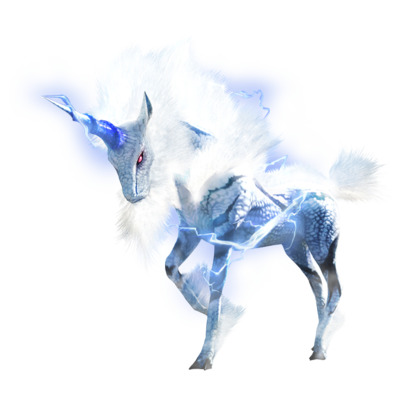
Description: Kirin is a dangerous Elder Dragon, famous for its horn. The Kirin’s fur is as tough as armor, making the delicate-looking creature robust. The Kirin is associated with the Thunder element, and all its attacks involve electricity. The Kirin summons lightning that strikes down on hunters. The Kirin can also charge itself with electricity to enhance its attacks.
Combat Tip: Due to the Thunder element, hunters can quickly become paralyzed and should bring enough Nullberries into the battle against the Kirin. The berries reduce the paralysis effect. A high resistance to the Kirin’s strong Thunder attacks is also essential.
This Kirin guide leads you quickly to victory!
Kulu-Ya-Ku
- Type: Bird Wyvern
- Habitat: Ancient Forest, Wildspire Waste
- Carves NR and HR:
- Kulu-Ya-Ku Hide/+
- Kulu-Ya-Ku Plumage/+
- Kulu-Ya-Ku Beak/+
- Kulu-Ya-Ku Scale/+
- Monster Bone L (NR) / Monster Bone+ (HR)
- Bird Wyvern Gem
- Carves MR:
- Kulu-Ya-Ku Shard
- Kulu-Ya-Ku Hide
- Large Kulu-Ya-Ku Plumage
- Large Kulu-Ya-Ku Beak
- Rare Wyvern Gem
- Monster Powerful Bone
- Carves Guiding Lands:
- Grim Dragonite Bone
- Shining Plumage
- Elemental Weaknesses
- Fire 2
- Water 3
- Thunder 2
- Ice 2
- Dragon 2
- Status Weaknesses
- Poison 2
- Sleep 2
- Paralysis 2
- Explosion 2
- Stun 2
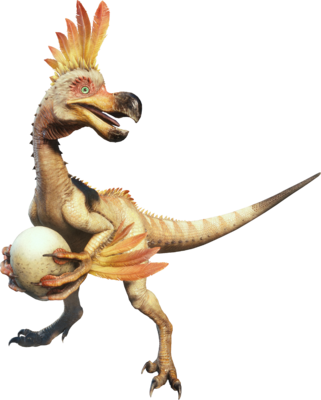
Description: Kulu-Ya-Ku resemble Dodos and throw stones at their enemies, using the stones as shields to defend themselves.
Combat Tip: Hunters can shoot the stones from Kulu-Ya-Ku’s hands with slings. The stone breaks when attacked multiple times with a weapon. The birds are vulnerable at the head, beak, and arms.
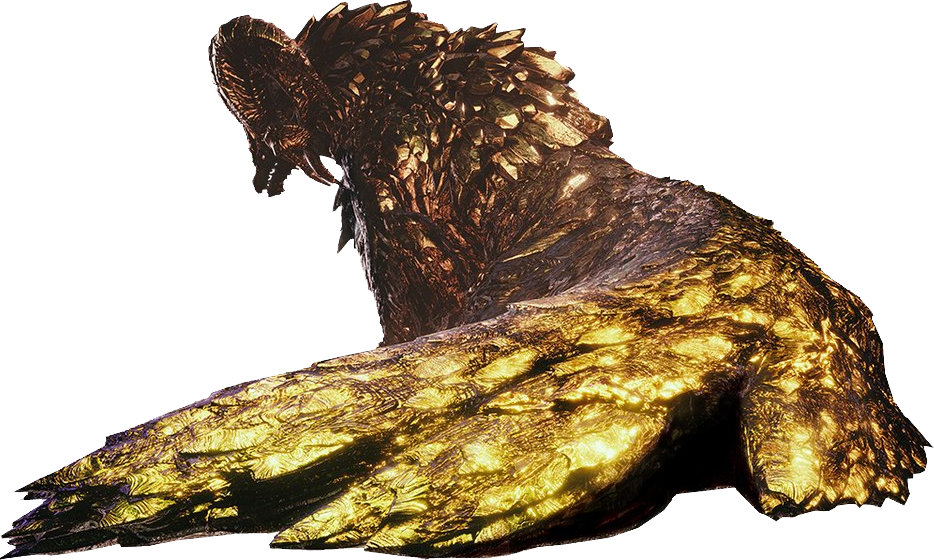
Kulve Taroth
- Type: Drachenältester
- Habitat: Eldorado-Höhlen
- Beute HR:
- KT Goldenes Spiralhorn
- KT Goldener Panzer
- KT Goldener Glimmstein
- Geschmolzene Waffe
- Zerlegte Waffe
- Sublimierte Waffe
- KT Goldene Schuppe
- KT Goldener Schwanzpanzer
- Drachenältester-Knochen
- Drachenältester-Blut
- Beute MR:
- KT Goldenes Spiralhorn+
- KT Goldener Panzer+
- KT Goldener Drachengottstein
- KT Goldene Schuppe+
- KT Goldener Schwanzpanzer+
- Elemental Weaknesses (Change when covered in gold, values in parentheses):
- Fire: 0 (1)
- Water: 2
- Thunder: 0 (3)
- Ice: 3 (0)
- Dragon: 2 (1)
- Status Weaknesses
- Poison: 1
- Sleep: 1
- Paralysis: 1
- Explosion: 1
- Stun: 1
Description: Kulve Taroth appears only during an event and in a special siege quest called “Feast in the Earthen Hall.” You can participate in the quest with up to 16 players and work together on progress. Using a points system, certain goals must be reached to improve rewards.
Combat Tips: Try to break as much of the golden armor as possible and collect all pieces to improve your rewards. This is how you get the rare relic weapons. The more players participate in the quest, the faster and easier it will be. Fire protection is immensely important against Kulve Taroth.
- Monster Hunter World: Kulve Taroth unlock, tips, armor & weapons
- Monster Hunter World: New siege quest and relic weapons explained
Kushala Daora
- Type: Elder Dragon
- Habitat: Home of the Elders
- Carves HR:
- Daora Dragon Scale+
- Daora Gem
- Daora Hide
- Daora Horn+
- Daora Back Plate
- Daora Tail
- Elder Dragon Bone
- Elder Dragon Blood
- Sharp Daora Claw
- Carves MR:
- Daora Shard
- Daora Cortex
- Daora Hard Claw
- Daora Hard Horn
- Great Elder Dragon Jewel
- Daora Gem
- Daora Whip
- Large Elder Dragon Bone
- Pure Dragon Blood
- Carves Guiding Lands:
- Elder Dragon Bone (Vein)
- Stormcaller Steel Wing
- Elder Spirit Bone (hardened)
- Hardened Steel Wing (hardened)
- Great Spirit Jewel (hardened)
- Elemental Weaknesses:
- Water 0
- Ice 0
- Dragon 2
- Fire 1
- Thunder 3
- Status Weaknesses:
- Poison 3
- Sleep 1
- Paralysis 2
- Explosion 1
- Stun 1
Description: The Kushala Daora has wings that are covered in metal. The dragon influences the wind and can create a strong wind barrier that repels hunters.
Combat Tip: The wind shield reflects projectiles from bows and bowguns. The shield is weakened when weapons are equipped with the Elder Seal. Additionally, the Kushala Daora’s vulnerability to poison is so high that if poisoned, its wind aura is suppressed.
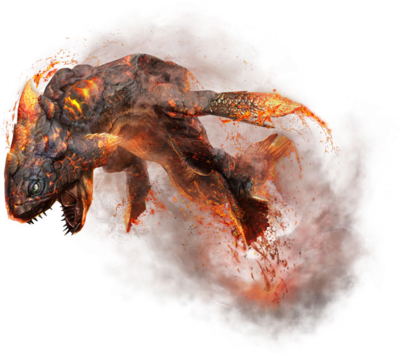
Lavasioth
- Type: Fish Wyvern
- Habitat: Home of the Elders
- Carves HR:
- Hell’s Sack
- Lavasioth Capture+
- Lavasioth Fin+
- Lavasioth Backplate
- Lavasioth Scale+
- Monster Hardbone
- Wyvern Gem
- Carves MR:
- Lavasioth Shard
- Lavasioth Cortex
- Lavasioth Hardfang
- Lavasioth Greatfin
- Large Wyvern Gem
- Blazing Sack
- Carves Guiding Lands:
- Heavy Dragonbone
- Glowing Magmafin
- Spiritvein Steelbone (hardened)
- Hardened Magmafin (hardened)
- Spiritvein Gem (hardened)
- Elemental Weaknesses:
- Water 3
- Thunder 1
- Ice 2
- Dragon 1
- Fire 1
- Status Weaknesses:
- Poison 3
- Sleep 1
- Paralysis 2
- Explosion 1
- Stun 2
Description: The Lavasioth is a Fish Wyvern that lives in lava – instead of water. The body of the Lavasioth is covered in lava. When the lava around its body hardens, it creates a strong armor. The Lavasioth also spits large fireballs at hunters, which shatter on the ground and become small projectiles.
Combat Tip: Hunters should bombard the Lavasioth with their strongest attacks when the Fish Wyvern emerges from the lava. At this point, the lava layer is still soft and the creature is vulnerable.
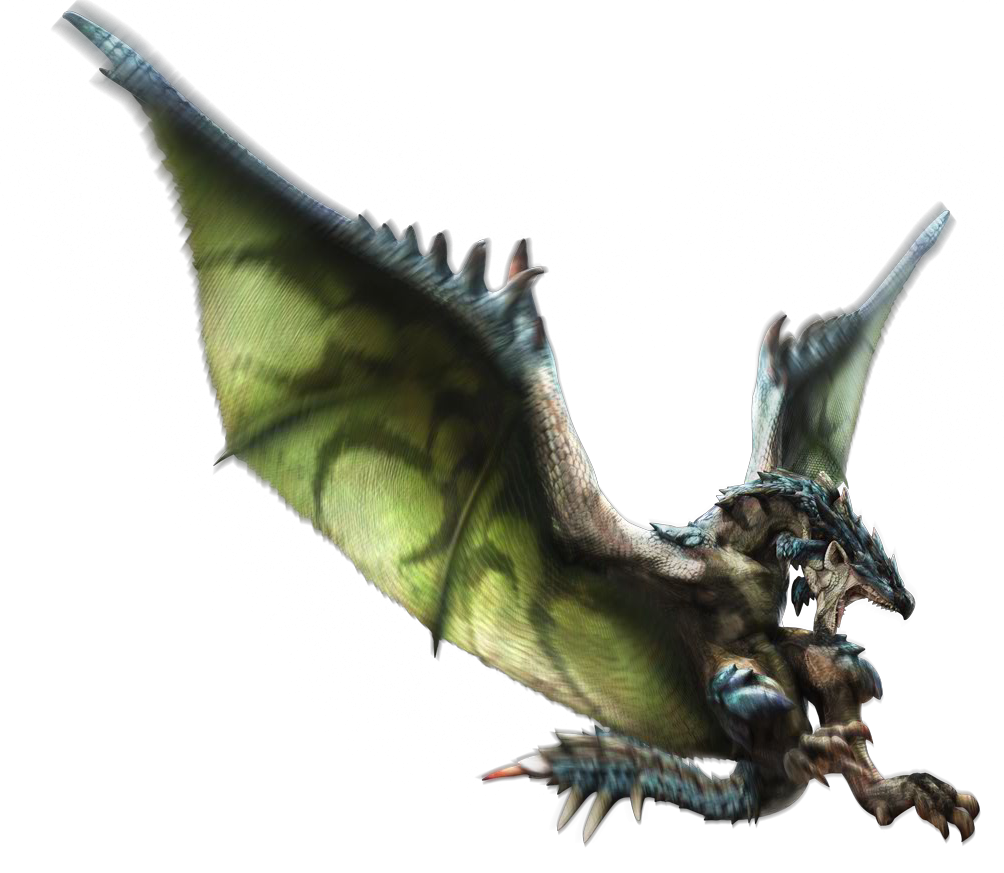
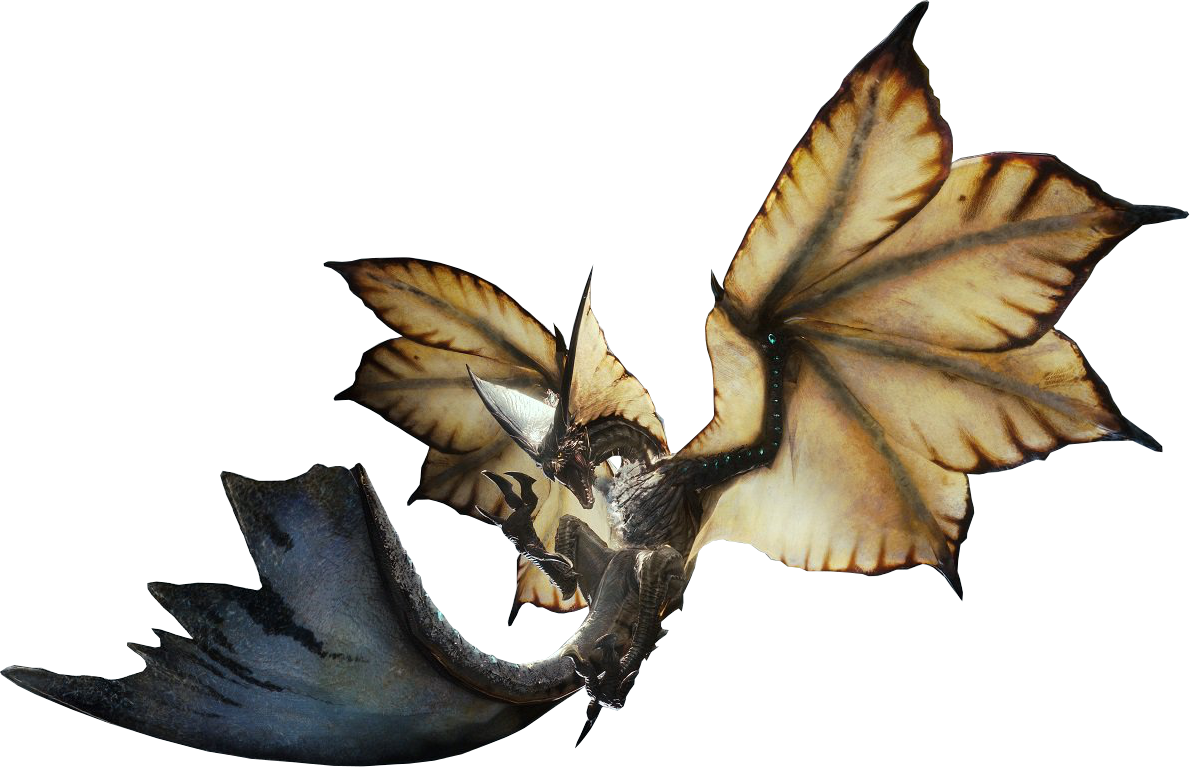
Legiana
- Type: Flight Wyvern
- Habitat: Coral Highlands
- Carve NR and HR:
- Legiana Tail Membrane
- Legiana Gem (HR)
- Legiana Wings
- Legiana Claw/+
- Legiana Hide/+
- Legiana Plate
- Legiana Scale/+
- Monster Bone+ (NR) / Monster Hard Bone (HR)
- Frost Sack
- Carve MR:
- Legiana Pelt
- Legiana Shard
- Legiana Hard Claw
- Legiana Wingmembrane
- Legiana Gem
- Legiana Shell
- Kryo Sack
- Carve Leading Land:
- Heavy Dragonbone
- Smooth Ice Hide
- Spirit Bone Steel (hardened)
- Hardened Ice Hide (hardened)
- Spirit Gem (hardened)
- Element Weaknesses
- Fire 2
- Water 1
- Thunder 3
- Ice 0
- Dragon 1
- Status Weaknesses
- Poison 3
- Sleep 2
- Paralysis 2
- Explosion 2
- Stun 2
Description: Legiana can move quickly through the air and attack with dangerous ice attacks. On their heads are thin horns connected to a membrane at the neck.
Combat Tip: If the membrane at the neck is severed, Legiana move significantly slower. Legiana are also susceptible to poison attacks.
Lunastra
- Type: Elder Dragon
- Habitat: Elder’s Home, Wildspire Waste
- Carves HR:
- Elder Dragon Bone
- Elder Dragon Blood
- Lunastra Gem
- Lunastra Wing
- Lunastra Mane
- Lunastra Horn
- Lunastra Back Plate
- Lunastra Scale+
- Lunastra Tail
- Carves MR:
- Lunastra Shard
- Lunastra Cortex
- Lunastra Mane+
- Lunastra Hardhorn
- Great Elder Dragon Jewel
- Lunastra Gem
- Lunastra Wing
- Lunastra Whip
- Great Elder Dragon Bone
- Pure Dragon Blood
- Carves Guiding Lands:
- Elder Dragon Bonechunk
- Azure Mane
- Elder Spiritbone (hardened)
- Hardened Azure Mane (hardened)
- Great Spiritstone (hardened)
- Elemental Weaknesses:
- Fire: 0
- Water: 1
- Thunder: 1
- Ice: 3
- Dragon: 2
- Status Weaknesses
- Poison: 1
- Sleep: 1
- Paralysis: 1
- Explosion: 2
- Stun: 2
Description: Lunastra is the female counterpart to Teostra and can, just like him, shroud herself in a flame aura. She uses her powerful teeth like flint to ignite a blue powder. The resulting aura continuously deals damage.
Combat Tip: Ice drinks and fire resistance are a must against Lunastra. Her fire attacks deal area damage with high range. Breaking Lunastra’s head significantly weakens her fire attacks. Flash Bombs are ineffective against Lunastra, as they do not fall from the sky through her. However, bombs neutralize the flammable powder and can negate the effect.
Monster Hunter World Guide: Defeat Lunstra and Recognize Its Weaknesses
Nergigante
- Type: Elder Dragon
- Habitat: Home of Elders, Wildspire Waste
- Loot:
- Immortal Dragon Scale
- Elder Dragon Bone
- Elder Dragon Blood
- Nergigante Gem
- Nergigante Horn+
- Nergigante Claw
- Nergigante Plate
- Nergigante Shell
- Nergigante Tail
- Elemental Weaknesses:
- Thunder 3
- Dragon 2
- Fire 1
- Water 1
- Ice 1
- Status Weaknesses:
- Poison 2
- Explosion 2
- Paralysis 2
- Sleep 2
- Stun 2
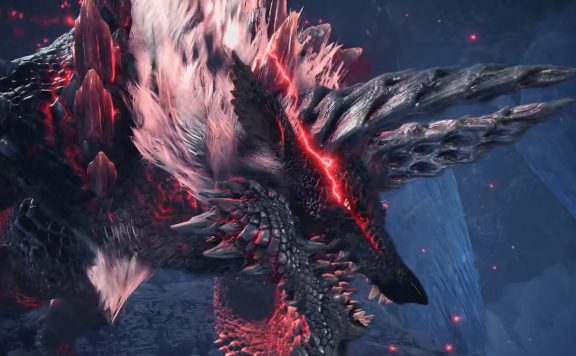
Description: The Nergigante is an Elder Dragon and can regenerate at an incredible speed. It is extremely aggressive and attacks anything that stands in its way. When the spikes on its arms or back break off, they grow back immediately. When they grow, the spikes are white and turn black once they are hardened. Once the spikes are hardened, they deal more damage.
Battle Tip: The Nergigante has an attack that slams the ground, breaking its spikes. At this stage, it is particularly vulnerable and should be attacked before the spikes grow back.
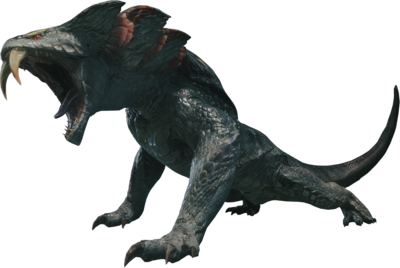
Odogaron
- Type: Talon Wyvern
- Habitat: Coral Highlands, Rotten Valley
- Carves NR and HR:
- Monster Bone+ (NR) / Monster Hardbone (HR)
- Nutritious Extract
- Odogaron Gem (HR)
- Odogaron Claw/+
- Odogaron Plate
- Odogaron Talon/+
- Odogaron Scale/+
- Odogaron Tail
- Odogaron Hide/+
- Carves MR:
- Hard Odogaron Hide
- Odogaron Shard
- Odogaron Hardclaw
- Odogaron Hardtalon
- Odogaron Gem
- Odogaron Shell
- Odogaron Whip
- Nutritious Extract
- Carves Master Rank:
- Heavy Dragonbone
- Deadly Claw
- Spiritsteel Bone (hardened)
- Hardened Claw (hardened)
- Spiritsteel Gem (hardened)
- Elemental Weaknesses:
- Fire 1
- Water 1
- Thunder 2
- Ice 3
- Dragon 1
- Status Weaknesses:
- Poison 1
- Sleep 2
- Paralysis 3
- Explosion 2
- Stun 2
Description: Odogaron are extremely agile and fast. Additionally, the lizards are highly aggressive and chase after hunters to pierce their powerful claws into their bodies.
Combat Tip: The claws of the Odogaron cause severe bleeding and should be avoided at all costs. Odogaron can be lured into traps with meat. Once the creature is trapped, it will have fits of rage that weaken it. Crouching helps against the bleeding.
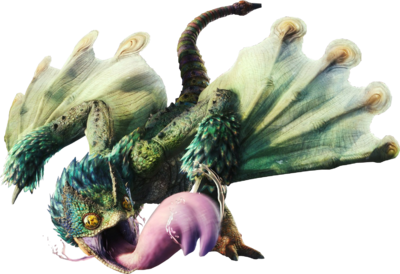
Paolumu
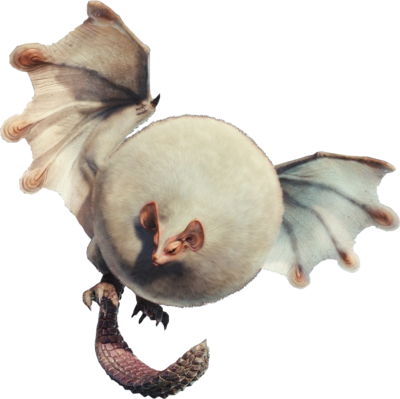
- Type: Flying Wyvern
- Habitat: Coral Highlands
- Carves NR and HR:
- Monster Bone L (NR) / Monster Bone Sharp (HR)
- Paolumu Hide (NR)
- Nutrient Extract
- Paolumu Wings
- Paolumu Pelt/+
- Paolumu Backplate/+
- Paolumu Scale/+
- Wyvern Gem (HR)
- Carves MR:
- Paolumu Thick Pelt
- Paolumu Shard
- Paolumu Cortex
- Paolumu Membrane Wings
- Large Wyvern Gem
- Wyvern Gem
- Nutrient Extract
- Carves Guiding Lands:
- Stygian Zinogre Bone
- Rubbery Carapace
- Spiritvein Bone (Hardened)
- Hardened Rubbery Carapace (Hardened)
- Spiritvein Gem (Hardened)
- Elemental Weaknesses
- Fire 3
- Water 0
- Thunder 2
- Ice 1
- Dragon 1
- Status Weaknesses
- Poison 2
- Sleep 2
- Paralysis 2
- Explosion 3
- Stun 3
Description: Paolumu fly through the Coral Highlands and feed on the floating eggs. The bat-like creatures can intentionally inflate their throat sacs and quickly deflate them to launch a wind attack. They also use their strong tails to slam down on hunters.
Battle Tip: Hunters should target the inflated throat sacs of Paolumu to limit its movement.
Pukei-Pukei
- Type: Bird Wyvern
- Habitat: Ancient Forest, Wildspire Waste
- Carves NR and HR:
- Monster Bone M (NR) / Monster Sharp Bone (HR)
- Pukei-Pukei Hide/+
- Pukei-Pukei Wing (HR)
- Pukei-Pukei Shell (HR)
- Pukei-Pukei Scale/+
- Pukei-Pukei Tail
- Poison Sack (NR) / Toxin Sack (HR)
- Bird Wyvern Gem
- Pukei-Pukei Quill (NR)
- Pukei-Pukei Armor (NR)
- Carves MR:
- Pukei-Pukei Cortex
- Pukei-Pukei Membrane Wing
- Pukei-Pukei Shard
- Pukei-Pukei Whip
- Large Pukei-Pukei Hide
- Rare Wyvern Gem
- Deadly Poison Sack
- Carves Guiding Lands:
- Grim Dragonbone
- Fragrant Poison Sack
- Spiritvein Solidbone (hardened)
- Hardened Poison Sack (hardened)
- Spiritvein Gem Shard (hardened)
- Elemental Weaknesses
- Fire 2
- Water 0
- Thunder 3
- Ice 2
- Dragon 1
- Status Weaknesses
- Poison 1
- Sleep 3
- Paralysis 3
- Explosion 2
- Stun 2
Description: Pukei-Pukei store a portion of their food in their mouth and tail. They combine the food with their venom, allowing them to spray poison from their mouth and tail.
Combat Tip: Pukei-Pukei are timid and flee from large monsters, which hunters can take advantage of. The tail of the Pukei-Pukei should be severed as quickly as possible so that it can no longer spray poison from it. The head, back, tail, and wings are vulnerable.
Radobaan
- Type: Fighting Wyvern
- Habitat: Valley of Corruption
- Carves NR and HR:
- Solid Bone (NR) / Dragon Bone Relic (HR)
- Monster Bone L (NR) / Quality Bone (HR)
- Sleep Sac (NR) / Dream Sac (HR)
- Radobaan Mark (NR)
- Crooked Bone
- Monster Sharp Bone
- Radobaan Medulla
- Radobaan Oil Armor
- Radobaan Shell (NR)
- Radobaan Scale/+
- Wyvern Bone
- Wyvern Gem
- Carves MR:
- Radobaan Cortex
- Radobaan Shard
- Radobaan Oil Armor+
- Radobaan Medulla
- Large Wyvern Gem
- Wyvern Gem
- Stun Sac
- Carves Guiding Lands:
- Grim Dragon Vein Bone
- Ink-Stained Oil Armor+
- Hardened Oil Armor+ (hardened)
- Spirit Vein Shard Bone (hardened)
- Spirit Vein Gem Shard (hardened)
- Element Weaknesses:
- Fire 1
- Water 1
- Thunder 1
- Ice 2
- Dragon 3
- Status Ailments:
- Poison 2
- Sleep 1
- Paralysis 2
- Explosion 3
- Stun 2
Description: The Radobaan rolls in the bones from the Valley of Corruption to use them as armor. When he attacks, he curls up into a ball and hurls himself at his enemies.
Combat Tip: To weaken the Radobaan, the bone armor must be destroyed. If the Radobaan is attacked while curled up, it will be thrown off balance.
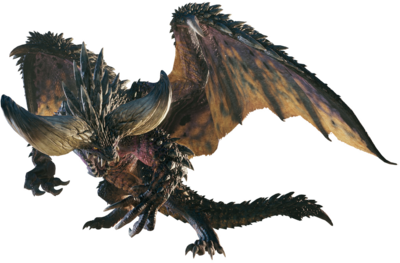
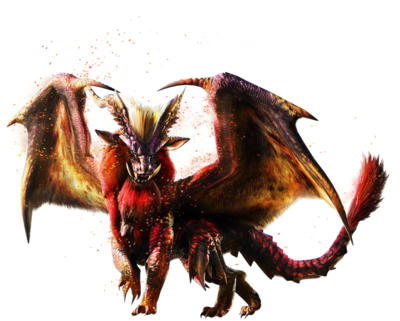
Rathalos
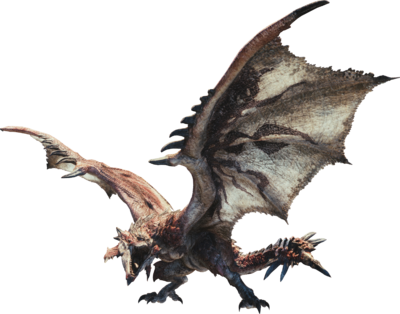
- Type: Flying Wyvern
- Habitat: Ancient Forest
- Loot:
- Flame Sac (NR) / Hellfire Sac (HR)
- Monster Bone+ (NR) / Monster Hardbone (HR)
- Rathalos Scale/+
- Rathalos Wing
- Rathalos Medulla
- Rathalos Plate
- Rathalos Ruby
- Rathalos Carapace
- Rathalos Tail
- Rathalos Wing Talon
- MR Loot:
- Rathalos Shard
- Rathalos Cortex
- Rathalos Wing Membrane
- Rathalos Medulla
- Rathalos Ruby
- Rathalos Shell
- Rathalos Whip
- Rath Wing Talon+
- Fire Sac
- Guiding Lands Loot:
- Heavy Dragonbone
- King Scale
- Spiritvein Steelbone (hardened)
- Hardened Red Scale (hardened)
- Spiritvein Gem (hardened)
- Element Weaknesses:
- Fire 0
- Water 1
- Thunder 2
- Ice 1
- Dragon 3
- Status Weaknesses:
- Poison 1
- Sleep 2
- Paralysis 2
- Explosion 1
- Stun 2
Description: Rathalos is highly aggressive and spews deadly flames from its mouth that can pierce its enemies like projectiles. The claws on its feet are highly toxic, and Rathalos plunges from the sky to drive them into the flesh of its foes.
Combat Tip: It is possible to bring Rathalos down from the air with a slinger or lightning bomb. Its wings are particularly vulnerable and should be targeted as soon as the creature is on the ground.
Rathian
- Type: Flight Wyvern
- Habitat: Wildswept Wasteland, Ancient Forest
- Rewards NR and HR:
- Flame Sac (NR) / Hell Sac (HR)
- Monster Bone L (NR) / Monster Sharp Bone (HR)
- Rath Wing Talon
- Rathian Hide
- Rathian Plate
- Rathian Ruby
- Rathian Carapace
- Rathian Scale/+
- Rathian Spike/+
- Rewards MR:
- Rathian Cortex
- Rathian Shard
- Rathian Membrane
- Rathian Over Spike
- Rathian Ruby
- Rathian Shell
- Rath Wing Talon+
- Flame Sac
- Rewards Guiding Lands:
- Grim Dragonbone
- Queen Scale
- Spiritvein Crystalbone (hardened)
- Hardened Green Scale (hardened)
- Spiritvein Gemstone Shard (hardened)
- Elemental Weaknesses:
- Fire 0
- Water 1
- Thunder 2
- Ice 1
- Dragon 3
- Status Weaknesses:
- Poison 1
- Sleep 2
- Paralysis 2
- Explosion 1
- Stun 3
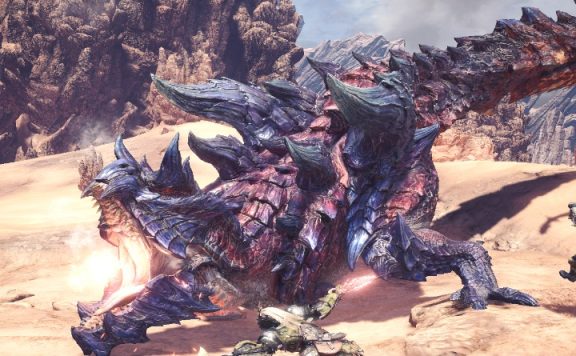
Description: The Rathian is the female counterpart to the Rathalos. Although it can fly, it primarily stays on the ground and fights from there. The Rathian can use its tail to poison opponents.
Battle Tip: The Rathian’s tail should be severed as quickly as possible to prevent these poison attacks. The lady also has the ability to unleash multiple fire bursts that ignite the ground beneath her. It is advisable to bring armor with fire resistance.
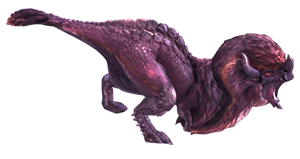
Pink Rathian
- Type: Fly wyvern
- Habitat: Wildspire Waste, Coral Highlands
- Carves HR:
- Hellfire Sac
- Monster Hardbone
- Rath Wing Talon
- Rathian Tissue
- Rathian Plate
- Rathian Ruby
- Rathian Spike+
- Pink Rathian Carapace
- Pink Rathian Scale+
- Carves MR:
- Pink Rathian Cortex
- Pink Rathian Shard
- Rathian Membrane
- Rathian Overbarb
- Rathian Ruby
- Rath Shell
- Rath Wing Talon+
- Blazing Sac
- Carves Master Rank:
- Grim Dragonbone
- Pink Scale
- Spiritbone Shard (hardened)
- Hardened Pink Scale (hardened)
- Spiritstone Shard (hardened)
- Elemental Weaknesses:
- Fire 0
- Water 1
- Thunder 2
- Ice 1
- Dragon 3
- Status Weaknesses:
- Poison 1
- Sleep 2
- Paralysis 3
- Explosion 1
- Stun 2
Description: The Pink Rathian is a subspecies of Rathian, having a more robust body and more health and attack power. It is more aggressive than the common Rathian and has more attacks and movements. The pink Rathian can move somewhat vertically and fires its fire attacks more often and faster.
Combat Tip: As with the common Rathian, hunters should also try to sever the poisonous tail of the pink Rathian as quickly as possible.
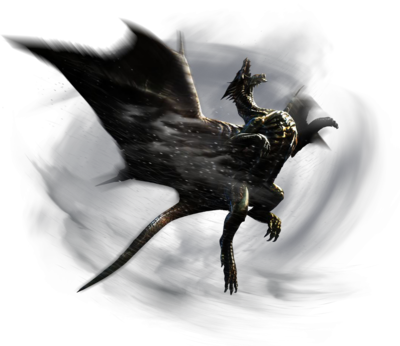
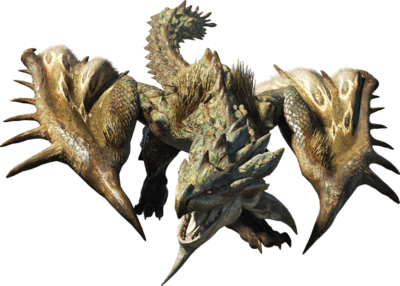
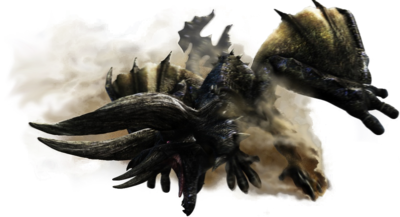
Black Diablos
- Type: Flight Wyvern
- Habitat: Wilderness Ruins
- Carves HR:
- Black Diablos Carapace+
- Black Twisted Horn+
- Blos Medulla
- Diablos Hardtail
- Diablos Claw
- Monster Hardbone
- Black Diablos Carapace
- Sprint Extract
- Wyvern Gem
- Carves MR:
- Black Diablos Crest
- Black Diablos Cortex
- Diablos Tail Guard+
- Diablos Medulla
- Large Wyvern Gem
- Wyvern Gem
- Black Twisted Horn
- Sprint Extract
- Diablos Hardhorn
- Carves Guiding Lands:
- Dragonbone Steelbone
- Black Twisted Tyrant Horn
- Spiritvein Steelbone (hardened)
- Black Twisted Hardhorn (hardened)
- Spiritvein Gem (hardened)
- Elemental Weaknesses:
- Water 2
- Thunder 1
- Ice 3
- Dragon 2
- Status Weaknesses:
- Poison 2
- Sleep 2
- Paralysis 3
- Explosion 2
- Stun 1
Description: The Black Diablos is considered one of the most aggressive monsters, quickly falling into blind rage. The Black Diablos, like the Diablos, also has an attack where it burrows and strikes from the ground.
Battle Tip: Unlike the Diablos, it can perform its jump attack vertically. This makes it even harder for hunters to evade the attack. Hunters should try to run diagonally away from the hole the Black Diablos creates in the ground.
Teostra
- Type: Elder Dragon
- Habitat: Home of Elders, Wilds of the Tower
- Rewards HR:
- Elder Dragon Bone
- Elder Dragon Blood
- Fire Dragon Scale+
- Teostra Gem
- Teostra Hide
- Teostra Horn+
- Teostra Mane+
- Teostra Powder
- Teostra Backplate
- Teostra Tail
- Rewards MR:
- Inferno Shard
- Teostra Cortex
- Teostra Hardclaw
- Teostra Mane+
- Great Elder Dragon Jewel
- Teostra Gem
- Teostra Whip
- Great Elder Dragon Bone
- Pure Dragon Blood
- Rewards Guiding Lands:
- Elder Dragon Bone Shard
- Inferno Mane
- Elder Spirit Bone (hardened)
- Hardened Crimson Mane (hardened)
- Great Spirit Jewel (hardened)
- Elemental Weaknesses:
- Fire 0
- Water 3
- Thunder 1
- Ice 3
- Dragon 1
- Status Weaknesses:
- Poison 2
- Sleep 1
- Paralysis 1
- Explosion 1
- Stun 2
Description: The Teostra is always male and can create a fire aura, by dispersing black scale dust around it, which explodes.
Combat Tip: This aura deals constant damage to hunters, so they should avoid it. A weapon with Elderseal weakens the Elder Dragon.
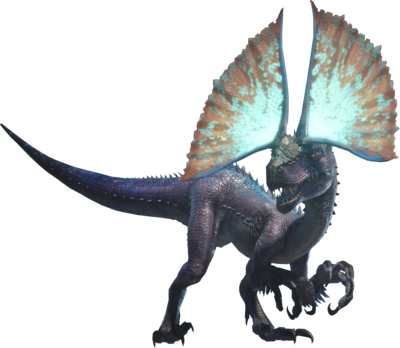
Tobi-Kadachi
- Type: Zinogre
- Habitat: Ancient Forest
- Materials NR and HR:
- Thunderbug (NR) / Thunderclap (HR)
- Monster Bone M (NR) / Monster Sharp Bone (HR)
- Tobi-Kadachi Electrode/+
- Tobi-Kadachi Claw/+
- Tobi-Kadachi Membrane
- Tobi-Kadachi Pelt/+
- Tobi-Kadachi Scale/+
- Wyvern Gem
- Materials MR:
- Tobi-Kadachi Densipelt
- Tobi-Kadachi Membrane+
- Tobi-Kadachi Shard
- Tobi-Kadachi Cathode
- Tobi-Kadachi Hardclaw
- Large Wyvern Gem
- Shock Trap
- Materials Leitland:
- Grim Dragonbone
- Brilliant Cathode
- Spiritbone (hardened)
- Hardened Cathode (hardened)
- Spirit Gem Fragment (hardened)
- Elemental Weaknesses
- Fire 2
- Water 3
- Thunder 0
- Ice 2
- Dragon 1
- Status Weaknesses
- Poison 3
- Sleep 2
- Paralysis 2
- Explosion 2
- Stun 2
Description: Tobi-Kadachi gathers static electricity by rubbing its fur against trees. It has a thin layer of skin between its legs and can glide long distances like a flying squirrel.
Combat Tip: Hunters should try to prevent Tobi-Kadachi from rubbing its fur against trees. The electricity enhances its attacks. When the creature is statically charged, hunters should also be careful to dodge Tobi’s tail.
Tzitzi-Ya-Ku
- Type: Bird Wyvern
- Habitat: Coral Highlands
- Low Rank and High Rank Loot:
- Monster Bone L (Low Rank) / Monster Bone+ (High Rank)
- Sprint Extract
- Tzitzi-Ya-Ku Scale (Low Rank)
- Tzitzi-Ya-Ku Claw/+
- Tzitzi-Ya-Ku Hide/+
- Tzitzi-Ya-Ku Scale/+
- Tzitzi-Ya-Ku Light Organ/+
- Bird Wyvern Gem
- Master Rank Loot:
- Tzitzi-Ya-Ku Shard
- Tzitzi-Ya-Ku Pelt
- Tzitzi-Ya-Ku Hard Claw
- Tzitzi-Ya-Ku Light Membrane
- Rare Wyvern Gem
- Sprint Extract
- Carving Loot:
- Grim Dragonbone
- Shimmering Light Organ+
- Elemental Weaknesses
- Fire 2
- Water 2
- Thunder 3
- Ice 3
- Dragon 2
- Status Weaknesses
- Poison 2
- Sleep 2
- Paralysis 2
- Explosion 2
- Stun 2
Description: Tzitzi-Ya-Ku use powerful hind legs to attack and deliver strong kicks. They are quite low on the food chain, which is why Tzitzi-Ya-Ku use their dark skin to hide in the underbrush. The fans on their head can create a blinding flash. Those who see the flash will be dazed for a while and unable to move.
Combat Tip: If you attack the fans on its head, you limit the range of its flash.
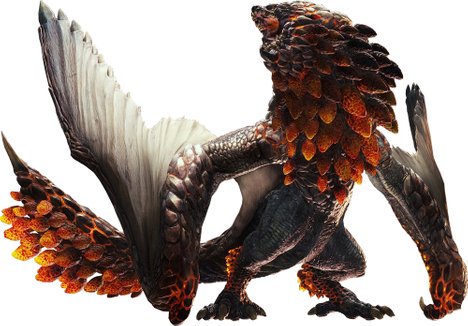
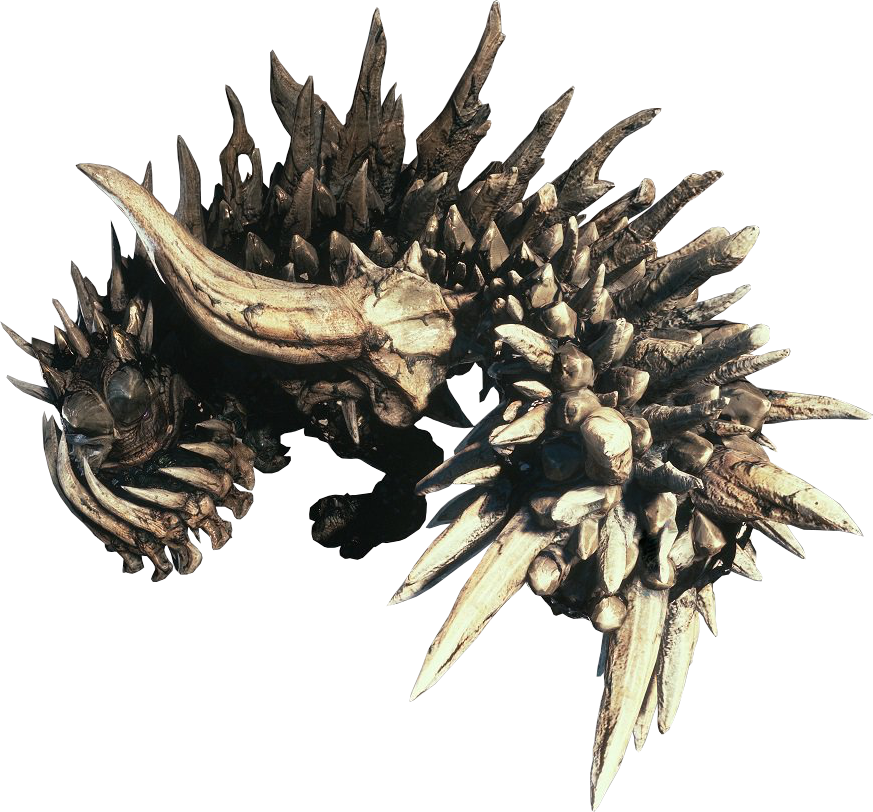
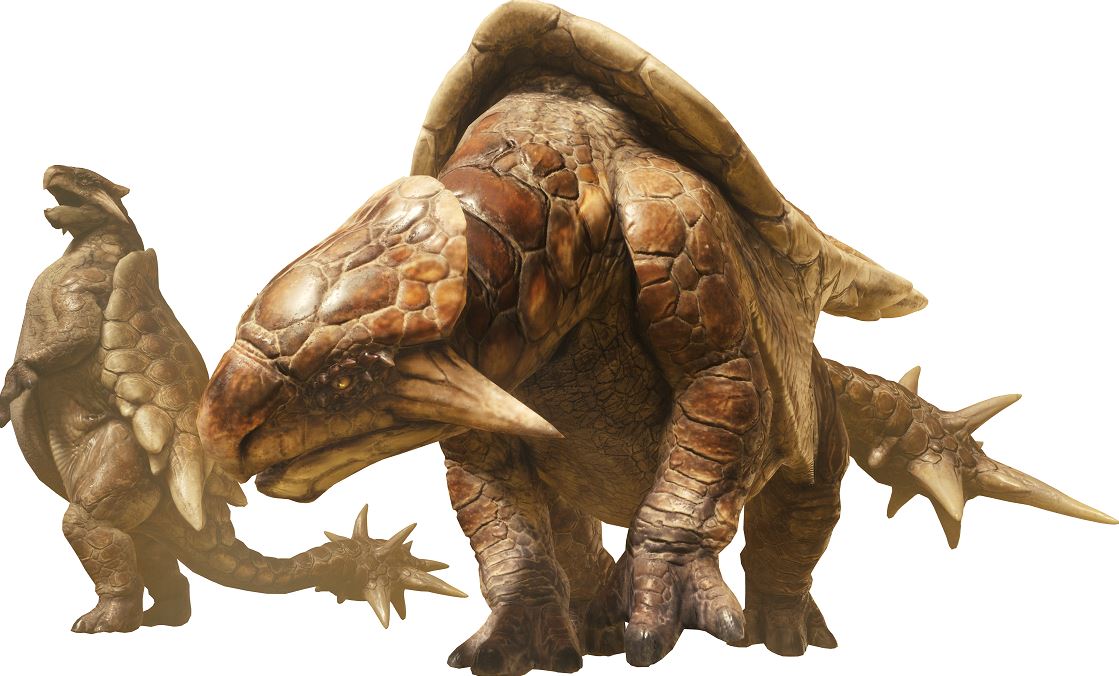
Uragaan
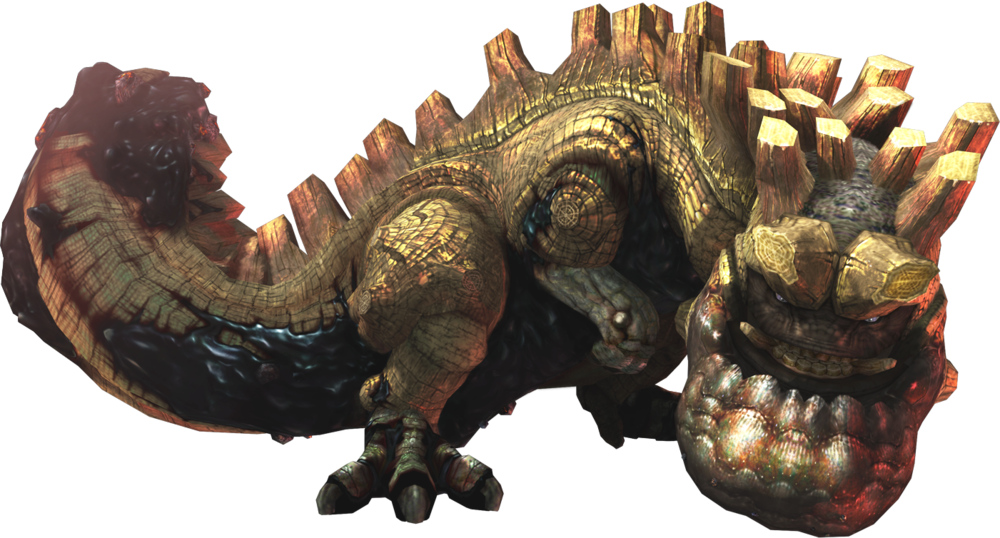
- Type: Fighting Wyvern
- Habitat: Home of the Elders
- Carve HR:
- Firestone
- Hellfire Sac
- Carbalite Ore
- Lavacore
- Monster Hardbone
- Uragaan Jaw
- Uragaan Ruby
- Carve MR:
- Uragaan Cortex
- Uragaan Shard
- Uragaan Shield+
- Uragaan Marrow
- Uragaan Pallium
- Uragaan Ruby
- Blazing Sac
- Carve Master Rank:
- Heavy Dragonbone
- Metal Shield
- Spiritbond Steelbone (Hardened)
- Hardened Shield (Hardened)
- Spiritbond Gem (Hardened)
- Elemental Weaknesses:
- Water 3
- Thunder 1
- Ice 2
- Dragon 2
- Status Weaknesses:
- Poison 3
- Sleep 1
- Paralysis 3
- Explosion 2
- Stun 2
Description: The Uragaan has a similar attack pattern to the Radobaan and rolls into a ball to attack. Its back is covered with hard crystals that protect it. Once the crystals are broken, they cannot regrow and the Uragaan becomes weakened in defense.
Combat Tip: The Uragaan has an attack where it slams its massive chin into the ground. This can create explosions and release a dangerous gas. The gas makes hunters fall asleep when the Uragaan is not yet angry. When it is angry, the gas deals fire damage to the hunters.
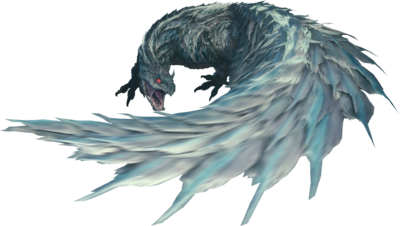
Vaal Hazak
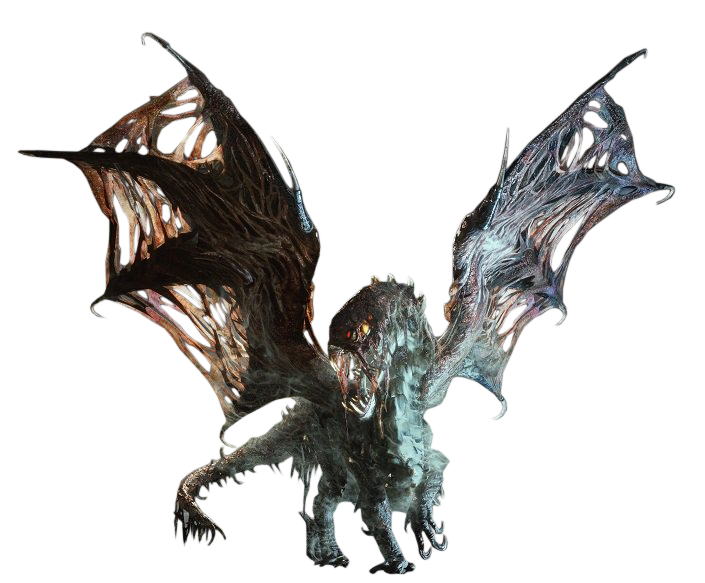
- Type: Elder Dragon
- Habitat: Vale of Corruption
- Loot:
- Elder Dragon Blood
- Elder Dragon Bone
- Vaal Hazak Gem
- Vaal Hazak Wing
- Vaal Hazak Claw
- Vaal Hazak Membrane
- Vaal Hazak Gloomfang+
- Vaal Hazak Backplate
- Vaal Hazak Tail
- Fallen Scale
- Elemental Weaknesses:
- Fire 3
- Water 0
- Thunder 1
- Ice 2
- Dragon 3
- Status Weaknesses:
- Poison 1
- Sleep 1
- Paralysis 1
- Blast 2
- Stun 2
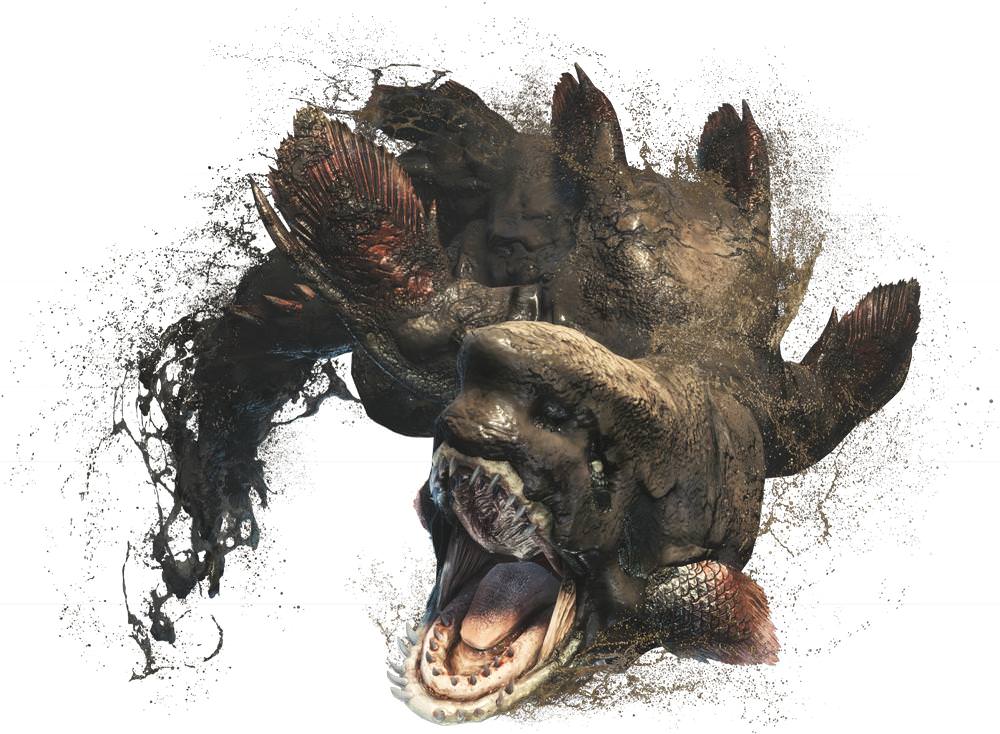
Description: Vaal Hazak lives in the Vale of Corruption, emitting a deadly mist that suits its environment. The gas of Vaal Hazak halves the life of hunters, regardless of which life pool they draw from. If they eat a large meal beforehand that boosts their health, this boost is nullified by the gas.
Combat Tip: Hunters should always be stocked with plenty of Nullberries when facing this beast. Consuming Nullberries weakens the poison of the Elder Dragon.
Xeno’jiiva
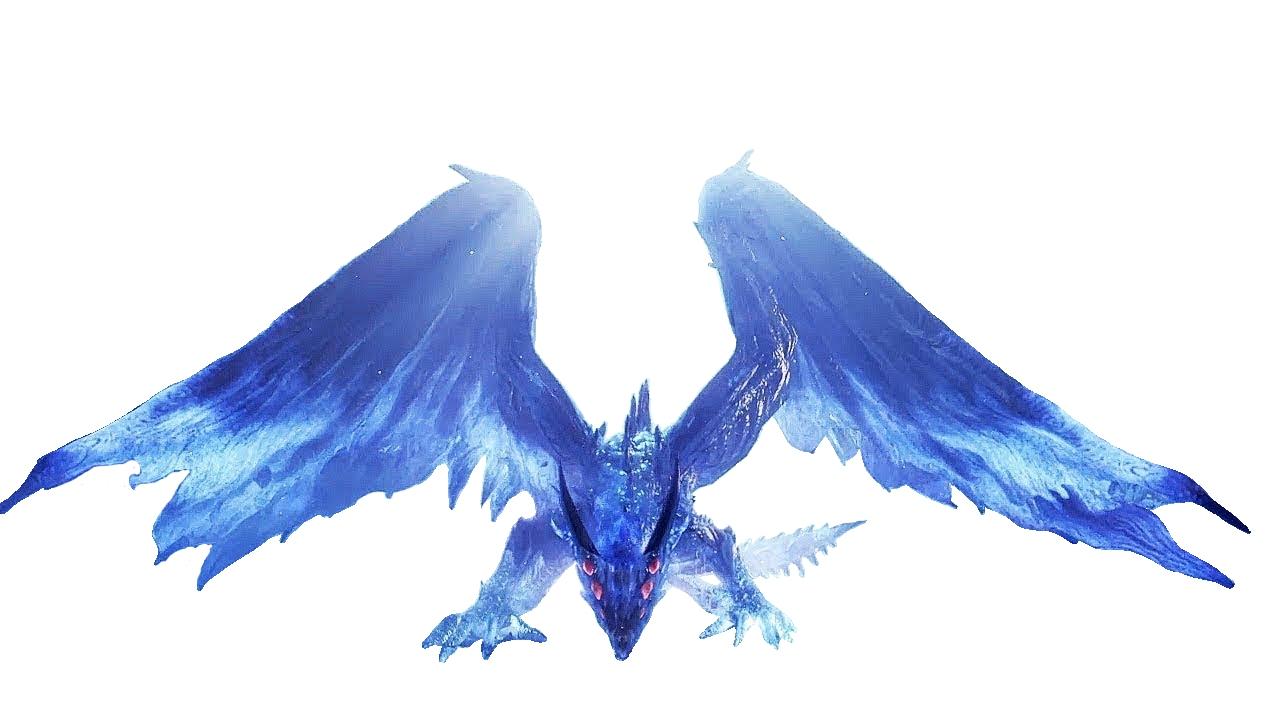
- Type: Elder Dragon
- Habitat: Home of the Elders
- Loot:
- Elder Dragon Blood
- Elder Dragon Bone
- Xeno’Jiiva Mantle
- Xeno’Jiiva Gem
- Xeno’Jiiva Wing
- Xeno’Jiiva Horn
- Xeno’Jiiva Claw
- Xeno’Jiiva Shell
- Xeno’Jiiva Tail
- Xeno’Jiiva Soulscale
- Elemental Weaknesses:
- Fire 2
- Water 2
- Thunder 2
- Ice 2
- Dragon 2
- Status Weaknesses:
- Poison 3
- Sleep 0
- Paralysis 1
- Explosion 2
- Stun 1
Description: Xeno’jiiva must be defeated in the highest 9-star quest to date. The Xeno’jiiva has sluggish energy attacks, but be careful! If the energy beam catches the player, the hunter will be knocked out immediately.
Combat Tip: The fight with Xeno’jiiva is divided into two phases.
- In the first phase, hunters should focus on the tail of the creature and try to sever it. At this point, Xeno’jiiva is still close to the ground, making it easier to reach its tail.
- In the second phase, the dragon rises to an elevated position. Here, hunters should focus on the legs, as they can break. Once the legs are broken, hunters can turn their attention to the head. If this breaks, they have a chance for an item drop. The wings are also a weak point.
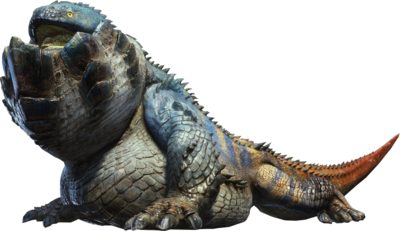
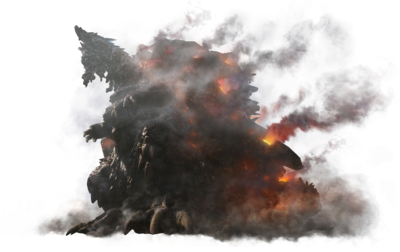
Zorah Magdaros
- Type: Elder Dragon
- Habitat: Only encountered during the quest “The Volcanic Colossus.”
- Loot:
- Dragonite Ore
- Light Crystal
- Zorah Magdaros Gem (HR)
- Zorah Magdaros Heat Scale
- Zorah Magdaros Crest
- Zorah Magdaros Magma
- Zorah Magdaros Pleura
- Zorah Magdaros Shell
- Elemental Weaknesses:
- Fire 0
- Water 3
- Thunder 1
- Ice 2
- Dragon 3
- Status Weaknesses:
- Poisons 0
- Sleep 0
- Paralysis 0
- Explosion 0
- Stun 0
Description: The Zorah Magdaros is a gigantic Elder Dragon resembling a volcano. It is so enormous that hunters must attack it with special weapons such as cannons and ballistae.
Combat Tip: During the quest, hunters land on the back of the Zorah Magdaros, where they must attack the Magma cores. They are always located in the same spots. It is also recommended to focus on the head of the Zorah Magdaros when hunters are shooting at it with cannons.
Small Monsters in Monster Hunter World
In this section, we introduce the small monsters that are not too difficult to defeat.
Apceros
- Habitat: Wildswept Wastes
- Loot: Raw Meat
Description: Apceros always travel in groups. Their common attacks can slow down hunters, but they do not have elemental attacks. On the back of this monster, there is sometimes the Fluffy Chicken, which gives particularly many research points and a trophy.
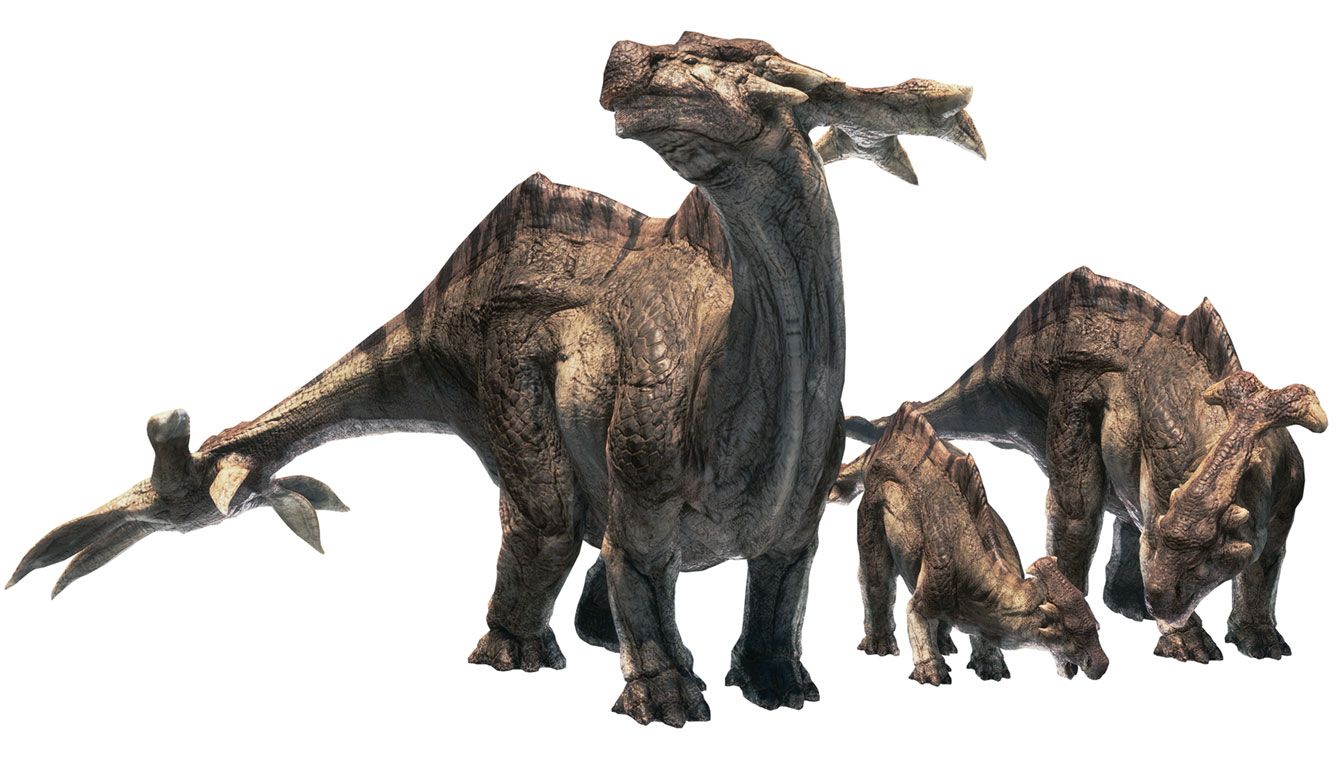
Aptonoth
- Habitat: Ancient Forest
- Loot: Raw Meat
Description: The meat of the Aptonoths is considered a delicacy and is said to be very rich. They always travel in herds and are a rather timid species. As soon as a member of the herd is attacked, other Aptonoths flee.
Barnos
- Habitat: Home of the Elders
- Loot: Barnos Claw, Barnos Hide+, Sturdy Bone, Flying Wyvern Hide, Monster Bone S, Nullberry, Raw Meat
Description: Barnos are peaceful and only attack when they are assaulted.
Gajalaka
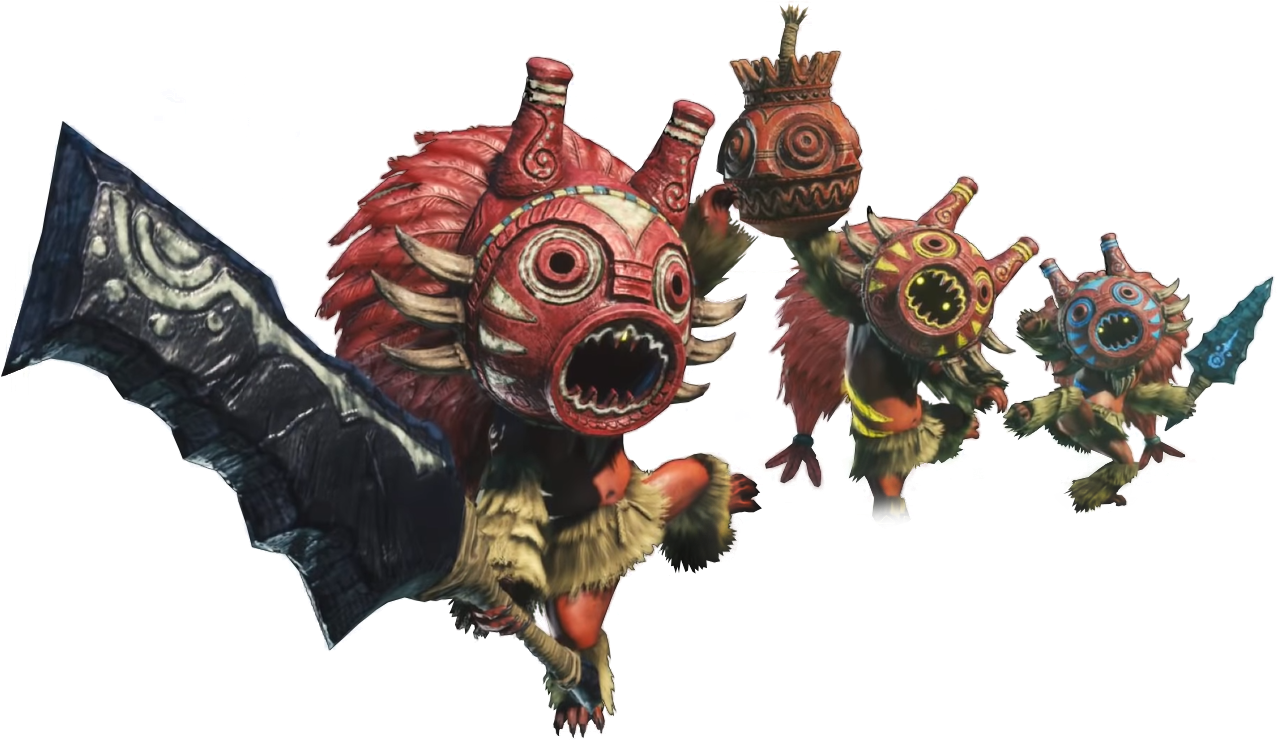
- Habitat: Home of the Elders, Ancient Forest, Wildspire Waste, Coral Highlands, Coral Highlands, Valley of Decay, Eldorado Caves
- Loot: Poisons Knife, Sleep Knife, Paralysis Knife, First Aid, Ration – The items that hunters receive from Gajalaka disappear when the mission ends.
Description: Even though Gajalaka are generally weaker monsters, hunters should not underestimate them. They are extremely aggressive and attack immediately when someone is near. They carry Molotov bombs and various knifes with coatings. They can also knock experienced hunters unconscious.
Description: Barnos are peaceful and only attack when provoked.
Gajau

- Habitat: Ancient Forest, Wildspire Waste
- Loot: Iron Ore, Gajau Fur, Gajau Skin, Machalite Ore, Dragonite Ore, Gajau Scale, Large Gajau Fur, Gajau Pelt, Steel Gajau Fur
Description: Gajau are extremely aggressive and attack anything that comes near. They can jump out of the water and even attack their prey on land. Afterwards they slowly glide back into the water
Gastodon
- Habitat: Home of the Elders
- Loot: Gastodon Horn, Gastodon Carapace
Description: These monsters are easily provoked and will attack monsters that are twice their size. They are weak against thunder.
Girros
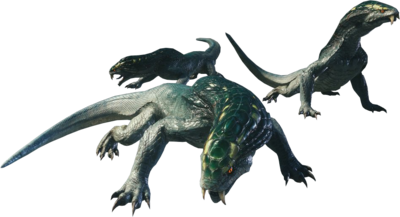
- Habitat: Valley of Decay
- Loot: Girros Hide/+, Girros Fang, Girros Scale/+, High-Quality Bone, Stinger Claw, Sturdy Bone, Sharp Claw, Girros Shard, Robust Claw
Description: Girros have two sharp teeth in front of their mouths like the Great Girros that can cause paralysis effects. They can be attracted and poisoned with rotten meat.
Grimalkyne
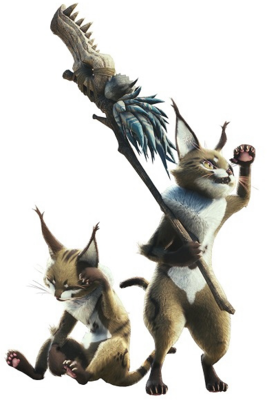
- Habitat: Home of the Elders, Ancient Forest, Wildspire Waste, Coral Highlands, Valley of Corruption
Description: The Grimalkyne are wild but intelligent Felyne that you can encounter in various areas. If you befriend them, you will receive special tools for your cat companion: That’s how you get all 5 gadgets for your Palico in Monster Hunter World
Hornetaur
- Habitat: Valley of Corruption
- Loot: Hornetaur Head, Hornetaur Inner Wing, Hornetaur Backplate, Monster Broth, Hornetaur Dagger Wing, Monster Essence
Description: Hornetaurs are small insects that always defend their territory and attack anything that intrudes. To get their loot, hunters can best attack them with the slingshot.
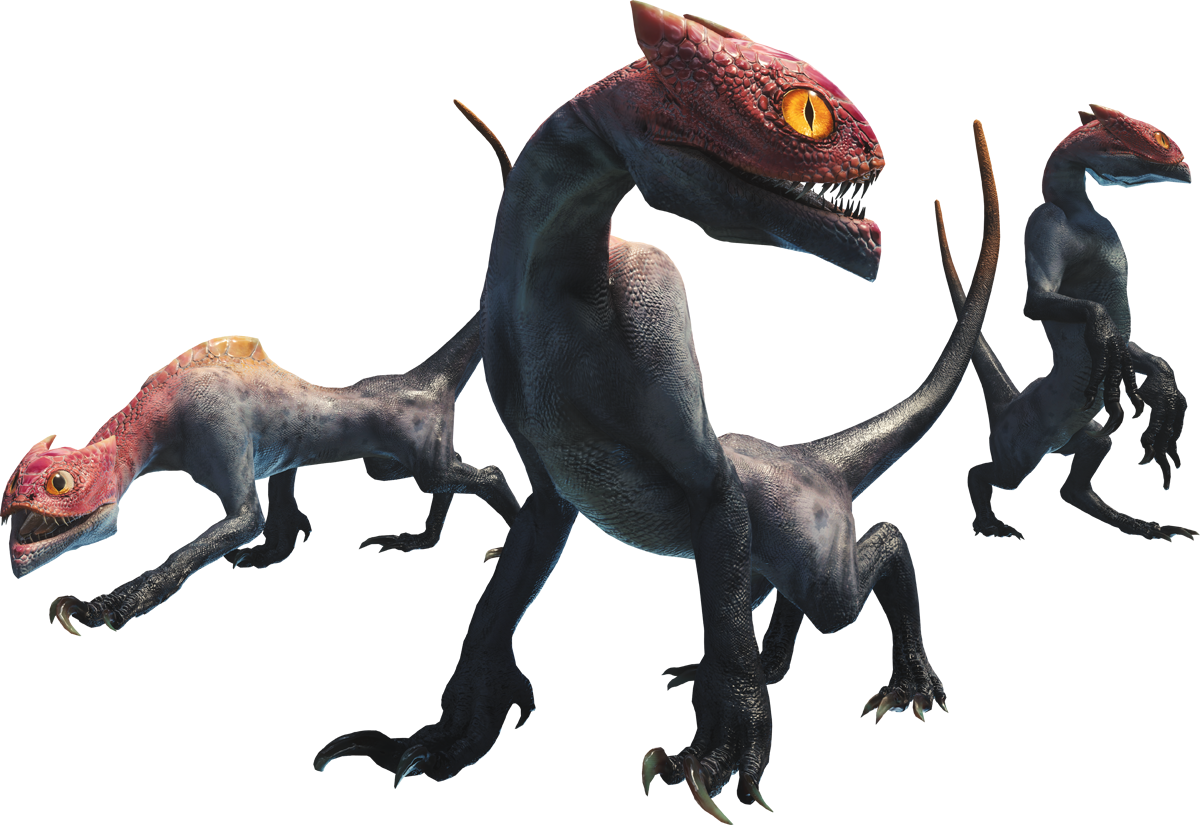
Jagras
- Habitat: Ancient Forest
- Loot: Solid Bone, Jagras Hide/+, Jagras Scales, Stinger Claw, Monster Bone S, Sharp Claw, Jagras Fragment, Robust Claw
Description: Jagras can move swiftly and live in packs. They always hunt together and try to surround their prey. Jagras are attracted to raw meat that hunters drop.
Kelbi
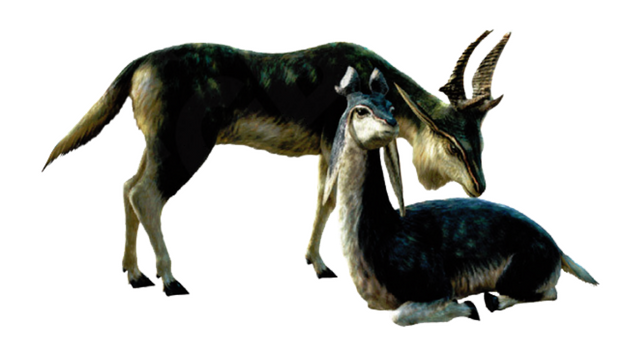
- Habitat: Wildspire Waste, Coral Highlands
- Loot: High-Quality Pelt, Kelbi Horn, Raw Meat, Warm Pelt, Fine Pelt, White Liver
Description: Kelbis are peaceful and herbivorous monsters. Their warm pelts are particularly sought after by hunters, and their horns are said to have healing powers.
Kestodon
- Habitat: Ancient Forest, Wildturm Waste
- Loot: Kestodon Shell, Kestodon Scale, Solid Bone, Kestodon Plate, Monster Bone S, Kestodon Layer Cover, Kestodon Scale
Description: Kestodon have a gentle temperament and only become aggressive when attacked. Male Kestodon have a crest on their head, which they use to butt other males. Female Kestodon do not have a crest and are different in color from the males.
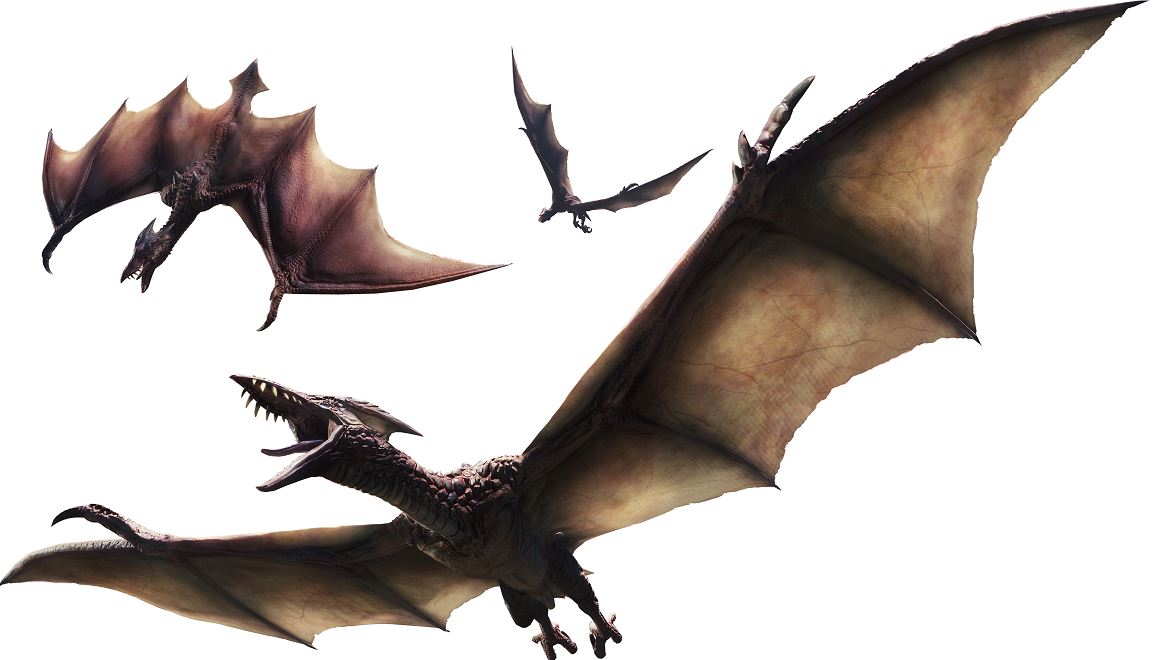
Mernos
- Habitat: Ancient Forest, Wildturm Waste
- Loot: Solid Bone, Flying Dragon Hide/+, High-Quality Fur, Raw Meat, Monster Bone S, Raw Meat, Warm Fur, Flying Dragon Fine Hide
Description: Mernos are small flying dragons and related to Noios and Rafinosu.
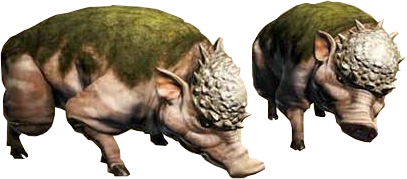
Mosswine
- Habitat: Ancient Forest, Wildturm Waste, Valley of Decay
- Loot: Moss Hide
Description: The Mosswine has a keen sense of smell and feeds on mushrooms. Therefore, anyone searching for mushrooms just needs to follow the Mosswine.
Noios

- Habitat: Wildturm Waste
- Loot: Flying Dragon Hide/+, High-Quality Fur, Scream Sack, Monster Bone S, Warm Fur, Flying Dragon Fine Hide
Description: Noios can mimic the scream of the Diablos and lure it in when feeling threatened.
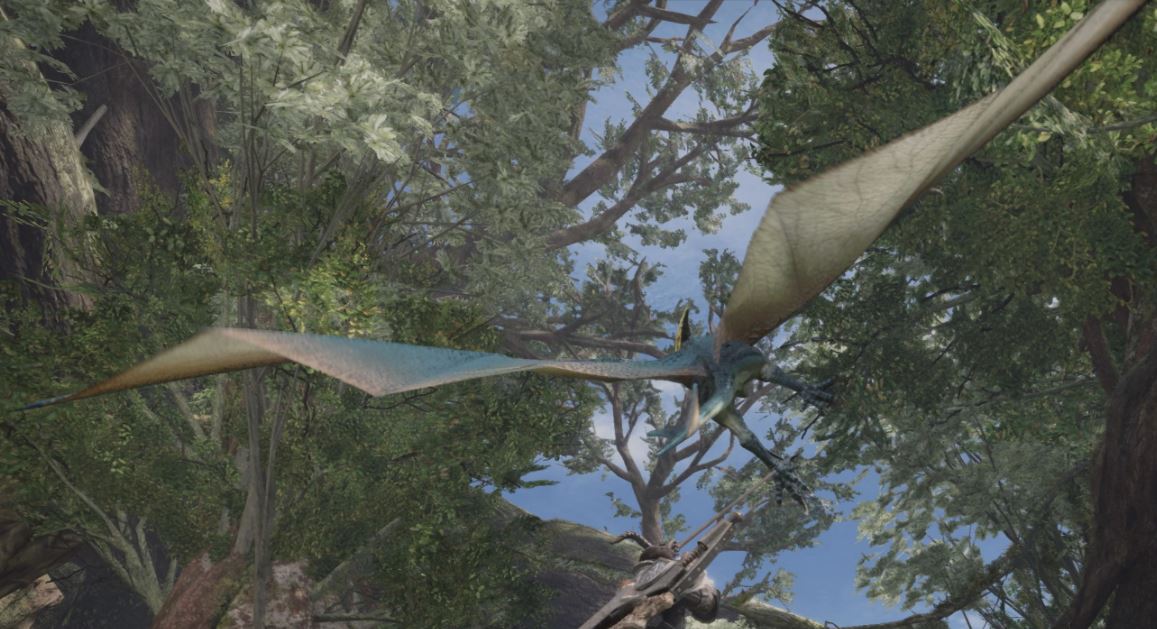
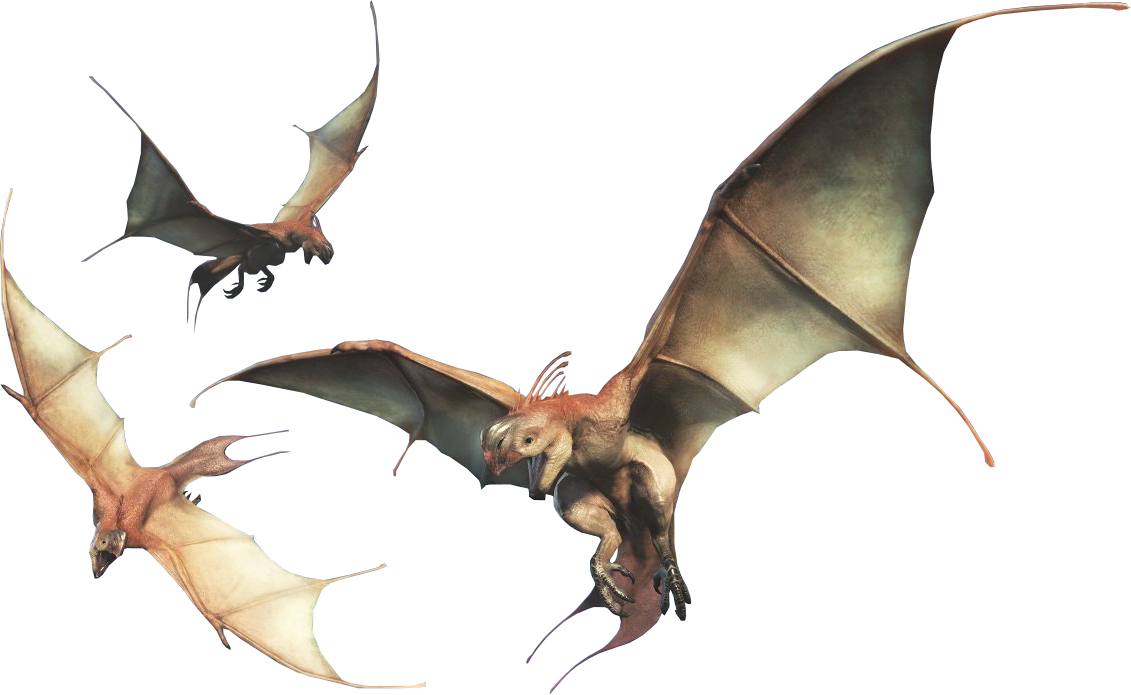
Raphinos
- Habitat: Coral Highlands, Valley of Despair
- Loot: Solid Bone, Flying Wyvern Hide/+, Curved Bone, Monster Bone+, Nullberry, Raw Meat, Flying Wyvern Fin
Description: These Flying Wyverns gather and are peaceful. They collectively steal the eggs of larger monsters.
Shamos
- Habitat: Coral Highlands
- Loot: Coral Crystal, Monster Bone+, Shamos Hide/+, Shamos Scale/+, Stinger, Solid Bone, Shamos Shard, Robust Claw
Description: Shamos attack their opponents in packs and are sensitive to the lightning from Tzitzi-Ya-Ku.
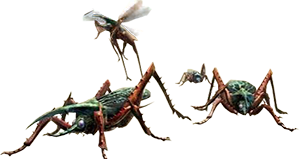
Vespoid
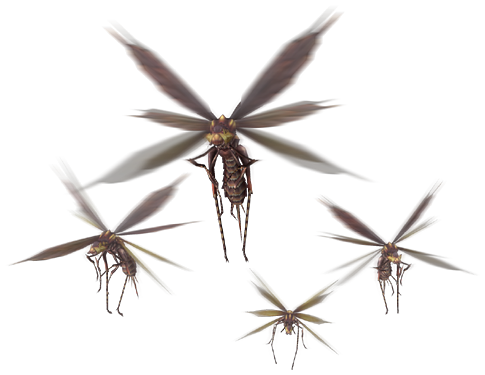
- Habitat: Ancient Forest, Wildspire Waste, Coral Highlands, Valley of Despair
- Loot: Honey, Monster broth, Monster fluid, Vespoid Inner Wing, Vespoid Back Plate, Vespoid Wing, Vespoid Shell, Vespoid Fangs, Monster Essence
What do you need to hunt down all these dangerous monsters? Weapons! Here we reveal what the 14 weapon classes from Monster Hunter World can do.