Destiny 2: Raid Guide to the Curse of the Past – The Boss Fight

Destiny 2: Raid Guide to the Curse of the Past – The Boss Fight

For a few days now, Guardians can attempt the new raid “Scourge of the Past” from the premium DLC “The Black Armory” in Destiny 2 . In the second part of our raid guide, we show you how to succeed in the tank phase and defeat the boss.

Since December 7, 2018, owners of the Annual Pass can venture into the new raid “Scourge of the Past“. There, you must put an end to the siege of the most valuable vault of the Black Armory by Fallen and you can grab various new loot. Learn about the two final phases of the raid here.

So far, the raid has gone: You can learn how to reach the third phase of the new raid in the first part of our guide: Raid Guide to Scourge of the Past – The Beginning

Phase 3 – The Tank Fight Against the Construct

Once you have left the vault of the Black Armory behind, you will eventually come to a door with the well-known holographic hand terminals. Activate both simultaneously with a melee attack. Then a door will open to the outside. This is where the next encounter takes place.

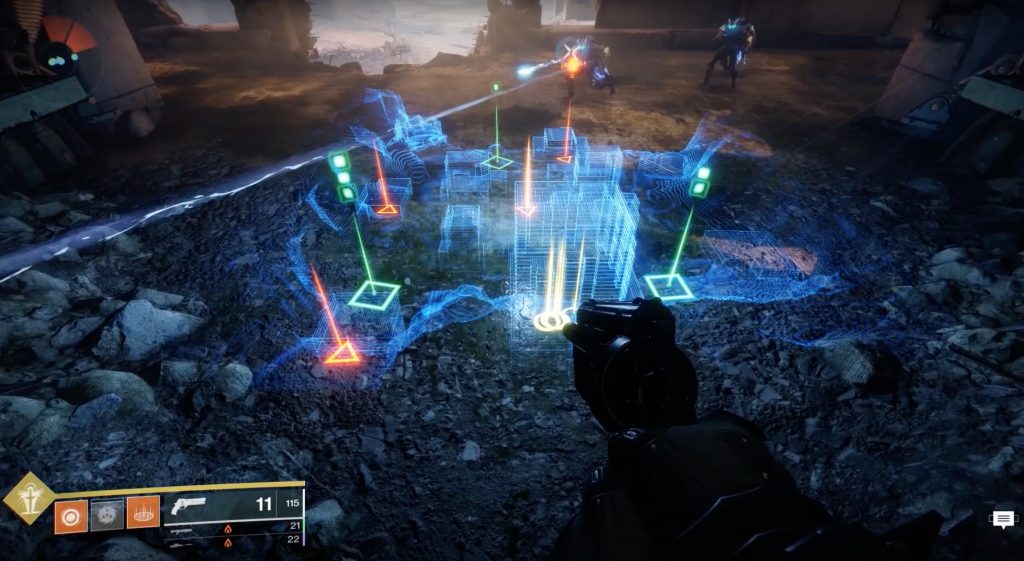
The situation: You find yourself in a vast ruins area of the city. The following is important:

  • On the outer edges left, right, and opposite the spawn point, there are a total of 3 load stations where 2 charges of tanks can be summoned.
d2 ba raid tank plate
One of the loading stations for the tank (Source: Nexxoss Gaming)
  • Additionally, there are 4 areas where enemy Servitors can spawn. These are easily recognizable.
  • In the middle, there is a construct that you need to fight during this phase.
  • There are also 4 entrances to an underground corridor that runs in a circle below this area. They are notably protected by an electric barrier.
  • Guide for the Tank Phase

    How to enter the damage phase: Your goal is to attack the construct in the middle until it has no energy left. However, to deal damage, you must first complete several tasks:

    • As soon as you enter the area, kill the first elite Servitor (yellow health bar). Once the Servitor is dead, the entrances to the underground complex that were previously blocked by an electric barrier will open.
    d2 ba raid servitor
    You need to take out these Servitors (Source: Nexxoss Gaming)
  • 3 players should now go into this underground corridor. There they will find 4 holographic terminals with a pink sphere, a blue pyramid, and a white cube. Each player activates a symbol (melee) and remembers it for the next round.
  • The fourth terminal flickers red and alternates between all 3 symbols. Ignore it for the duration of the fight. Otherwise, it will kill you after activation.
  • d2 ba raid pyramid
    The pyramid symbol in the underground corridor (Source: Mtashed)
  • The lower players remain in the corridor while the other 3 team members stay on the surface and clean up there. Once they take out the next Servitor, the terminal cycle resets and the access to the corridor opens again.
  • The lower players should only rotate in a coordinated direction in the corridor until they arrive at their symbol. They should keep their distance from the other two, as they could die otherwise (watch out for the circular barrier surrounding the players). They now activate their symbol a second time to get the second charge.
  • The message “Continuous charge beams x2” on the left side of the screen indicates that you have acquired 2 charges.
  • With this method, they can immediately acquire both charges for the tank and summon it near the platform without needing to go underground a second time. This is because each tank requires 2 of these charges.
  • d2 ba raid artillery
    Tank under fire from Fallen airstrike (Source: Nexxoss Gaming)

    This is how you deal damage to the construct:

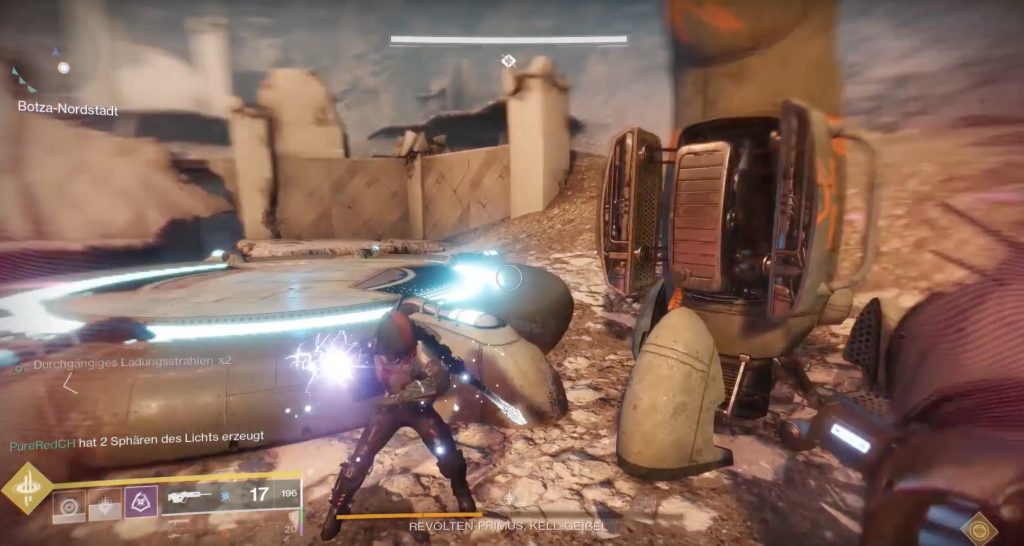
    • Now comes the damage phase. Each of the 3 underground players must now go outside and to one of the 3 plates where the tanks can be summoned. It doesn’t matter which symbol goes to which station. As soon as you deliver both charges there, a tank will appear.
    • Coordinate who runs to which station. Once you have summoned a tank, jump in, drive toward the construct in the middle, and shoot it. Particularly the arms of the machinery are vulnerable, so focus on that.
    d2 ba raid construct
    Focus on the arms of the construct (Source: Nexxoss Gaming)
  • Stay in motion. The Fallen will call in airstrikes for support during this phase, which you can recognize by the red circles and light columns.
  • Importantly, the construct has a timer. If you do not defeat it in time, it will perform an attack that will kill you instantly. There is no way to protect yourself from it. However, the health bar of the construct consists of several bars. Each bar that the construct loses during the fight gives you more time.
  • Keep in mind that you can use the Sparrow anywhere to move faster – even in the lower corridors.
  • d2 ba raid timer
    The timer of the construct (Source: Nexxoss Gaming)

    Once the damage phase is over, the 3 underground players return to the corridor, and the game starts over. Repeat these steps until the construct has no energy left. Then you have successfully mastered this phase and can secure the loot chest at the original spawn point.

    Phase 3 in video: In this video, Nexxoss Gaming explains the exact process of the tank passage:

    Recommended editorial content

    At this point you will find external content from YouTube that complements the article.

    I consent to external content being displayed to me. Personal data can be transmitted to third party platforms. Read more about our privacy policy.
    Link to the YouTube content

    Phase 4 – The Battle Against the Revenant Primus

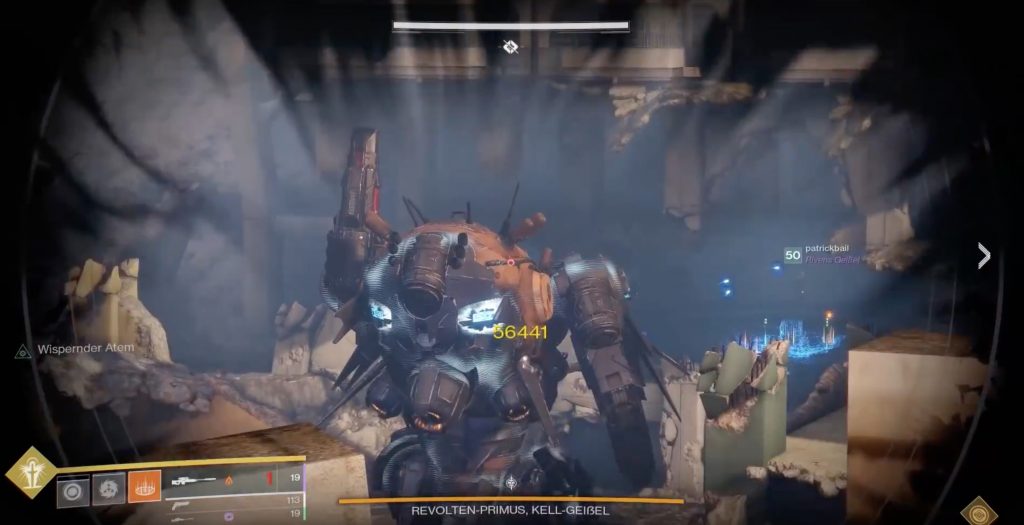
    Now the last phase begins with the actual fight against the raid boss.

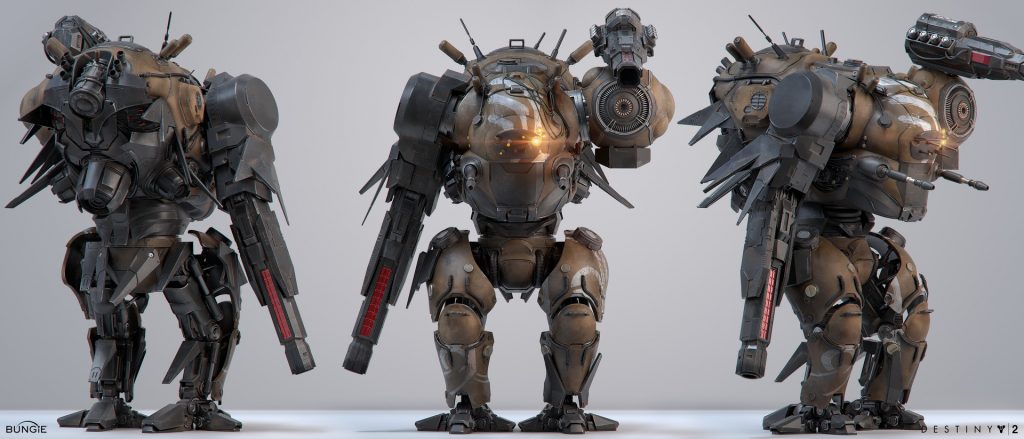
    The situation: You remain in the same area as in the previous phase. However, now you face a towering Fallen mech in the style of Mech-Warrior, which rises from the construct in the middle of the map. If you defeat the giant, you have successfully completed the raid.

    d2 ba raid boss 2
    The raid boss Revenant Primus (Source: Roderick Weise on ArtStation)

    Guide for the Raid Boss Revenant Primus

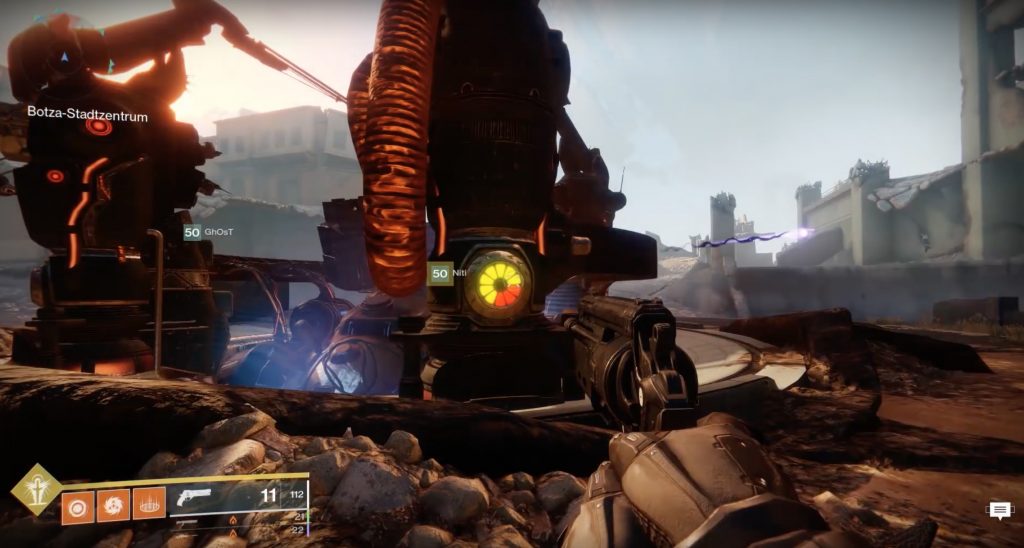
    This encounter essentially utilizes the same mechanics as phase 1 of the raid in the Botza city center. The goal is to eliminate Berserkers, collect batteries from them, and use them to charge a station where a tank will spawn instead of a hole in the ground, allowing you to trigger the damage phase.

    This is how you start the fight: Kill the Berserker in the middle, grab the battery, and insert it into the generator at the spawn point.

    d2 ba raid berserker 2
    You need to eliminate this Berserker (Source: Nexxoss Gaming)

    Then the familiar holo-map appears and the boss fight begins. The symbolism and function of the map remain identical to phase 1.

    d2 ba raid map boss
    The map of the boss encounter (Source: Nexxoss Gaming)

    How to enter the damage phase:

    • The players now split into three teams. One player stays at the map, coordinates the team, and assists with the boss. Another player exclusively focuses on the weak spots of the giant, and one team is responsible for obtaining and transporting the batteries.
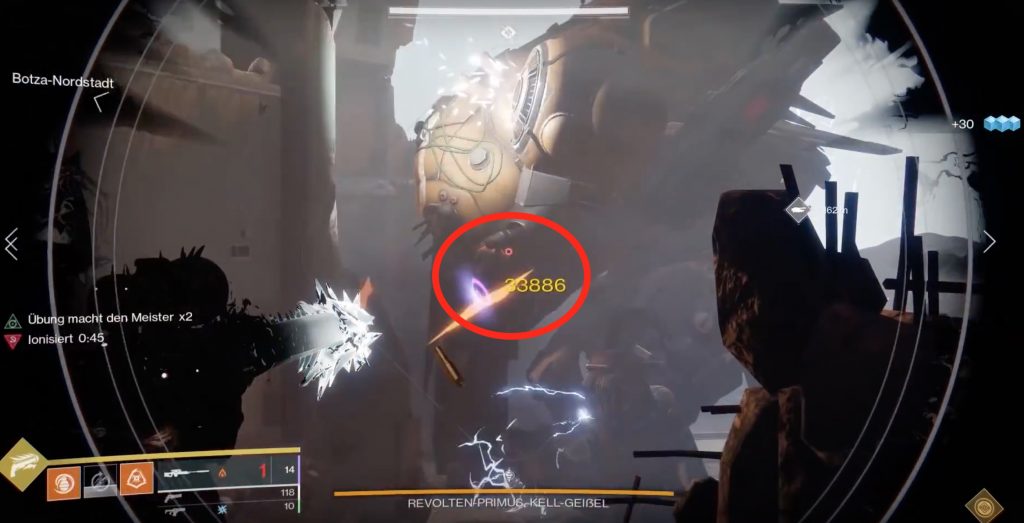
    • Once one of the stations is charged with 4 batteries, a tank will appear there that you can use to deal damage to the boss. However, before that, you must disable his shield generators, which are spread over his metal body so that he takes damage. These are the bluish parts with a white shimmer.
    d2 ba raid boss weak front
    The shield generators at the front (Source: Nexxoss Gaming)
  • Coordinate your attacks so that the last of his shield generators is destroyed only when you have a tank. Otherwise, you won’t deal enough damage to enter the proper damage phase.
  • For the generators, the map reader and the individual player will now take action. The map reader will attack the Revenant Primus from the front, while the other player positions themselves behind the giant – best on the left roof behind him from the spawn point – to deal with the rear weak points (generators).
  • d2 ba raid boss weak back
    The shield generators at the back (Source: Nexxoss Gaming)
  • If you want to prevent the Revenant Primus from flying around and occasionally launching devastating stomp attacks, you should shoot his jet packs from behind. The player responsible for the rear generators can take care of this.
  • This is how the damage phase goes:

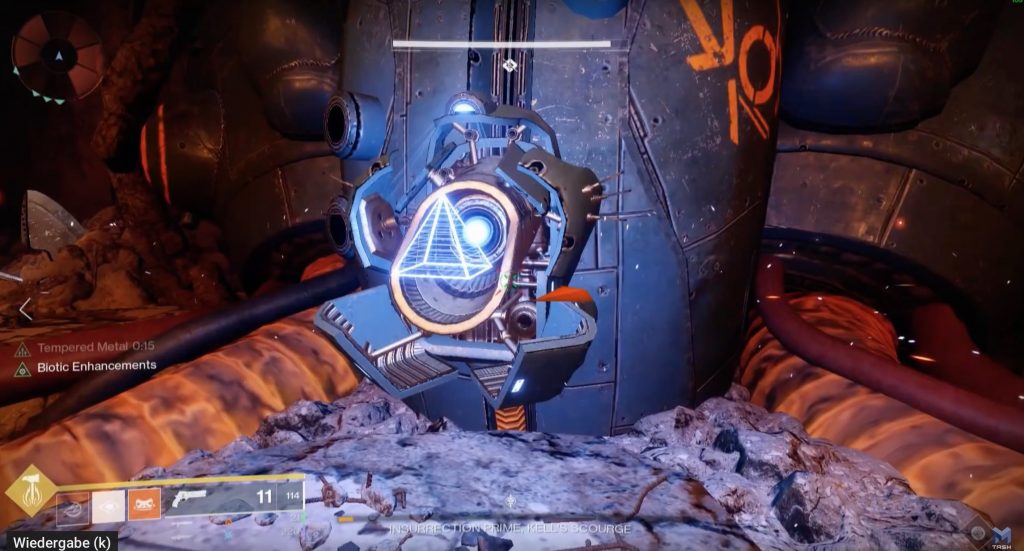
    • Once all generators are off, you can crack the boss with the tank until the Primus reveals its true weak point. A hatch opens on its belly, where you can see a Servitor. You must then all focus fire on this weak point. That is the actual damage phase.
    D2 ba raid boss servitor belly
    The weak point on the belly – an integrated Servitor (Source: Nexxoss Gaming)
  • If you take too long to defeat the boss, he will eventually launch an attack that will inevitably kill the entire team. So don’t take too long to open the hatch.
  • Since the fight takes place at a distance, the Sleeper Simulant, the Whisper of the Worm, and even the Polaris Lance are particularly recommended as weapons. A shotgun for the Berserkers wouldn’t hurt either.
  • There is a mechanic you should also be aware of:

    • During the damage phase, the boss emits a pulse wave that activates 3 buffs – one for each 2 players. You see them on the left side of the screen. Use this mechanic to your advantage. Communicate accordingly and position yourselves appropriately.
    • If two players with the same buff stand close to each other, they deal significantly more damage to the boss. If two or more players with different buffs are too close together, they will take damage themselves and will not benefit from the damage increase.
    D2 ba raid boss finish
    Done – The boss is defeated (Source: Nexxoss Gaming)

    Once the damage phase is over, the hatch with the Servitor closes. The whole game starts over now. Repeat the individual steps until the final boss is defeated. Then a large hole will open in the center of the map, where you can collect your final raid loot.

    Phase 4 – The Raid Boss in Video: Here, Nexxoss Gaming explains the detailed procedure of the boss fight, other possible strategies, and numerous tricks and nuances that could further ease your journey:

    Recommended editorial content

    At this point you will find external content from YouTube that complements the article.

    I consent to external content being displayed to me. Personal data can be transmitted to third party platforms. Read more about our privacy policy.
    Link to the YouTube content

    Here are more details about the new raid exotic from Scourge of the Past:

    More on the topic
    The 1st new exotic in Destiny 2 has been found and it is crazy
    von Schuhmann

    Good luck and happy looting.

    Deine Meinung? Diskutiere mit uns!
    8
    I like it!
    This is an AI-powered translation. Some inaccuracies might exist.
    Lost Password

    Please enter your username or email address. You will receive a link to create a new password via email.