

In our Raid guide to Last Wish, you will find the solutions for all boss encounters. How do you defeat Kalli in Destiny 2 Forsaken? What strategy should be applied against Riven? Here is our raid guide with images and videos.

Forsaken raid is active: Since September 14, 2018, brave Guardians have been able to embark on the raid “Last Wish”. This raid awaits you in the Dreaming City and is the longest raid ever in Destiny.
The power level requirements: You must have a minimum power level of 520 to enter the raid. 550 is recommended. However, enemies with 560 await you right at the first raid encounter, and the power of the enemies increases to 580 throughout the raid. Therefore, it is worth it to level up extensively first before daring to enter the raid.
How do I start the raid? On the map of the Dreaming City, you will find the raid symbol in the upper left corner. You fly to the Divalian Mists, where a gate opens before you. Go through it. On your left side, there is a small rift in the wall leading you to the first raid encounter.
Note: The following explains the mechanics of the raid, so spoilers ahead! If you want to explore the raid yourself, you should not continue reading.

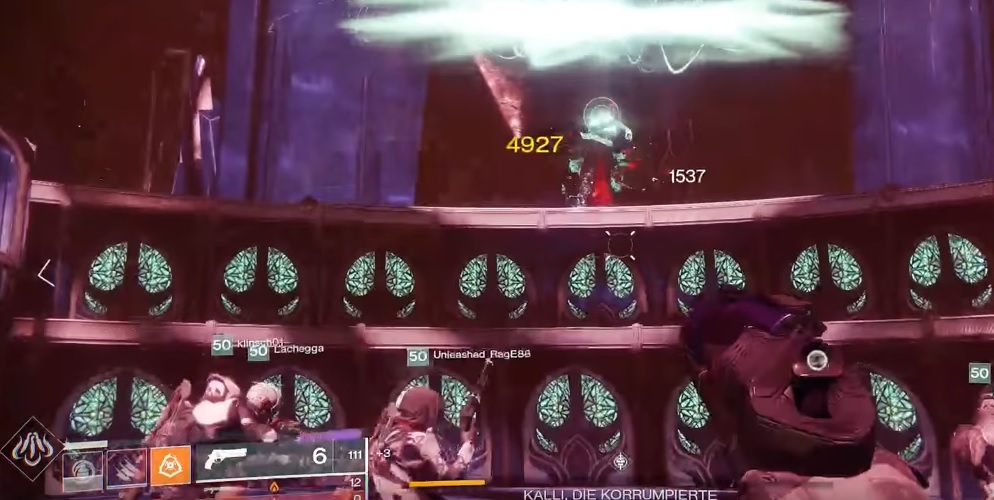
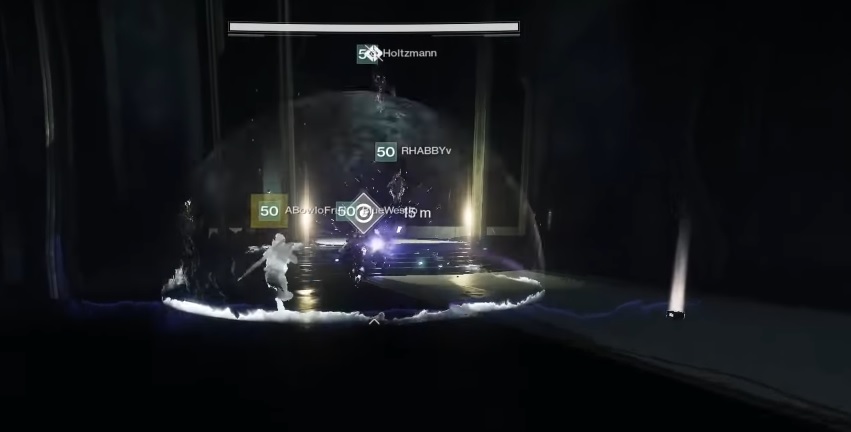
Kill Kalli, the Corrupted – Solution and Strategy
The starting conditions:
- Your goal is to defeat Kalli the Corrupted.
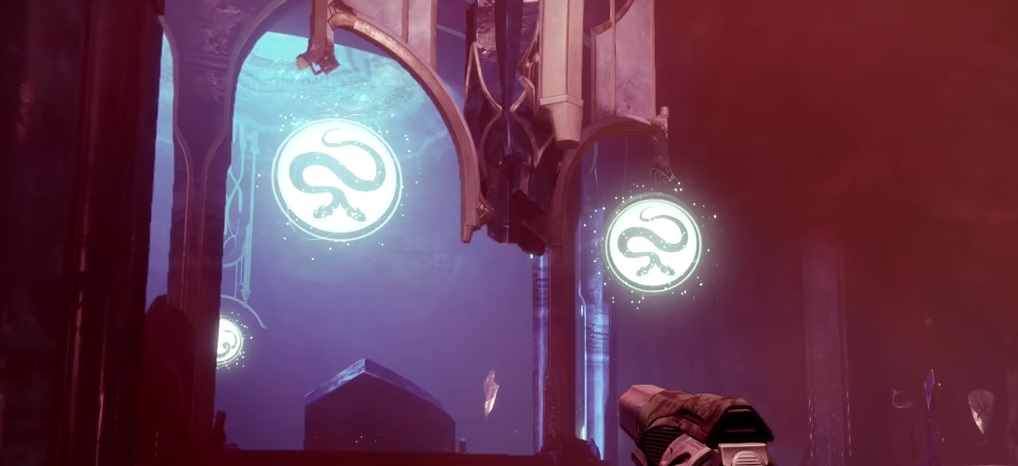
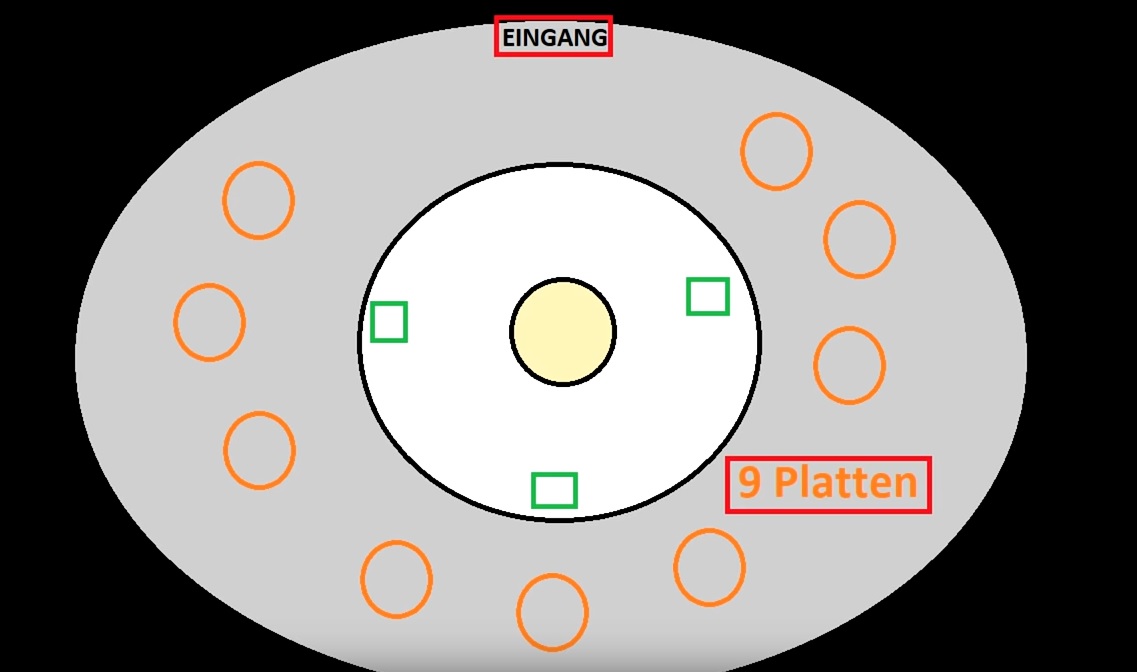
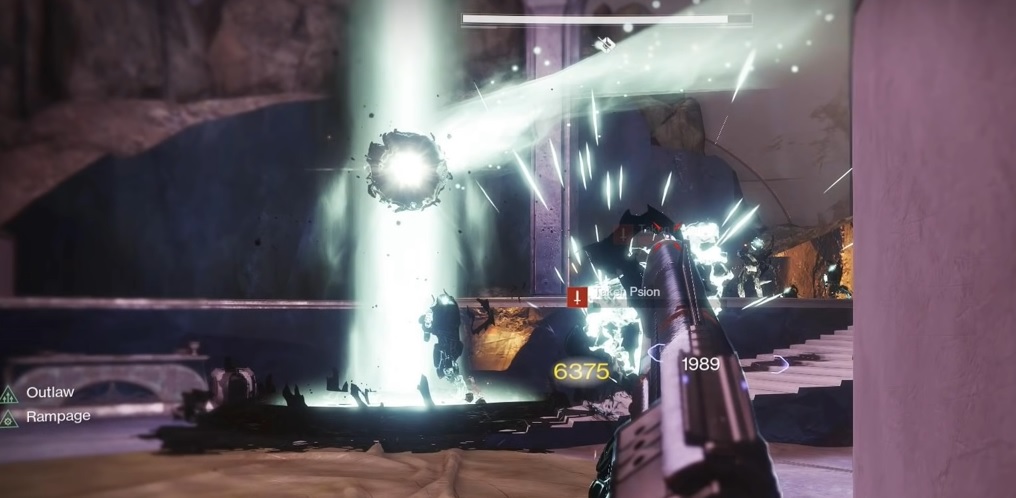
- You are in a circular room called “Tower of Open Eyes”. Inside are 9 platforms above which glowing emblems float. These emblems are formed by various symbols created by snake-like beings. Name these 4 symbols “8”, “U”, “S”, and “Infinity” (a lying 8).
Instructions for the Kalli boss:
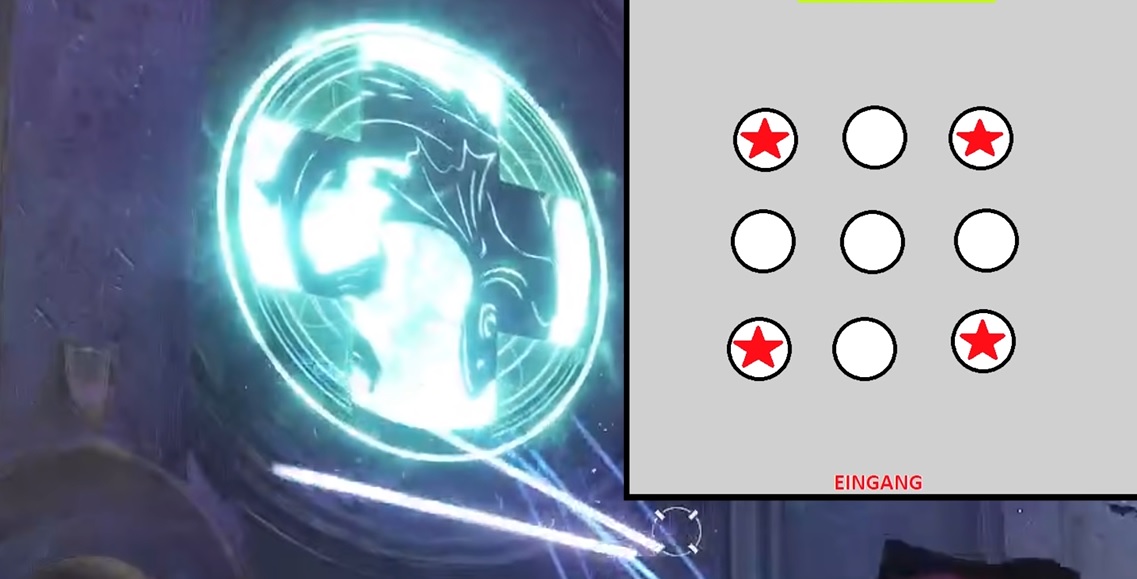
- You must trigger the bombs on those six platforms that match the symbols in the center of the room (where Kalli first appears, marked in green in the following graphic). If you do it wrong, two ogres will spawn in the center as punishment. Communicate with each other and establish beforehand who will take care of which of the six displayed symbols. The symbols are arranged randomly each time.
Venero TV provides you with more tips in the video in German:
Defeating Shuro Chi, the Corrupted – Solution and Strategy
The starting conditions:
- After a jumping sequence over a bridge, you come from Kalli to Shuro Chi.
- As soon as you enter the boss room, a 4-minute countdown called Shuro Chi’s Song begins. If it runs out, you will die.
- The boss encounter is roughly divided into three phases: kill enemies, deal damage to the boss, complete the puzzle.
Instructions for the Shuro Chi boss:
- First, eliminate the numerous possessed enemies, preferably with your super to generate spheres of light for your teammates. This way you have many supers available.
- Three platforms are positioned around Shuro Chi, on which three prism weapons spawn once the small enemies are defeated. Grab the prism weapons at the same time, stand on the platforms, and shoot yourself in a triangle with the prism weapons. Just as shown in this graphic by Venero TV:

More tips are provided by Venero TV in the video:
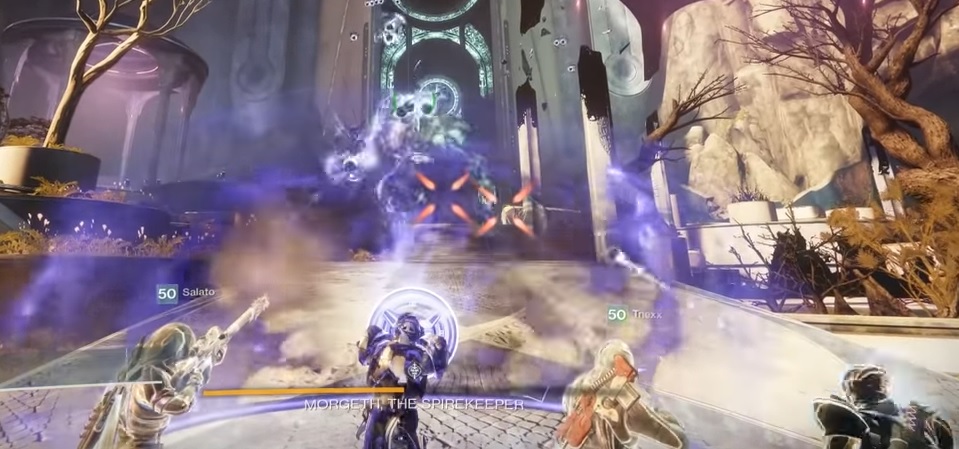
Defeating Morgeth, the Pillar Guardian – Solution and Strategy
The starting conditions:
- With Morgeth, you will face a big ogre.
- Morgeth increases in strength by absorbing possessed energy. Once he reaches 100% strength, you will die. To prevent this, these orbs must be stolen:
- When you pick up an orb, you gain the effect “Possessed Strength.” Morgeth will then try to take this strength from you. If he does, you will die after 20 seconds. You can only hold a maximum of 2 orbs at once. Picking up three will kill you.
- To prevent dying after 20 seconds, another guardian with the “Possessed Essence Antumbra” must come to you and free you from one. You will receive this essence from possessed knights named “Eye of Riven.”
- The essence bearer does not delete the possessed strength but absorbs it instead. They may only hold a total of two such strengths themselves; otherwise, they will die. Additionally, Morgeth will now try to take strength from the essence bearer, so they can also go down after 20 seconds. Another guardian with the essence must come and free them. This possessed strength must therefore be passed around so that no one dies.
Instructions for the Morgeth boss:
- Split into two groups of three, one group left, one group right, and defeat all the small enemies (including possessed ogres) running around.
- Once all enemies are dead, the possessed orbs will spawn, which you must pick up.
- Kill the knights, collect the essence, and continue passing the possessed strength until the damage phase begins. This starts when an orb spawns directly in front of Morgeth, and you take it from him.
- Retreat as far as possible for the damage phase, with the Titan’s Void Shield now being advisable. This can deflect orbs that Morgeth shoots at you, allowing the other guardians to concentrate on dealing damage to the boss.
- During the damage phase, Morgeth continues to gain strength. If he reaches 100%, you will die. Therefore, you must use a super attack with the possessed essence in time (at the latest at 90%) to prevent this. This will break Morgeth’s focus, the damage phase ends, and you have survived.
- Repeat this mechanic, and the boss will be defeated. Communication is essential. Call out who has the essences, who picks up the possessed orbs, who needs to be healed from the 20-second timer.
More tips can be found in the video by Venero TV:
Infiltrating the Chamber – Solution and Strategy for the Vault
The starting conditions:
- After Morgeth, you must master a vault security mechanism. This requires activating your grey cells, as it is a riddle that has countless variations.
- You only have a limited time for this, during which you must fend off waves of possessed enemies.
Instructions for the Chamber:
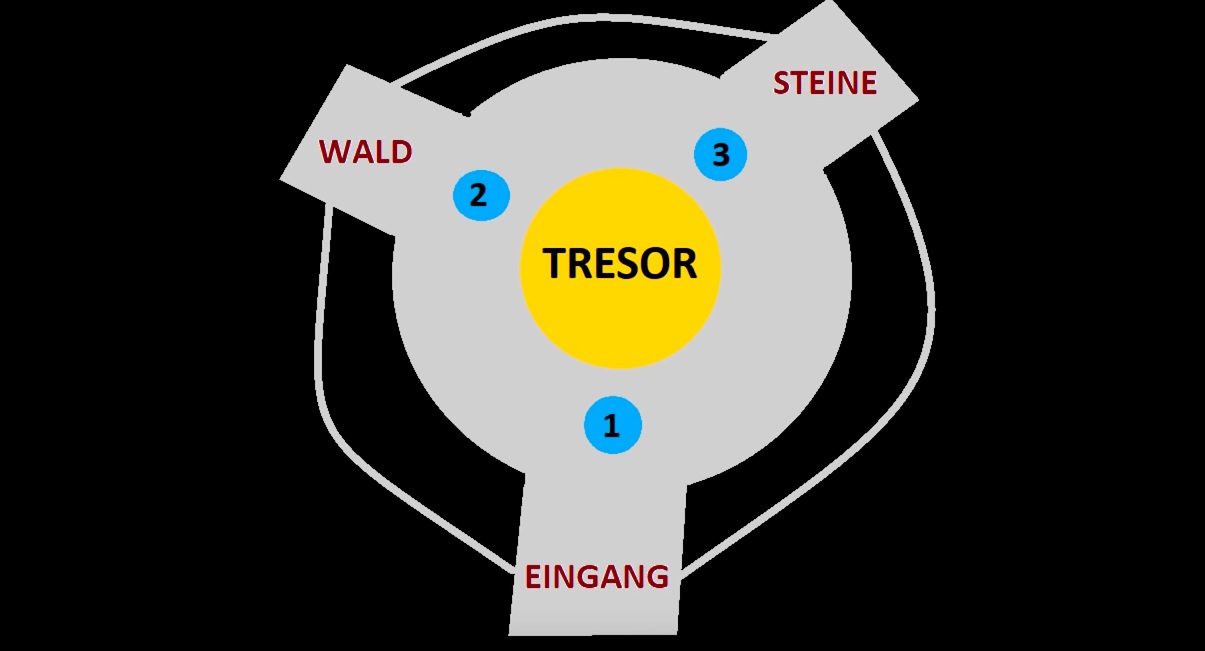
- In the middle of the room is a strange object – the vault – surrounded by three plates. If you stand on all three, they start to glow, and the mechanism starts. Enemies will also spawn.
- Now defeat the enemies until knights, the Eyes of Riven, appear in one of the outer rooms (referred to above as forest, stones, and entrance), who again carry possessed essences. These essences are needed to cleanse the plates you stood on. More on that shortly.
- Extremely strong possessed knights called Might of Riven will also appear, who want to overload the plates. If they succeed, you will die. You need to kill them in time.
- While you are standing on the plates, symbols will appear over the three plates near the vault. Call out the middle symbol that a colleague sees above their plate on either the left or right side:

- Example: On Plate 1 (in the graphic bottom left), there is a dragon with a staff in the middle. Now the guardian on Plate 1 asks: “Does anyone have a dragon with a staff on the left or right side?” Then the guardian on Plate 3 replies: “Yes, I have it. It is on my left side!”
- If the symbol is on the left side, the corresponding plate with the Penumbra buff must be cleansed. If it is on the right side, you need the Antumbra buff.
- You need to lead the guardian with the correct possessed essence to the appropriate plate, depending on which buff is needed. In the example above, a guardian with the possessed essence Penumbra must cleanse the third plate.
- The one on Plate 3 then asks who has a dragon flying down on the left or right. Because this symbol is in the center of the third plate in the upper example. You can see that this symbol is on the right of Plate 2. So, Plate 2 must be cleansed with the Antumbra essence.
- Call out the middle symbols in turn until all three platforms are cleansed.
- The symbols are randomly arranged each time. It is best to determine three guardians who will announce the symbols of their plates each time.
- But that’s not all. The essences must be collected from knights in somewhat secluded rooms that lock up as soon as you have the essence. Make sure that only the essence bearer is in the room when the door to the room locks.
- The essence bearer must find a way outside to return to the main room with the essence and cleanse the plate. Walls will rise during this, which the team must announce in the middle so that the essence holder knows how to escape.
- During this time, the essence bearer should announce which essence they have (Antumbra or Penumbra). This way, those on the plates can find out in time which plate the essence bearer must cleanse.
In this phase, a lot of calling and coordination is needed. You can see a video about it from Venero TV:
Defeating Riven, the Thousand Voices – Solution and Strategy
Riven is probably the most complicated and difficult raid boss that has ever existed in Destiny. Only a week after the raid launch did real video guides for this encounter start appearing – one from the Destiny expert Datto lasts a whopping 24 minutes. We explain the boss fight.
The starting conditions:
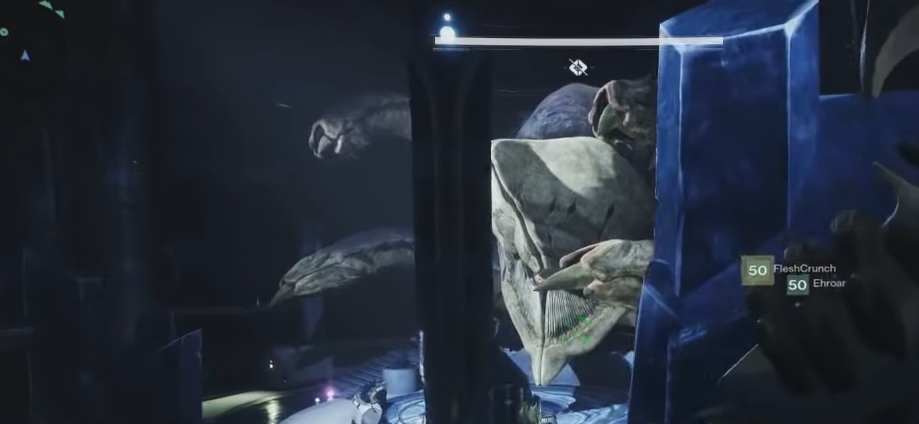
- You are fighting against Riven, an Ahamkara. This is a dragon-like being.
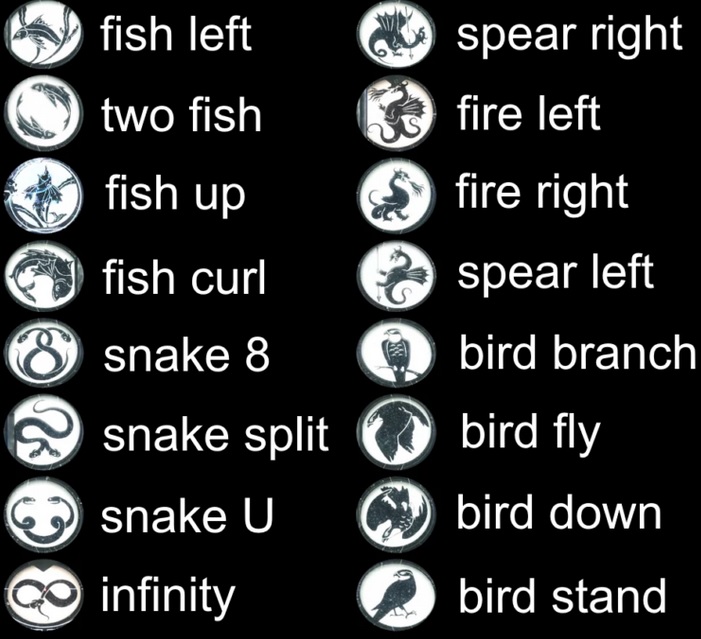
- If not done in the chamber yet, you should establish clear terms for the raid symbols at the latest now, as you need to announce them precisely. Here are all the symbols with English terms – how you name them is up to you:
Instructions for Riven:
- To start the encounter, all 6 guardians must stand on a plate.
- There are two different rooms, so you must split into two teams of three. One team goes into the “yellow” room, the other team into the “blue” room. There is a bit more cover in the blue room; otherwise, they are identical.
- When you enter the room, one of three possible things happens:
- Riven spawns in your room and breathes fire
- Riven spawns in your room and attacks with tentacles
- Riven is not in your room, but in the other room.
Riven is in your room
If Riven is in your room, you must do the following:
- Stun Riven until she reveals two glowing eyes. Now announce to the other team in the other room which eyes they are. Riven will then disappear into the other room, for which the other team needs this information.
- You stun Riven by shooting her in the mouth when she breathes fire and her mouth glows red, or by shooting the tentacle when she attacks with tentacles. For the tentacle attack, a guardian must get close to Riven. She will prepare a hit; jump away quickly, the tentacle will smash down and glow. You can then deal damage to it. Be careful: the radius of this tentacle attack is enormous – fly away quickly.
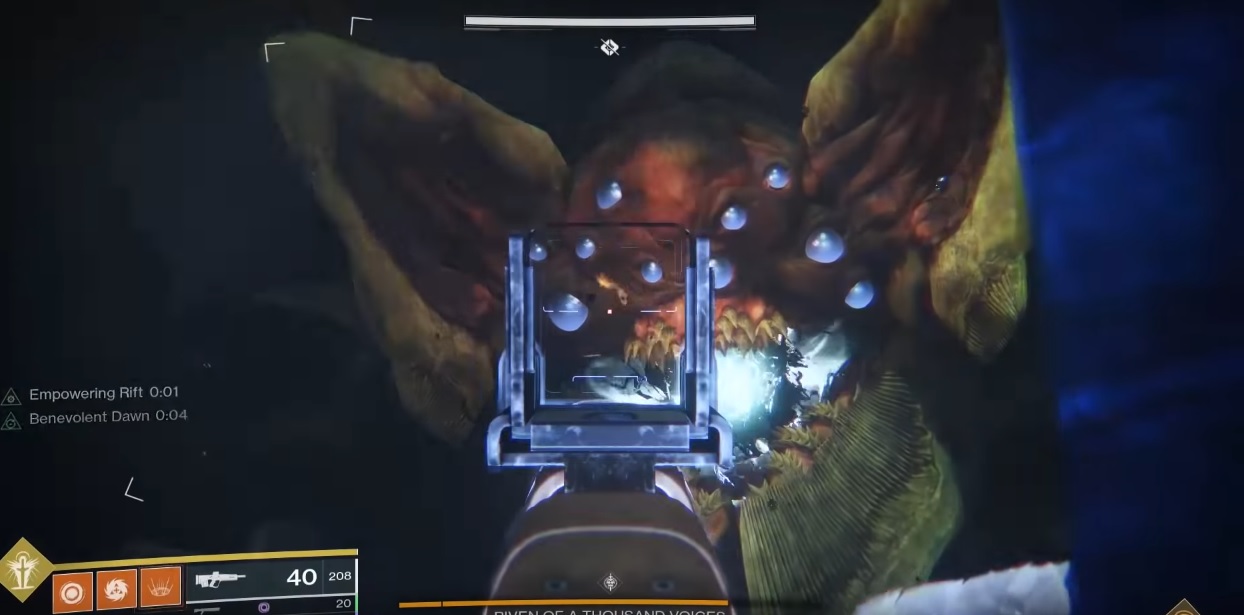
- She will now show you her 10 pretty eyes. Two of them will glow. Share these glowing eyes with the colleagues in the other room to avoid a wipe. You can number Riven’s eyes to make announcements clear:
Riven is not initially in your room
This is what you do in the other room:
- In the room without Riven, a knight named “Eye of Riven” will spawn. This one has a possessed essence from the kill.
- The guardian who picks up this essence will be the only one to see a symbol light up in the back of the room. This symbol is stacked five times. Announce which symbol you see.
- Additionally, there is a large window in the room. If you stand behind this window and look through the glass, you will see several raid symbols on the stairs and in the middle of the room:
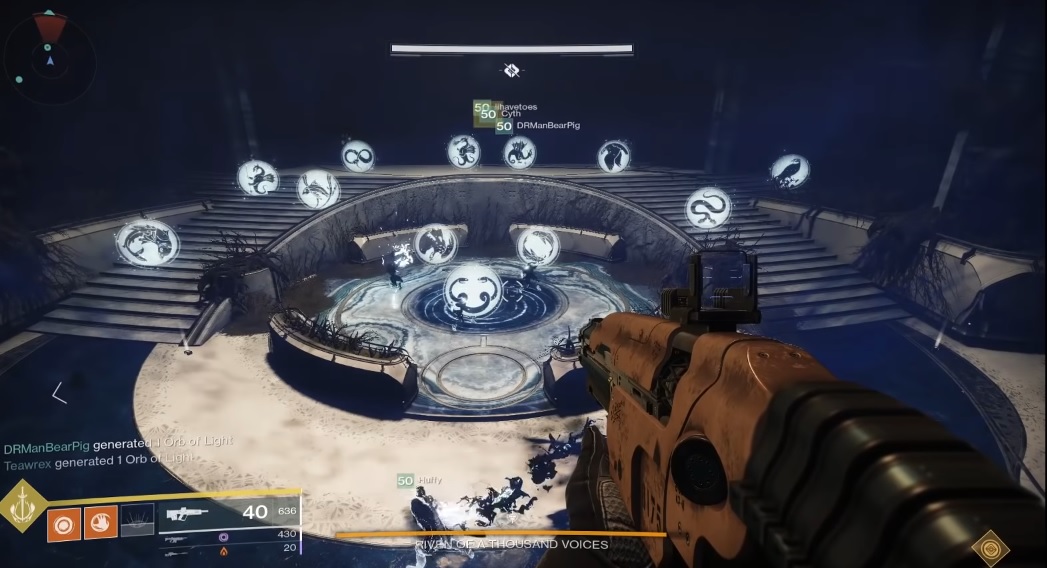
- Now you need to lead the essence bearer to the symbol they saw. The essence bearer themselves cannot see the symbols in the upper image when looking through the glass. The essence bearer must press the grenade button at the right spot to cleanse the symbol.
You must do this in both rooms, but at different times. This is when Riven is not in your room. The team that had Riven first now performs the possessed essence mechanic.
Riven comes into your room after the two eyes are announced
So, the other team has stunned Riven and found out the two eyes, you have cleansed the correct symbol with the essence, and now Riven comes into your room – what now?
- Riven is now preparing an attack. Possessed energy swirls in her mouth. Shoot at it.
- At the moment Riven closes her mouth, shoot at the two announced eyes. Be careful: they are no longer glowing now. You need to remember which eyes were called out from the other room.
- If you’ve done it, Riven will flee. She goes up a level, and both guardian teams should do the same at the same time. Take the elevator up.
One floor up + big DPS phase
- Now the sides switch: if you had Riven in your room first, you will have a room in front of you now where you can directly execute the mechanics with the essence.
- Repeat the entire process.
- Once you have done this, you must be teleported to the large chamber where the fight against Riven began. This is now the important DPS phase.
- As a whole team of 6 Guardians, you may now stun Riven three times. Many enemies will spawn, including goblins and ogres. Goblins can sometimes make the ogres immune, which can be quite annoying. Deal with them in time.
- Riven appears in several locations in the room, attacking with fire and tentacles. After each stun, you must remember the two glowing eyes.
- After three stuns, Riven will start her attack again. Shoot in her mouth, and when she closes it, you must quickly shoot the six correct eyes.
- Note: If there are no more enemies in the room, a quickly rising debuff will start, killing you when it reaches its maximum. Stand on one of the plates to get rid of the debuff.
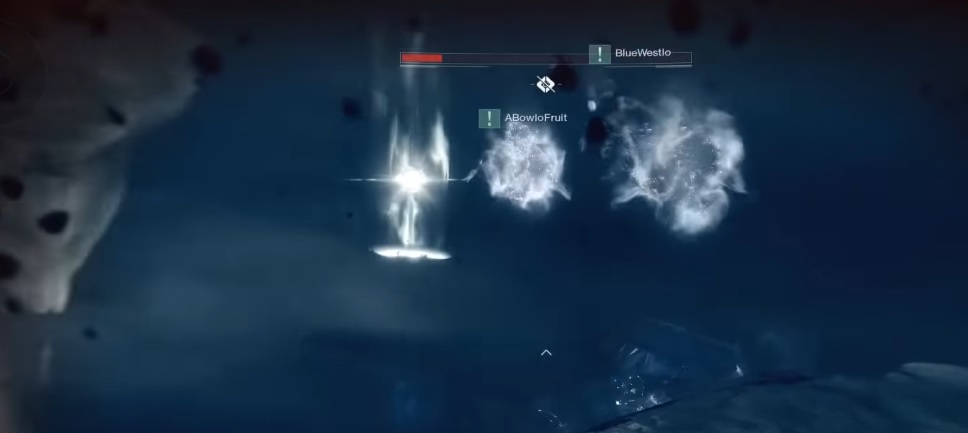
- When all are standing on the plates, they will open, and you will land in free fall.
- During the free fall, you will see the enormous size of Riven. Shoot at her weak spots (glowing growths) which deal massive damage to Riven. When a weak spot is destroyed, possessed orbs that chase you will be released. Destroy them before they hit you.
Ascendant world of Riven
As soon as you land on the ground after the free fall, the whole mechanic starts over. Try to have weakened Riven after two rounds. Because then you will be teleported into an Ascendant world.
- In the Ascendant world, you can showcase your jumping skills and pave your way to the top.
- Watch out for the snipers who can kill you quickly. Additionally, quickly kill the possessed phalanxes that want to push you into the abyss with their shield.
- In the Ascendant world, you lose health permanently. So don’t dawdle. You will not regenerate health.
- If you reach the top, where a possessed charge awaits you, the entire team will be returned to the main room.
- There is now the finale in the fight against Riven. Shoot the Ahamkara in the mouth until it dies.
- Now run into Riven’s mouth until you find a possessed blight. Destroy it – and the boss fight is over.
Throughout the entire fight against Riven, you are allowed to eliminate many possessed enemies.
Datto shows you the fight against Riven and the final phase of the raid in the video:

Complete the Last Wish raid – solution for the final phase
Once Riven is dead, the raid is not over yet. Now you must carry Riven’s heart to a Technician.
Here’s how:
- Fate decides who must carry the heart. Only the chosen guardian can pick up the heart.
- The goal is to bring the heart to the chamber. The heart suppresses all abilities of the heart bearer. This person cannot shoot, throw grenades, or use a second jump. The team must protect him.
- A timer starts as soon as the heart is picked up. If the timer runs out, the bearer will be teleported to another area. This area is sometimes referred to as the “rainbow room.”
- Now another Guardian, who is chosen, must take the heart and carry it for as long as possible. The heart must be passed around until you reach the destination. But be careful: if you stand too close to the heart bearer when the timer runs out, you will also be teleported away. Or if you immediately step onto the spot from which the heart bearer was teleported away, you will also be teleported away. This must not happen.
- The heart also forms a dome around the heart bearer. If a player stays outside this dome for too long, they will die. This means the task force must stay relatively close together. The dome shrinks the longer the “heart timer” runs out.
- The rainbow room is interestingly inside the heart. In it, you must fight against numerous enemies, including knights named “Might of Riven.” The more guardians are in the rainbow room, the more enemies will spawn.
- In the rainbow room, guardians must pick up possessed orbs to gain possessed strength. If you pick these up, the timer for the current heart bearer will be extended. The time will then be set to 15 seconds. This is the time they need to get closer to the goal. However, pick up the last possessed orb in each round only when the timer is at 3 or 2 seconds to reset it back to 15 seconds.
- If you successfully reach the goal, the raid is completed.
Note: This guide will be complemented with German video guides as soon as they are available. If you have further tips and hints on the raid mechanics, please write them in the comments.
Secrets and Weapons in the Last Wish Raid
- In the Last Wish raid, there is a secret room that fulfills wishes
- Destiny 2 has a new “Gjallarhorn” – the raid exotic is completely OP in PvE and PvP
- Destiny 2: All raid weapons from Last Wish – here’s how strong they are


Your opinion is important to us!
Do you like the article? Then let us know!