

In Destiny 2 is the first quest of the Black Armory live. We show you how to master the quest around the Völundr Forge, obtain the weapon core, farm powerful enemies, and craft your first power weapon from the Black Armory.

With the weekly reset on December 4, the first premium DLC The Black Armory went live in Destiny 2. The first quest of the Black Armory revolves around the Völundr Forge in the EDZ and consists of multiple steps. Here you will learn what you need to do to gain access to the forge and master the first quest of the Black Armory.
This is how the first quest of the Black Armory goes
The quest is available to all owners of the Annual Pass. All other players do not have access to it. However, to even obtain the quest as a season pass owner, you must first gain access to the Black Armory.
This is how you gain access to the Black Armory
So first head to Spider in the Tangled Shore. This NPC is marked with a quest symbol of the Black Armory. There you will receive an identification for the Black Armory.
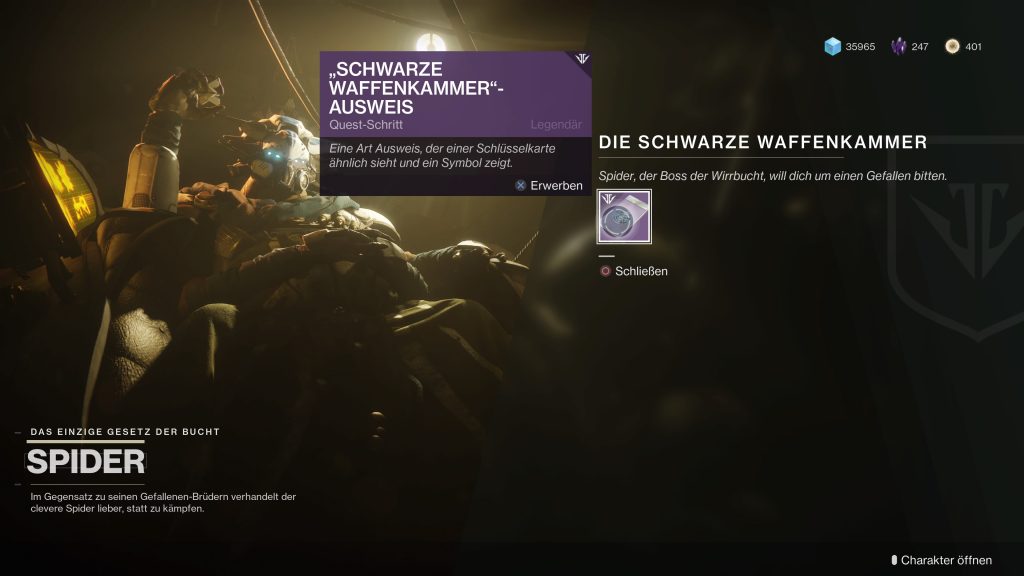
Now fly back to the Tower. There you must visit the new vendor, Ada-1. She is also marked with a quest symbol and is located in a new area of the Tower.
Ada-1 runs the Black Armory and simultaneously gives you the first corresponding quest step. You receive a machine gun form, a type of blueprint that you need to complete and eventually craft at the Völundr Forge.
Obtain the weapon core and collect mixed ether
Once you have received the machine gun form, you need to obtain a weapon core and collect mixed ether. The quest sends you to the EDZ on Earth.
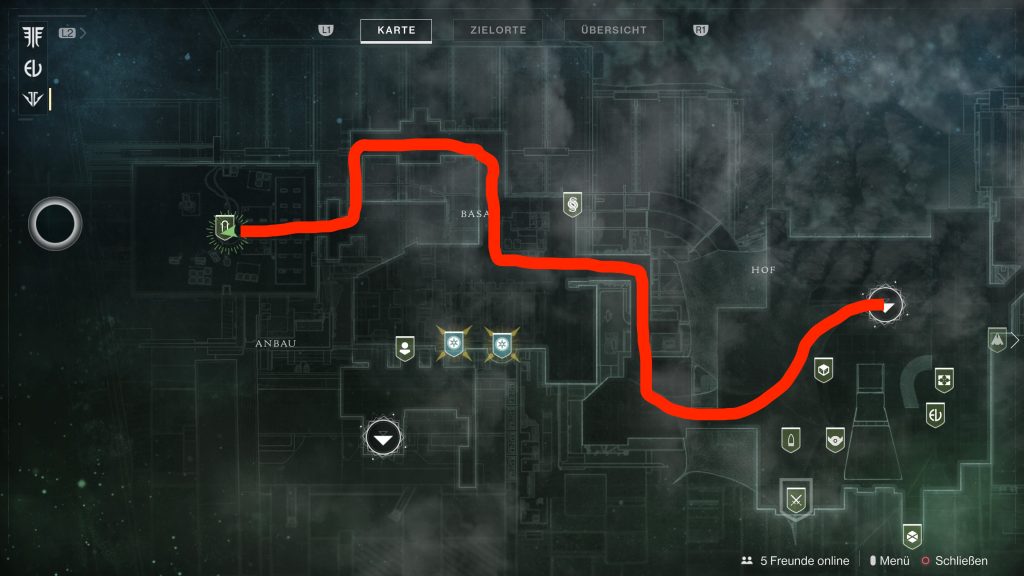
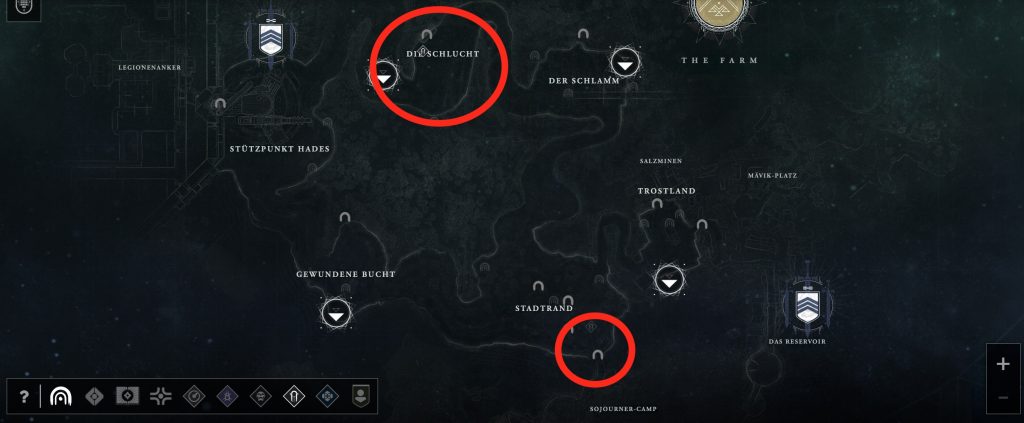
The weapon core: You can collect the weapon core in two different areas of the EDZ – in the canyon or at the outskirts.
There you need to visit a mini-boss and loot a Black Armory chest that you find near him. You will recognize the boss – either a Cabal Leader or a Servitor (depending on the area) – by the bluish power field that protects him, which is maintained by small blue drones. The chest is also protected by such a field.
You do not have to kill the boss, but his arrival or presence signals that the chest is currently available. Save yourself the boss fight and just grab the chest. Because that’s where you’ll find the weapon core. Destroy the drone. The forcefield disappears and you can open the chest.
At the outskirts, it is easiest to find the chest. Because the Servitor boss and the chest always spawn in the south at the bridge that crosses the river – either directly on it or to the right or left of it. In the canyon, the chest can spawn throughout the area. There you really have to keep your eyes open.
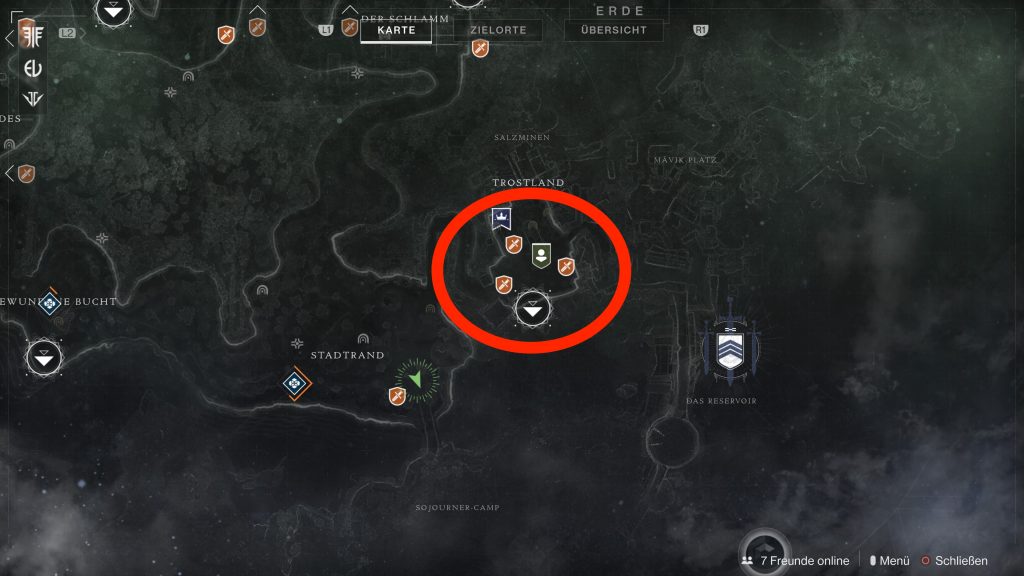
Mixed ether: You get mixed ether from all Fallen enemies. Just head into the Trostland area by the church in the EDZ and take down 25 Fallen there. You should have no trouble finding them.
You can find more about this in this video by Venero TV:
Guardian Kills with Power Weapons and Power Weapon Multi-Kills
The next step is to eliminate Hive enemies with a power weapon and achieve multi-kills with power weapons.
For this, it’s best to visit the Lost Sector Kırn Terminus in the Braytech Futurescape area on Mars or complete some rounds in the Escalation Protocol.
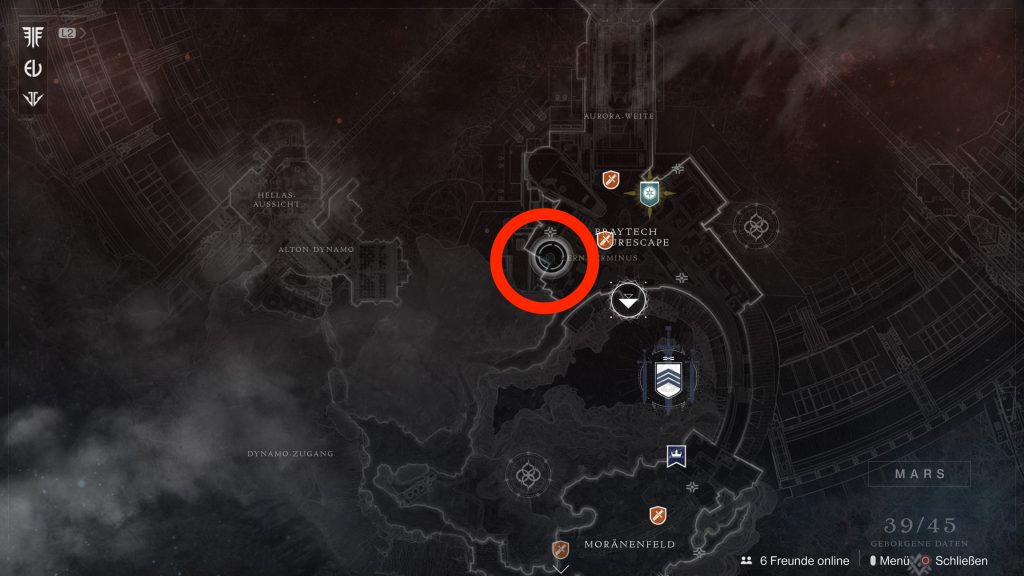
It’s best to use the exotic machine gun Thunderlord. This way, you should have the necessary kills in just a few minutes.
Farming Powerful Enemies
Now you need to eliminate Majors, meaning enemies with yellow health bars, using power weapons. This can be easily done in the Escalation Protocol on Mars. Alternatively, you can fly to the first raid of Destiny 2 on the Leviathan. You can access it from the planet view of Nessus.

There you will already find corresponding enemies at the landing zone. Eliminate them with a heavy weapon, such as the Whisper of the Worm, and then simply reset the raid. This way, you will always have enough power ammo and plenty of powerful enemies. This task can be completed in just a few minutes.
Collect Radiant Seeds
Next, you need to collect an item called radiant seeds, which drop from powerful enemies, meaning enemies with yellow health bars, upon death. This task is also best completed on the Leviathan or during the Escalation Protocol.

The drop is not guaranteed from every powerful enemy, but you will collect the seeds relatively quickly. Stick to the strategy on the Leviathan or play some rounds of Escalation Protocol.
Master the Völundr Forge
Once you have found enough radiant seeds, you must return to Ada-1. She will then give you the next quest step, which requires you to ignite the Völundr Forge in the EDZ. For this, you need to complete the new activity “Forging the Chain” there.
What is “Forging the Chain”? It is a new co-op game mode for three players in the style of the Escalation Protocol or the Blind Well – only with new mechanics and integrated matchmaking.
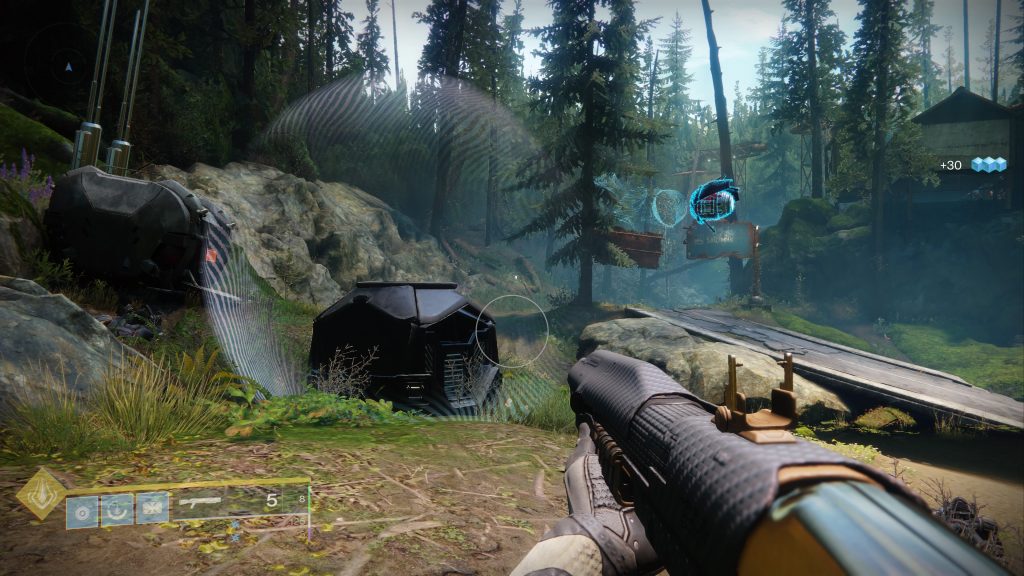
Where can I find the Völundr Forge? Currently, only the first forge – the Völundr Forge – is active. When you reach this step in the quest, you will find the forge in the “Sunken Isles” area in the EDZ on Earth. The position is highlighted by a quest marker. Select it on the map, and the game will guide you there smoothly.
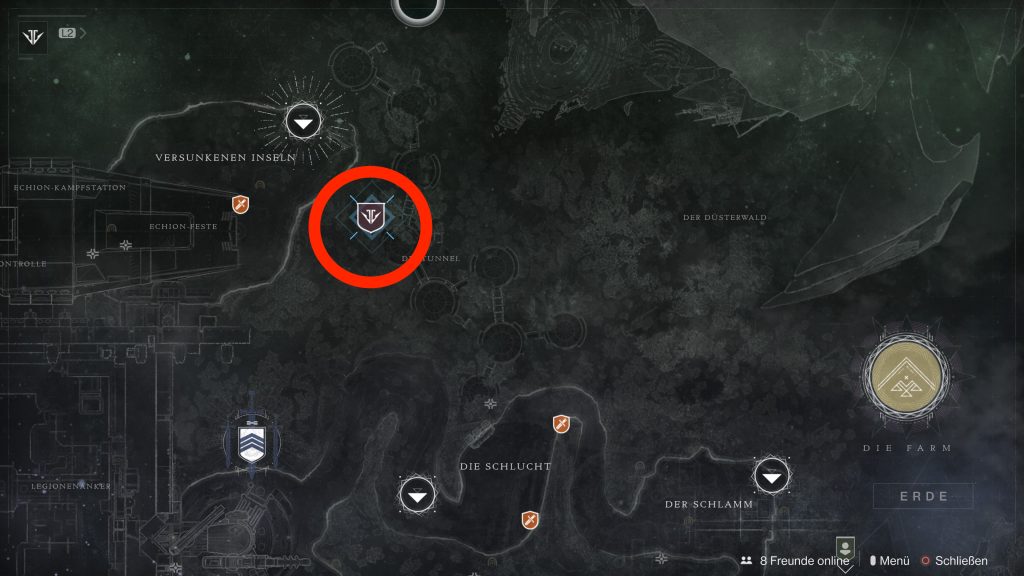
Once you’ve spawned in the area, turn left and follow the rock wall to the tunnel. From there, the direction is always clearly indicated. Follow the tunnel until you reach a large cave room. Take the right path there. It will lead you directly to the forge.
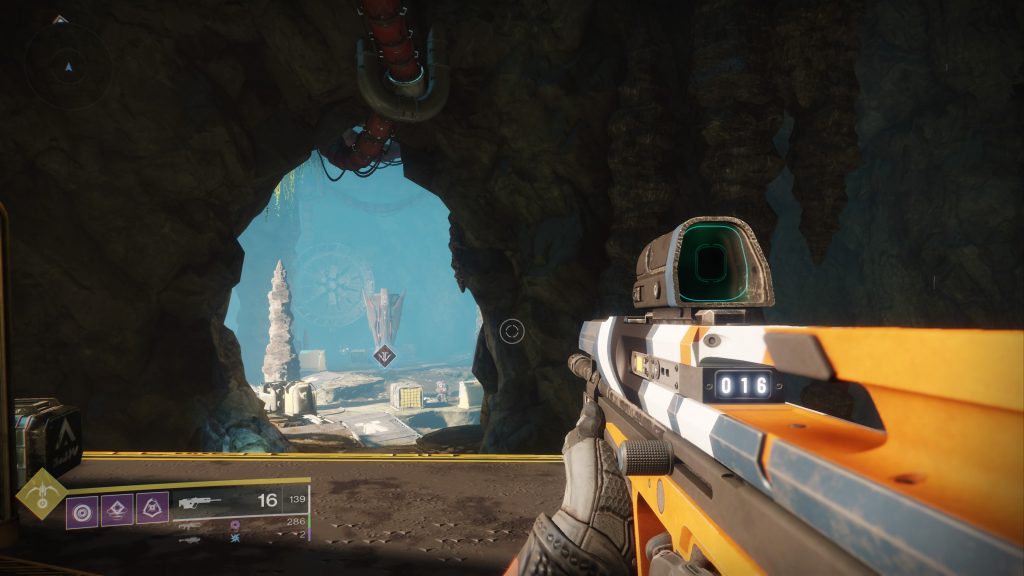
When you arrive at the forge, you only need to eliminate some minor enemies. Then you can start the event at the forge apparatus in the middle of the room.
How does the event work? In this activity, the objective is to survive waves of enemies under time pressure across three rounds while keeping the forge operational as your reward is being forged there. In the third and final round, there is then a boss fight.
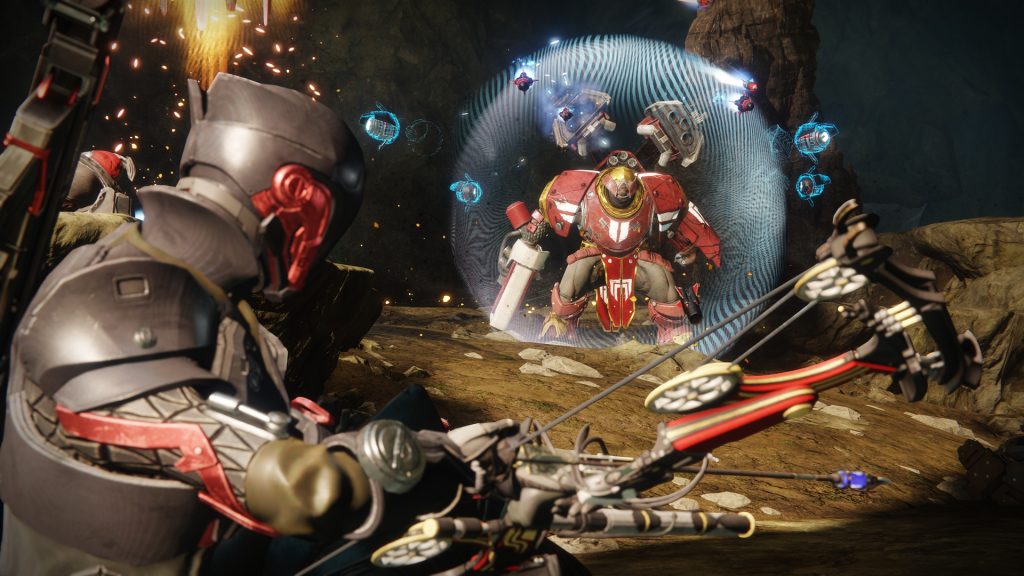
To charge the forge, you need to throw a total of 20 cores per round onto the forge apparatus, which are dropped by killed powerful enemies. The timer is ticking down. You earn new time by eliminating powerful enemies (not by throwing the balls at the forge).
The requirements for the Völundr Forge: While the quest up to the forge is relatively simple, many Guardians will initially struggle with the new activity – more precisely, with its level requirements. Because they are enormous:
- Round 1: Power Level 615
- Round 2: Power Level 625
- Round 3 (Boss fight): Power Level 630
You can really start making progress from a power level of 610. While it is also possible just below that, it can be extremely tough and is not much fun – so the conclusion of numerous players who have already mastered the quest.
Guardians below a power level of 605 should completely avoid this activity initially and level up first. As a result, many players are excluded from this activity right from the start.

The reward: If you successfully master a match in the forge, you will receive the heavy MG Hammerhead from the Black Armory as a reward. Updated weapons from the first year in the style of the Black Armory can also drop here.
How to currently obtain DLC-specific armor pieces is not known at this time.
What comes next? Once you have ignited the forge, vendor Ada-1 will be fully unlocked. Now you can work on another form – this time for the automatic rifle of the Black Armory.
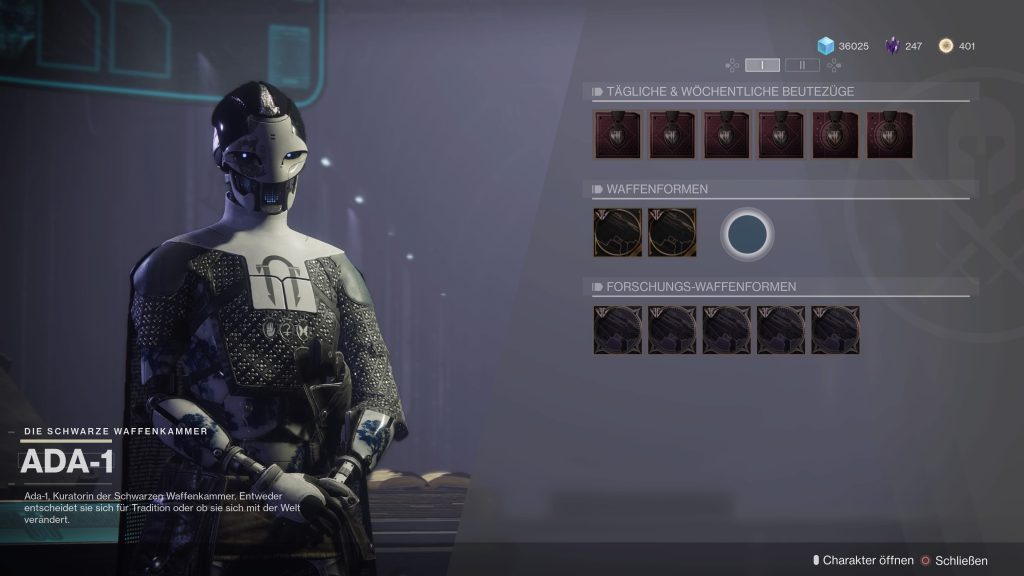
Additionally, you can complete special bounties from the Black Armory that provide you with materials needed for further weapon forms.
A good overview of the forge is provided by the YouTuber Houndish in this video:

Your opinion is important to us!
Do you like the article? Then let us know!