

In CoD: Black Ops 6, you can complete the main mission on the map “Liberty Falls” to unlock rewards. This mission, also called an Easter Egg, is not explained and you have to figure out the individual steps yourself. To spare you the stress, we will show you how the Liberty Falls Easter Egg works.

What do I need to know before starting the Easter Egg? You can easily complete the Liberty Falls Easter Egg alone. The mission is simple and can be successfully completed without any experience or guessing with our guide. The most important thing here is mainly the ability to survive. If you can do that, the rest is a piece of cake.
We’ll go through all the steps of the Easter Egg, tell you what you need to do, and provide important tips that you should know. In addition, we will show you the rewards you can earn. The following steps are crucial for the Easter Egg:
- Step 1: Build the Jetgun or pull it from the Mystery Box
- Find the water valve
- Find the handbrake
- Find the power cable
- Step 2: Interact with the SDG Generator in the church
- Step 3: Find and assemble the parts for the LTG device
- Location: First LTG piece (church)
- Location: Second LTG piece (comic book store)
- Location: Third LTG piece (barber)
- Assemble the LTG parts
- Step 4: Capture the first HVT with the Aether canister
- Step 5: Activate all sensors with the Strauss counter
- Step 6: Capture the second HVT with an Aether canister
- Step 7: Preparation for the final fight
- Step 8: Activate the SDG Generator
- Rewards for the Easter Egg of Liberty Falls
With our directory, you can quickly jump to the individual steps and get an overview:
Step 1: Build the Jetgun or pull it from the Mystery Box
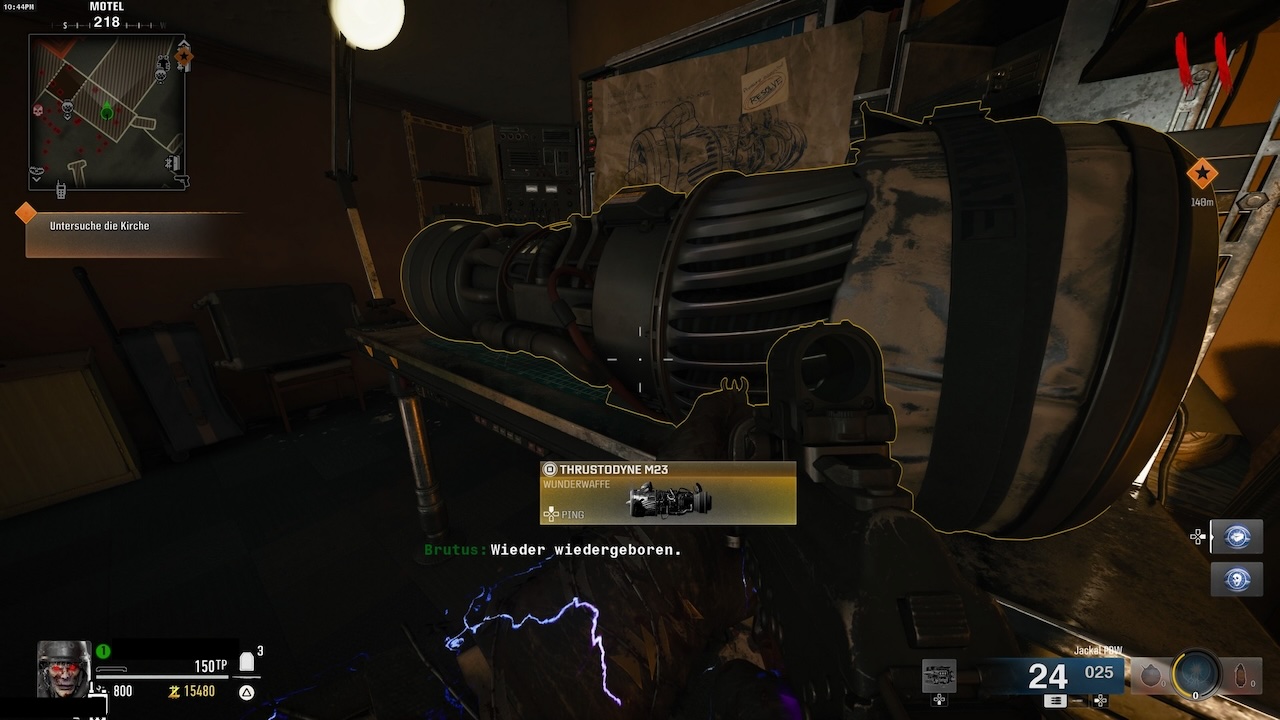
The Jetgun, also known as Thrustodyne M23, is an important wonder weapon you need for the first steps of the Easter Egg. With it, you can pull components from distant points on the map to assemble them later.
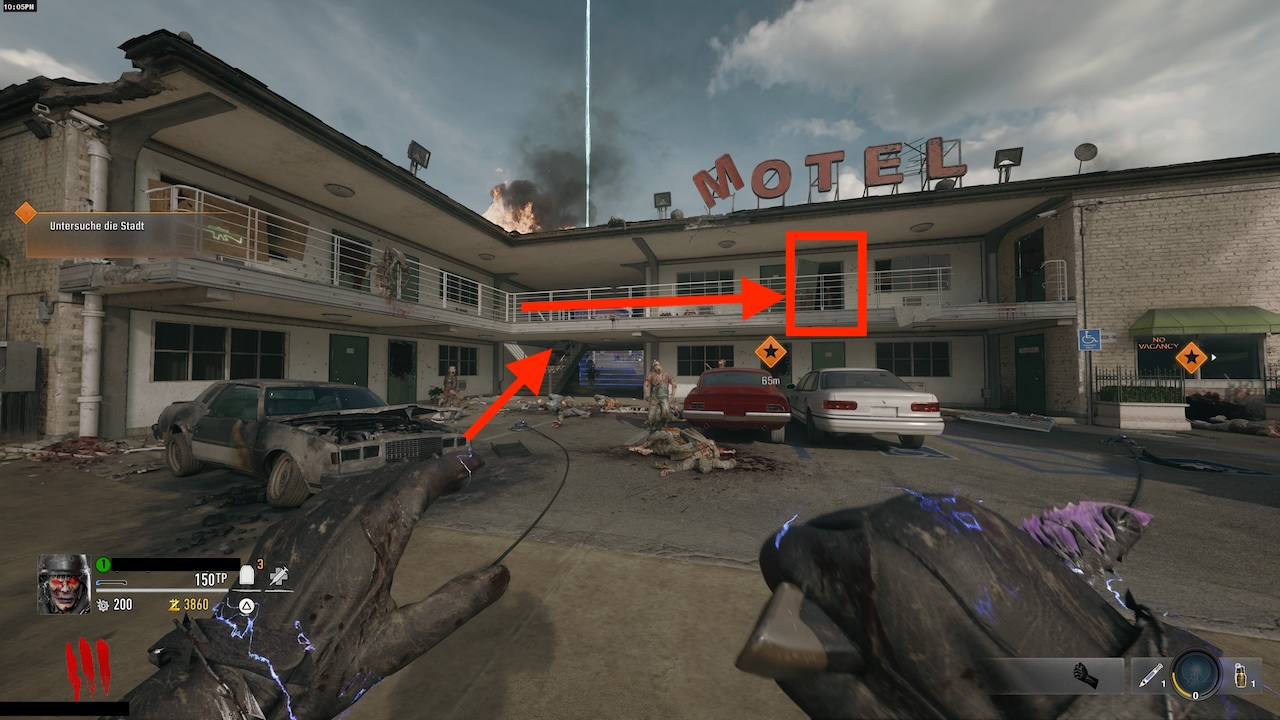
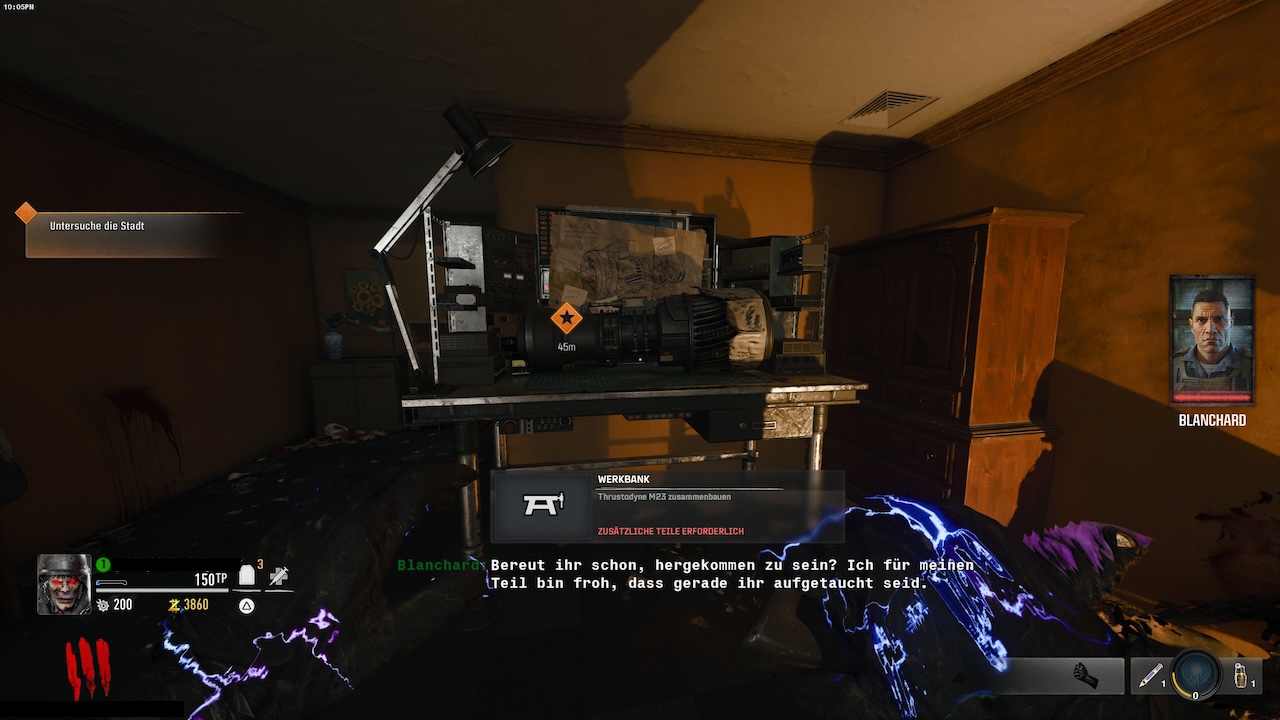
You can either pull the Jetgun from the Mystery Box with some luck or assemble it at the workbench with components in motel room 202.
Since not every player is that lucky, we will show you the components and their locations that you need for assembly:
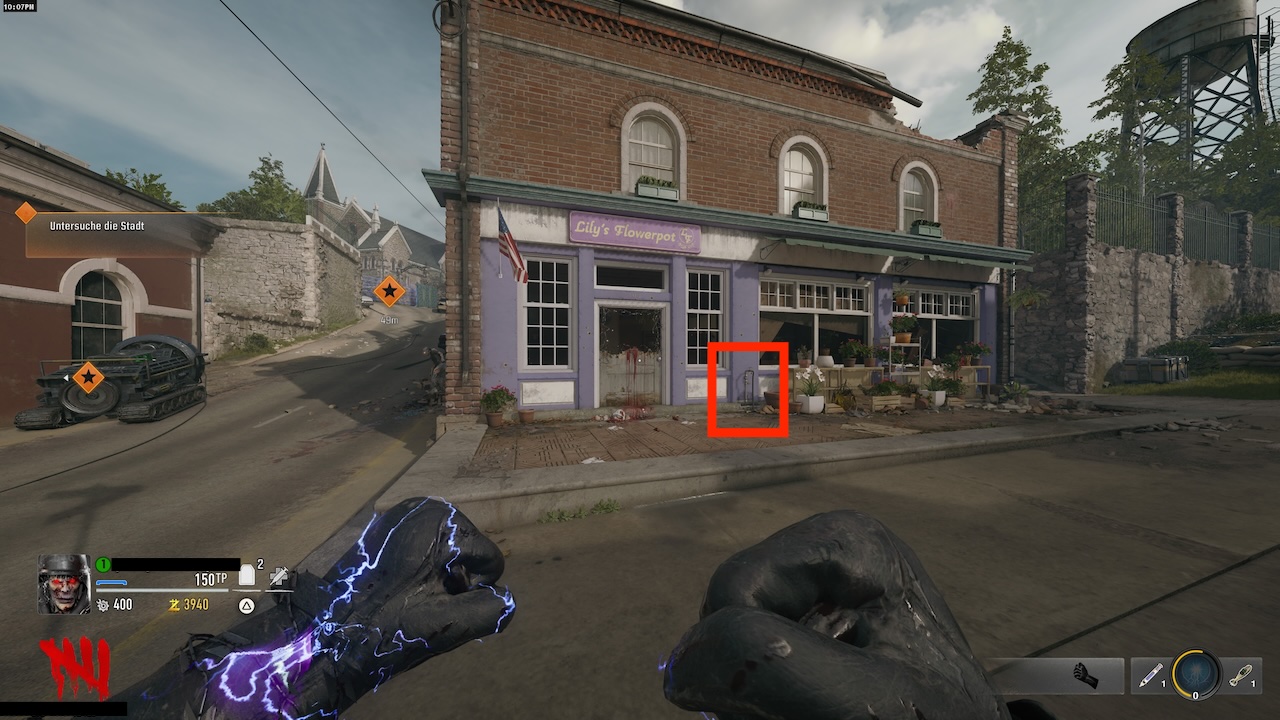
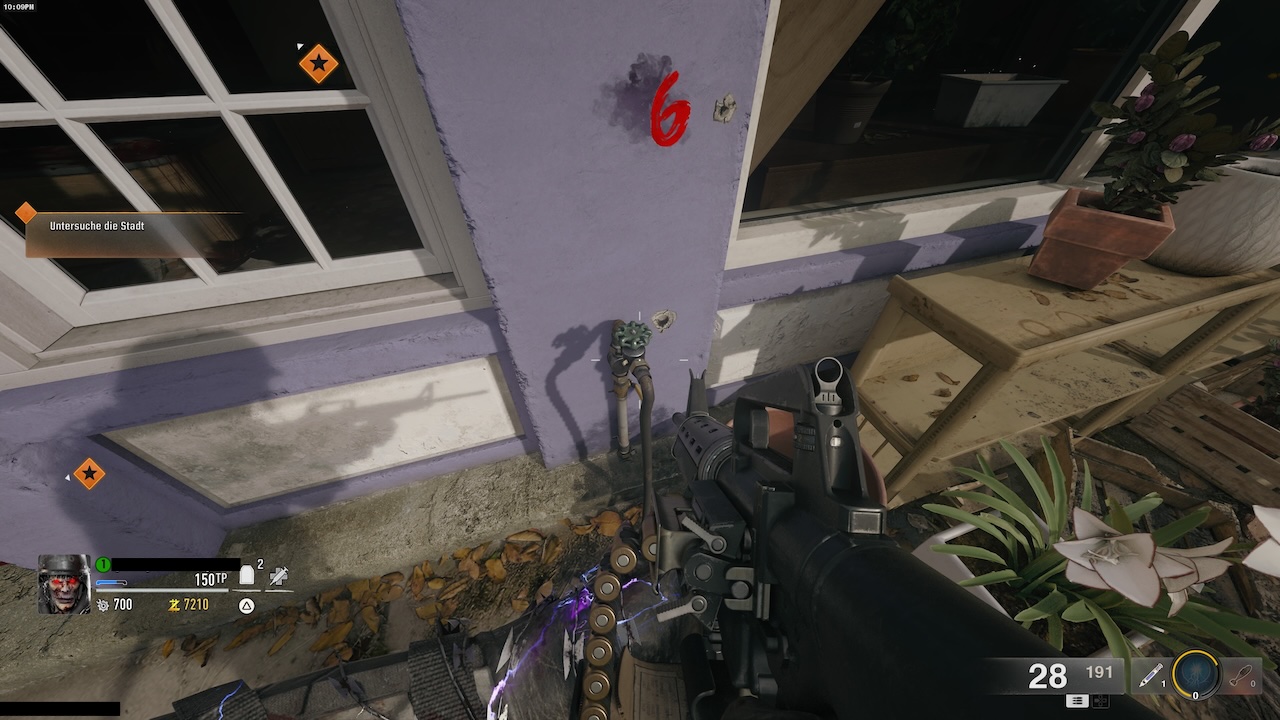
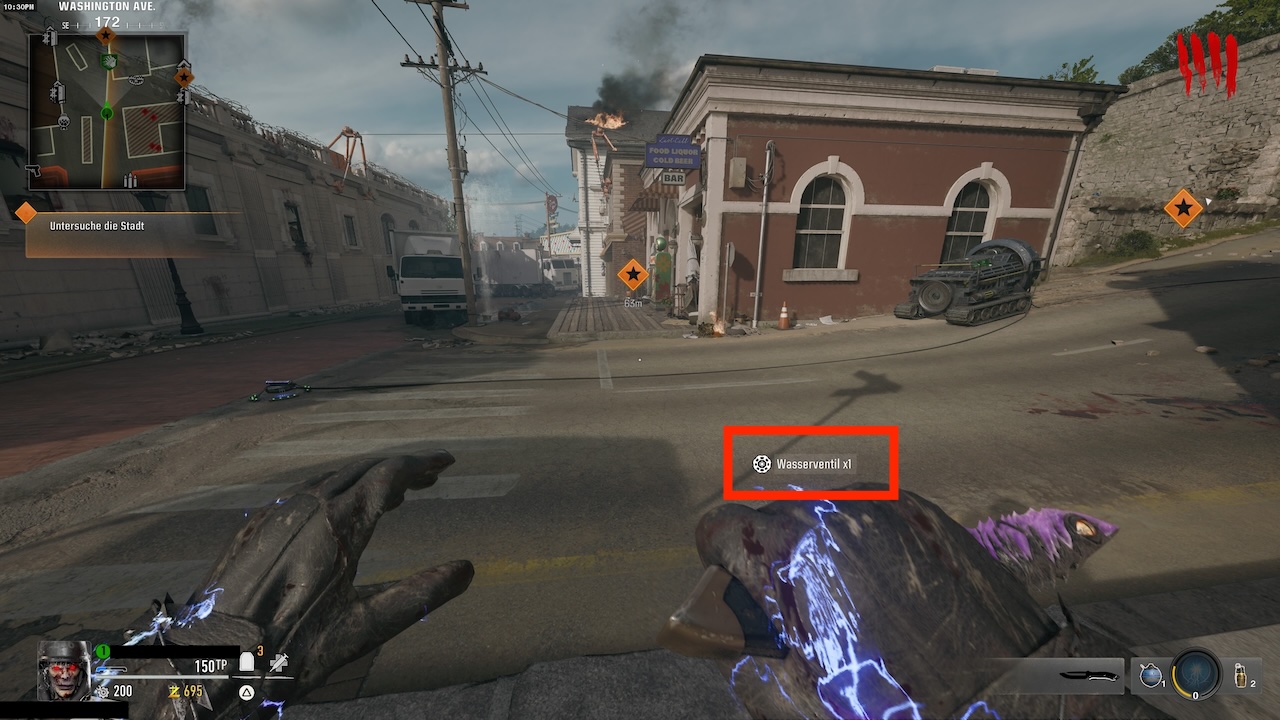
Find the water valve
The first component for the Jetgun can be found at the store “Lily’s Flowerpot”. In front of the flower shop, which is directly across from the bank, there is a pipe with a green water valve. Interact with this using the Square button (PS5), X button (Xbox), or F key (PC). You will now be able to pick up the valve.
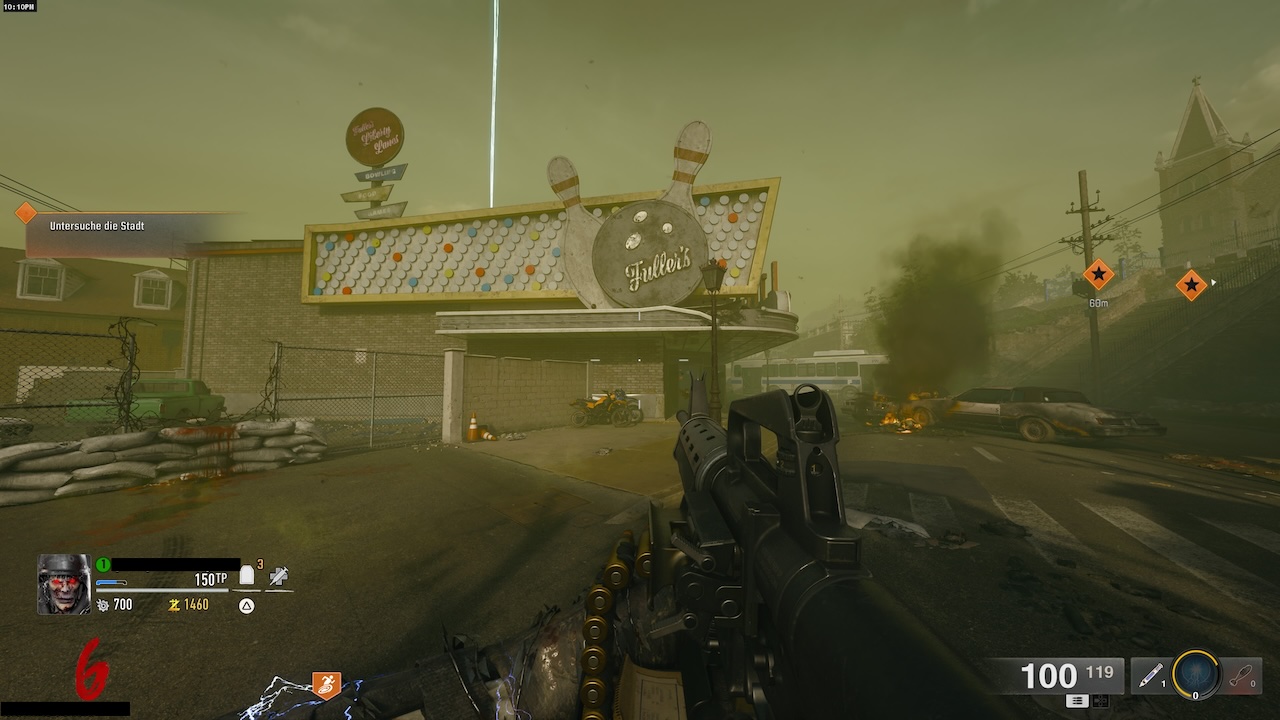
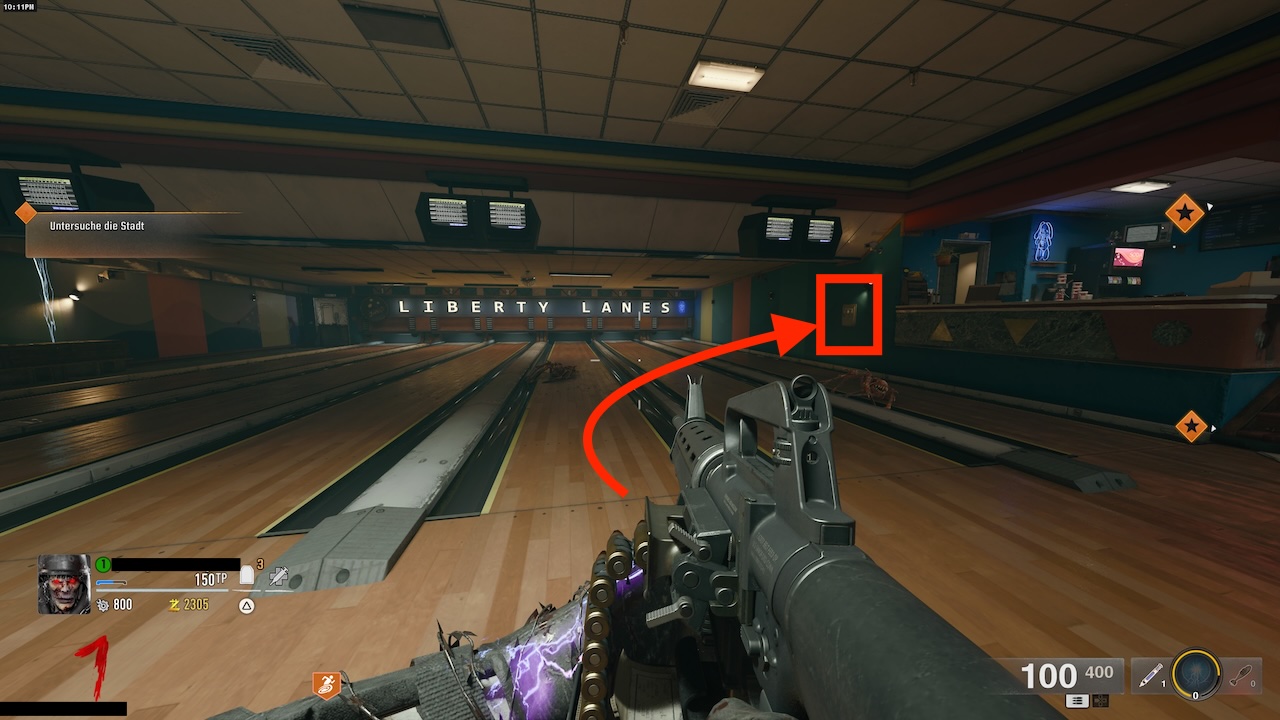
Next, head to the bowling alley. There you will find a yellow box for water pressure on the right lane next to a wall. This is where you will place your valve. Open the box by shooting it with your weapon.
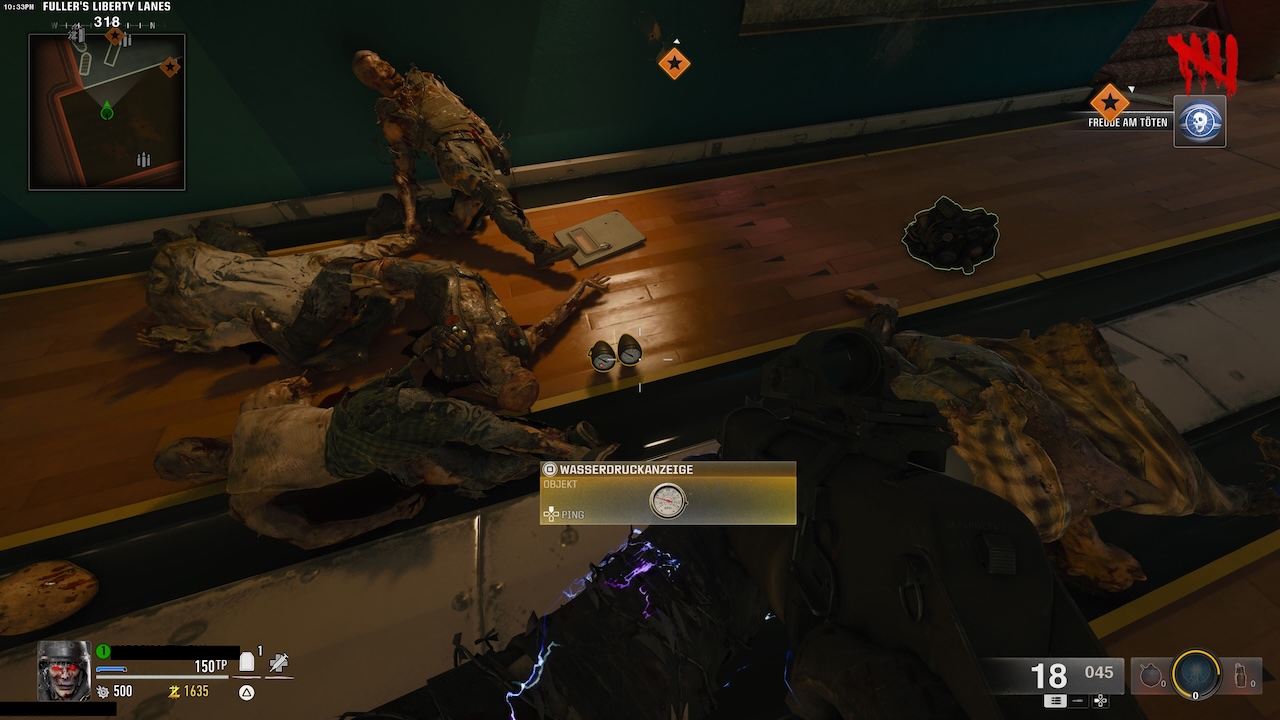
While you secure the valve, zombies will constantly spawn. So you’ll need to turn the valve while being hunted, without getting killed. Make sure to gather all the zombies, destroy them simultaneously, and then turn the valve for a few seconds.
You can use flashbangs and monkey bombs to stop and distract the zombies to give you more time when turning. Once the valve is fixed, you will receive the water pressure gauge as your first component.

Find the handbrake
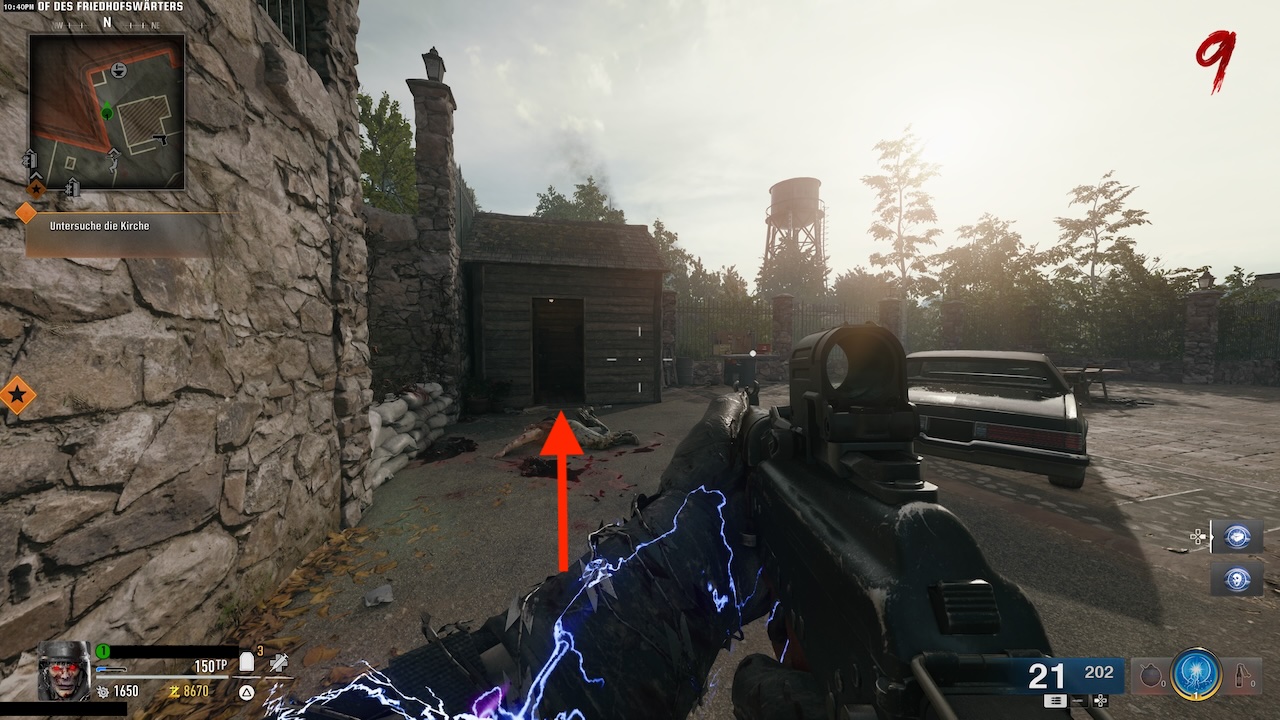
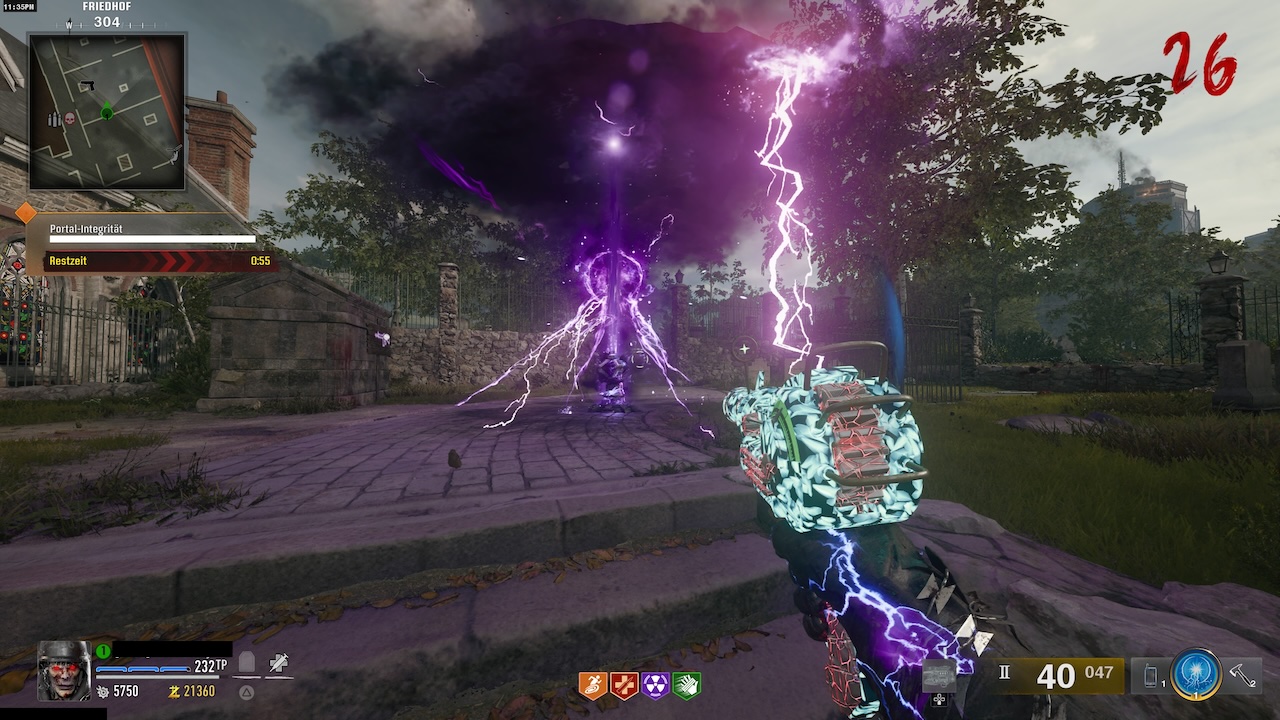
The handbrake is the second component. You can find it in a shed near the church. To gain access to this shed, you first need to eliminate the graveyard keeper at the graveyard to the right of the church.
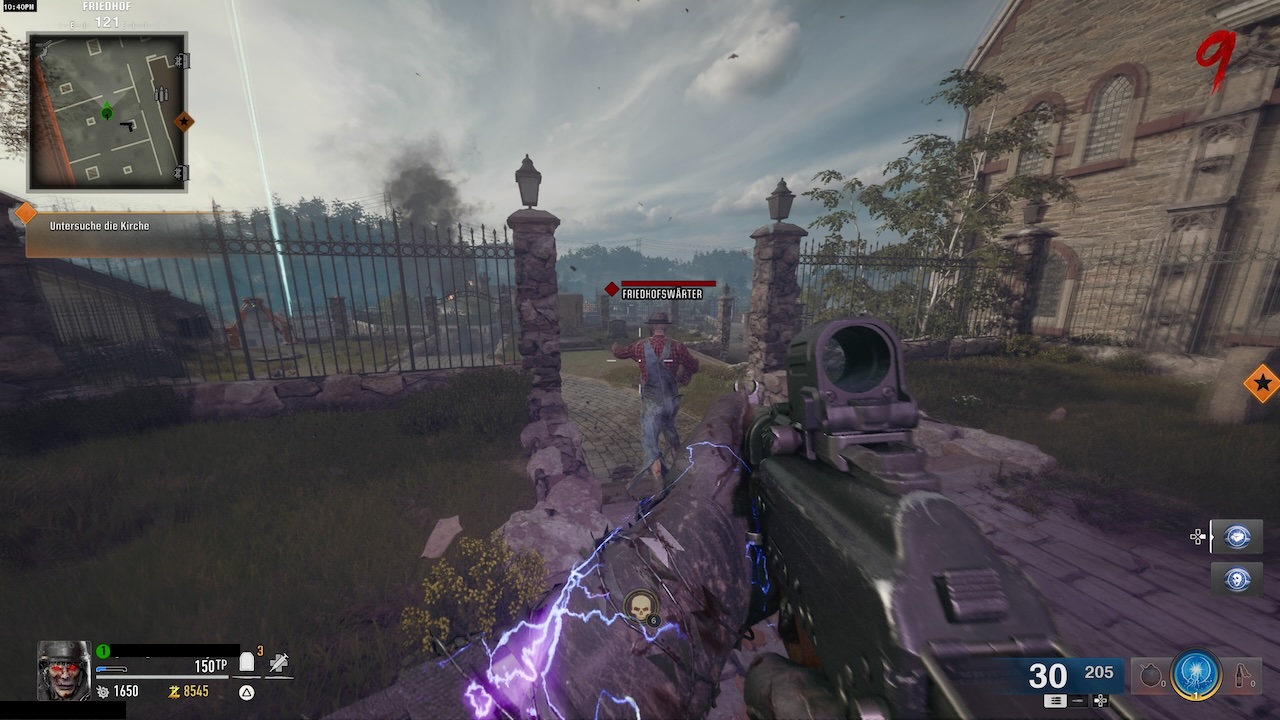
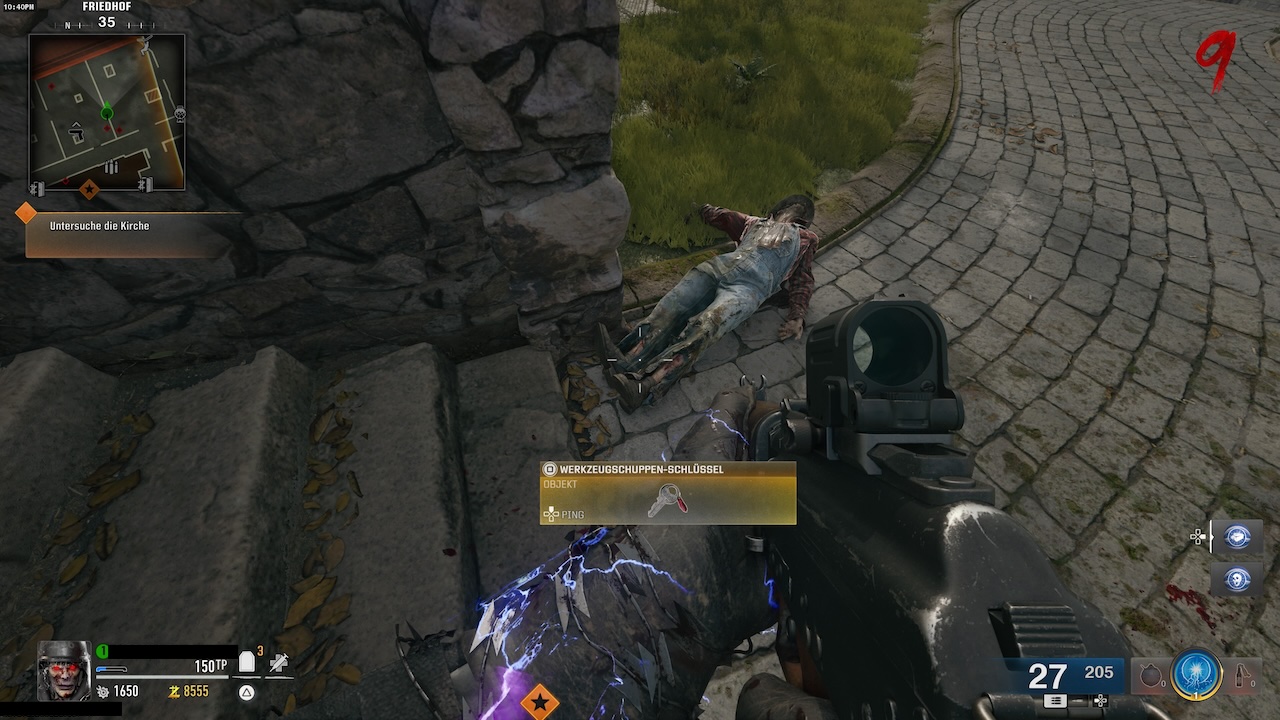
This is a zombie wearing a hat and overalls. He spawns randomly with a purple lightning bolt in the cemetery, checks the grass, and disappears again. So you have to be quick to not miss him. Once you defeat him, you will receive the shed key.
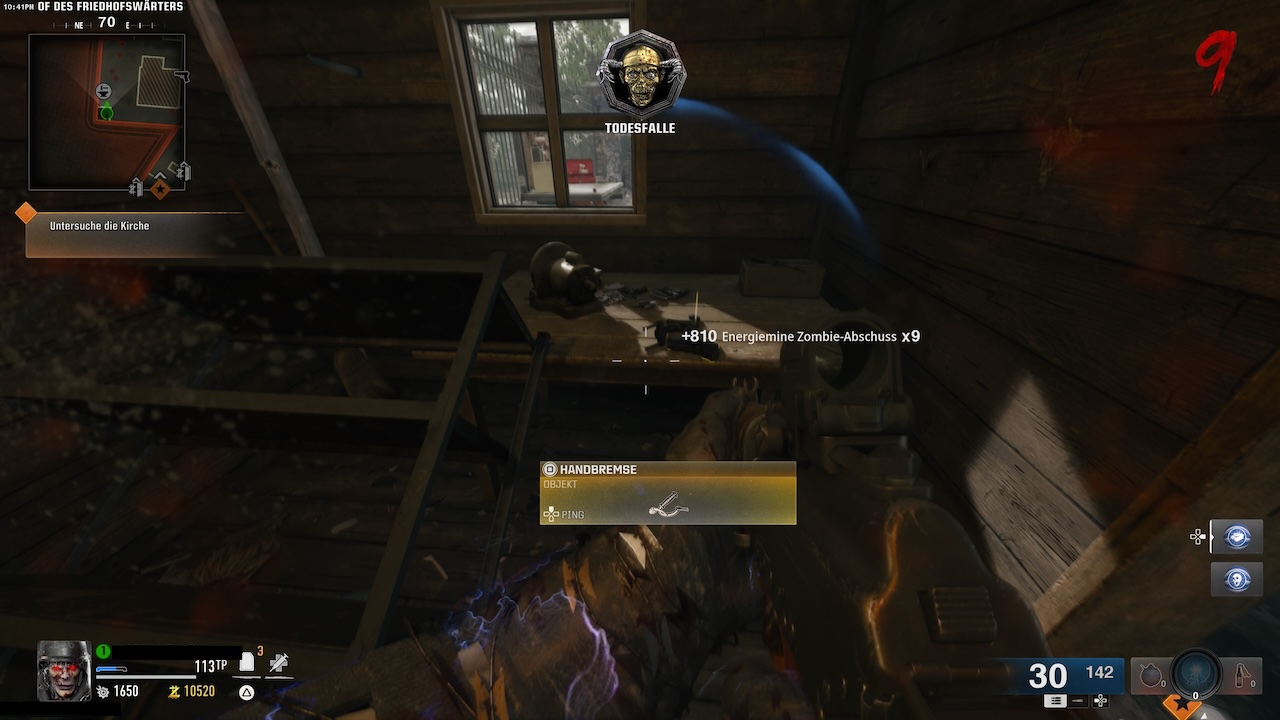
With this key, go to the shed and open the door. On the wooden table, you will now find the handbrake.
Find the power cable
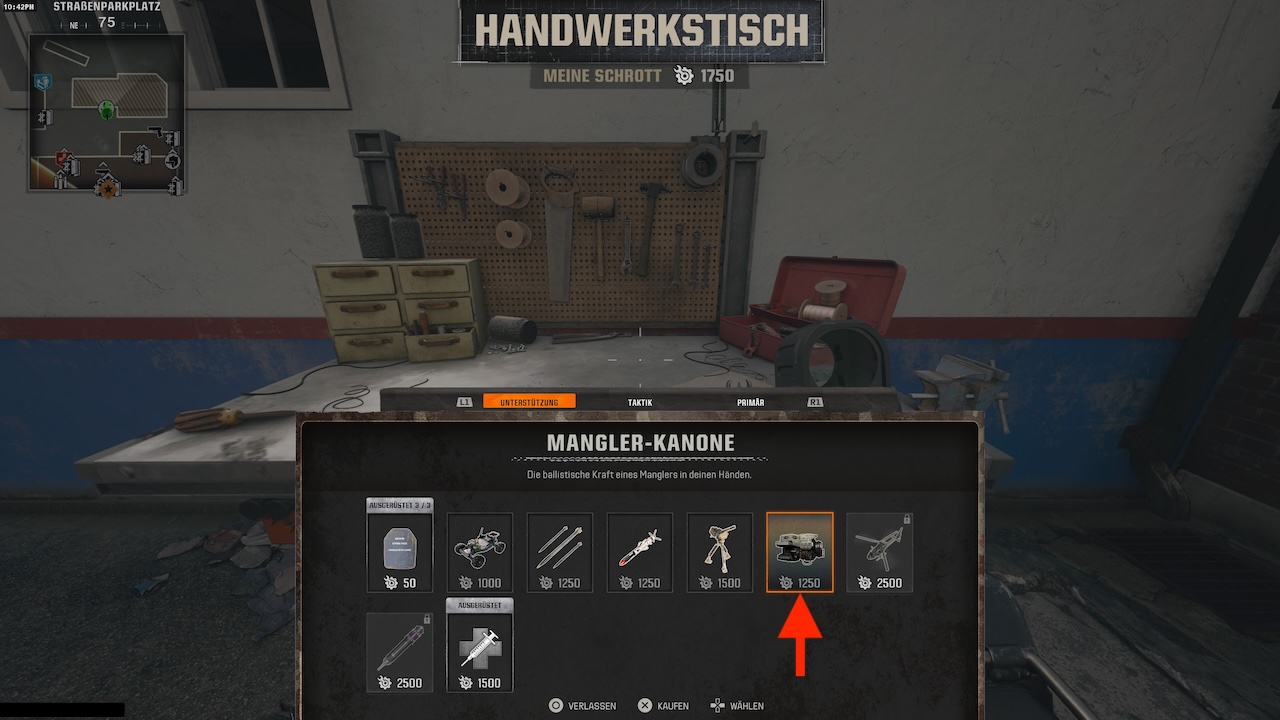
To find the power cables, you need to acquire a Mangler Cannon. These are dropped randomly by Manglers. However, you can also obtain one for scrap – use a crafting table and switch to the “Support” tab. The cannon costs 1250 scrap.
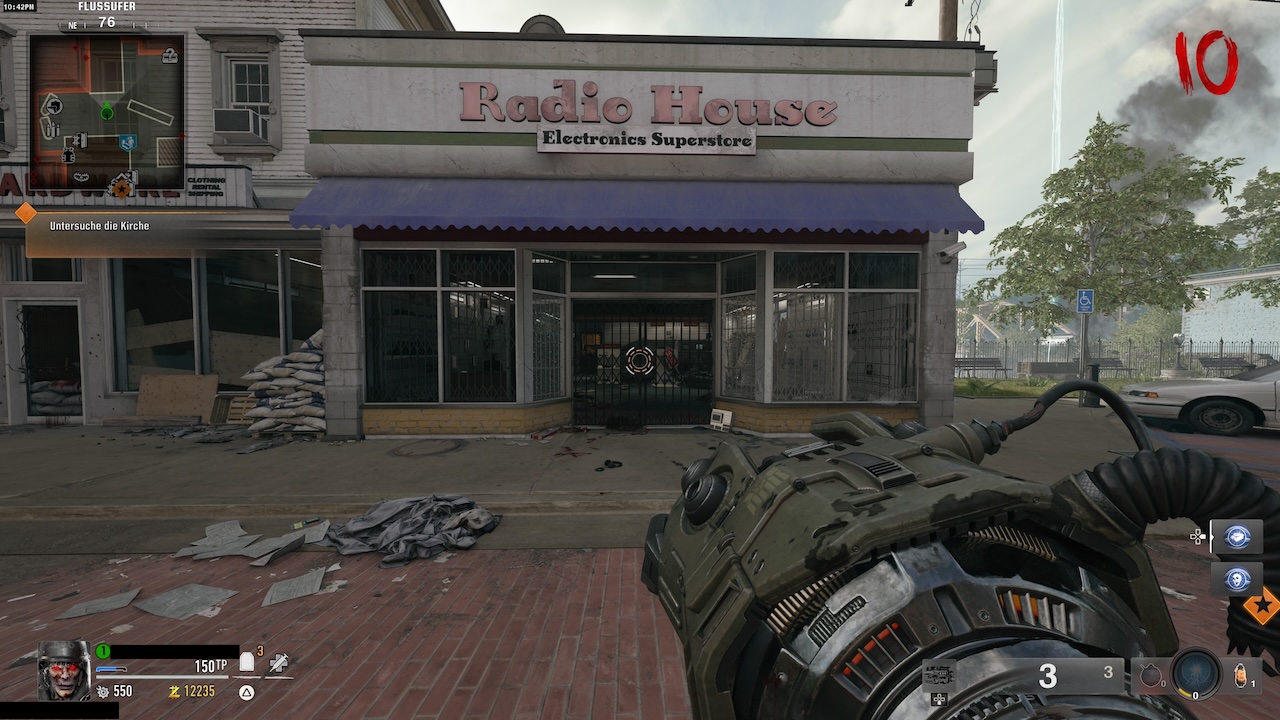
Equipped with the cannon, you now need to visit the store “Radio House”. The electronics store is firmly locked, but with a shot from the cannon, you can blow the door open.
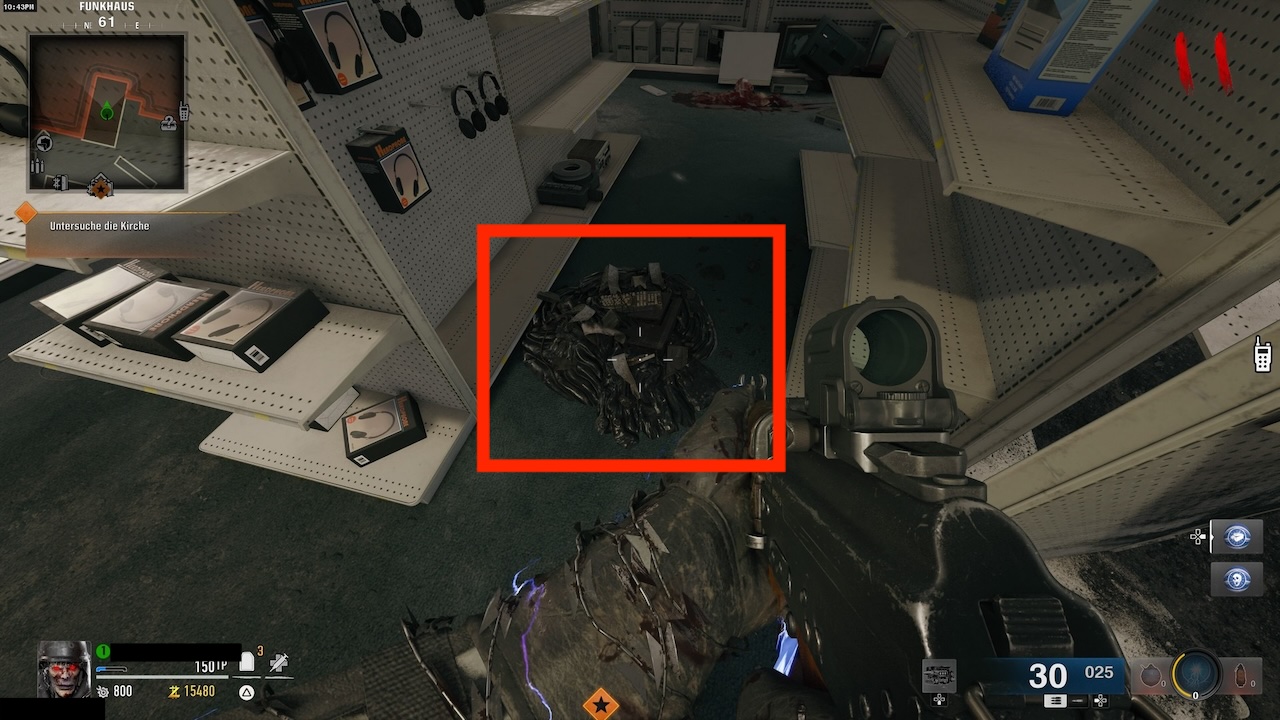
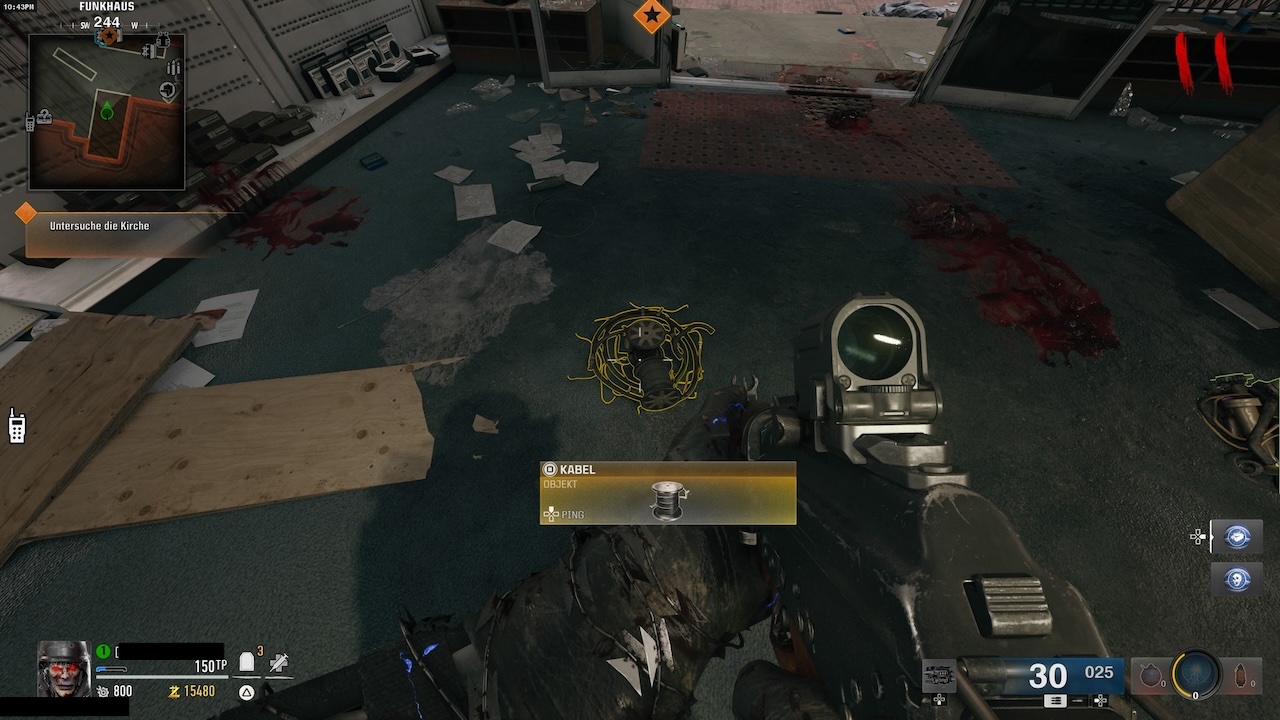
In the store, interact with each cable pile on the floor until one of them spawns power cables. Collect these and head to motel room 202 to pick up your Jetgun.
Be careful when building: You should build the Thrustodyne M23 or Jetgun only at the end of a round. Many zombies spawn from your room, and you can quickly be surrounded.
Step 2: Interact with the SDG Generator in the church
With your Thrustodyne M23 in tow, you can now interact with the SDG Generator in the church. Use the same button as when picking up items and listen to Panos’ conversations. The generator is located on the right side of the church against the wall.
Step 3: Find and assemble the parts for the LTG device
The next step will have you go on a treasure hunt. You need to build the LTG device, but for that, you need three components scattered throughout Liberty Falls. Now your Jetgun comes into play. With it, you can pull these scattered parts from their “hiding spots” to you. You must now visit these locations:
Location: First LTG piece (church)
The first LTG piece can be found directly in the church. Look up at the ceiling, you will find a round part there. Pull it in with your Jetgun.

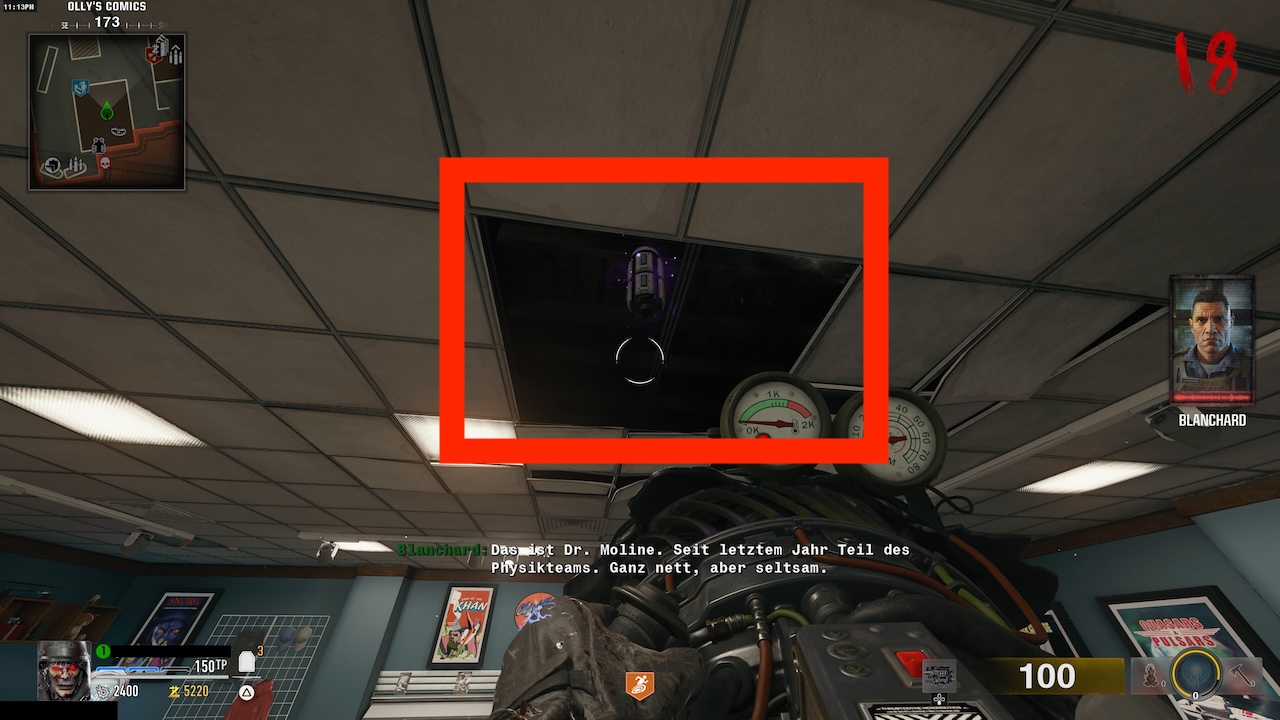
Location: Second LTG piece (comic book store)
The second LTG piece can be found in “Olly’s Comics”, the comic book store. Go into the store and head towards the cash register. At the ceiling by the broken paneling, you can suck in the second piece.
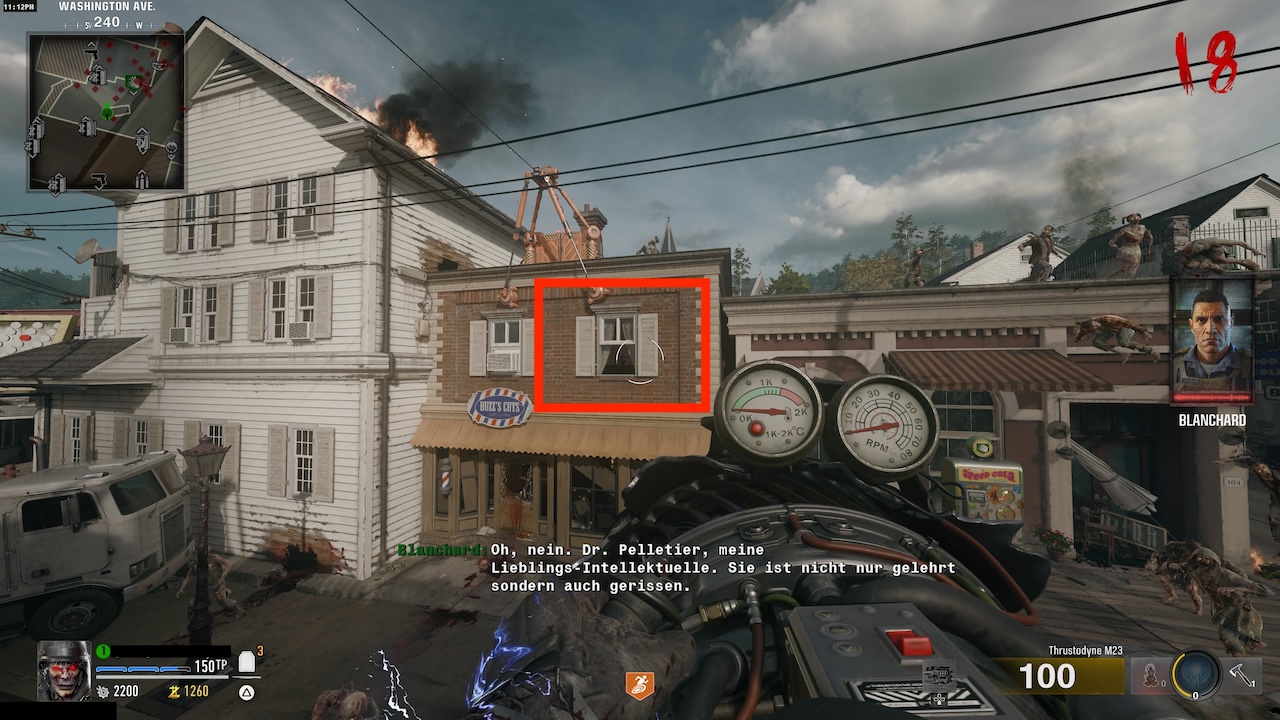
Location: Third LTG piece (barber)
The last LTG piece can be found on the first floor of the barber’s/hairdresser’s. To do this, go onto the roof of the barber’s and jump from there onto the roof of the white van that is directly opposite the barber. Aim at the right open window of the barber and suck in the last piece.
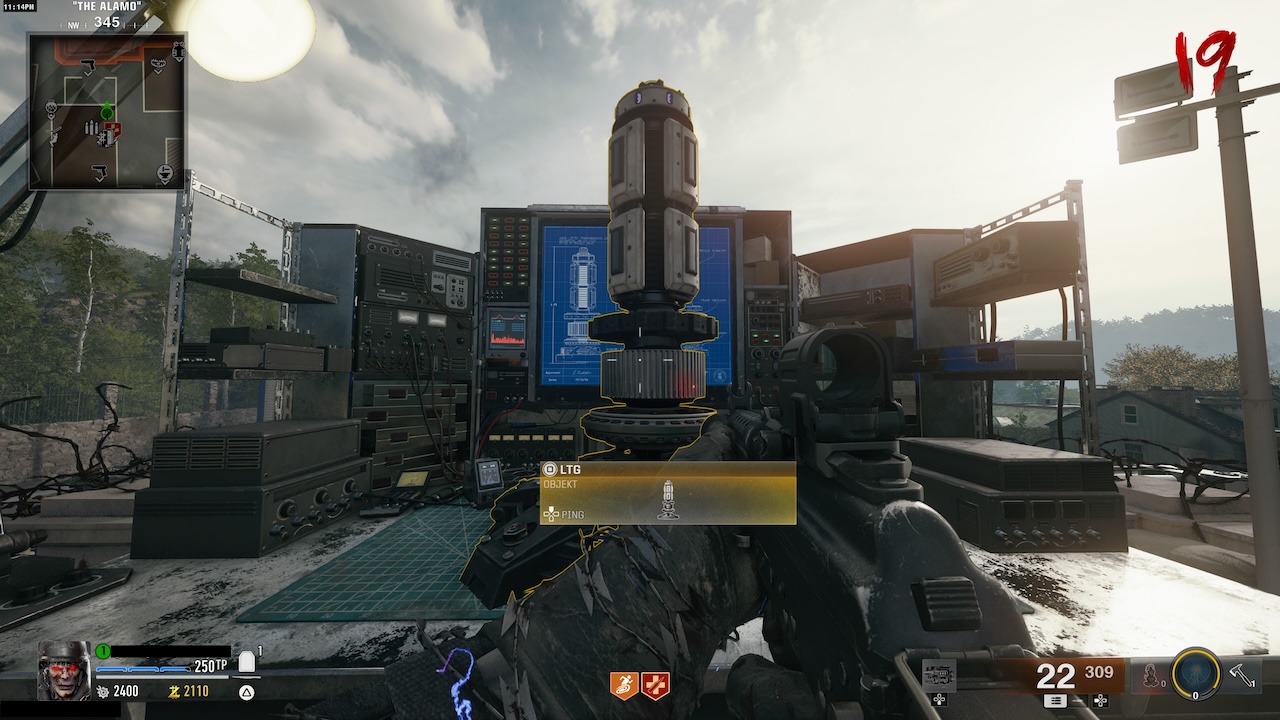
Assemble the LTG parts
To assemble the parts, you must go to the roof of the bank. Buy one of the gondolas that are located in Liberty Falls. We recommend taking the one at the cemetery. On the northern side of the roof, you will find the workbench.

Step 4: Capture the first HVT with the Aether canister
Equipped with the LTG, you now need to return to the church and interact with the SDG Generator to collect the first Aether canister. Note that the canister will slow you down once equipped.
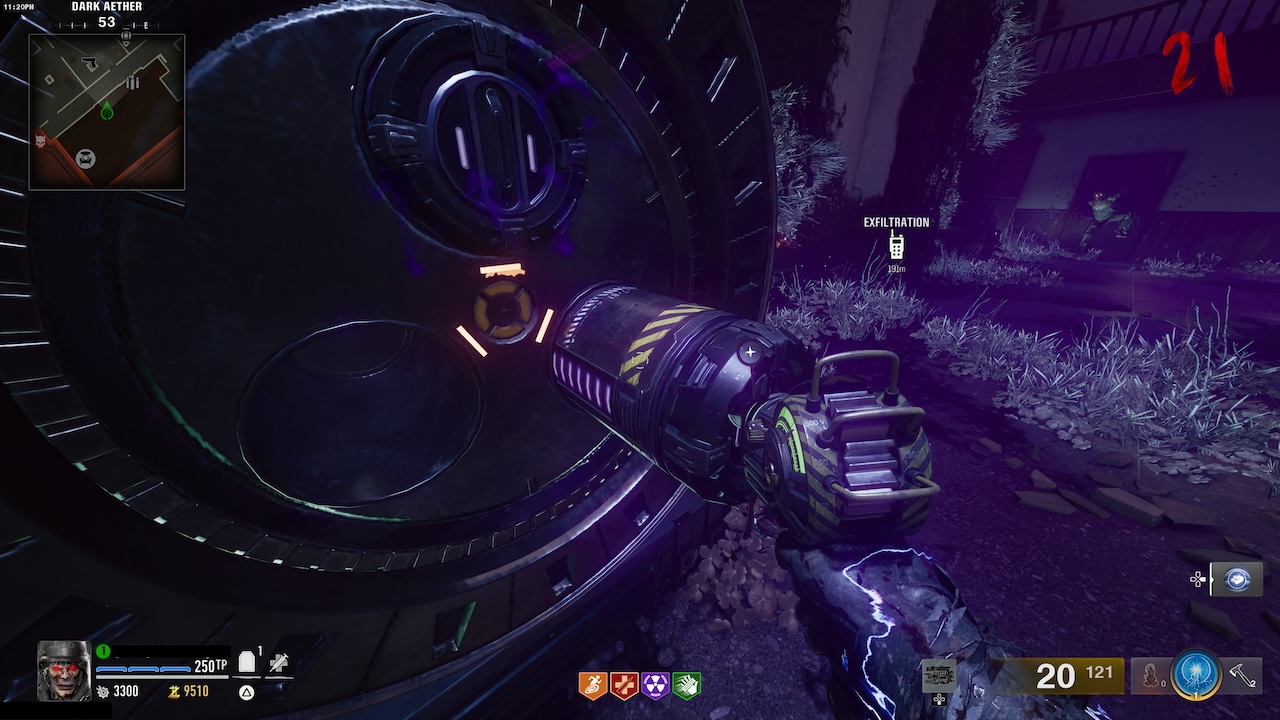
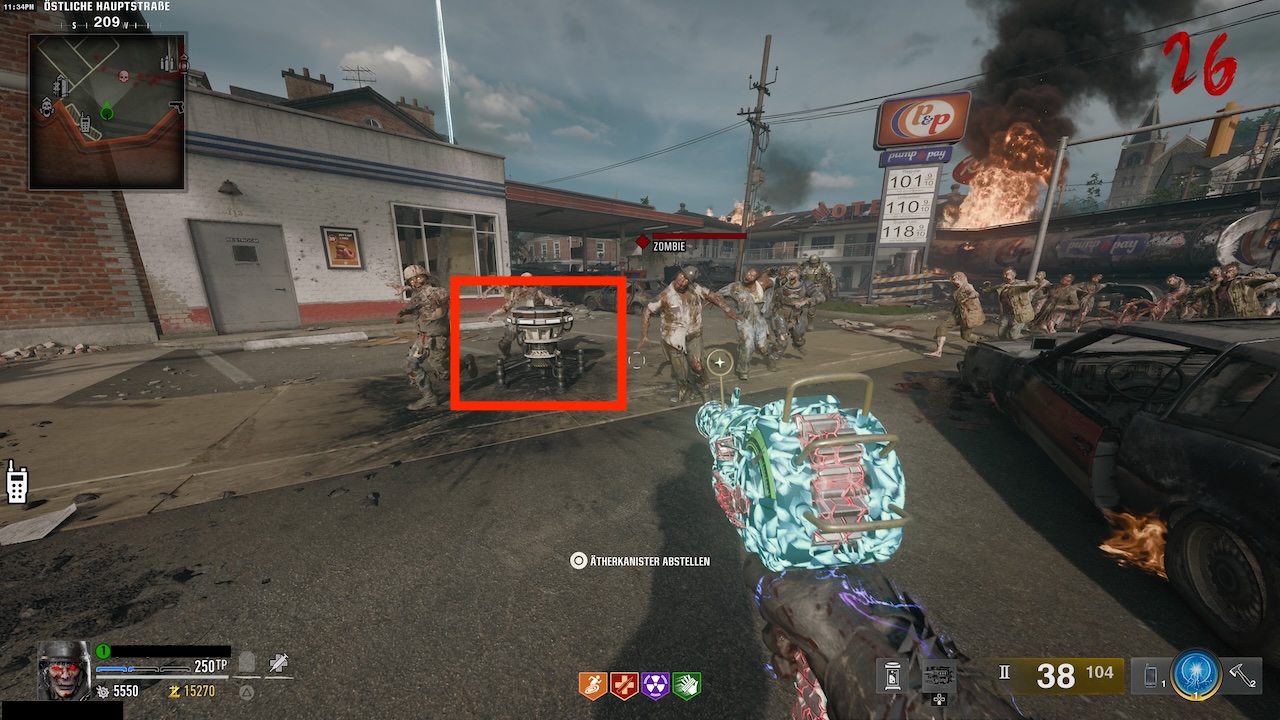
Now head towards the spawn point and place the canister near an Aether trap. You can recognize this by its round design and wiring.
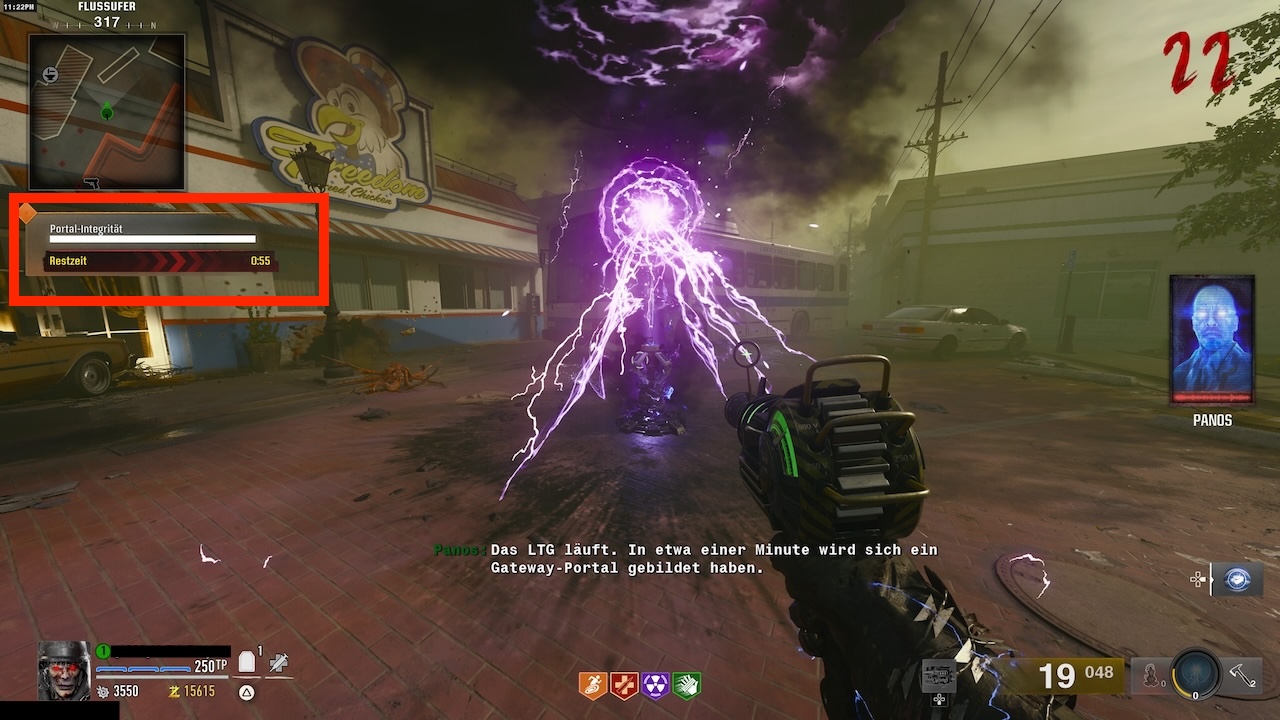
Now head towards the Aether storm that is nearby. There, drop off the LTG. A sequence will start where you need to protect the LTG for one minute. So kill every zombie near you.
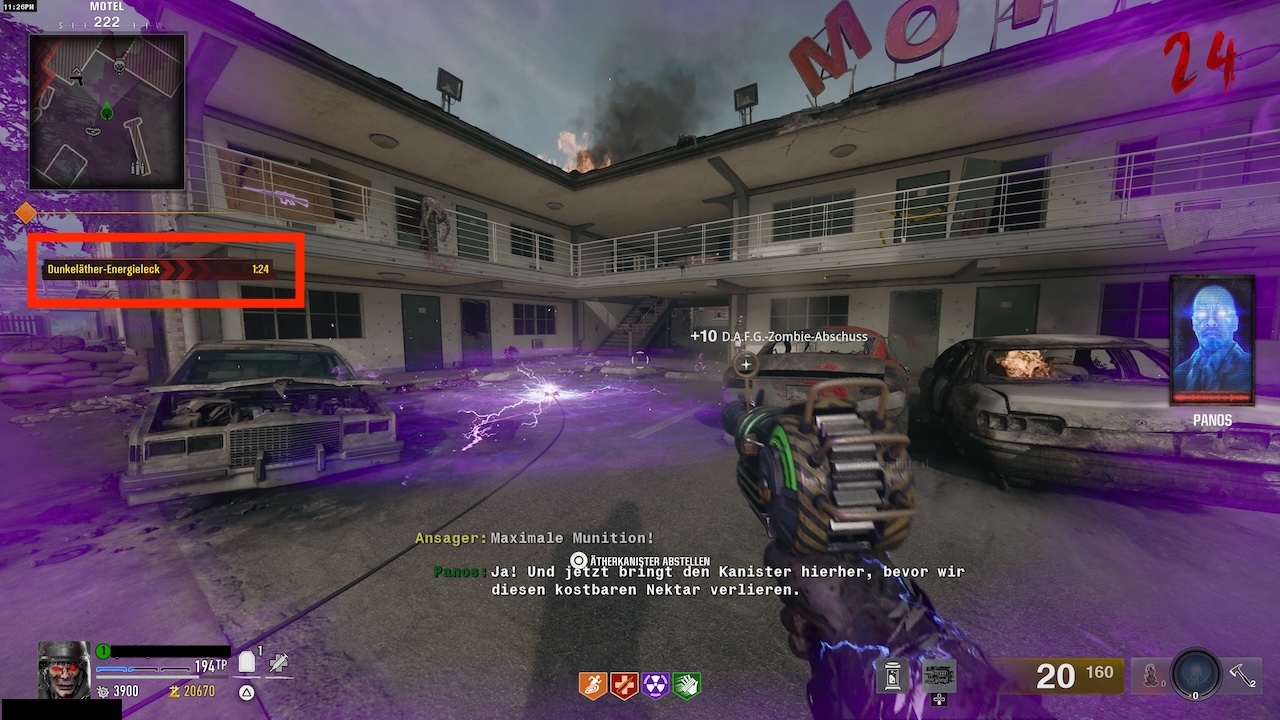
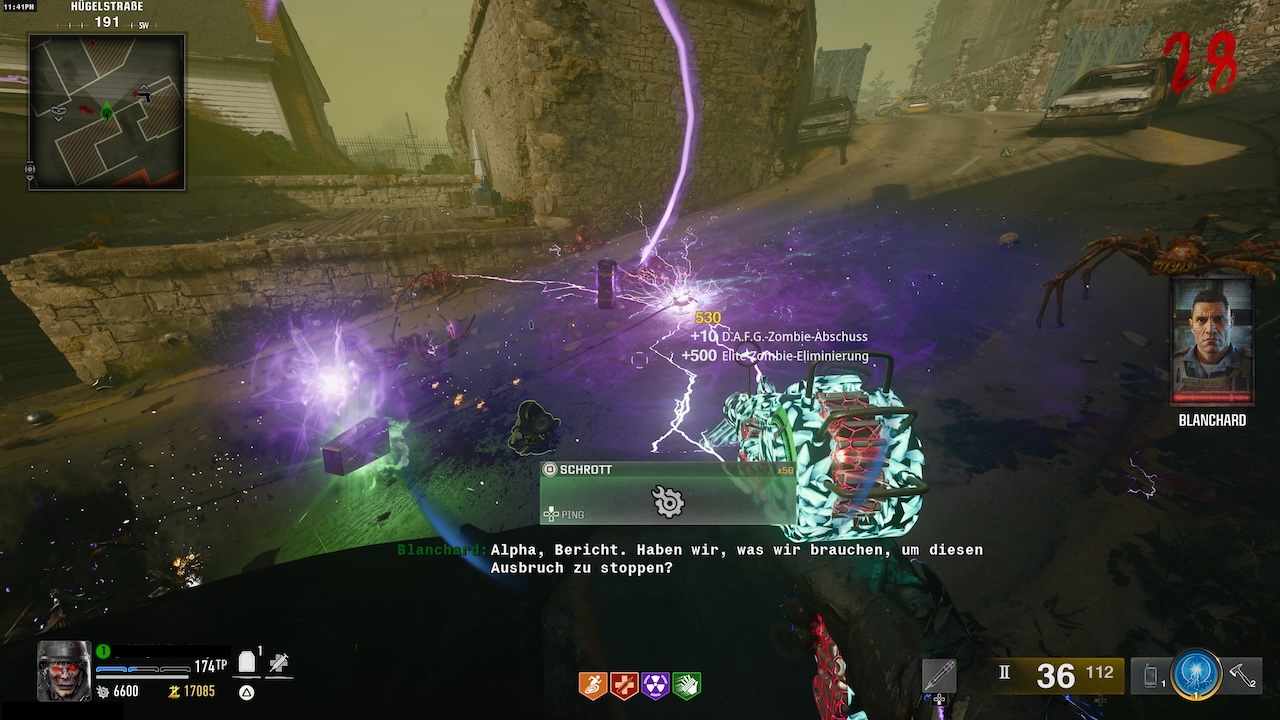
Once the minute has passed, a special zombie will spawn. Lure him towards the Aether canister and activate the Aether trap. Now defeat the Mangler while he is within the radius of the activated trap. Once he is defeated, his soul will be loaded into the canister and you must pick this up.
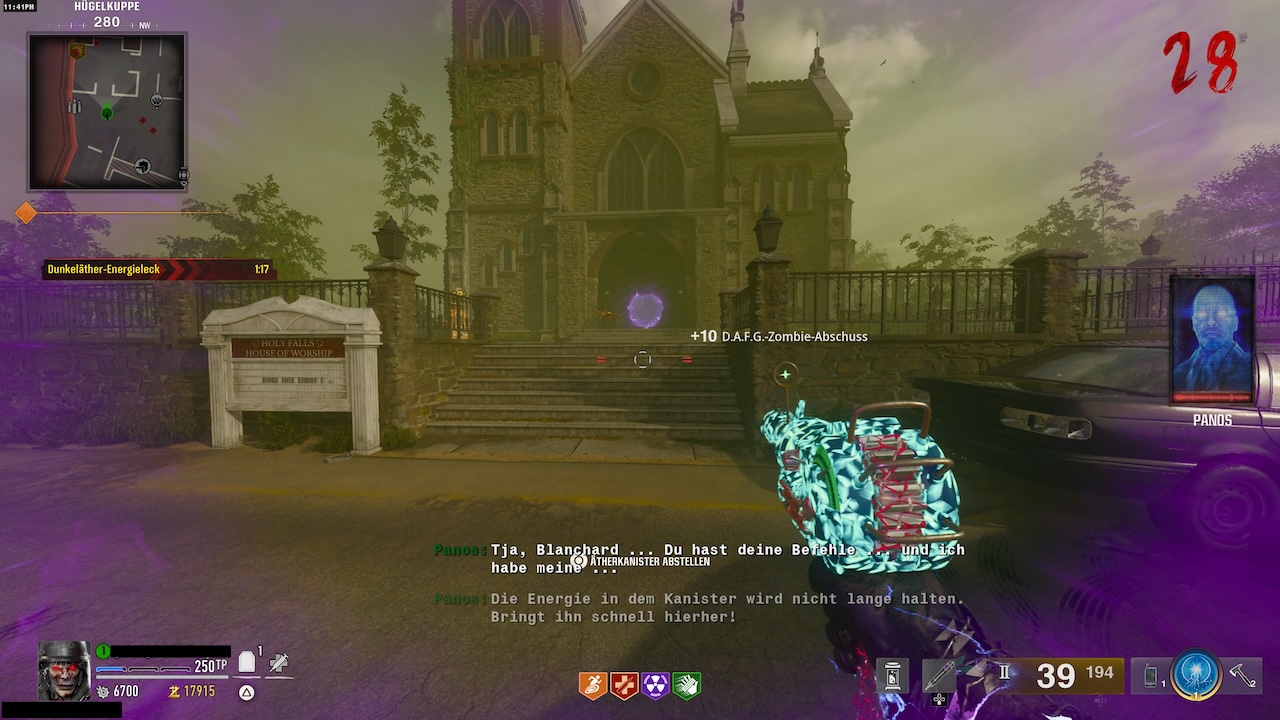
Now a timer will appear. You need to return to the church as quickly as possible and deliver the canister at the SDG Generator. So ignore every enemy and run as fast as you can.
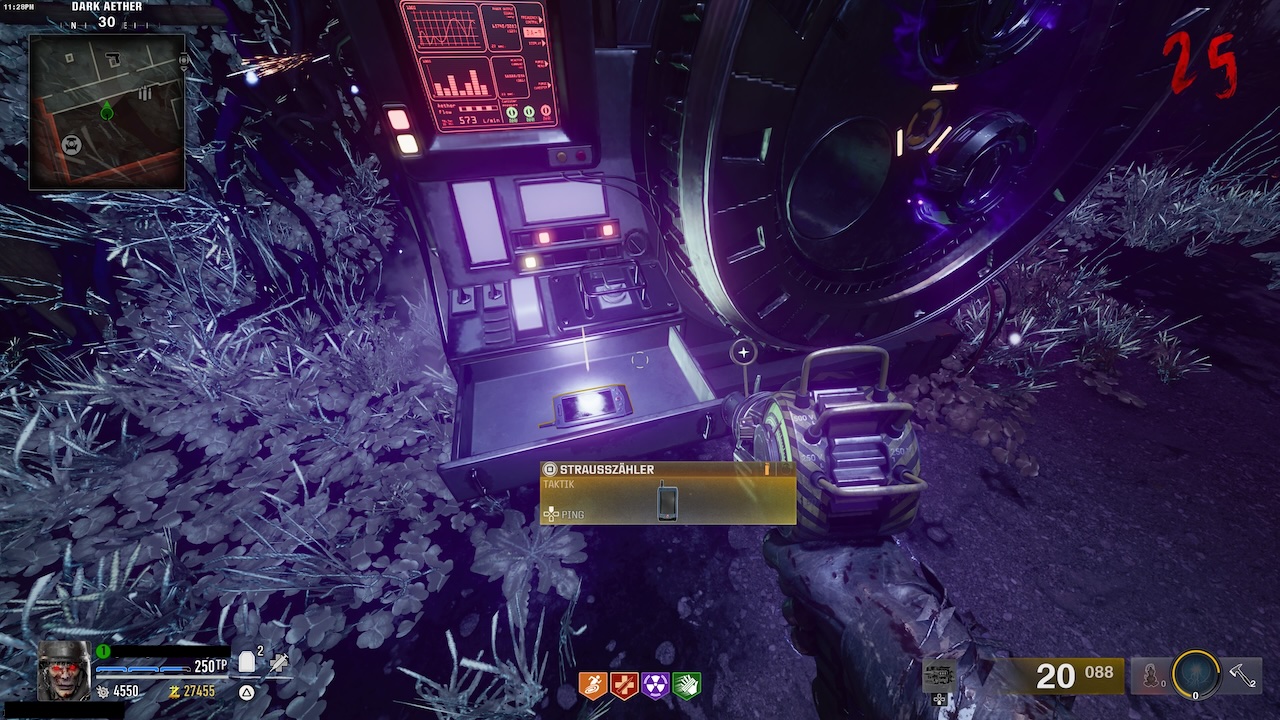
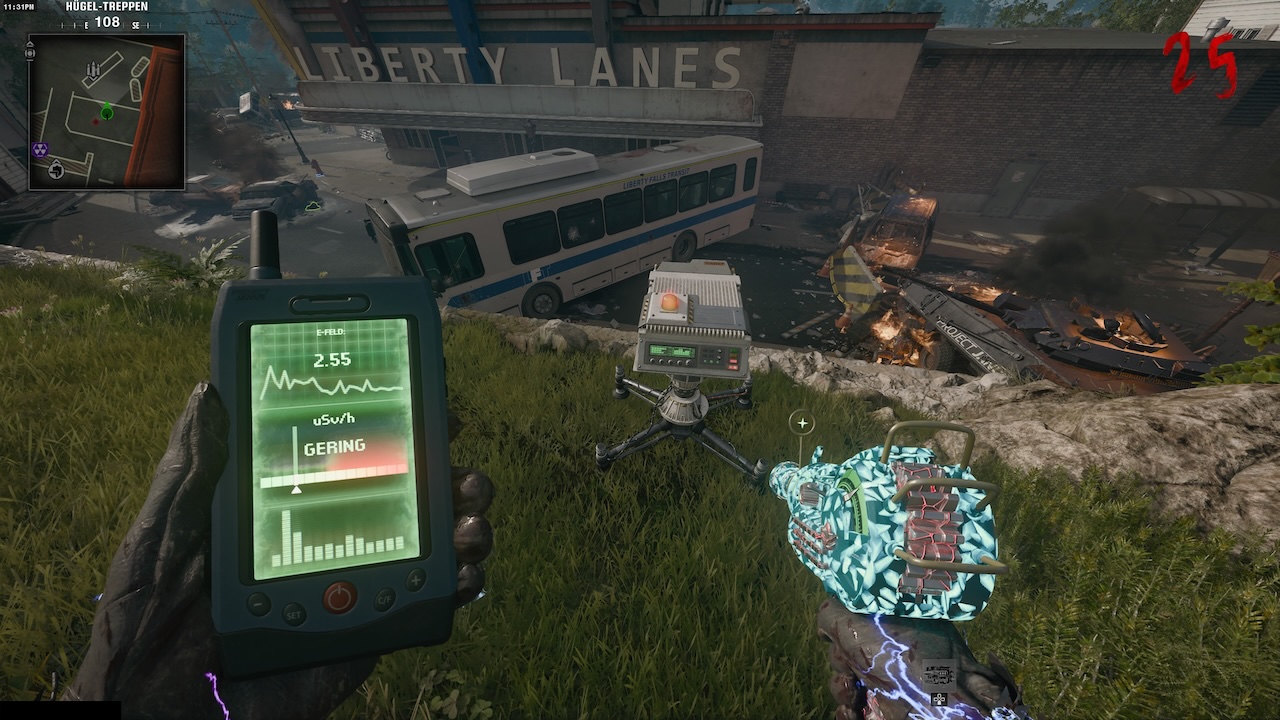
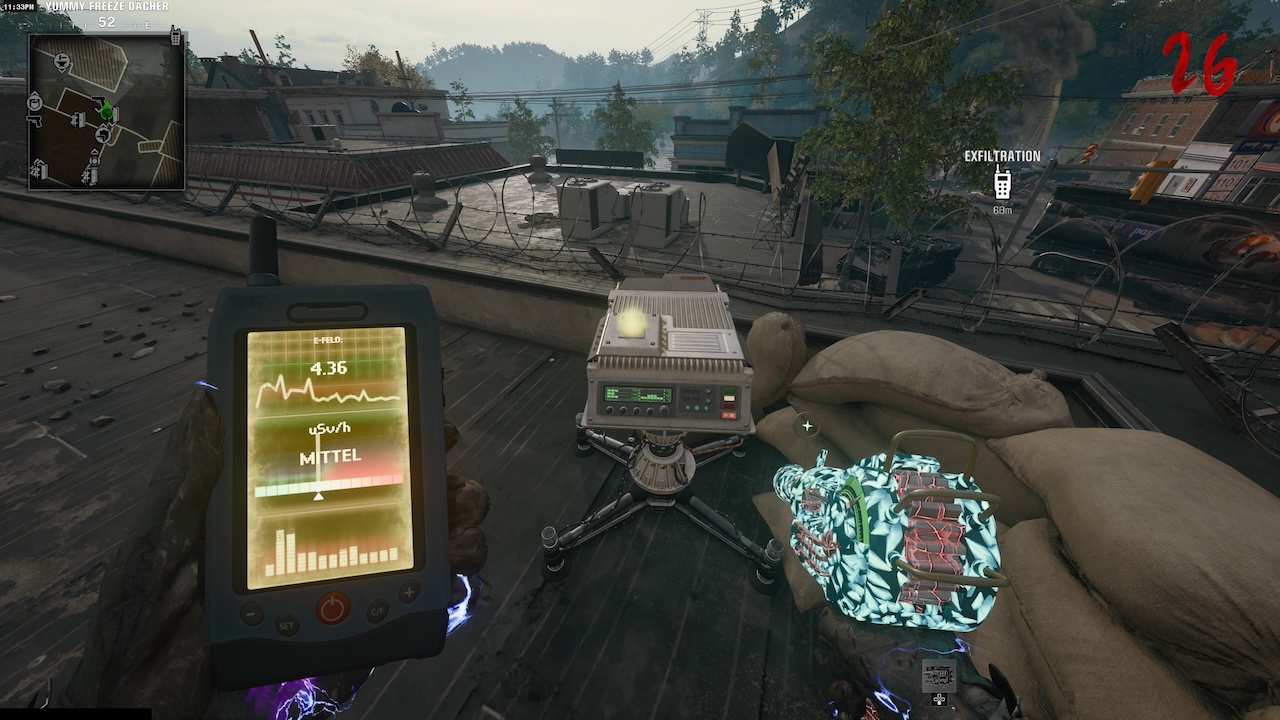
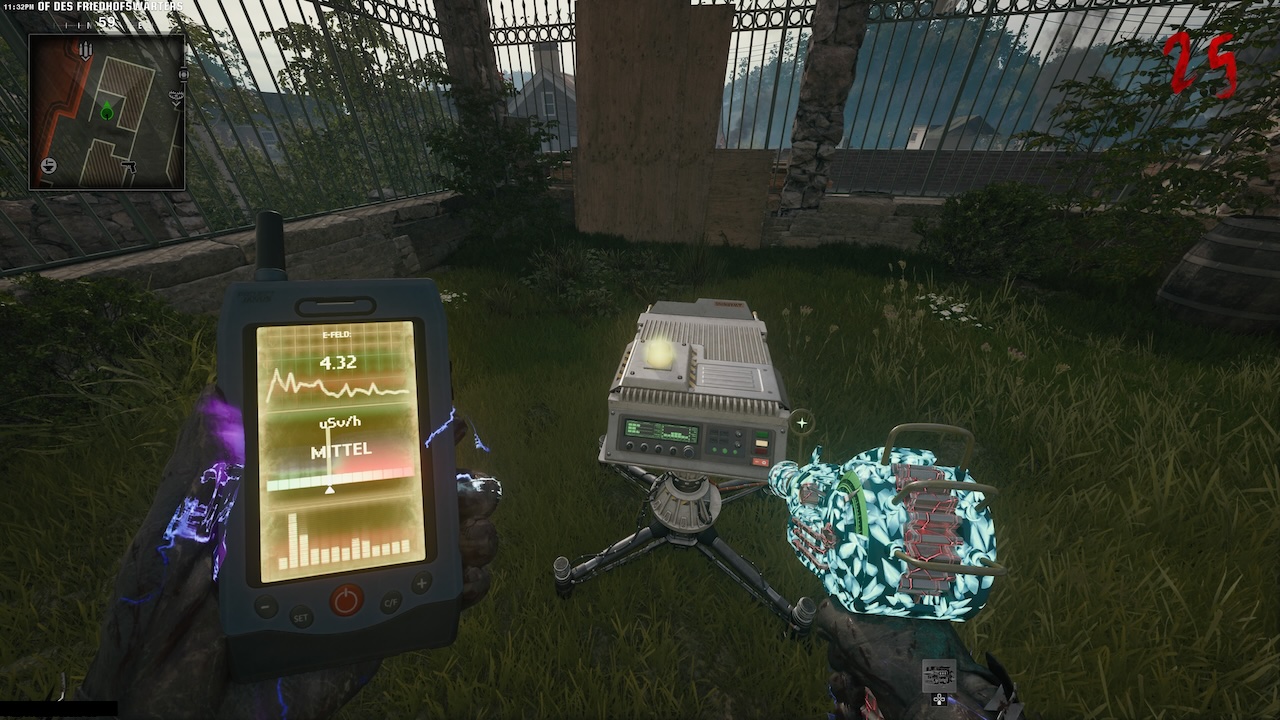
Step 5: Activate all sensors with the Strauss counter
After you have delivered the first canister, the SDG Generator will hand you the Strauss counter. With this, you will only go to the three installed sensors and calibrate them.
The sensors are located at the following positions:
- On the grassy area opposite the Perk-a-Cola “PhD Flopper”
- Across from the shed where you picked up the handbrake (next to the graveyard)
- On the roof of “Yummy Freeze” – To do this, go to the roof of the bank and buy your way up
Interact with one of the sensors. A colored light will now turn on, which can be either red, green, or yellow. Now take out your Strauss counter and check what color the counter shows you. Depending on what you see, you have to change the color of the sensor by interacting as follows:
- If the Strauss counter shows green, the sensor must be red
- If the Strauss counter shows yellow, the sensor must be yellow
- If the Strauss counter shows red, the sensor must be green
If you have set all sensors correctly, you need to return to the spawn. There is a machine next to the gas station “Pump & Pay” that holds the second Aether canister for you. Collect it.
You should note: If you fail during your first attempt and try the Easter Egg again, you will encounter different colors for the sensors and the Strauss counter. They always cycle and are never the same.
Step 6: Capture the second HVT with an Aether canister
Take the second Aether canister with you and head to the road that leads up to the church. Place the Aether canister near the Aether trap again. Now return to the first Aether storm and collect your LTG device there. Take it to the second Aether storm located at the cemetery next to the church.
Now you need to defend your LTG device for one minute while it charges. Afterward, another special zombie will appear, which you must defeat within the radius of the Aether trap. After your victory, the soul will jump into the canister and you must once again run with the canister to the church and plug it into the generator.

Step 7: Preparation for the final fight
Now comes an important step before triggering the final battle of the Easter Egg – preparation. The fight will send you into a tight room with no escape. So you need strong perks, weapons, and items to support you in the fight, as many zombies and elite enemies will rush at you.
Here’s what you should accomplish first:
- Pack-a-Punch your weapons to at least level 3
- Weapons you should use are either the Ray Gun or Mustang & Sally
- Get a revive
- Buy or find a mutation package to make yourself invincible for a short time in a critical situation
- Use the following colas:
- Juggernog
- Speed Cola
- Stamin-Up
- PhD Flopper (to avoid killing yourself with a Ray Gun or Mustang & Sally)
What is the Mustang & Sally?
The Mustang & Sally is a legendary weapon that has been featured in almost every zombie mode. In Black Ops 6, it is the GS-45 in Akimbo, which can then be transformed into Mustang & Sally at the Pack-a-Punch. The weapon is one of the strongest imprints in the game – it fires grenade launcher ammunition that deals high explosive damage at any distance.
Step 8: Activate the SDG Generator
Once you are prepared, you need to activate the generator. After that, the doors of the church will close, and you must defeat all enemies that spawn. Eventually, the red Mangler that you defeated in a previous step will appear. You must defeat him again.

Then, more groups of zombies will attack you. Eventually, the captured Abomination will appear – you must defeat this as well. Once you’ve dealt with both, you will be “killed”, before a short video sequence appears. If that happens, you have successfully completed the Easter Egg.
Rewards for the Liberty Falls Easter Egg
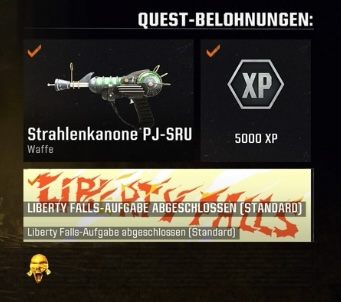
Those who have completed the Easter Egg will receive the following rewards:
- Banner
- PJ-SRU ray gun (skin for the ray gun)
- 5,000 XP
If you also complete the Easter Egg before the start of the story mode, you will receive an alternative version of the banner with a golden skull. This is meant to show other players that you were one of the first to complete the Easter Egg before it was simplified.


If you want to complete the Easter Egg on Liberty Falls, it can help to open the vault in the bank to secure yourself some free loot. The vault can also drop the Raygun. You can find out how to open it here: CoD Black Ops 6 Zombies: Safe Code & Loot Key – How to open the vault in Liberty Falls

Your opinion is important to us!
Do you like the article? Then let us know!