
The patch 4.25 of Final Fantasy XIV is now live and along with it the open world content “Forbidden Land Eureka”. We have a guide for leveling and farming in the new Forbidden Land, which allows you to obtain the relic weapons and relic armor.

In this guide, you will find useful tips and tricks for quick leveling and farming for the new relic equipment.
Basics – FFXIV Eureka Guide
Basically, you can enter the Forbidden Land Eureka both solo and in a group. Group formation is also possible and strongly recommended within the instance.
The item level is lowered to 300 upon entering the area and you can spend a maximum of 180 minutes there.
Flying is generally not possible in Eureka, and to unlock the mounts, you must complete the level 17 story quest of Eureka.
You can only switch jobs at the main camp at the entrance of Eureka. Next to the aetheryte in this camp, there are two more crystals on the map.
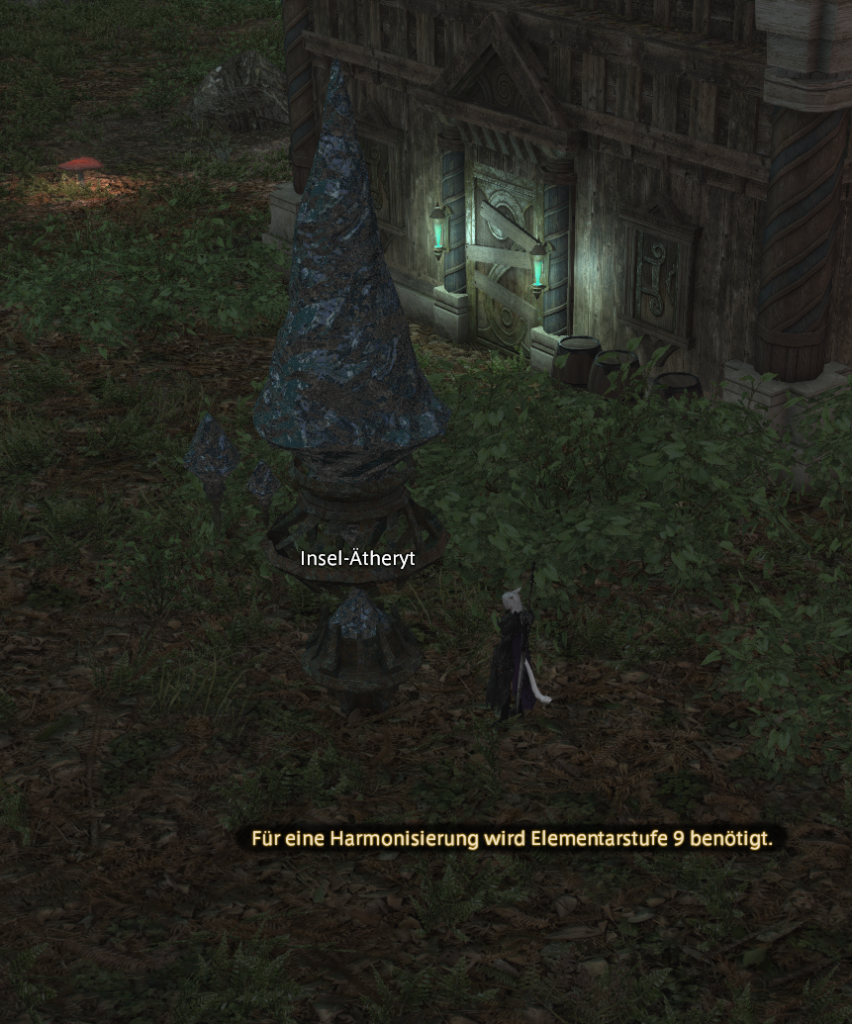
However, these can only be used when you have reached an elemental level of 9. You can also only teleport from one crystal to another.
The proximity to these crystals will not protect you from monsters. If monsters randomly come close, they will attack you just like anywhere else.
The quests also work differently in Eureka. There is no archive where you can check where to go next. Players should remember well what hints the NPCs have given; otherwise, it may happen that you forget where to go.
Some of the quests are also designed so that you must cooperate with at least one other player to solve them.
At the NPC material manager, you can buy various potions. They don’t cost much but can only be used in Eureka.
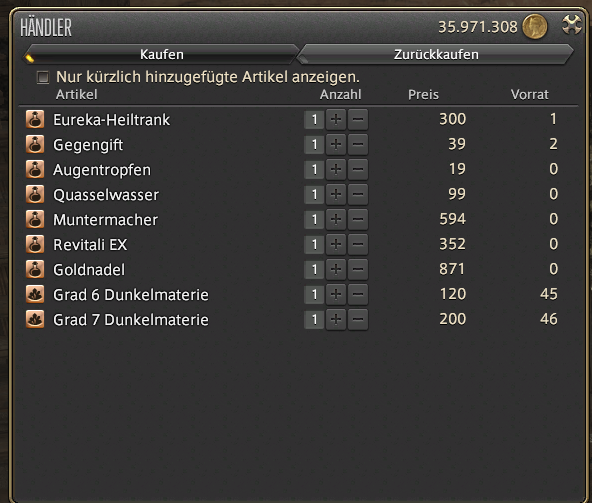
It is advisable to have at least a handful of healing potions and antidotes, as they help while farming or can even save the player’s life in FATEs.
Charles has also published a video about Eureka on his Youtube channel:
Magia Board
Instead of the normal levels, there is a separate element-based leveling system in Eureka. Players need Maginite, which can be used on the Magia Board to change their elemental strengths and weaknesses.
Maginite is obtained through leveling and completing quests within Eureka.
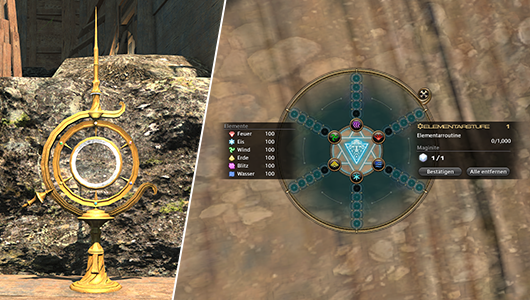
To place the Maginite on the Magia Board, you must use the Magia Fuser at the main camp at the entrance. It is the only place where players can place their Maginite.
You can see how much bonus the respective element receives by inserting the Maginite also on the display of the Magia Fuser. Two inserted Maginite give a bonus of 52%.
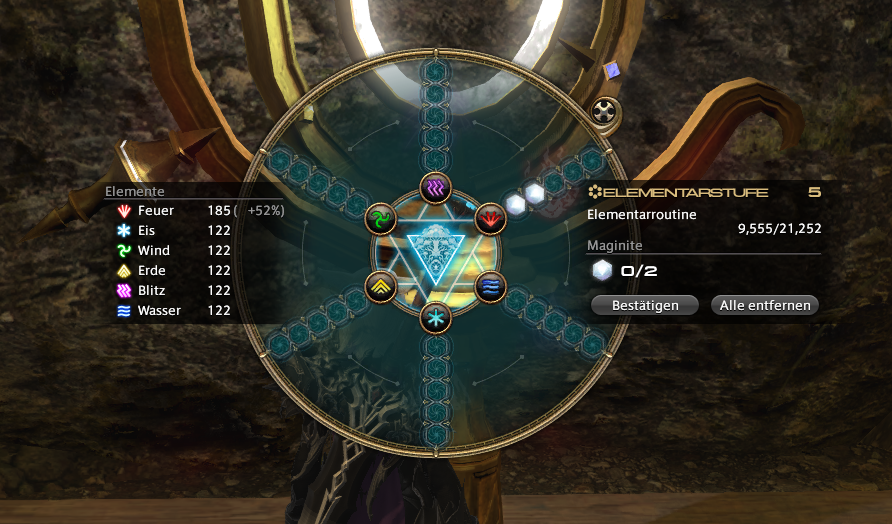
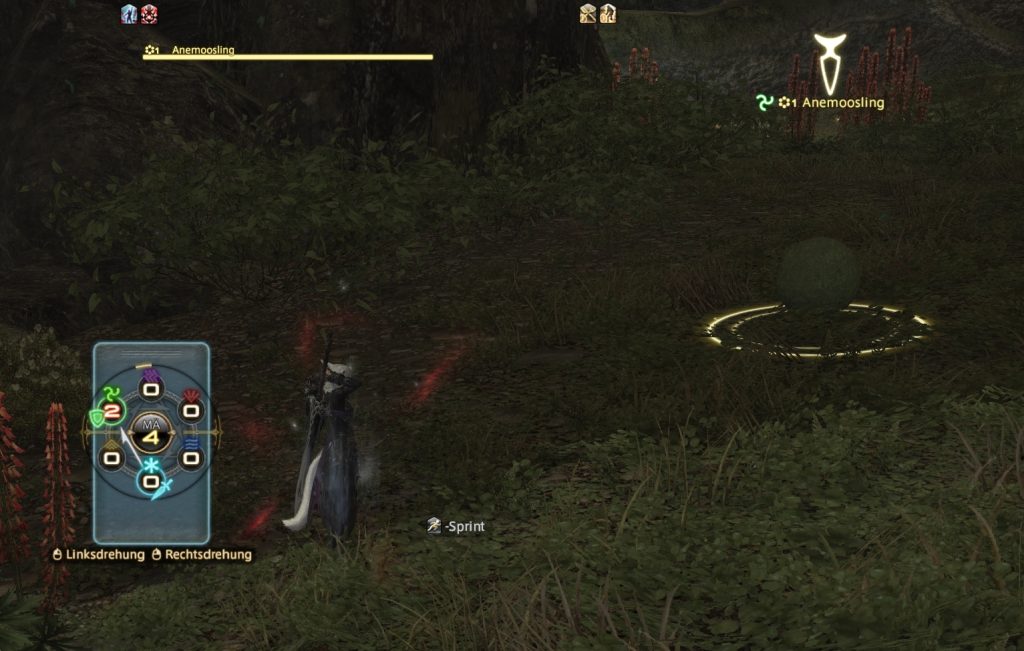
Basically, you want to adapt your element to the opponent you are fighting at the moment. To be able to do that quickly in battle, the board can be rotated.
Which elements the opponents are weak against can be seen directly on the Magia Board when you target them.
You can use elemental properties both offensively and defensively. In this case, the monster being targeted is wind-elemental.
That means:
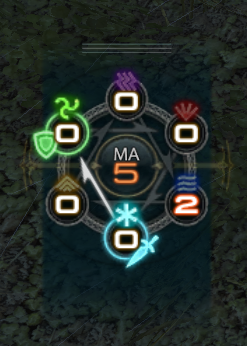
- The DPS and healers should invest their Maginite into the ice element to deal more damage.
- The tanks, on the other hand, should choose the same element as the monster, as they will take much less damage as a result.
Your own elemental properties can be changed at any time by rotating the Magia Board. A completed rotation consumes one MA point, of which you can have a maximum of 5.
A rotation can consist of several turns in different directions. As long as the element is not locked, the MA point is not consumed.
The MA points are slowly replenished over time or can alternatively be fully replenished directly at the Magia Fuser.
Monsters of Eureka
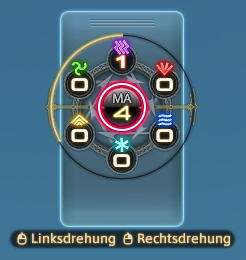
The enemies in Eureka all have a fixed assigned elemental property and a level. For example, the level 1 spinning crabs are water-elemental and the level 9 black wolves are fire-elemental.
The monsters also possess four different aggro patterns:
- They attack either upon line of sight: sight
- when they hear the players’ steps: sound
- when a character’s HP falls into the yellow area: blood
- or when someone uses magic in their vicinity: magic
In general, the rule is: Everything with eyes is “sight-aggro,” meaning most animal monsters like crabs, wolves, or frogs and everything that walks on two legs.
But also magical beings like imps, bombers, or puddings. This means that you can stand right behind them without being attacked.
Unfortunately, you cannot infer in reverse that everything that “has no eyes” is “sound-aggro.” The sound-aggro monsters are, however, rarer and harder to identify.
Some plant monsters like morbols or bats, but also opponents like leeches or sea bishops can be classified as “sound-aggro.” As mentioned, unfortunately, it is not immediately visible, and only personal experience helps.

The “blood-aggro” occurs primarily with undead creatures like skeletons or ghosts, and “magic-aggro” only with elementals.
Additionally, the chance of being attacked by an opponent decreases with the increasing level. At level 4, you will be left alone by level 1 mosslings and crabs.
Overall, you can categorize the opponents in Anemos into three different categories:
Normal Level Mobs
These are the enemies you will fight in regular level groups. They do not have much HP and drop the coveted unstable crystals after death, which are needed for upgrading the relic equipment.
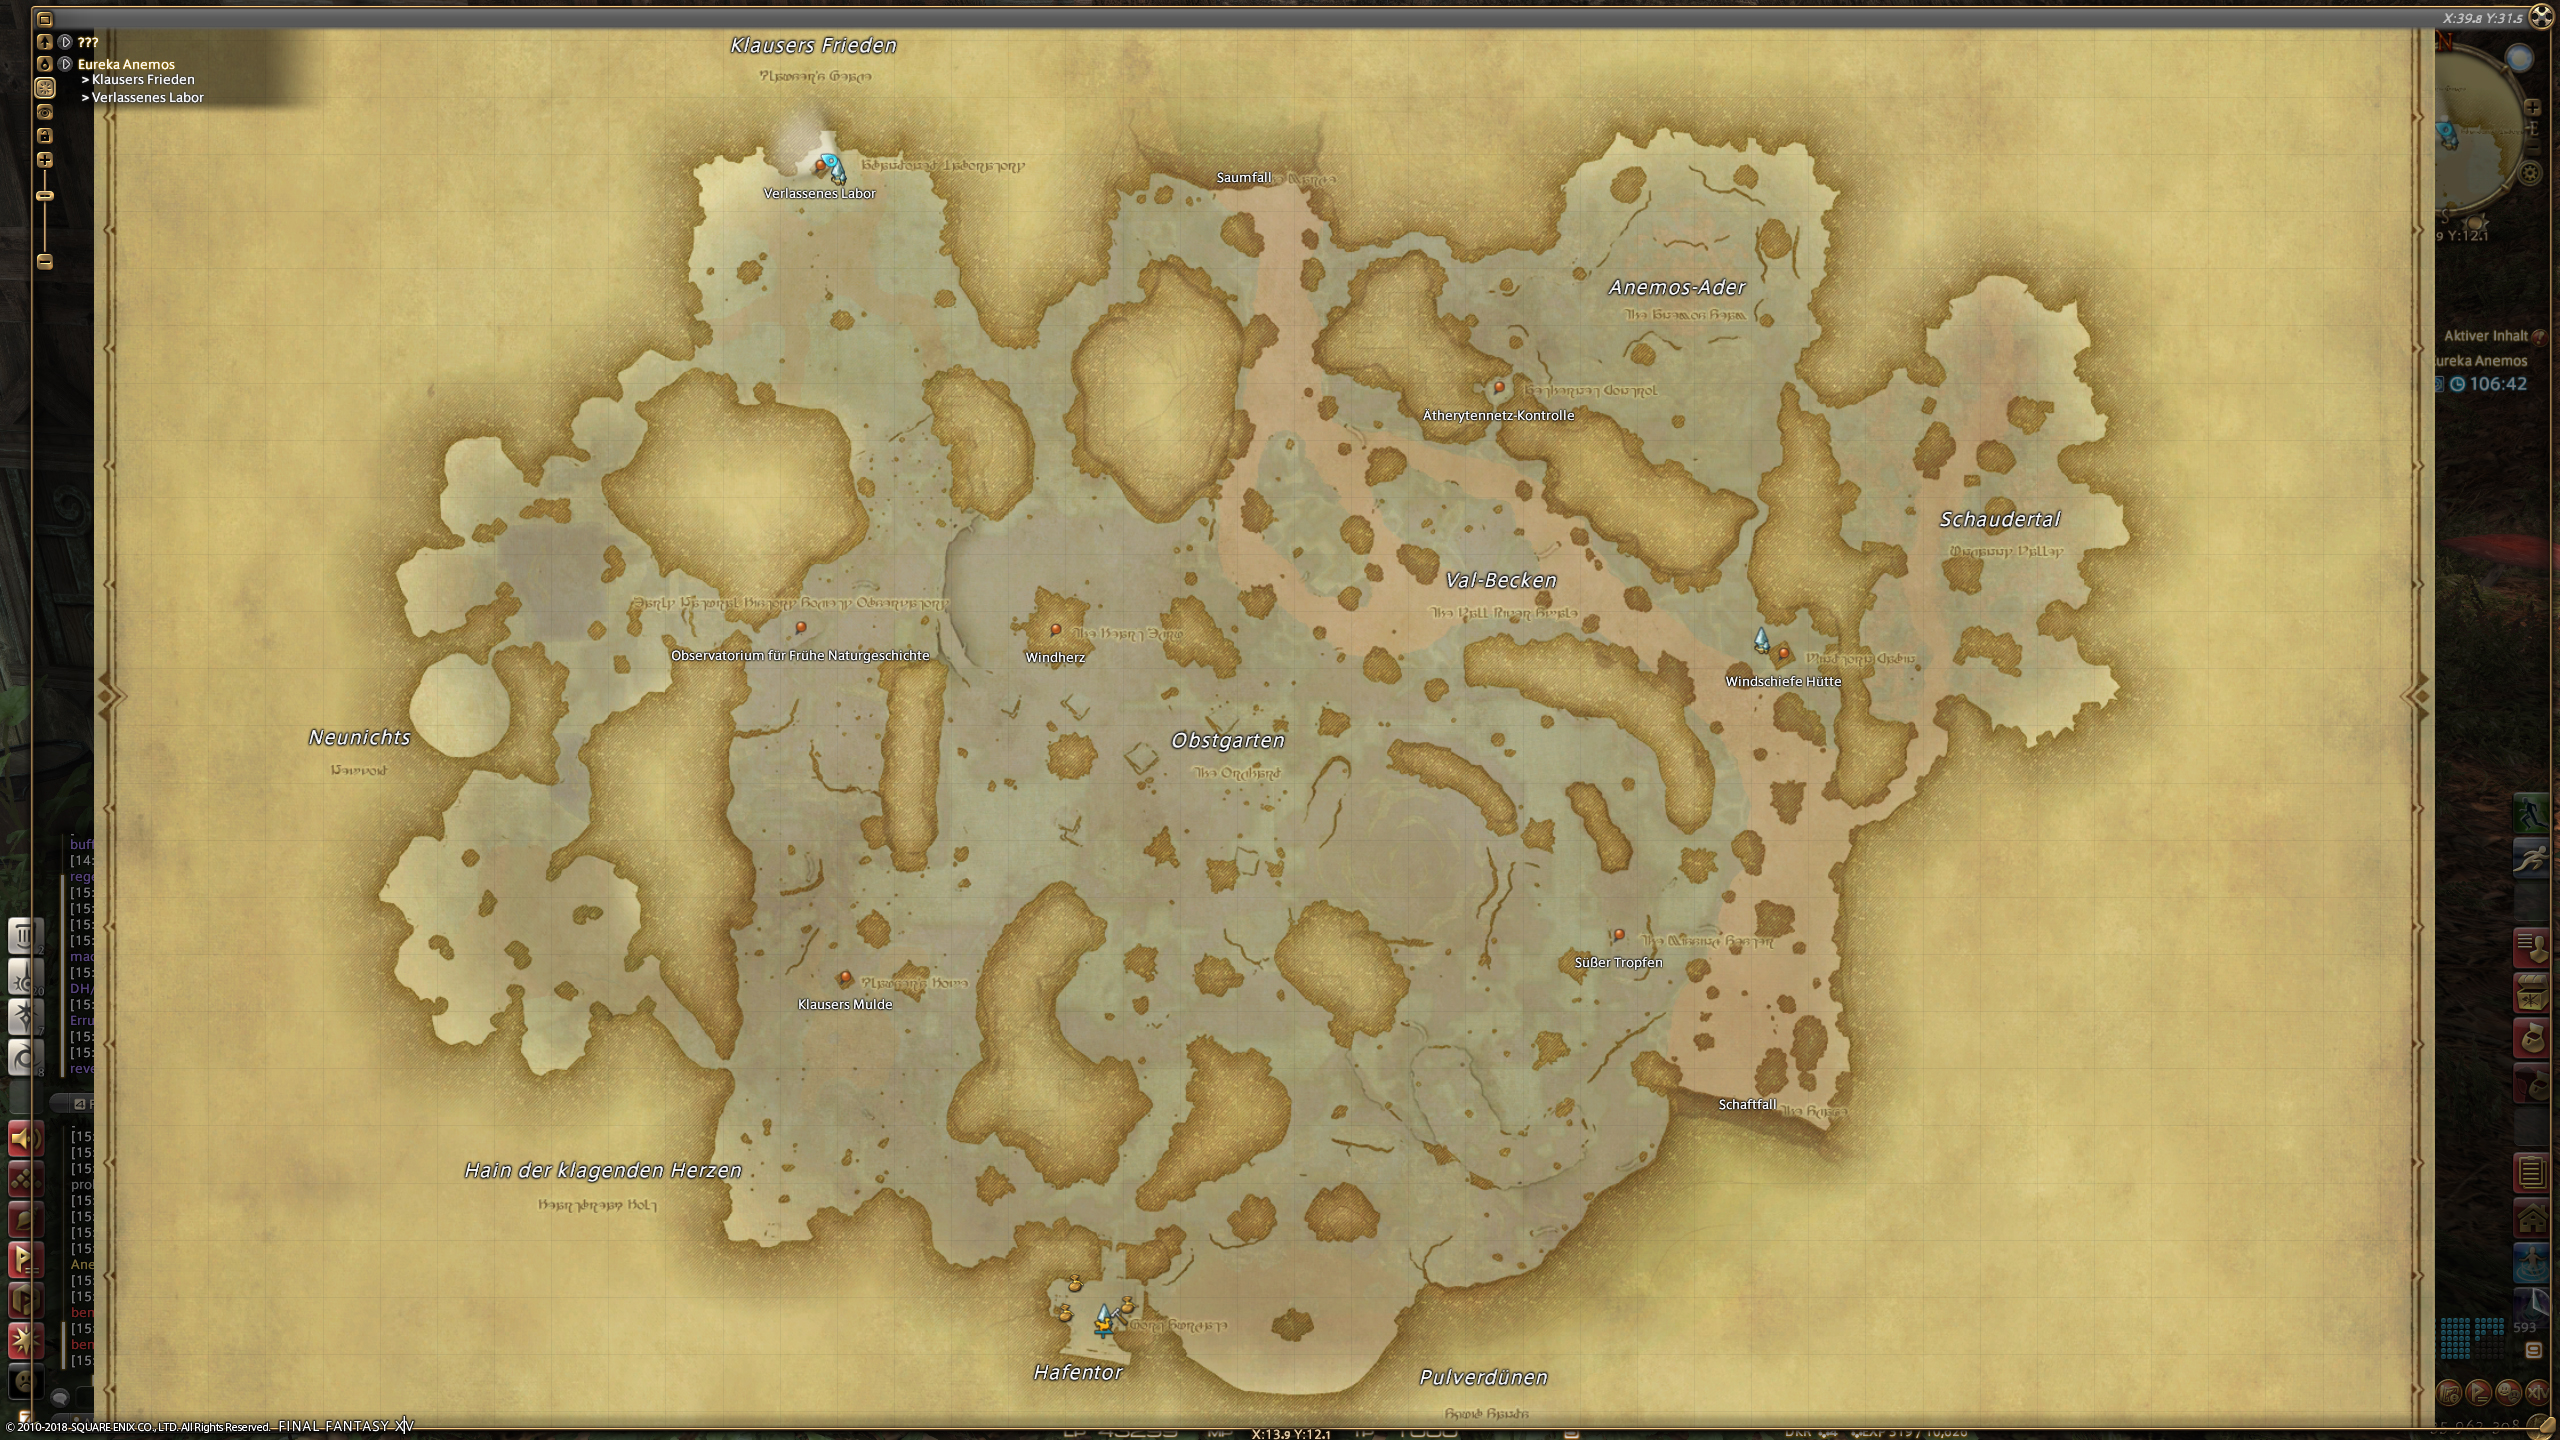
On the map, they gather in groups in specific areas, which can be seen in this overview.

Some of the monsters only appear under certain conditions, such as weather or time of day. For example, you can only find the undead like skeletons at night.
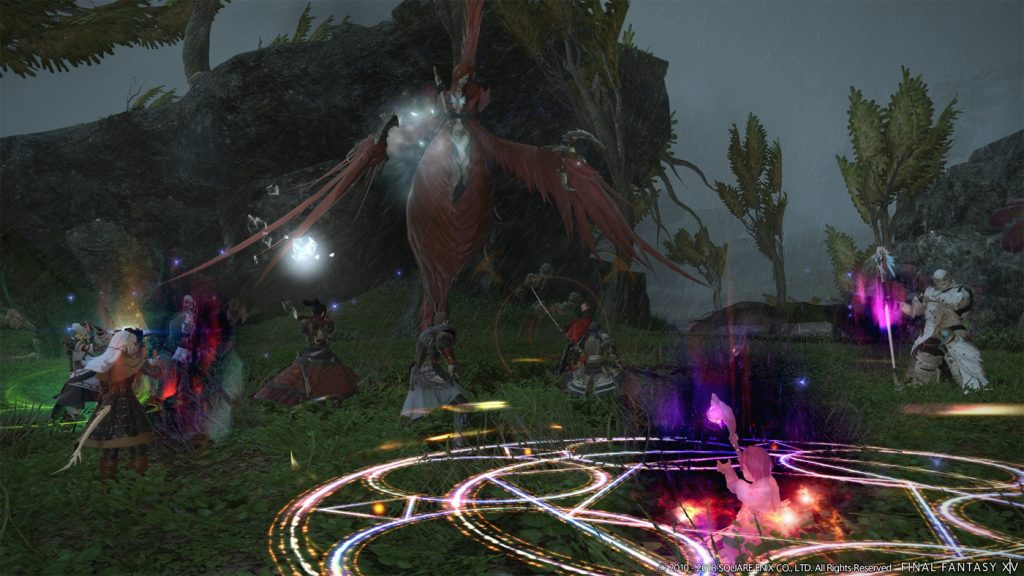
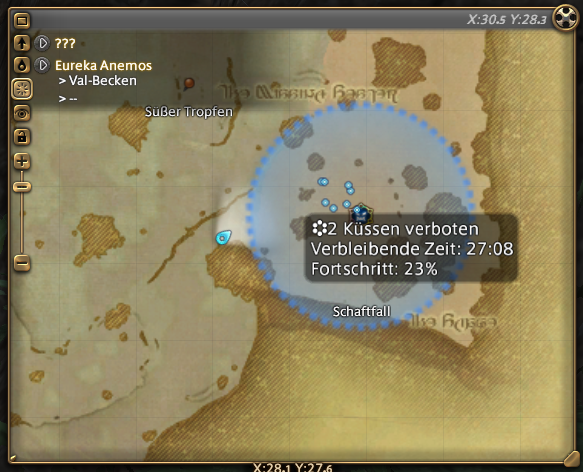
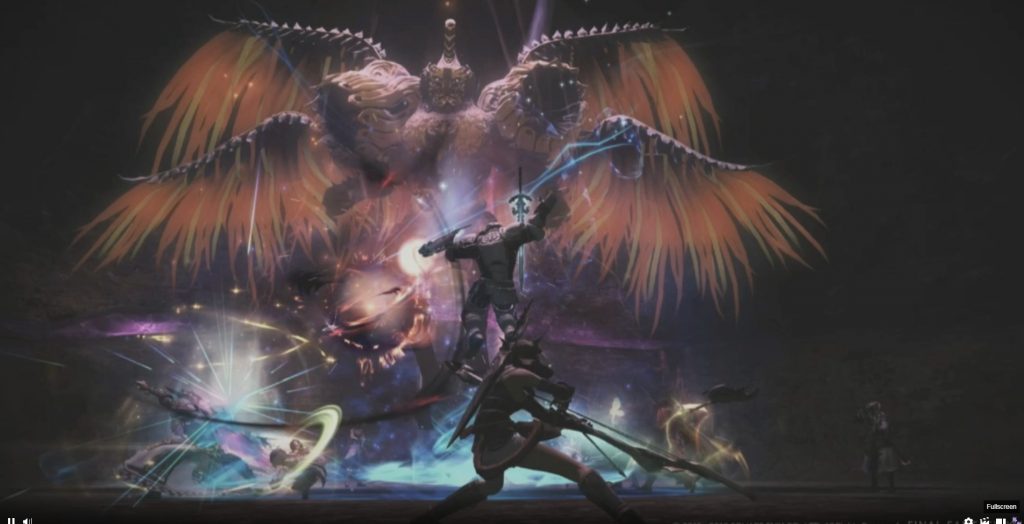
Notorious Monsters
This special type of enemy will be familiar to FFXI players. They appear as boss enemies in special FATEs of Eureka after certain conditions are met.
The FATEs can feature specific mechanics, similar to those in Ixion, which players must manage. These mechanics are often related to the elemental system of Eureka.

So in the FATE “Numerical Superiority,” you need to destroy portals, which have different elemental weaknesses, as quickly as possible to summon strong monsters.
As rewards for successfully completing, players receive large amounts of EXP, Anemos crystals, and lockboxes. Additionally, you can receive other small rewards.
For instance, from the FATE of the Anemos Emperor, you receive the level 1 headgear “Emperor’s Hairpin”.

To trigger the FATEs of the Notorious Monsters, you have to kill certain monsters. You can find all known Notorious Monsters and the necessary foes for them in the following table:
| Notorious Monster | Necessary Opponents | Approximate Location of the FATE |
| Sabotender Corrido Level 1 | Blooming Cactuars | X: 14 / Y: 21 |
| Prince of Anemos Level 2 | Sea Bishops | X: 29 / Y: 27 |
| Teles Level 3 | Anemos Harpy | X: 25 / Y: 27 |
| Anemos Emperor Level 4 | King Dragonflies | X: 17 / Y: 22 |
| Callisto Level 5 | Val Bears | X: 25 / Y: 22 |
| Number Level 6 | Pneuma Killers | X: 23 / Y: 22 |
| Jahannam Level 7 | Typhoon Exergone | X: 17 / Y: 18 |
| Amemet Level 8 | Abraxas | X: 15 / Y: 15 |
| Caym Level 9 | Stealth Ziz | X: 13 / Y: 12 |
| Bombadeel Level 10 | Ancient Gourmets | X: 28 / Y: 20 |
| Serket Level 11 | Khor Claws | X: 25 / Y: 18 |
| Judging Julika Level 12 | Bilsenkraut | X: 21 / Y: 15 |
| The White Rider Level 13 | Dullahan of Dusk | X: 20 / Y: 13 |
| Polyphemus Level 14 | One-Eyed | X: 26 / Y: 14 |
| Simurgh’s Runner Level 15 | Sharlayan Zu | X: 28 / Y: 13 |
| Hazmat King Level 16 | Anemos Anala | X: 35 / Y: 18 |
| Fafnir Level 17 | Fossil Dragon | X: 35 / Y: 21 |
| Amarok Level 18 | Nothing Scales | X: 7 / Y: 18 |
| Lamashtu Level 19 | Island Bitoso | X: 7 /Y: 27 |
| Pazuzu Level 20 | Shadow Spirits | X: 7 / Y: 21 |
The table will be updated as new information becomes available regarding the NMs and their FATEs.
The amount of opponents that need to be killed to trigger the FATEs varies widely. Player reports range from a dozen to nearly 100 monsters.
The notorious monsters are very strong and can take quite a bit of damage, even in low-level FATEs. However, like regular FATEs, their strength scales with the number of players who have participated in the previous FATE.
Friendly Monsters
The friendly enemies are various elemental spirits of Anemos. They are relatively rare and primarily inhabit larger areas populated by many monsters.
When interacting with them, you receive the buff “Elemental Blessing,” which has a significant impact. It increases attack power and grants a regen effect. Additionally, you receive more EXP from the enemies.
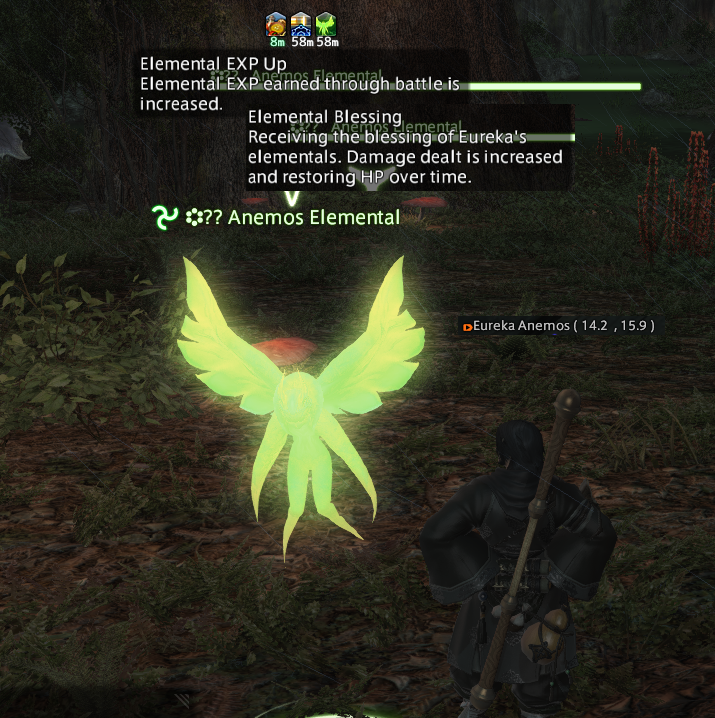
The buff lasts for one hour, and if players encounter such an elemental, they should definitely try to obtain the buff.
However, the fairies will not stay forever. After granting the buff to a certain number of players, they will disappear again.
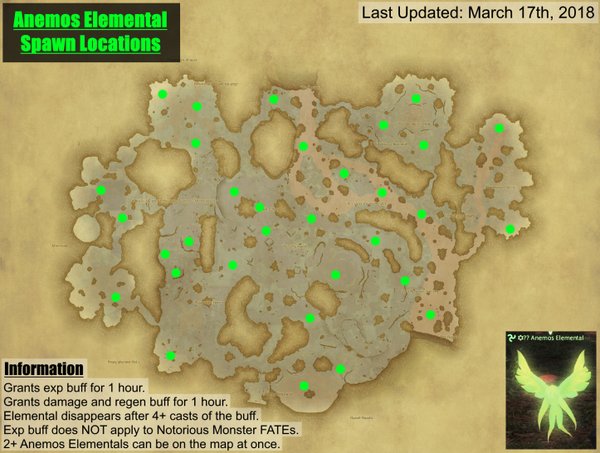
On this map, you can find the possible appearance locations of the elementals. But beware: If they get caught by the AOEs of other enemies, they can die.
Leveling
Since Eureka is group content, leveling in groups is also more efficient than solo. Veterans from FFXI will be familiar with the process.
Group Composition
First, you build your own group using the new adventurer list or join an already existing group. A full group should be balanced in terms of jobs and ideally include the following roles:
- 1 to 2 tanks
- 2 healers
- 1 bard or machinist
- 1 red mage or summoner
One tank is enough to hold the enemies. However, a second tank is recommended for those “Oh shit!” situations that can and will happen. But as long as everything is fine, the second tank can stay in DPS stance.
Two healers are also a precaution. Firstly, it makes survival much easier and more comfortable.
Secondly, there is someone to resurrect the first healer if a monster decides to turn around in the middle of the fight and smack them. However, red mages or summoners can also serve as backup.
Bards and machinists are there because healers and melee fighters will eventually run out of MP and TP. Of course, they are not strictly necessary but practical to have.
Group members can either be found via the /shout command or by going into the adventurer list and directly asking players if they want to join.
Farming Camps
Within the group, you need to agree on what type of enemies you want to farm.
While you receive less EXP per enemy in a group because it gets split among all group members, monsters go down much faster in a group.
Therefore, it is advisable to farm enemies that are about 2 levels above you with a light team of 4-5 players. With 7-8 players in a group, you can tackle 4-5 levels stronger enemies.
There are certain “camps,” areas on the map where many monsters with the same elemental weaknesses gather.
At lower levels, for example, the area around X: 28.7 / Y: 27.1, where there are many water-elemental sheep yolks, or X: 13.1 / Y: 21.8 with many cactuars and protoplasm.
Players must adapt to the elemental strengths and weaknesses of the respective monsters on-site.
Thus, the DPS and healers in the sheep yolk camp would choose thunder as their attack element to deal more damage, and the tanks water for better defense.
As soon as everyone gathers at the camp, you look for a safe monster-free spot a bit off to begin pulling the enemies. Basically, this should be done by the tank, as everyone else will take extreme damage, up to one-shot.
Even if you don’t always have to pull only 1 monster at a time, but sometimes 2 or 3, you should still be careful. Dying in Eureka is heavily punished from level 6.

A character at level 6+ who is not revived within 10 minutes loses 25% of their EXP. A “level down” can only occur starting from level 11.
Success Strands: A New Mechanic
Another new feature that has made its way into the combat system of Eureka is the strands, also called “chains.”
It builds up automatically when you kill enemies within a short time. The maximum chain level is 30. After that, the counter resets to 0.
Each additional level in the chain increases the EXP gained by 3%.
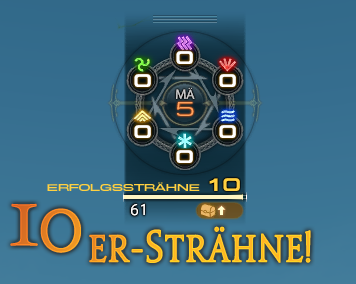
The time in which you must kill the next monster to extend the chain decreases until it reaches down to 45 seconds.
The effect of the success strands is in addition to an increased chance of obtaining unstable crystals, also an increased EXP rate. Therefore, it is important to keep the chains from breaking as much as possible.
However, you should keep the following in mind:
- Enemies below your level do not grant a success strand
- Enemies attacked first by someone else provide little to no EXP
- HOWEVER: Killing foreign monsters can extend your own success strand
Therefore, when players level, they should do so as much as possible away from other players and on enemies that are higher level than themselves.
FATEs of Eureka
As mentioned above, FATEs in Eureka are triggered by killing certain types of enemies. As soon as such a FATE appears on the map, you should immediately head there.
Not only do you receive lockboxes and Anemos crystals from there, but FATEs also give you an incredibly large amount of EXP.
Depending on the level of the FATE, you receive more or less EXP, but they are always worth it – so don’t miss them!

As with normal FATEs, it is important to join a group to be resurrected more quickly if you die and to receive as high rewards as possible.
After completion, FATEs go on cooldown, which can last between 90 and 120 minutes, so they cannot be triggered consecutively.
It cannot be emphasized enough how important it is to participate in such a FATE, so be sure to join!
Charles has also released a video guide on his channel:
Loot and Rewards
There are a total of three different types of loot that you can obtain from enemies in Eureka.
Unstable Crystals

These are randomly dropped by enemies while leveling. Stronger monsters at level 15+ drop correspondingly more crystals.
They can be turned in to Gerolt to obtain the improved job-specific armor.
Anemos Crystals

Larger forms of unstable crystals. You receive them from special FATEs in Eureka and can exchange them for the ilvl 350 Anemos equipment.
Alternatively, you can have them broken down by Gerolt into unstable crystals. It is up to each player whether to break them down or not.
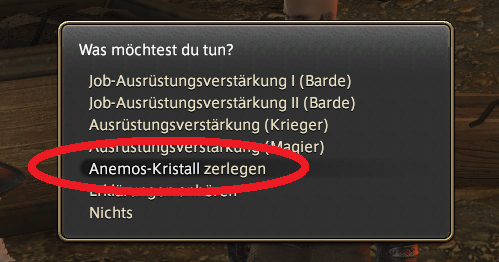
The exchange rate is random, and per Anemos crystal, you can expect 2-5 unstable ones. So if you can already obtain the unstable crystals through efficient farming, it is worth saving the Anemos crystals.
Lockboxes

The lockboxes function just like in Diadem. You also receive them from FATEs and can have them decrypted by the NPC.
The items contained within are varied: mounts, companions, Chocobo saddles, level 1 projection outfits for all classes, materia, and of course a lot of useless stuff that will clutter your inventory.

Here is the list of known special items that can be obtained from the lockboxes:
Level 1 Projection Armor
- Anemos Hat
- Anemos Cask
- Anemos Jacket
- Anemos Gambeson
- Anemos Shirt with Suspenders
- Anemos Gloves
- Anemos Targeting Gloves
- Anemos Sarouel
- Anemos Chaps
- Anemos Boots
- Anemos Targeting Boots
Companions
- Mini Fafnir
- Mithra Doll
- Prince of Anemos

Mount
- Tyrannosaurus Mount
Miscellaneous
- Red Mage Chocobo Saddle
- Sheet Music “No Quarter”
- Sheet Music “Wicked Winds Whisper”
- Sharlayan Wardrobe
- Sharlayan Chest
Relic Weapons and Armors
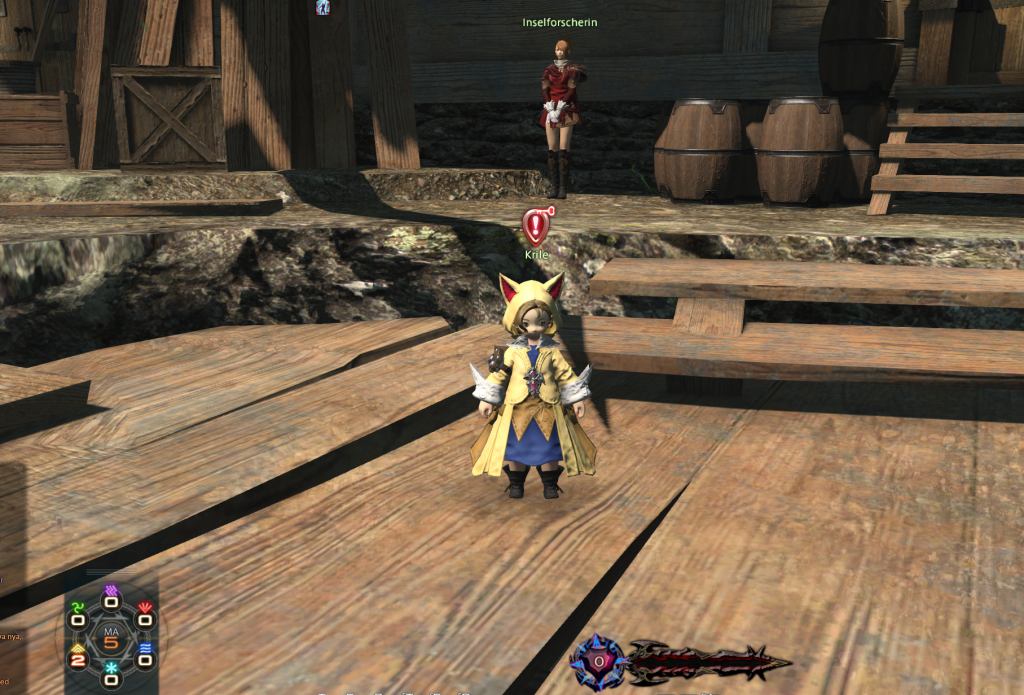
The new relic quest begins in Eureka after completing a level 1 quest. For this, bring Krille an unstable crystal.
After that, you can upgrade the job-specific ilvl 290 equipment obtained from the level 70 job quest with the help of these crystals from Gerolt.
These form the basis for future upgrades of the relic armor set until it becomes “best in slot”.
The upgrades start at ilvl 335 and occur gradually in increments of 5 ilvl. For this, players must carry the items that Gerolt should upgrade.
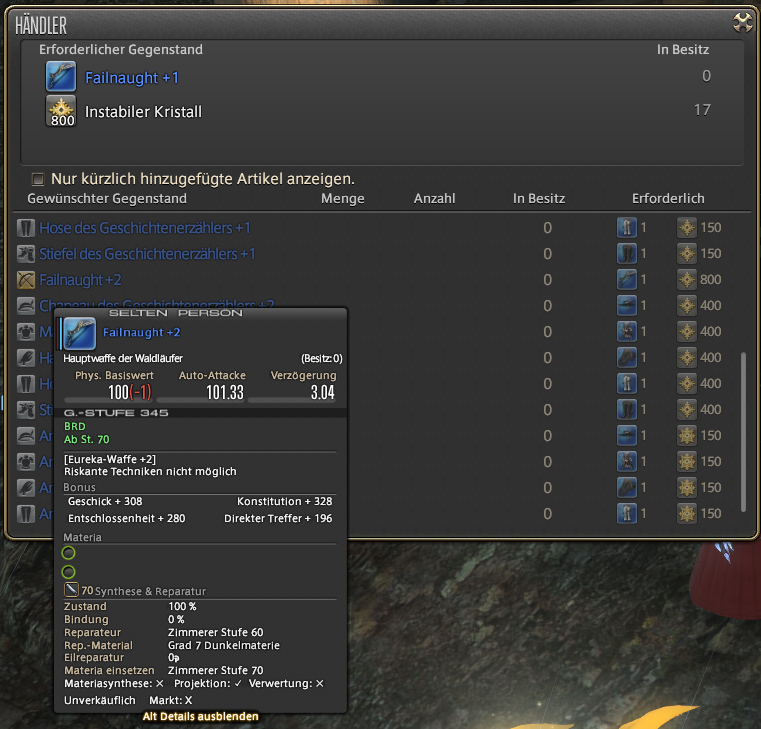
The steps are very simple. You just need to bring Gerolt about a ton of unstable crystals to get the gear upgraded to quality level +2, and then another half ton of Anemos crystals to make the last upgrade step.
In total, players need the following amount of crystals for individual armor sets:
- Step 1 at ilvl 335: Requires 350 unstable crystals
- Step 2 at ilvl 340: Requires 1150 unstable crystals
- Step 3 at ilvl 345: Requires 2800 unstable crystals
- Step 4 at ilvl 350 without weapon: Requires 1150 Anemos crystals
From ilvl 350, the armor can be dyed and gets 5 guaranteed materia slots.
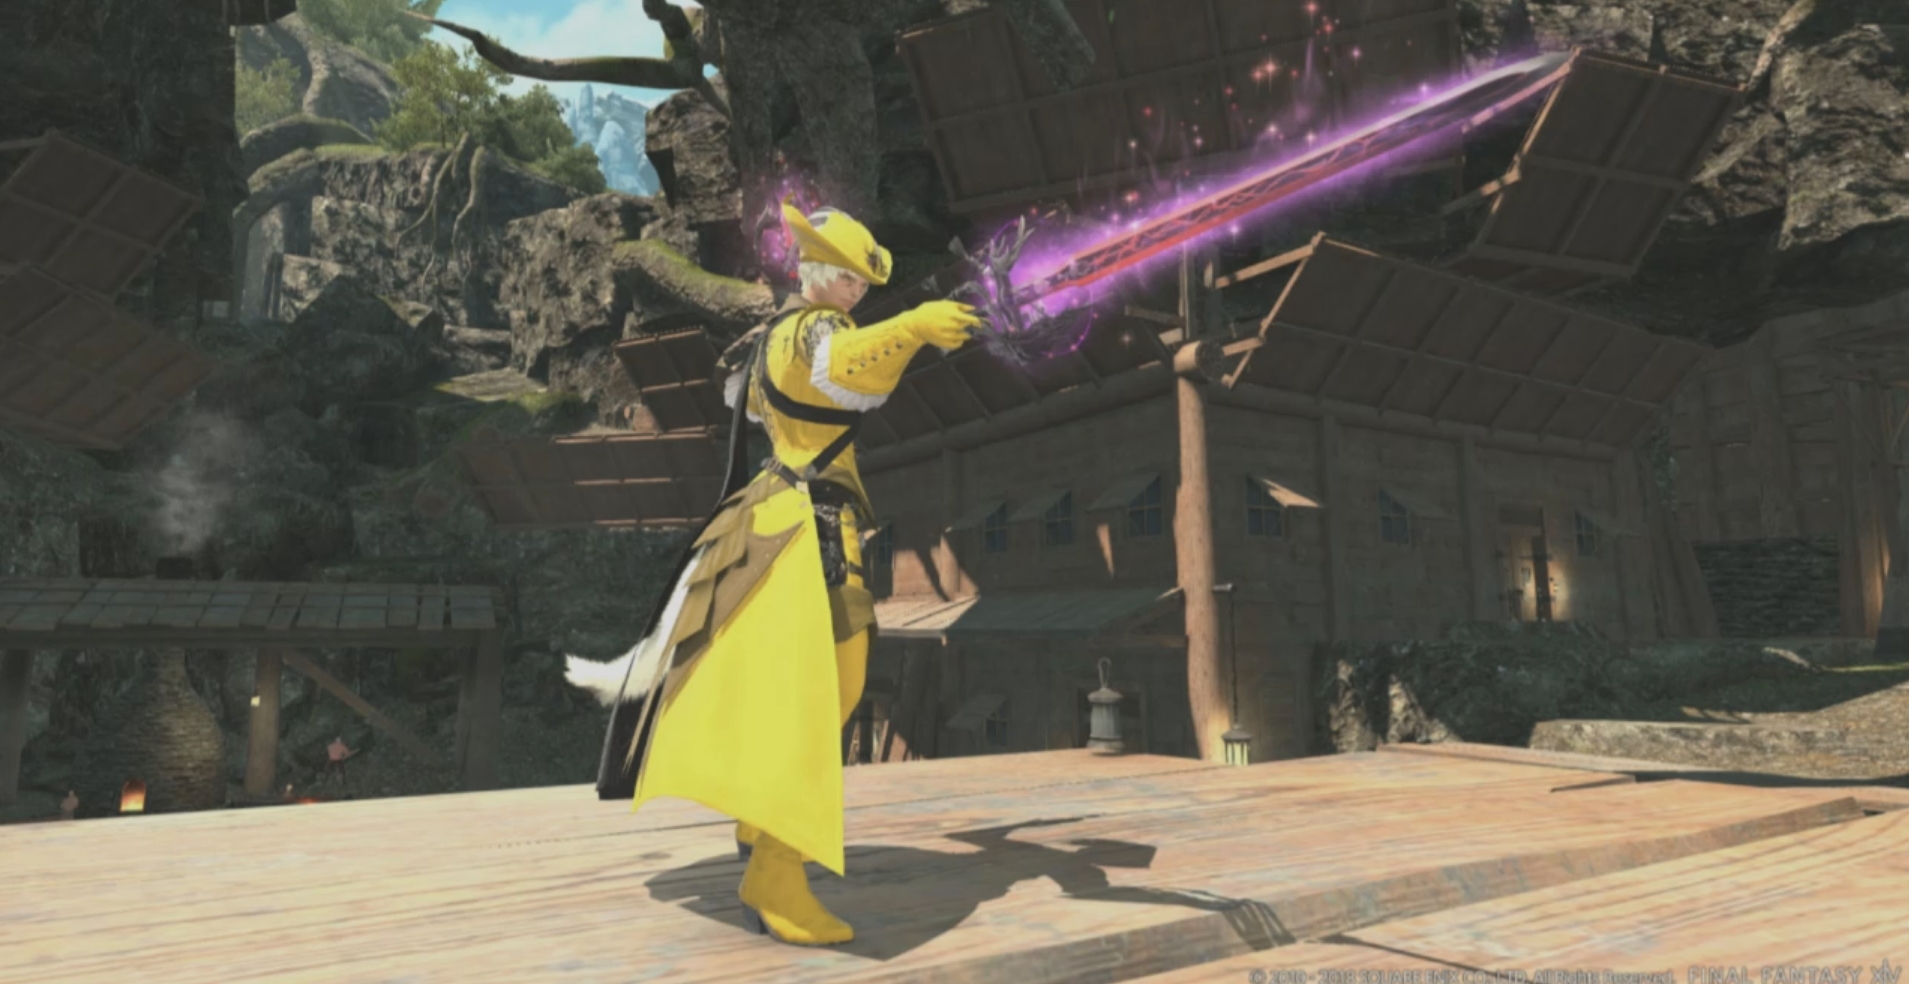
The weapon will be upgraded separately in a later step and will receive a glowing effect that cannot be dyed. It also has 5 guaranteed materia slots.

For the final step of the weapon, you need exactly 3 Pazuzu Feathers, which you receive from the Pazuzu NM FATE. To trigger the FATE, you must kill shadow spirits.
The FATE of Pazuzu has a cooldown of only one hour, but it can only appear in stormy weather conditions.
After successful completion, you directly receive all 3 feathers, but only if you are at least level 19.
In total, you need 3 feathers and 5450 crystals, which is definitely a significant amount. With the help of this guide, the farming time should definitely be considerably reduced.
Good luck playing!
Eureka is a first highlight in 2018 – What else can we expect?
After player number record 2017: What will Final Fantasy XIV achieve in 2018?

Your opinion is important to us!
Do you like the article? Then let us know!