The Leviathan Raid in Destiny 2 has been cracked! In our raid guide, you will find solutions for all phases. How do the royal baths work? How do I get through the Pleasure Garden? And who is Benedict 99-40? Our raid guide.
On September 13, 2017, the Leviathan Raid opened its gates, and countless Guardians rushed into this 6-player PvE activity to put a stop to the new threat.
To play the raid, you must be at least Power Level 260. The recommended power is 270, but you should ideally increase your power even higher before tackling the raid. This one is challenging.
In the following, we explain the mechanics of the raid. A note here: Spoiler Alert! If you want to explore the raid yourself, you should not continue reading.
Standard Bearers in the Castell – Solution and Strategy for Phase 1
You start the Leviathan Raid directly via the Navigator. Above Nessus, in “Nessus Orbit”, the symbol for the raid will be displayed. You have to form a fireteam of 6 players yourself, there is no matchmaking. Only later will there be Raid guide games.
You now enter a kind of palace, where everything is lavishly and golden decorated. Your task is to master several trials from Calus, the former Kabal Emperor.
It should be noted: During some activities, there are only limited revival tokens. These are displayed at the bottom right of the screen. This means you cannot revive indefinitely.
Let’s get started in the Castell:
- In this phase, you must defeat Standard Bearers, hefty Kabal units. Once one is defeated, it drops a relic.
- This relic is then picked up by a team member and placed in the center of the room:
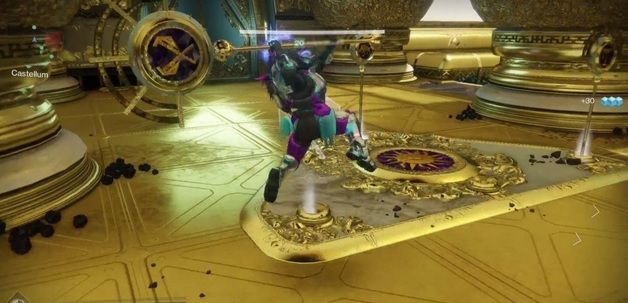
- Once you have hammered a relic into the device, Standard Liberators will gradually appear. They will try to take the relics away. In other words, you must defeat them as quickly as possible. If the Liberators succeed in stealing a relic, you must defeat another Standard Bearer. Ideally, always have 2 or 3 people in the middle to defend the relics.
- During the fight, Council Members will appear. These floating Psions are immune to weapon damage from outside their bubble. Therefore, you must go inside their bubble and defeat them; a melee attack is sufficient. Always pay attention to the indicator at the bottom left of the screen to know when Council Members appear. Because they protect the Standard Liberators. Defeat the Council Members as quickly as possible to be able to defeat the Standard Liberators as quickly as possible.
Tip: Divide yourselves into three attackers (relic holders and Council Member eliminators) and three defenders (who defend the relics). Then this phase should not be a bigger problem. Here is a video about the Castell:
Note: The order of phases 2, 3, and 4 changes weekly.
Royal Baths – Solution and Strategy for Phase 2
In Phase 2, you should stop a bathing ritual in the royal baths. For this, you first need to split your fireteam.
Starting position: There are four plates that must be occupied. Each Guardian stands on one plate. The other two Guardians are in the middle.
- As soon as you stand on the plates, you receive Psionic Protection. This protects you from the environmental damage of the dark goo. This protection lasts for 50 seconds.
- The two people in the middle can refill the Psionic Protection in the middle. They help the Guardians on the plates so that there are always Guardians with Psionic Protection on these plates. Rotate through. The Guardian who is replaced by a Guardian from the middle now runs to the middle and refills his protection.
- When every plate is occupied, the chains apparatus will move. However, you are not alone in this process. In addition to regular adds, Telaks will appear at the chains, who deal immense damage in close combat. Defeat these as quickly as possible so you can continue to occupy your plate. It’s best to whip out the power weapon.
- Tip: As soon as your Psionic Protection is nearing its end, let your team know so that a Guardian from the middle can come to you. Communication is key here. Three Guardians should take care of the left two plates and three Guardians of the right two plates.
- Do this until a music plays and the chains have been fully moved. Now all rush into the middle room. When you stand on the plate in the middle, you can deal damage to the incense vessels. Your goal is to destroy all of them:
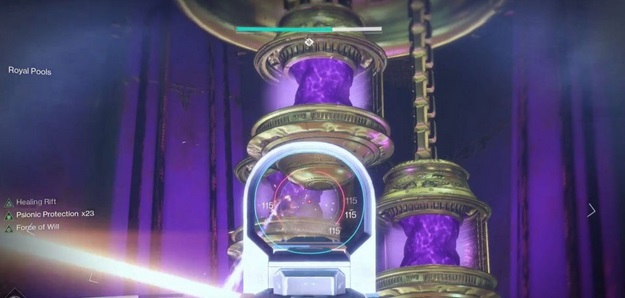
But beware: In the middle, many nasty enemies will come that will make your life difficult. Don’t hesitate to eliminate them quickly with your super. Because your main goal is the purple vessels.
Update: This is the solution to the raid challenge “Royal Baths”!
Pleasure Garden – Survive the Hunt of the Royal Beasts – Solution and Strategy for Phase 3
Now you return to the Castell, where you must proceed as in Phase 1 to enter the next area.
Phase 3 takes place in the Pleasure Garden. Your task is to eliminate 6 royal beasts. These roam around and attack when they see you. So: Don’t let yourself be detected at first, stay hidden.
- Let’s get started by picking up the Prism Weapons. Then enter the security room below.
- Four Guardians now pick up Royal Pollen. These must be taken to glowing, purple flowers.
- Once all four pollen holders are gathered around a flower, a Prism Weapons holder shoots a beam at the flower. For this, a Prism Weapons holder stands in a light. These lights are located on the rocks.

Once all are defeated, you can proceed. Here is a video about the Pleasure Garden:
Update: This is the solution for the Pleasure Garden raid challenge!
The Circus – Solution and Strategy for Phase 4
You return to the Castell and must proceed as in Phase 1. Then the gate for Phase 4 opens.
- In the Circus, you should initially stand on pillars so they sink into the ground. For this, you just stand on them.
- Now you must defeat enemies, including heavy Centurions, until two psionic charges appear. Two Guardians pick these up and are teleported to the outer area of the arena – into a tunnel.
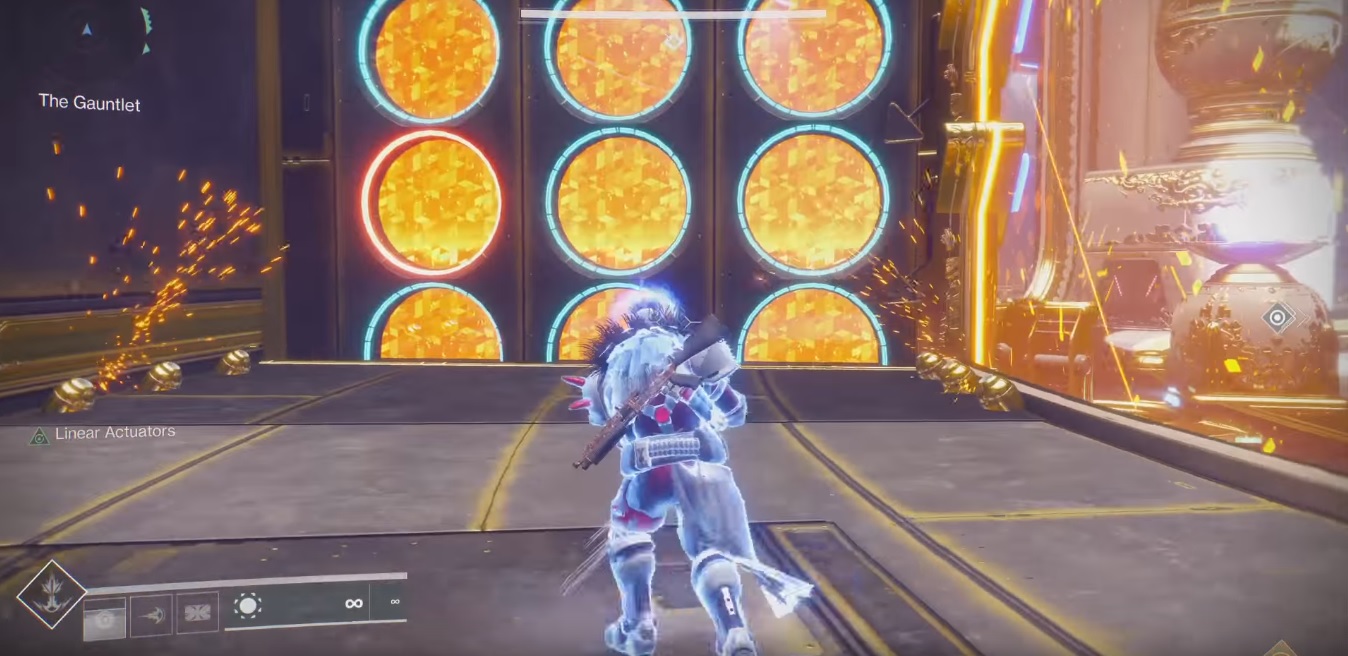
- The Guardians with the charges must announce which circle is marked in red – there are the rows Top, Middle, and Bottom. Two Guardians not in the tunnel stand on the corresponding pillar opposite the barrier and shoot at the two arrows in the rows that are not marked in red. This must happen quickly. This will open the barrier for the Guardian with the charge. He must jump through the circle that was marked in red.

- Example: If a circle in the middle is marked red (as in the picture), the Guardians must shoot the arrows in the Top and Bottom rows. Communication is important.
- Repeat this for all barriers until the charge carriers are back outside. But be careful – the charge carriers must overcome an obstacle course in the tunnel. Once they are outside, they bring their charges to the center of the room. Each charge ignites a torch there.
- Important: The Guardians that do not carry a charge must deal with the Council Members that spawn. Otherwise, the whole team will die. Take them out with a melee attack.
- Once six torches are burning, everyone rushes into the middle room. There you pick up spheres that teleport you into the tunnel. You must then run through the tunnel together and pick up spheres that extend your timer. Each Guardian has an individual timer. Coordinate so that every Guardian remains above 0. Enough Guardians must remain at the end to fully “light up” the torches in the middle room.
You can watch this phase here in the video:
Update: This is the solution for the Circus raid challenge!
Calus – The Throne Room – The Final Boss
Now it’s time for the final boss. You start the fight by shooting at the chalice that Calus holds. Numerous enemies will appear that must be defeated. Also, Council Members that you can take down (but not have to right away).
- As soon as Calus claps his hands, all Guardians are teleported to another dimension, where a giant head of Calus faces you. Three must stay in this new place, three can teleport back by passing through a glowing sphere.
- The three players who remain in the other dimension must announce which symbol is on Calus’ head. There is a chalice, a sword, a sun, and a dog. Each of the three Guardians sees a different symbol. There is only one symbol that no one sees. This one missing symbol is crucial.

- These four symbols are also above the heads of four Council Members, whom the other Guardians can take care of in the throne room. The Council Member that corresponds to the symbols above Calus’ head must not be defeated. In other words, ignore all other Council Members with symbols that were announced.
- Example: Player 1 sees the chalice symbol, Player 2 sees the dog, and Player 3 sees the sword, so the Council Member with the sun must be eliminated. Communication is essential here!
- As soon as a Council Member is defeated, two more Council Members will appear that must be quickly defeated. Weapon damage is sufficient.
- The Guardians in the other dimension with Calus’s head are now being drawn back to the head. Repeat the process several times, and the players in the other dimension come closer to Calus’s head. They must watch out for Psions and obstacles in the way.
- Once they are directly in front of the head, it spits out skulls. You should shoot as many as possible, as they contribute to a “Force of Will” buff that increases your damage. You will need this buff for the final fight.
- Once Calus stops spitting out skulls, the Guardians can pick up spheres and return to the throne room.
- To obtain the “Force of Will” buff, every team member must stand on a platform and shoot at Calus. After a few seconds, you will no longer be able to deal damage to him. Therefore: All should stand on a single platform, shoot at him until he raises his arm, then move together to the next platform and shoot at him again.
- In each damage phase, you should remove about a third of Calus’s health points. A good rotation for the pillars is to start with the top right, then bottom right, then bottom left, and finally top left.
Repeat this until he is dead. You can see the final boss fight here in the video:
Update: This is the solution to the raid challenge at Calus!
And who or what is Benedict 99-40? – What raid gear is available as a reward in the Leviathan Raid?
In many chests, you will receive tokens called “Emperor Calus” tokens. You should bring these to Benedict 99-40 in the Tower. This is a new NPC. You will find him near Hawthorne. Go down the stairs, there stands the cleaning robot.
We will create a separate article for the raid gear (linked at the end of the article).
Have you mastered the Leviathan Raid yet?
More articles about the raid:
- You can find all the chests in the raid here.
- The raid loot is available here.
- Destiny 2: Prestige Raid – Here are the changes – with solutions
Articles about the raid track: